Loading ...
Loading ...
Loading ...
. ii iiiiiii ii IIIIIHIIIIIIIIIIIII II Jill III IIII IIIIIII IIH IIIIIIIIIIIIIIIIIIIIIIIIIIIIIIIIIIIIIIIII •
"1 _m,r .... ,, ,,,,,I_UII,I,I I I .=, _,,, i i
DI
Wear protective gloveswhan handltng
or _ yoursaw. Thechain ISsharpandcan _.t
you even when it Isnot movingl
• Yoursaw isequipped with a Reduced-KIckbeck
Guide Bar and a Low-Kickbeck Chain.
• Use onlythe Reduced-Kickback GuideBarand
Low-Kickback Chain specified for your chain
s_rwmodel when replacing these parts. See
"Specifications:'
z
1 AWARNING
Do not start engine without guide bar end chain com-
pletMy asumbisd. Otherwise, thedutch can comeoff
and serious'Injury can moult.
1. Tumtheadjustingscrewcounterclockwisetomove
theadjustingpinalmostasfarasitwillgotother_.
Figure10.
2. Mounttheslottsdendoftheguidebaroverthebar
Figure 8
4.
.
7.
Figure 9
E. CHAIN TENSION
• Correct chain tension is very important:
--a loose chain wilt wear the bar and itself.
--a loose chain can jump off the bar while
you are cutting.
--a tight chain can damage the saw and/or
break.
• The chain stretches during use, especially
when new. Check tension:
each timethesaw isused
-- more t_requentiywhen the chainisnew
as thechain warms up tonormaloperatingtem-
perature
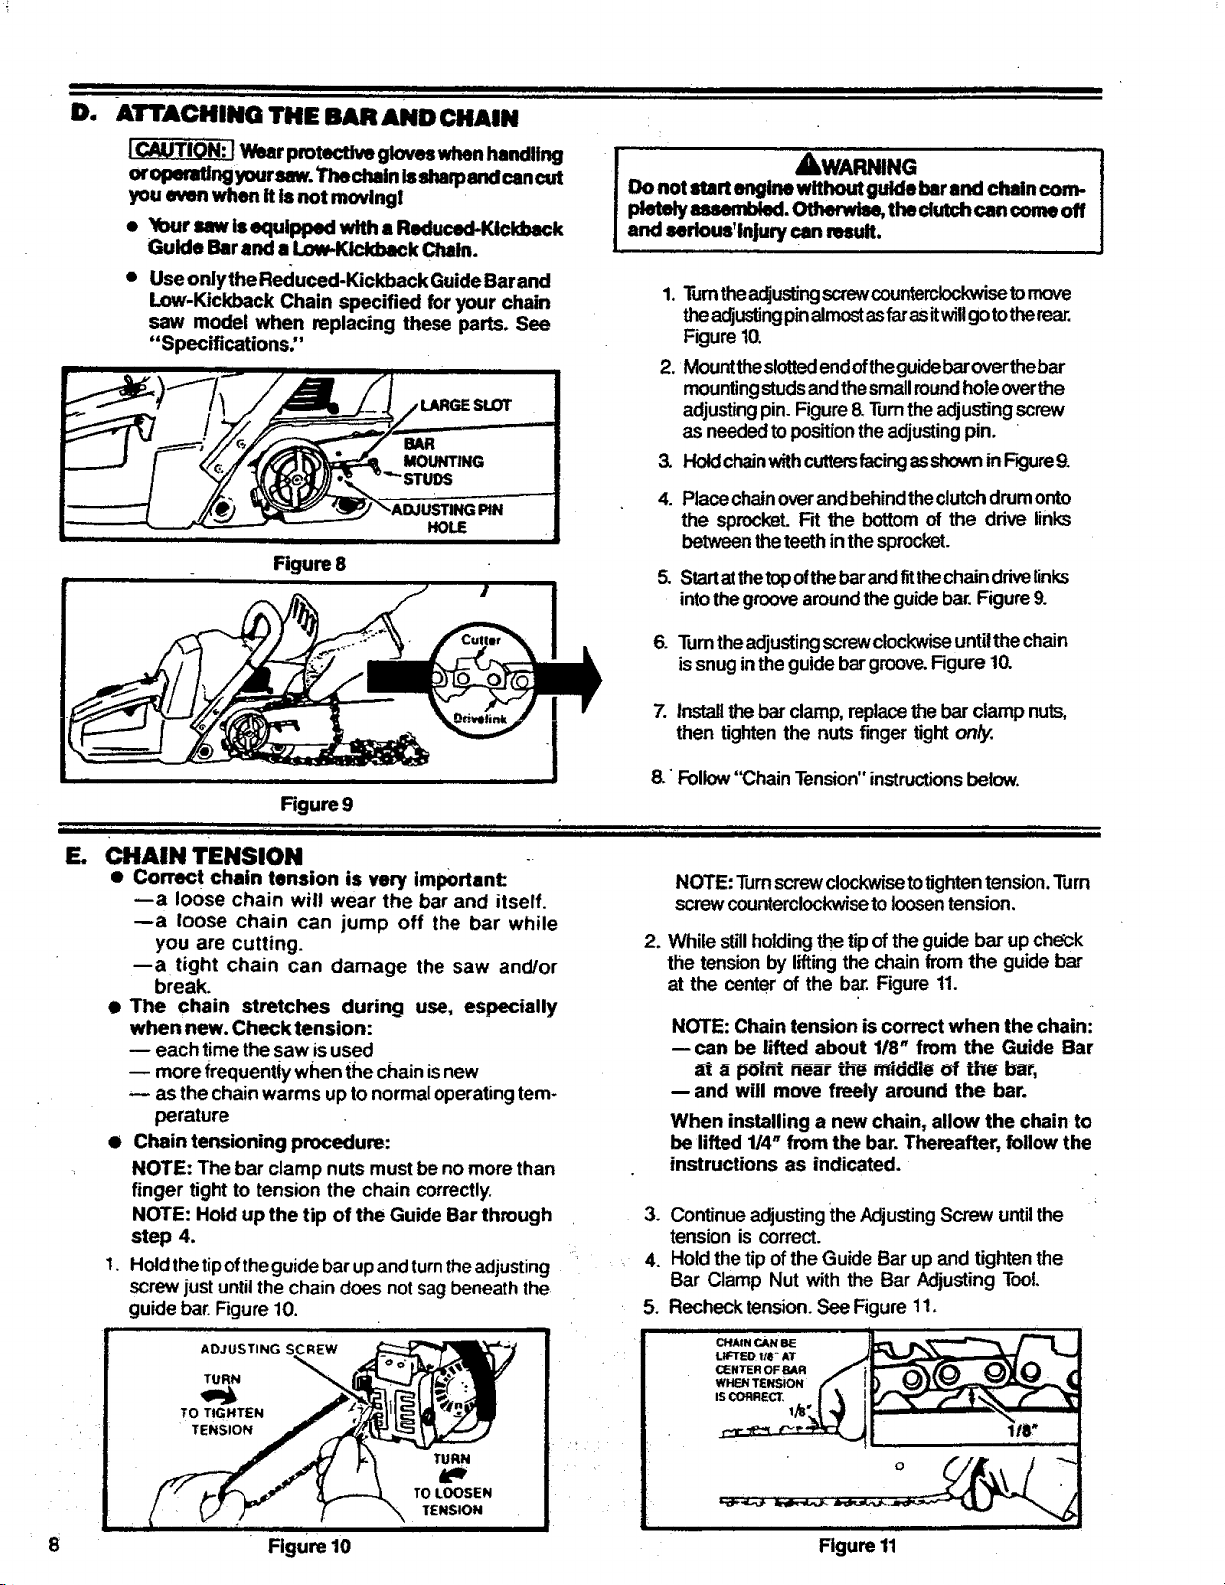
• Chain tensioning procedure:
NOTE: The bar clamp nuts mustbe no more than
finger tight to tension the chain correctly.
NOTE: Holdup the tip of the Guide Bar through
step 4.
1. Holdthetipoftheguide barupandturntheadjusting
screwjust untilthe chain does notsag beneaththe
guide bar.Figure10.
ADJUSTING SCREW
TURN
TO LOOSEN
TENSION
TURN
TO TIGHTEN
TENSION
Figure 10
.
mountingstudsandthesmallroundholeoverthe
adjusting pin.Figure8 Turntheadjustingscrew
as neededtopositiontheadjustingpin.
HoldchainwithcuttersfacingaSshowninFK:jure9.
Placechainoverandbehind theclutchdrumonto
the sprocket.Fit the bottomof the ddve links
between theteethinthesprocket.
Startatthetopofthebarandfitthechaindrivelinks
into thegroovearoundtheguidebar.Figure9.
Tumthea_usting screwclockwiseuntilthechain
issnugintheguide bargroove.Figure10.
installthebar clamp,replace thebar clamp nuts,
then tightenthe nuts finger tighton_
8."Foliow"ChainTension"instructionsbelow.
IIIIIHIII
NOTE: Turnscrewclockwisetotighten tension.Turn
screwcounterclockwisetoloosentension,
While still holdingthetipofthe guidebar up che_k
the tension by liftingthe chainfromthe guide bar
at the center of the b_ Figure 11.
NOTE: Chaintension is correct when the chain:
--can be lifted about 1/8" from the Guide Bar
at a point neat the middle of the bar,
--and will move freely around the bar.
When installing a new chain, allow the chain to
be lifted 114"from the bar, Thereafter, follow the
instructions as indicated,
3. ContinueadjustingtheAdjustingScrew untilthe
tension is correct.
4. Holdthetip ofthe Guide Bar up and tightenthe
Bar Clamp Nut with the Bar Adjusting Tool.
5. Rechecktension.See Figure 11.
11
Figure 11
Loading ...
Loading ...
Loading ...