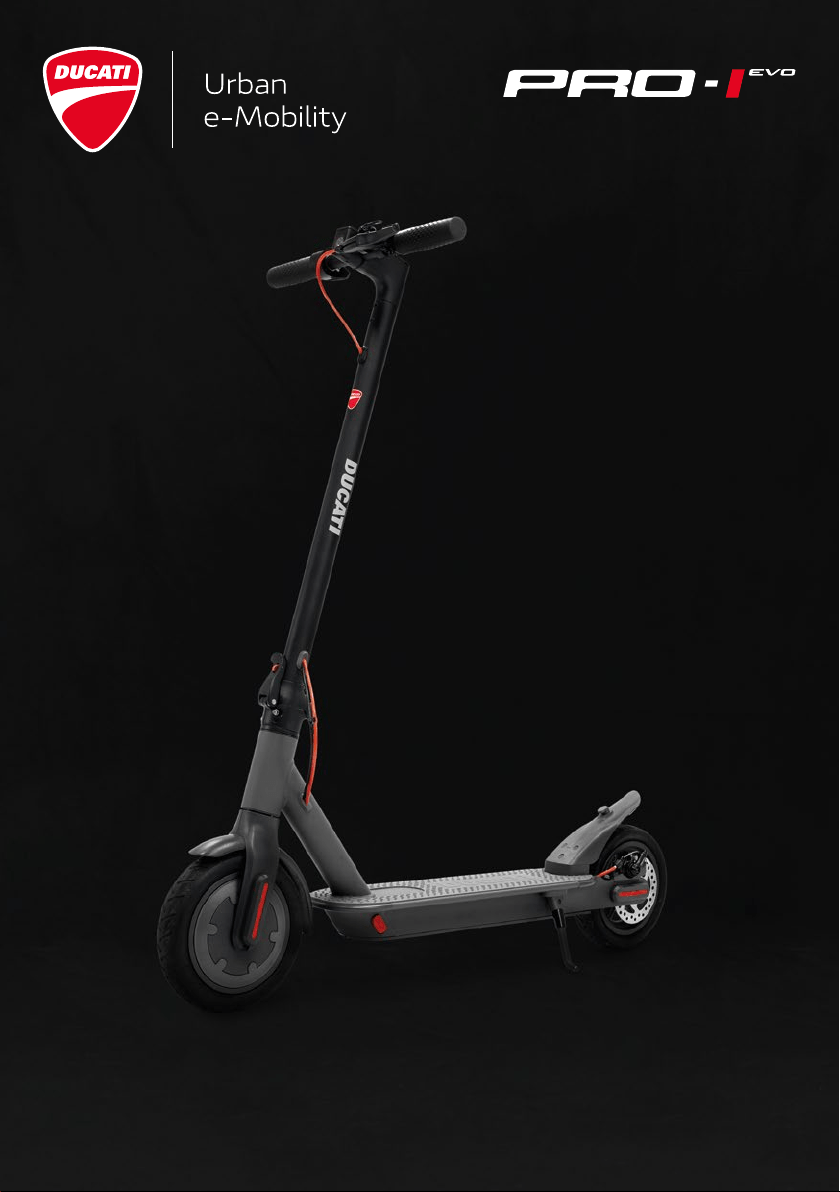
User Manual
electric scooter
English | Italiano | Español | Français | Deutsch | Polish

English
Italiano
Español
Français
Deutsch
Polish
01
36
71
106
141
176
Index

01
electric scooter
User manual
Thank you for choosing this product.
the website www.ducatiurbanemobility.it
English

02
Contents
1.
2.
3.
4.
5.
6.
7.
8.
9.
10.
11.
12.
13.
14.
15.
16.
17.
18.
19.
20.
Safety instructions
Package contents
Control information / Control panel
Assembly and configuration
Folding and carrying
Brake adjustment
Range
Storage and cleaning
General warnings
App configuration
Learning to ride
Responsibilities
Maintenance and daily care
Data sheet
Troubleshooting
Error code table

03
1. Safety instructions
manual for future reference or new users.
non-compliance either with road regulations or the instructions in this manual.
• This electric scooter is not a toy. Use it responsibly, with care and respect for others.
• Check the local regulations in force regarding the use of this type of product before
a helmet.
holding the handlebars at the correct height.
• The maximum load capacity for the product is 100 kg.
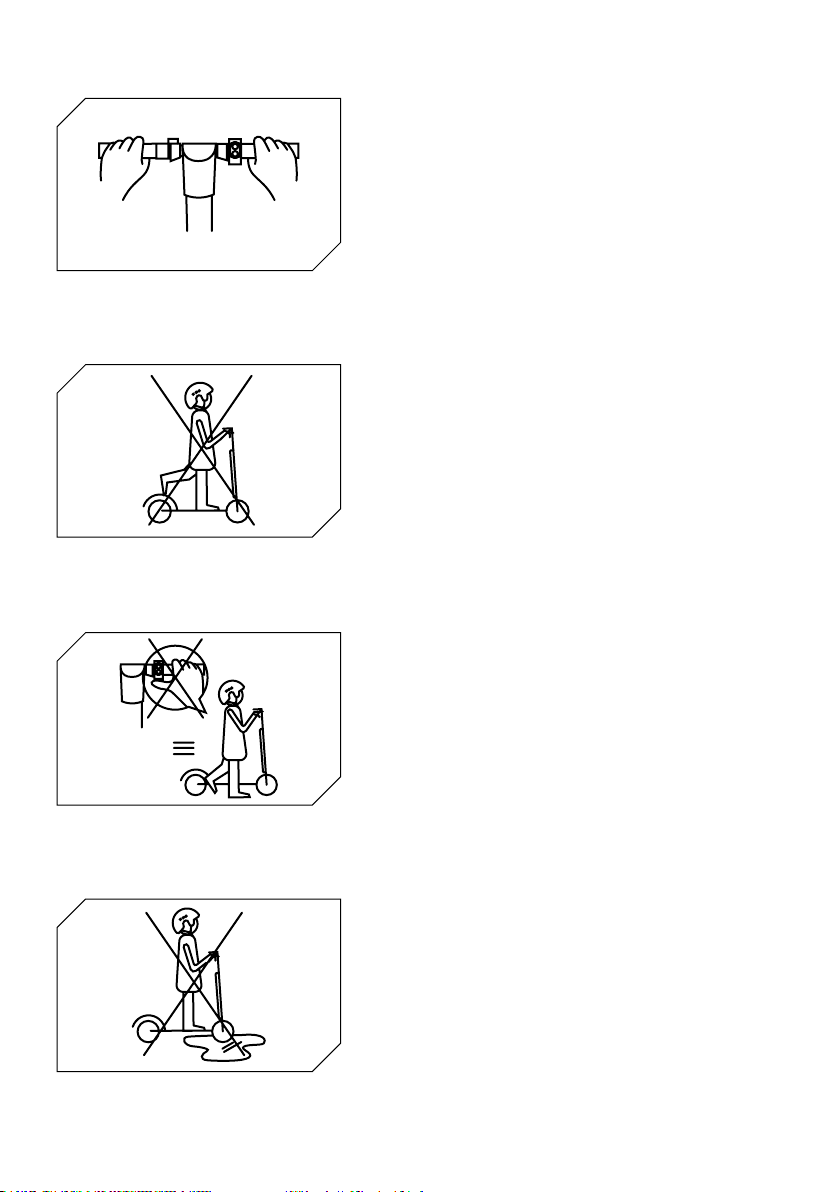
• This product may not be used by more than one person at the same time.
• Misuse of the product or non-compliance with the instructions in this manual may cause
serious damage.
using it for the first time, regarding the following aspects:
1. Acceleration
2. Deceleration
3. Braking

04
probably deflated again. It will therefore be necessary to restore the pressure as indicated.
• Put your hands on the handlebar. Step onto the footplate with one foot and use the
accelerator.
turn the handlebars.
motion can cause injury.
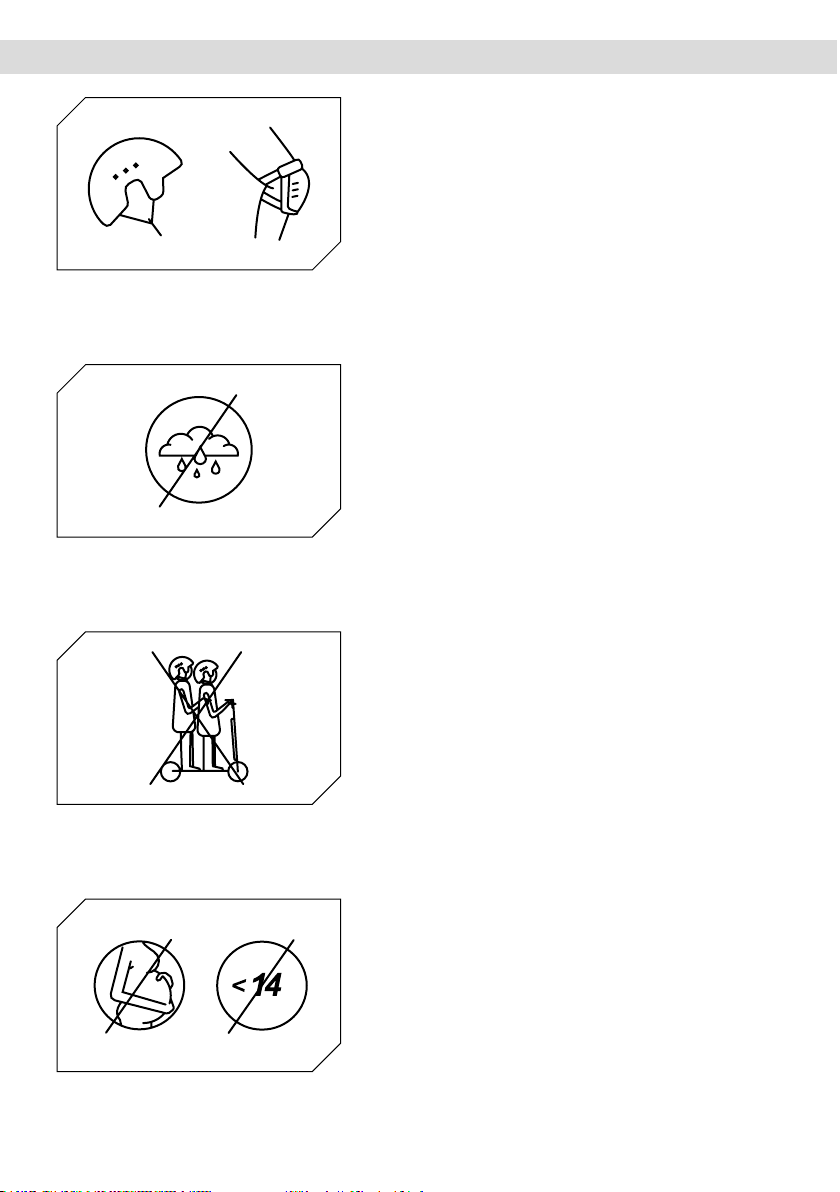
For your own safety, wear a helmet and knee pads to protect yourself against falls and
injuries while learning to ride the electric scooter.
WARNING

05
3. Package contents
• Scooter
• Accessories:
- Allen key
- 4 screws
- Spare air chamber
- Replacement stickers
- Tyre inflation adapter
06
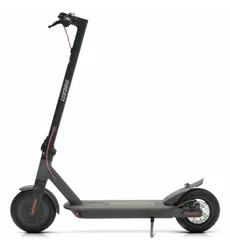
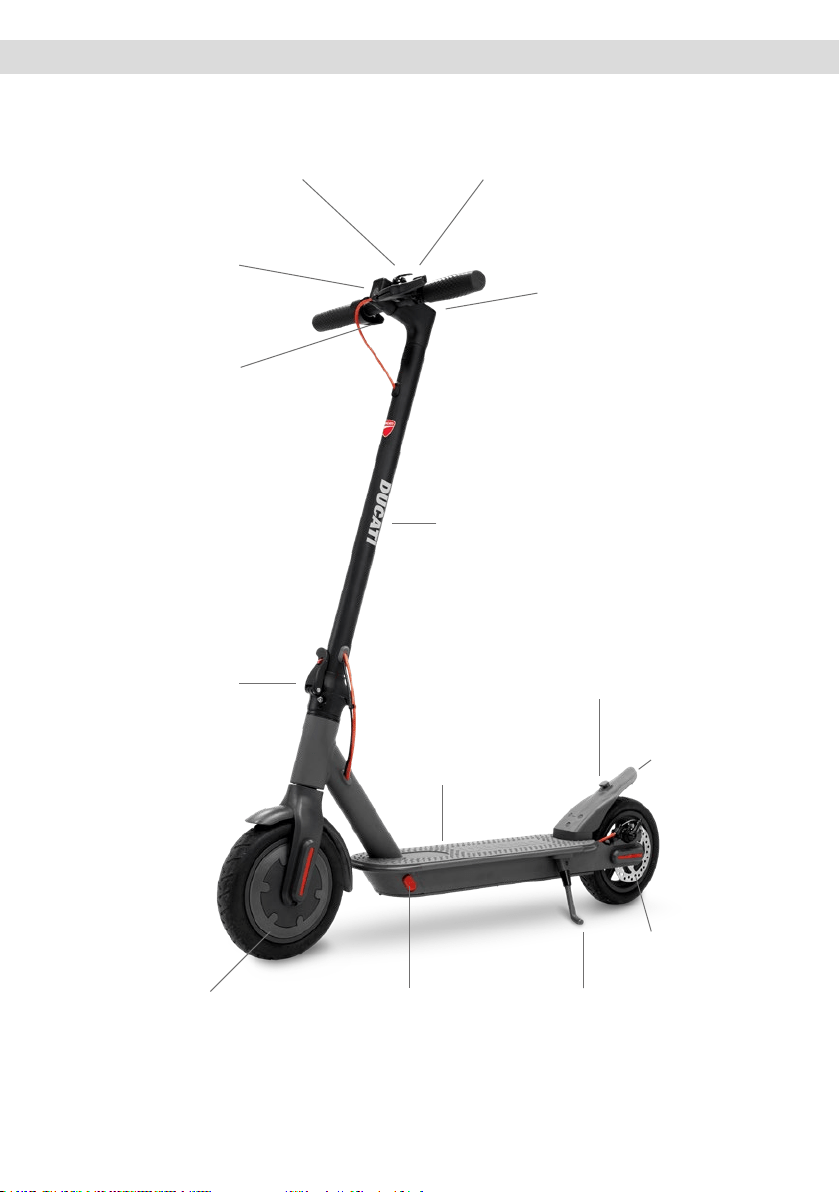
4. Product overview
dashboard
handlebar rod
folding lock
brake light
disc brake
standmotor
footplate
brake
bell
front light
accelerator
folding mechanism

07
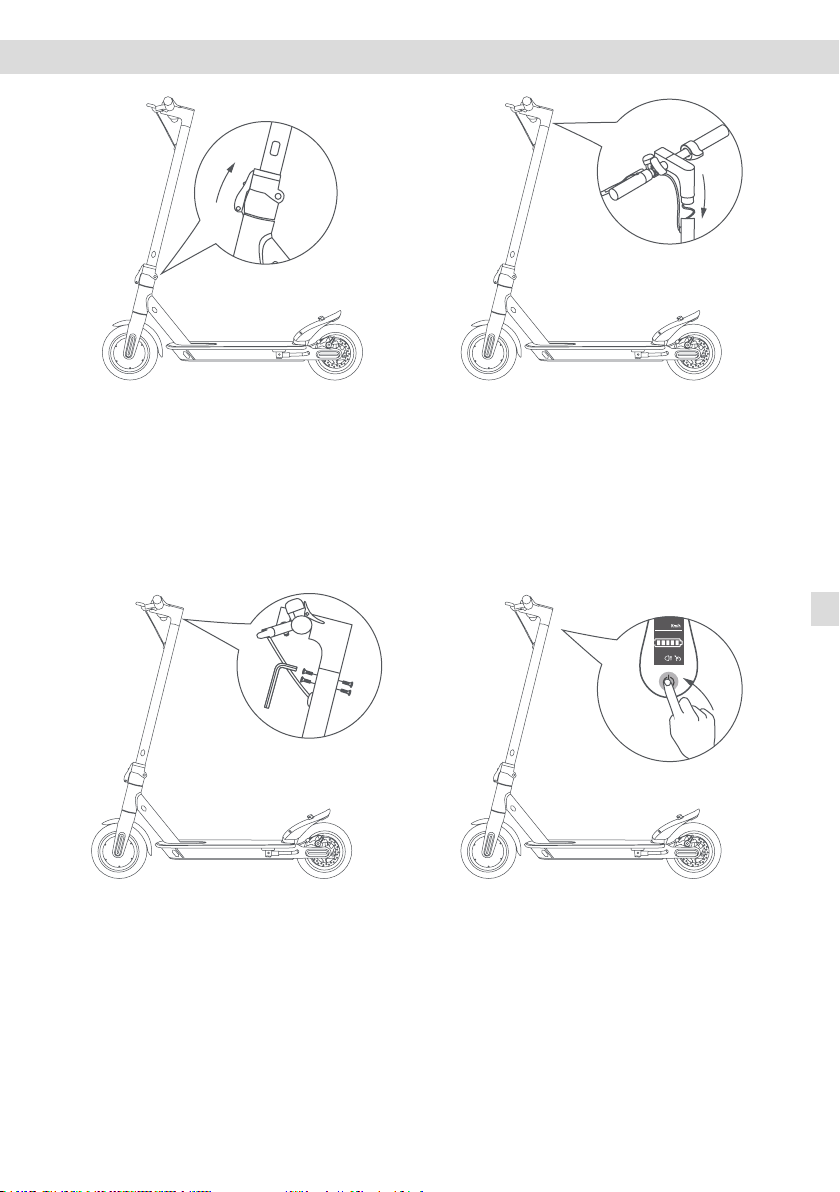
5. Control information / Control panel
1
75
3
4
9
6
8
10
2
A
1. Speedometer: displays the current speed of the scooter.
4. Bluetooth: Bluetooth indicator.
for a few seconds.
10. Fault: if on, check a possible solution by consulting the table of error codes.

08
- E: up to 6 km/h
- D: up to 20 km/h
- SPORT: up to 25 km/h
WARNING
A

09
Open the stand, raise the rod, place the
tightening them, then use the
and secure the handlebar.
is working. For technical assistance,
contact your dealer.
6. Assembly and configuration
00

10
Loose handlebar rod
If the handlebar rod is loose, you can tighten the screws on the folding system using the
key supplied.
Closing:
Opening:
Release the handlebar rod from the mudguard: press the clip to release the handlebar,
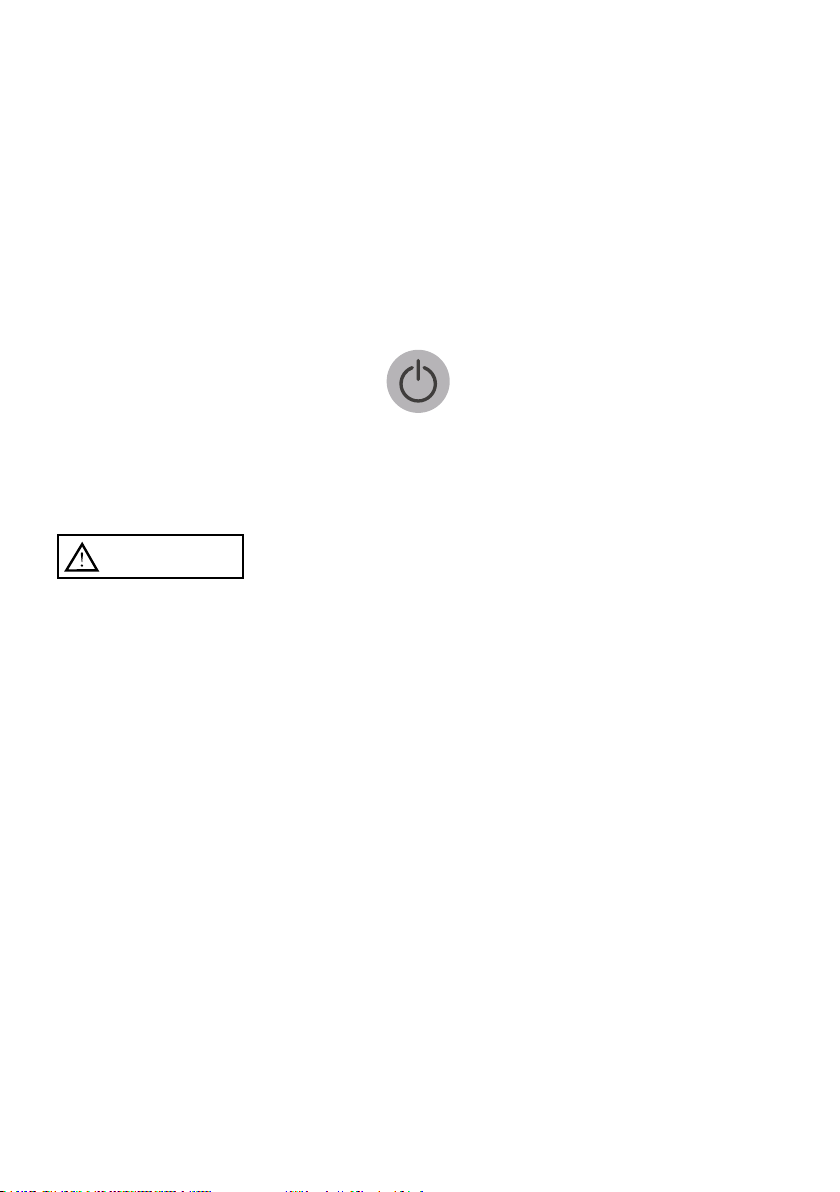
the electric scooter on.
7. Folding and carrying
Closing Opening

11
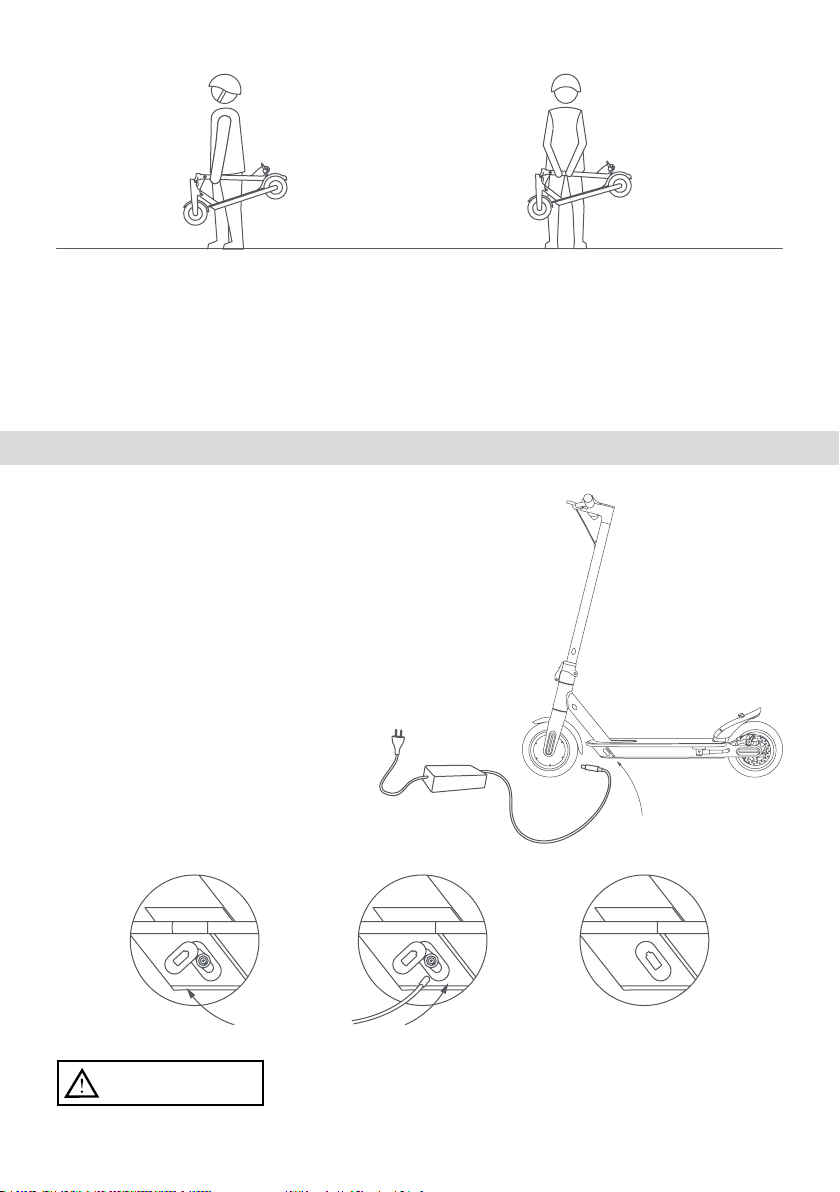
1. Open the rubber cap of the charging
footplate.
2. Plug the charger connector into the
socket.
the charger connector.
The red light on the power supply will turn green when
charging is complete.
Always carry the scooter by holding it with one or both hands by the handlebar rod.
Carrying position
CAUTION
1 2 3

12
There is a risk of falling when using the electric scooter. For your own safety, wear a
helmet and knee pads to protect yourself against falls and injuries while learning to ride
the electric scooter.
Brake adjustment
If the brake is too tight, use the key supplied and turn it anti-clockwise to release the
loose, do the opposite and lengthen the brake cable.
9. Brake adjustment
Brake cable

13
roads and slopes.
range.
Maintenance: timely recharging and correct maintenance increase the range.
structure of the electric scooter. Do not use pressurised water guns or running water for
cleaning. The electric scooter is not waterproof.
Do not expose it to rain or water, or immerse it in water to wash it.
10. Range
11. Storage and cleaning

14
12. General warnings
If you notice unusual noises or any anomalies, do not use the product and contact the
its structure and cause problems.
Instructions on driving behaviour
• Do not use the phone or listen to music while riding the scooter.
• Always grasp the handlebar with both hands when riding.
• Do not get distracted while riding and always look ahead.
• Always ride at a speed at which you can brake safely.

15
13. App configuration
• Set the Cruise Control function
• Display cruising speed
• Display speed modes
Access the app store to download and install the Ducati Urban e-Mobility app

16

17
Associated electric
scooter
Electric scooter
Speed in real time
Record route
application
Riding modes
Usage time
Map

18
Information on “Cruise Control”:
the function.
User profile
App language
Name of the
electric scooter
Speed units
ON/OFF Cruise Control
ON/OFF Mode
ON/OFF Motor lock
Information
User profile logout

19
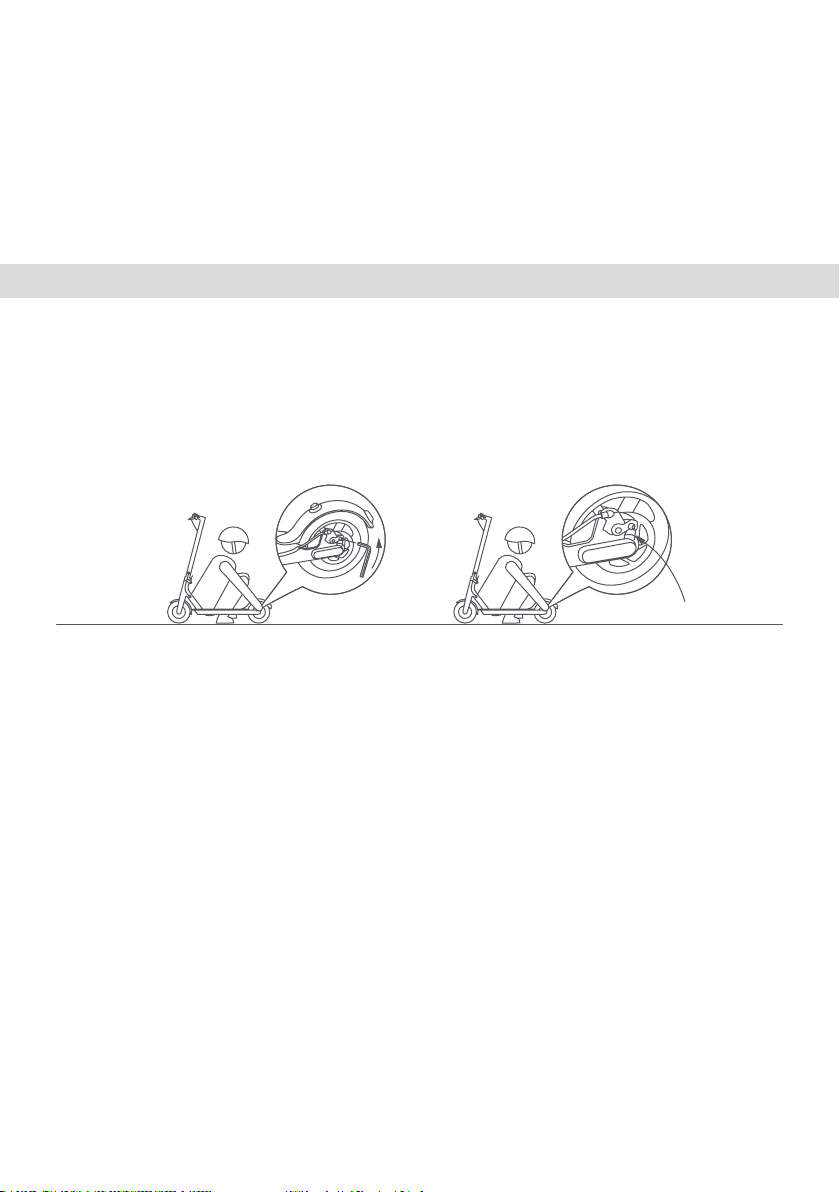
Follow the safety instructions before riding
the scooter.
and knee pads.
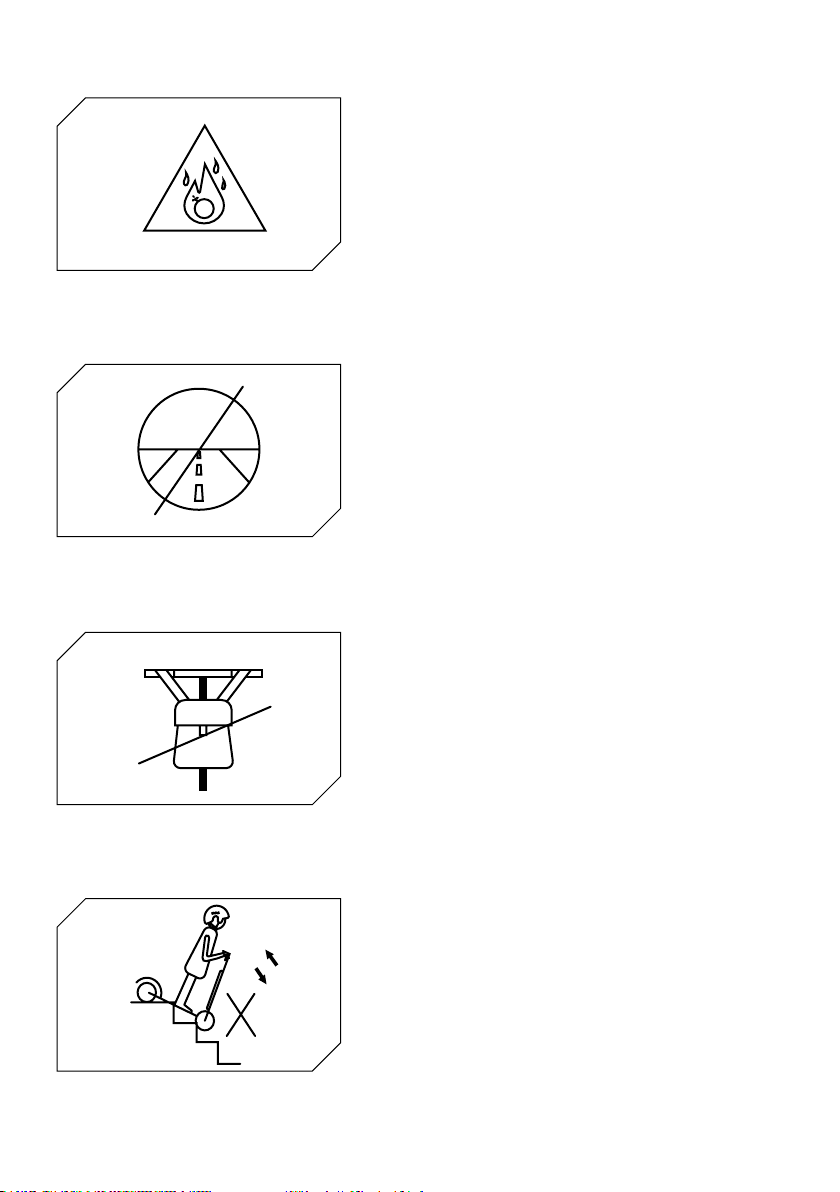
Do not use the electric scooter in the rain.
The electric scooter cannot be used by more
than one person at the same time.
women should not use this electric scooter.
Law L 27/12/2019 no. 160
14. Learning to ride

20
Minimum weight allowed on the electric
scooter: 20 kg.
Maximum weight allowed on the electric
scooter: 100 kg.
Do not ride the electric scooter if you
medicines.
Do not use your phone or listen to music
while riding the electric scooter.
are bumps, sand, puddles, frost, snow or
steps, or in dark places and at night or in
wet conditions.

21
Do not use the electric scooter in dangerous
areas, in the presence of flammable and/or
This electric scooter is not designed to be
ridden on roads and motorways. Consult
municipality on where electric scooters are
electric scooter.

22
Always ride with both hands on the handlebar.
Do not ride on the electric scooter with just
one foot.
Do not press the accelerator when walking
with the electric scooter.
Do not ride the electric scooter in puddles or

23
under canopies, doors and the like.
do not turn the handlebar abruptly.
release the accelerator before braking.
on obstacles such as steps, borders or
bumps.

24
5m
Do not hit obstacles with the wheels.
riding, it could be extremely hot.
Maintain a minimum safety distance of 5 m

25
potential risks.
life and may cause other potential risks.
Do not charge in direct sunlight or near a fire.
before charging.
the DC charging socket with metal objects.

26
What to avoid:
Using any charger other than the original.
The rider is obliged to use the electric scooter with the utmost diligence and in full
compliance with current legislation regarding the use, operation and riding of the
responsibility, as described in the warnings and recommendations section, and to
keep all the documentation regarding the maintenance of the electric scooter.
dangerous to use the electric scooter. To this end, we recommend moderating your
16. Responsibilities

27
17. Daily maintenance and care
Cleaning and storage
persist, put toothpaste on them, brush with a toothbrush, then wipe with a damp cloth. If
the charging cable disconnected and the rubber cap closed, as a water leak could cause an
• Check the brakes and that they are adjusted correctly.

28
Note:

29
18. Data sheet
Frame
Motor
Net weight
General information
Electrical system
Measurements
Speed
Brake
Gross weight
Motor
Product dimensions closed
Tyres
Lights
Packaging dimensions
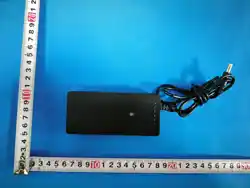
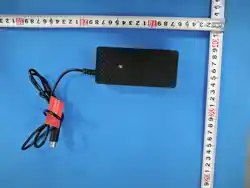
Charger
Current limit
Bluetooth
Motor type
Maximum load
Operating temp.
Charging time
Range
Rider
Maximum incline
Brakes
Display
Product dimensions open
Aluminium alloy
12kg
Front electronic
14.5kg
1050 x 440 x 480mm
Front and rear LED
1120 x 160 x 520mm
15A
Functionality with app
Brushless
100kg
-10°C / 40°C
IP54
Approximately 3/5 hours
Check the current legislation in your country
Electronic front and rear disc brakes
Integrated colour LED display
1050 x 440 x 1150mm

30
19. Troubleshooting
Tests to be carried out
• Check tyre wear and pressure.
• Check the wear of the brakes and cables.
Error
The motor is not running
The rear wheel will not turn
The motor stops while it is running
the scooter does not turn on
running
Cause
Brake problem
Connection problems
Damaged power cables
and controls
Electrical problem
Solution
Adjust the brakes
Release the accelerator and wait for it
to cool
dealer
dealer
dealer
dealer
dealer
31
20. Error Codes Table
Error Code
E.1
E.2
E.3
E.4
E.5
E.6
E.7
E.8
Indications
Motor malfunction
Control unit signal error
Control unit MOS malfunction
Phase/current error
is released.
CAUTION
CAUTION

32
CAUTION
Disposing of electrical or electronic devices at the end of their life (applicable in all
European Union countries and in other European systems with separate collection
systems)
This symbol on the product or packaging indicates that the product
should not be considered as normal household waste, but instead
taken to an appropriate collection point for recycling electrical and
By ensuring this product is disposed of correctly, you will help
and human health which could otherwise be caused by
natural resources.
For more detailed information about recycling this product, you
the outlet where you purchased it.
of this type of waste separately, in two possible ways:
same function.
specific separate waste collection.

33
CAUTION
other European systems with separate collection system)
pack should not be considered normal household waste. On some
chemical symbol.
disposed of correctly.
purchased it.

34
NOTE
Read the manual and instructions below in full before using the product.
Product name: Ducati PRO-I EVO
Product type: Electric scooter
Year of production: 2020
Note:
• Using another type of charger can damage the product or pose other potential risks.
hours.
• The product should only be charged at temperatures between 0°C and 40°C.
• The product must be used only at temperatures between 0°C and 40°C.
• Do not recharge in sunlight or near open flames.
before charging.
charged.
be used.

35
Declaration of conformity
The undersigned: M.T. Distribution S.r.l.
that the design and manufacture of this product
Related Standards:
EN ISO 12100:2010, EN
Serial numbers: YYYY2020XXXXXXX to YYYY2020XXXXXXX
First name and surname: Emanuele Summa
Position: Director
Company: M.T. Distribution S.r.l.
Date: 01/12/2020
Product brand:
Item model number:
Type of product:
Ducati
PRO-I EVO
Electric scooter
Emanuele Summa
Director

36
Italiano

37
Indice
1.
2.
3.
4.
5.
6.
7.
8.
9.
10.
11.
12.
13.
14.
15.
16.
17.
18.
19.
20.
Guida rapida
Autonomia
Imparare a guidare
Responsabilità
Scheda tecnica
Tabella codici errori

38
1. Istruzioni di sicurezza
e gomitiere ed indossare il casco.
liscia e sicura
3. Frenata
4. Regole basiche sulla guida

39
2. Guida rapida
per darsi un leggera spinta e accelerare.
per accendere le luci, indossare un gilet catarifrangente.
AVVISO

40
3. Contenuto della confezione
• Accessori:
- Stickers di ricambio

41
pannello di controllo
asta del manaubrio
chiusura
ripiegamento
luce freno
freno a disco
motore
pedana
frenocampanello
luce frontale
acceleratore
meccanismo di
ripiegamento

42
5. Informazioni dei comandi / Pannello di controllo
1
75
3
4
9
6
8
10
2
A
3. Fari: Spia del fanale.
4. Bluetooth: Spia del Bluetooth.
43
- E: fino a 6 km/h
- D: fino a 20 km/h
- SPORT: fino a 25 km/h
AVVISO
A

44
esagonale fornita per serrarle e fissare il
manubrio.
6. Assemblaggio e configurazione
00

45
Asta del manubrio traballante
Chiusura:
Chiusura

46
1. Aprire il tappo in gomma della presa di
ricarica situata nel lato sinistro della
pedana.
nella presa.
manubrio.
ATTENZIONE
1 2 3

47
freno.
9. Regolazione dei freni

48
guida su strade sconnesse e pendii.
10. Autonomia
11. Conservazione e pulizia

49
bambini.
• Condurre sempre con entrambi i piedi sopra la pedanain modo comodo e sicuro.
prima di frenare
• Non fare gare a discapito di altri conducenti.

50
13. Configurazione app
• Impostare le modalità di guida

51

52
associato
Velocità in tempo reale
Registra percorso
Modalità di guida
Mappa

53
Informazioni sul “Cruise Control”:
Profilo utente
Nome del
ON/OFF Cruise Control
ON/OFF Modalità
ON/OFF Blocco motore
Logout profilo utente

54
ginocchiere.
pioggia.
contemporaneamente.
disciplinata dalla legge L 27/12/2019 N.160
14. Imparare a guidare
55

56
sporco.
strade e autostrade. Consultare il decreto

57
Circolare sempre con le due mani sul manubrio.
solo piede.
58
consentita non girare il manubrio in maniera
brusca.
prima di frenare.
59
5m
Non colpire ostacoli con le ruote.
Non toccare il motore subito dopo

60

61
Da non fare:
16. Responsabilità

62
17. Manutenzione e cura quotidiana
Pulizia e conservazione
o incendi.

63
Nota:

64
18. Scheda tecnica
Telaio
Motore
Informazioni generiche
Misure
Velocità
Freno
Peso lordo
Motore
Pneumatici
Luci
Dimensioni packaging
Caricatore
Limite di corrente
Bluetooth
Tipologia motore
Carico massimo
Tempo di carica
Autonomia
Conducente
Freni
Display
Lega di alluminio
12kg
14.5kg
1050 x 440 x 480mm
LED anteriore e posteriore
1120 x 160 x 520mm
15A
Brushless
100kg
-10°C / 40°C
IP54
Circa 3/5 ore
-
Display LED a colori integrato
1050 x 440 x 1150mm

65
19. Risoluzione dei problemi
Errore
La ruota posteriore non gira
Il motore si spegne mentre
Causa
Problema ai freni
Surriscaldamento del motore
Problemi di connessione
danneggiati
Soluzione
Regolare i freni

66
20. Tabella Codici Errori
Codice Errore
E.1
E.2
E.3
E.4
E.5
E.6
E.7
E.8
Indicazioni
Errore segnale centralina
Errore fase / corrente
ATTENZIONE
ATTENZIONE
67
ATTENZIONE
dal suo smaltimento inadeguato. Il riciclaggio dei materiali aiuta a
modalità di consegna:

68
ATTENZIONE
altrimenti essere causate dal loro smaltimento inadeguato. Il riciclaggio dei materiali

69
AVVERTENZE
Nota:
lesioni personali.
lesioni personali
carico.
70
Dichiarazione di conformità
Related Standards:
N° di serie: YYYY2020XXXXXXX to YYYY2020XXXXXXX
Nome e cognome: Emanuele Summa
Società: M.T. Distribution S.r.l.
Data: 01/12/2020
Ducati
PRO-I EVO
Emanuele Summa
Amministratore

71
patinete eléctrico
Manual de uso
Gracias por elegir este producto.
Español

72
Índice
1.
2.
3.
4.
5.
6.
7.
8.
9.
10.
11.
12.
13.
14.
15.
16.
17.
18.
19.
20.
Instrucciones de seguridad
Contenido del embalaje
Vista del producto
Información de los controles/panel de control
Montaje y configuración
Ajuste de los frenos
Configuración de la aplicación
Aprender a conducir
Responsabilidad
Mantenimiento y cuidado diario
Ficha técnica
Solución de problemas
Tabla de códigos de error

73
1. Instrucciones de seguridad
• Este patinete eléctrico no es un juguete. Úselo con responsabilidad, atención y respeto
lisa y segura.
• El uso incorrecto del producto o el incumplimiento de las instrucciones de este manual
stencia técnica de su distribuidor.
• No intente desmontar o reparar el producto por su cuenta.
aspectos:
1. Aceleración
2. Desaceleración
3. Frenada

74
2. Guía rápida
• Pulse el botón de encendido durante unos segundos para iniciarlo.
una carga periódica para funcionar.
• Ponga las manos en el manillar. Suba a la plataforma con un pie y utilice el otro para
impulsarse ligeramente y acelerar.
acelerador.
instantes y gire lentamente el manillar.
• Para detener el patinete, suelte el acelerador, pulse el freno electrónico o la palanca
lesiones mientras aprende a conducir el patinete eléctrico.
El conductor asume todos los riesgos relacionados con la falta de uso del casco o de
Por razones de seguridad, el patinete está configurado inicialmente para evitar el
ADVERTENCIA

75
3. Contenido del embalaje
• Patinete
• Accesorios:
- 4 tornillos

76
4. Vista del producto
panel de control
barra del manillar
cierre plegable
freno de disco
pie de apoyomotor
plataforma
frenotimbre
acelerador
mecanismo de plegado
77
5. Información de los controles/panel de control
1
75
3
4
9
6
8
10
2
A
3. Faros: testigo del faro.
4. Bluetooth: indicador del Bluetooth.
sobrecalentamiento del motor.

78
el patinete.
- E: hasta 6 km/h
- D: hasta 20 km/h
- SPORT: hasta 25 km/h
ADVERTENCIA
A

79
cierre.
apretarlos y asegurar el manillar.
Cuando haya terminado, encienda el
todo funcione. Para obtener asistencia
técnica, póngase en contacto con su
distribuidor.
6. Montaje y configuración
00

80
Barra del manillar inestable
Si la barra del manillar es inestable, puede apretar los tornillos del sistema de plegado
Cierre:
hacia dentro. Encienda el patinete eléctrico.
Cierre

81
1. Abra la tapa de goma de la toma de carga
plataforma.
toma.
conector del cargador.
cuando finalice la operación de carga.
manillar.
8. Carga y activación de la batería
ATENCIÓN
1 2 3

82
aprende a conducir el patinete eléctrico.
Ajuste del freno
contraria y extienda el cable del freno.
9. Ajuste de los frenos
Cable de freno

83
conduce en calles irregulares y con pendientes.
meses. Si no se usa a diario, se recomienda almacenar el patinete a 15-25 °C. No se debe
apariencia como la estructura interna del patinete eléctrico. No utilice pistolas de agua a
10. Autonomía
11. Almacenamiento y limpieza

84
chaleco reflectante.
• No se suelte mientras conduce y mire siempre hacia delante.
• No haga carreras contra otros conductores.

85
13. Configuración de la aplicación
• Iniciar un autodiagnóstico
• Establecer los modos de conducción
• Configurar la función de control de crucero
• Ver los kilómetros totales y parciales recorridos
Acceda a la «app store» para descargar e instalar la aplicación Ducati Urban e-Mobility

86

87
Patinete eléctrico
emparejado
patinete eléctrico
Velocidad en tiempo real
Registrar recorrido
aplicación
Modo de conducción
Tiempo de uso
Mapa
Configuración

88
Idioma de la aplicación
Nombre del patinete
eléctrico
Control de crucero ON/OFF
Modo ON/OFF
Inicio desde cero
ON/OFF
Información
Solicitud de asistencia
de usuario

89
Siga las instrucciones de seguridad antes de
conducir el patinete.
Utilice elementos homologados, como
cascos y rodilleras.
patinete eléctrico.
por la ley L 27/12/2019 N.º 160
14. Aprender a conducir

90
eléctrico: 20 kg.
eléctrico: 100 kg.
tomar alcohol o medicamentos.
mientras conduce el patinete eléctrico.
Preste atención a la conducción en presencia
escaleras, en lugares oscuros y de noche o

91
peligrosas, en presencia de sustancias,
para circular por carreteras ni autopistas.
circulación de patinetes eléctricos.
eléctrico.

92
manillar.
solo pie.
No pulse el acelerador cuando camine con el
patinete eléctrico.

93
permitida, no gire el manillar de manera
brusca.
Comience a frenar a una distancia suficiente
soltar el acelerador antes de frenar.
baches.

94
5m
Mantenga una distancia de seguridad

95
Cargue el patinete en un ambiente seco, lejos de materiales inflamables
temperatura interna de 15-25 °C, y nunca por debajo de 0 °C o por encima de 45 °C.
durante una hora antes de cargarlo.
Lea las secciones sobre la carga y el almacenamiento para mantener y manipular la
Precauciones con la batería:
la salud y el medioambiente. No utilice el patinete si emite olores, sustancias o un calor

96
No debe:
etc. Conducir el patinete eléctrico mientras se carga.
centro de asistencia en el sitio web
16. Responsabilidad

97
17. Mantenimiento y cuidado diario
el patinete no esté en uso, se debe guardar en un lugar cerrado, seco y fresco. No se debe
• Compruebe los frenos y su ajuste.
seguridad.
medioambiente.

98
Nota:

99
18. Ficha técnica
Marco
Motor
Peso neto
Sistema eléctrico
Medidas
Velocidad
Freno
Peso bruto
Motor
Dimensiones del producto cerrado
Luces
Dimensiones del embalaje
Protección de baja tensión
Cargador
Bluetooth
Tipo de motor
Temperatura de funcionamiento
Tiempo de carga
Conductor
Pendiente
Frenos
Pantalla
De aleación de aluminio
12kg
Electrónico delantero
14.5kg
1050 x 440 x 480mm
Led delantero y trasero
1120 x 160 x 520mm
15A
Funcionalidad con la aplicación
Sin escobillas
100kg
-10°C / 40°C
IP54
Aproximadamente 3-5 horas
Frenos de disco electrónicos delanteros y traseros
Pantalla integrada led a color
1050 x 440 x 1150mm

100
19. Solución de problemas
controles.
Error
El motor no funciona
La rueda trasera no gira
El motor se apaga cuando
el patinete no se enciende
Causa
Problema en los frenos
Sobrecalentamiento del motor
Problemas de conexión
Problemas con el cargador
Cables de alimentación
Problema eléctrico
Ajuste los frenos
Solicite asistencia técnica a su distri-
buidor
Solicite asistencia técnica a su distri-
buidor
Solicite asistencia técnica a su distri-
buidor
Sustituya el cargador
Solicite asistencia técnica a su distri-
buidor
Solicite asistencia técnica a su distri-
buidor

101
20. Tabla de códigos de error
E.1
E.2
E.3
E.4
E.5
E.6
E.7
E.8
Indicaciones
Funcionamiento incorrecto del motor
Funcionamiento incorrecto de la palanca del acelerador
Funcionamiento incorrecto de la centralita MOS
Error de fase/corriente
Funcionamiento incorrecto de la corriente media
Funcionamiento incorrecto de la palanca de freno
Al presionar la palanca del acelerador, hasta el tope de su
parado.
ATENCIÓN
ATENCIÓN

102
ATENCIÓN
recogida selectiva)
entregarse en un punto de recogida adecuado para el reciclaje de
una eliminación inadecuada. El reciclaje de materiales ayuda a
producto, puede ponerse en contacto con la oficina municipal, el
municipales, cuando estén disponibles.
Si los REEE contienen pilas o acumuladores, estos deben retirarse y someterse a una
103
ATENCIÓN
en otros países europeos con sistemas de recogida selectiva)
interior también se procese correctamente.

104
ADVERTENCIAS
Nombre del producto: Ducati PRO-I EVO
Tipo de producto: patinete eléctrico
Nota:
potenciales.
• El periodo de recarga del producto no debe exceder las cuatro horas. Interrumpa la car
ga después de cuatro horas.
ocasionar lesiones personales.
• El producto debe usarse a una temperatura de entre 0 °C y 40 °C.
personales.
• El producto se suele suministrar parcialmente cargado. Se debe dejar en ese estado

105
El abajo firmante: M.T. Distribution S.r.l.
2014/35/UE
Normas relacionadas:
EN ISO 12100:2010, EN
N.° de serie: YYYY2020XXXXXXX a YYYY2020XXXXXXX
Nombre y apellidos: Emanuele Summa
Cargo: administrador
Empresa: M.T. Distribution s.r.l.
Fecha: 1/12/2020
Marca del producto:
Tipo de producto:
Ducati
PRO-I EVO
Emanuele Summa
Administrador

106
Français

107
Table des matières
1.
2.
3.
4.
5.
6.
7.
8.
9.
10.
11.
12.
13.
14.
15.
16.
17.
18.
19.
20.
Consignes de sécurité
Guide rapide
Présentation du produit
Informations sur les commandes/Panneau de commande
Assemblage et configuration
Réglage des freins
Autonomie
Apprendre à conduire
Responsabilité

108
1. Consignes de sécurité
produit ou du non-respect du code de la route et des instructions du présent manuel.
sur le sol en tenant le guidon à la bonne hauteur.
lisse et sûre.
• La charge maximale autorisée par le produit est de 100 kg.
peut entraîner de sérieux dommages.
1. Accélération
2. Décélération
3. Freinage
109
2. Guide rapide
fonctionner.
AVERTISSEMENT

110
3. Contenu de l’emballage
• Accessoires :
- Clé Allen
- Chambre à air de rechange
- Autocollants de rechange
- Adaptateur pour gonfler les pneus

111
4. Présentation du produit
panneau de commande
tige de guidon
fermeture du mécanis-
me de pliage
feu de freinage
moteur
plate-forme
frein
accélérateur
mécanisme de pliage

112
5. Informations sur les commandes/Panneau de commande
1
75
3
4
9
6
8
10
2
A

113
déclenché 6 fois.
AVERTISSEMENT
A
114
fournie pour les serrer et fixer le guidon.
6. Assemblage et configuration
00

115
Tige de guidon bancale
clé fournie.
Fermeture :
Fermeture

116
de la plate-forme.
connecteur du chargeur.
ATTENTION
1 2 3
117
Réglage du frein
9. Réglage des freins

118
sur des routes accidentées ou en pente.
10. Autonomie

119
de freiner.
• Ne faites pas la course au mépris des autres usagers de la route.

120
13. Configuration de l’application
• Lancer un auto-diagnostic
• Définir les modes de conduite
• Définir le mode de démarrage

121

122
jumelée
Vitesse en temps réel
Mode de conduite

123
Profil utilisateur
ON/OFF Cruise Control
ON/OFF Mode
ON/OFF Verrouillage
du moteur
Informations
Déconnexion du profil
utilisateur

124
la pluie.
par la loi L 27/12/2019 N° 160.
14. Apprendre à conduire

125
des médicaments.
sombres et la nuit ou sur une chaussée
mouillée.

126

127
guidon.
humides.

128
autres.
escaliers, des bords ou des bosses.

129
5m

130
45°C.

131
À ne pas faire:
excessifs.
circulation dense.
En cas de dysfonctionnement du produit pour des raisons non imputables à un
le site
16. Responsabilité

132
17. Entretien et soins quotidiens
incendie.

133
Remarque:

134
18. Fiche technique
Cadre
Moteur
Poids net
Informations générales
Dimensions
Vitesse
Frein
Poids brut
Moteur
Dimensions du produit fermé
Pneus
Phares
Protection basse tension
Chargeur
Limite de courant
Bluetooth
Type de moteur
Charge maximale
Temp. de fonctionnement
Temps de charge
Autonomie
Conducteur
Pente maximale
Freins
Écran
12kg
14.5kg
1050 x 440 x 480mm
1120 x 160 x 520mm
15A
Sans balais
100kg
-10°C / 40°C
IP54
-
Écran LED couleur intégré
1050 x 440 x 1150mm

135
19. Résolution des problèmes
Essais à réaliser
Erreur
Le moteur ne fonctionne pas
Cause
et commande endommagés
refroidisse

136
20. Tableau des codes d’erreur
Code d’erreur
E.1
E.2
E.3
E.4
E.5
E.6
E.7
E.8
Indications
Dysfonctionnement du moteur
Erreur de phase/courant
Dysfonctionnement courant moyen
ATTENTION
ATTENTION
137
ATTENTION
Traitement du dispositif électrique ou électronique en fin de vie (applicable dans tous
collecte séparée des déchets)
par une destruction inappropriée. Le recyclage des matériaux aide
Pour des informations plus détaillées sur le recyclage de ce
soumis à une collecte séparée.

138
ATTENTION
Traitement des piles usagées (applicable dans tous les pays de l’Union européenne et
Selon le décret législatif 49/2014, le produit rentre dans la catégorie des EEE

139
AVERTISSEMENT
Nom du produit: Ducati PRO-I EVO
Année de production: 2020

140
Déclaration de conformité
La soussignée: M.T. Distribution S.r.l.
tension
Normes connexes:
EN ISO 12100:2010, EN
N° de série: YYYY2020XXXXXXX à YYYY2020XXXXXXX
Nom et prénom: Emanuele Summa
Fonction: Administrateur
Société: M.T. Distribution S.r.l.
Date: 01/12/2020
Type de produit:
Ducati
PRO-I EVO
Emanuele Summa
Administrateur

141
elektroroller
Vielen Dank, dass Sie sich für dieses Produkt entschieden haben.
Deutsch

142
Inhalt
1.
2.
3.
4.
5.
6.
7.
8.
9.
10.
11.
12.
13.
14.
15.
16.
17.
18.
19.
20.
Sicherheitshinweise
Inhalt der Verpackung
Produktübersicht
Bedienungsinformationen/Display
Einstellen der Bremsen
Reichweite
Lagerung und Reinigung
Allgemeine Hinweise
Fahren lernen
Fehlerbehebung
Fehlercode-Tabelle

143
1. Sicherheitshinweise
auf.
in diesem Handbuch.
Sorgfalt und im Respekt anderen gegenüber.
halten.
• Die missbräuchliche Verwendung des Produkts oder die Nichtbeachtung der
Ihres Händlers.
• Vermeiden Sie die Verwendung gebrauchter, defekter und/oder nicht originaler Akkus.
Aspekte eingewiesen wird:
1. Beschleunigung
2. Verlangsamung
4. Grundlegende Fahrregeln

144
2. Kurzanleitung
• Stellen Sie den Roller auf eine ebene Fläche.
drücken Sie das Gaspedal.
und drehen Sie die Lenkstange langsam.
Bremse oder die Hebelbremse auf der linken Seite des Lenkers.
Aus Sicherheitsgründen ist der Roller zunächst so eingestellt, dass das Anfahren aus
HINWEIS

145
3. Inhalt der Verpackung
• Roller
- Inbusschlüssel
- 4 Schrauben
Nach der Montage des Rollers, muss die Lenkstange mit den entsprechenden Schrauben
angeschraubt werden.

146
4. Présentation du produit
display
lenkerstange
bremslicht
scheibenbremse
ständerladeanschluss
motor
bremseklingel
frontlicht
gaspedal
klappmechanismus

147
5. Bedienungsinformationen/Display
1
75
3
4
9
6
8
10
2
A
1. Tachometer: Zeigt die aktuelle Geschwindigkeit des Rollers an.
Geschwindigkeit einige Sekunden lang beibehalten wurde.
Tabelle.

148
gedrückt.
HINWEIS
A

149
Stange an und bringen Sie den Hebel in
die geschlossene Position.
Inbusschlüssel an, bis der Lenker fest
Bringen Sie den Lenker an der Stange
Schalten Sie das Gerät nach der
sich an Ihren Händler.
6. Montage und Konfiguration
00

150
Verschluss:
Schalten Sie den Elektroroller aus, entriegeln Sie den Verriegelungsmechanismus:
Sie den Hebel nach innen drücken. Schalten Sie den Elektroroller ein.
Schliessen
151
Ladebuchse auf der linken Seite
2. Stecken Sie den Ladestecker in die
Steckdose.
3. Ziehen Sie den Ladestecker heraus, wenn
der Akku aufgeladen ist.
Halten Sie den Roller immer mit einer Hand oder beiden Händen an der Lenkerachse
8. Laden und Aktivieren des Akkus
WARNUNG
1 2 3

152
Einstellen der Bremse
9. Einstellen der Bremsen
Bremskabel

153
Reichweite.
10. Reichweite
11. Lagerung und Reinigung

154
12. Allgemeine Hinweise
Hinweise zum Fahrverhalten
• Fassen Sie den Lenker beim Fahren immer mit beiden Händen an.

155
13. Konfiguration der app
• Die Fahrmodi einstellen
• Die Reisegeschwindigkeit ansehen

156

157
Hauptbildschirm
Elektroroller
Akkustand des Elektrorol-
Zurückgelegte Strecke
Zurückgelegte Strecke
Fahrmodus
Einstellungen

158
Informationen zu „Tempomat”:
Sprache der app
Name des Elektrorollers
Geschwindigkeitseinheit
EIN/AUS Tempomat
EIN-/AUS-Modus
EIN/AUS Motorsperre
Informationen
-
profils

159
Sie mit dem Roller fahren.
Sicherheitsausrüstungen wie Helme und
Verwenden Sie den Elektroroller nicht bei
Regen.
14. Fahren lernen

160
Mindestbelastung des Elektrorollers: 20 kg.
Elektrorollers: 100 kg.
Fahren Sie den Elektroroller nicht
Medikamenten.
Musik, während Sie mit dem Elektroroller
fahren.
Nacht oder Nässe.

161
Führen Sie den Elektroroller nicht in
Dieser Elektroroller ist nicht für das Fahren
Informieren Sie sich bei Ihrer Gemeinde über
und darüber, wo das Fahren mit E-Rollern
erlaubt ist.
Stellen Sie keine schweren Gegenstände auf
den Lenker.
Vermeiden Sie es, mit dem Elektroroller

162
Legen Sie beim Fahren stets beide Hände auf
die Lenkstange.
Fahren Sie den E-Roller nicht mit nur einem
Drücken Sie nicht auf das Gaspedal, wenn
Sie den Elektroroller schieben.
Fahren Sie nicht mit dem Elektroroller in

163
Vordächer, Türen und/oder dergleichen
Drehen Sie den Lenker nicht abrupt,
Geschwindigkeit fahren.
mit ausreichendem Abstand, um
Geschwindigkeit über Hindernisse wie

164
5m
Fahren Sie nicht mit den Rädern gegen
Hindernisse.

165
Stellen Sie sicher, dass der Roller, das Ladegerät und der Ladeanschluss trocken sind.
Verwenden Sie nur das Originalladegerät. Andere Ladegeräte beschädigen Ihr Gerät und
Materialien.
Laden Sie das Gerät nicht bei direkter Sonneneinstrahlung oder in der Nähe eines Feuers auf.
Aufladen eine Stunde lang abkühlen.
Gegenständen.
eine Beschädigung am Akku, die durch Niederspannung über einen längeren Zeitraum
Vorsichtsmaßnahmen für den Akku:

166
Was Sie nicht tun sollten:
befinden.
Bewahren Sie den Akku nicht im Regen oder unter direkter Sonneneinstrahlung auf und
Verwenden Sie nur das Originalladegerät.
sorgfältig abwägen. Daher empfehlen wir, die Geschwindigkeit bei widrigen
Bei Fehlfunktionen des Produkts aus Gründen, die nicht auf ein falsches

167
Reinigung und Aufbewahrung
beim Reinigen sicher, dass der Roller ausgeschaltet, das Ladekabel abgesteckt und
die Gummikappe geschlossen ist, da ansonsten eine Gefahr durch Stromschläge oder
des Rollers und des Akkus.
• Überprüfen Sie die Bremsen und deren Einstellung
1. Verwenden Sie keine Akkus anderer Modelle oder Marken, da diese ein Sicherheitsrisiko

168
Hinweis:
180 Tagen.

169
Rahmen
Motor
Allgemeine Informationen
Elektrisches Anlage
Abmessungen
Geschwindigkeit
Bremse
Motor
Akku
Produktabmessungen geschlossen
Reifen
Beleuchtung
Verpackungsabmessungen
Ladegerät
Bluetooth
Maximale Belastung
Betriebstemperatur
Reichweite
Fahrer
Maximales
Bremsen
Display
Aluminiumlegierung
12kg
Elektronische Vorderradbremse
14.5kg
1050 x 440 x 480mm
8,5 Zoll Vorder- und Hinterreifen mit Schlauch
1120 x 160 x 520mm
Ladegerät nach EU-Standard, 42V, 1.5A
15A
Funktionalität mit app
Bürstenlos
100kg
-10°C / 40°C
IP54
Ca. 3 - 5 Stunden
-
1050 x 440 x 1150mm

170
19. Fehlerbehebung
Fehler
Das Hinterrad dreht sich nicht
Der Motor schaltet sich während der
Nach dem Aufladen schaltet sich das
Der Akku lädt nicht
Ursache
Der Akku ist leer
Problem mit den Bremsen
Der Akku ist beschädigt
Anschlussprobleme
Beschädigter/leerer Akku
Probleme mit dem Ladegerät
und Steuerung beschädigt
Elektrisches Problem
Lösung
Den Akku aufladen
Bremsen einstellen
Sie, bis er abgekühlt ist
bei Ihrem Händler an
bei Ihrem Händler an
bei Ihrem Händler an
bei Ihrem Händler an
bei Ihrem Händler an

171
20. Fehlercode-Tabelle
Fehlercode
E.1
E.2
E.3
E.4
E.5
E.6
E.7
E.8
Hinweise
Signalfehler des Steuergeräts
Fehlfunktion des Gashebels
MOS-Fehlfunktion des Steuergeräts
Phasen-/Stromfehler
Fehlfunktion des Bremshebels
und behält die gleiche Geschwindigkeit bei, auch wenn der
Hebel losgelassen wird.
steht.
WARNUNG
WARNUNG

172
WARNUNG
Entsorgung von elektrischen oder elektronischen Altgeräten (gilt in allen Ländern der
Europäischen Union und anderen europäischen Ländern mit Abfalltrennungssystemen)
Dieses Symbol auf dem Produkt oder auf der Verpackung weist
darauf hin, dass das Produkt nicht als normaler Haushaltsabfall
abgegeben werden muss.
Ressourcen bei.
oder der Verkaufsstelle, an der Sie es erworben haben.
entsorgen:

173
WARNUNG
anderen europäischen Systemen mit getrennten Abfallsammelsystemen)
Dieses Symbol auf dem Produkt oder der Verpackung weist
natürlicher Ressourcen bei. Bei Produkten, für die aus Sicherheits-, Leistungs- oder
elektrischen und elektronischen Geräten ab. Dadurch wird sichergestellt, dass auch die

174
WARNHINWEISE
Produktname: Ducati PRO-I EVO
Produktionsjahr: 2020
Hinweis:
Ausgangsspannung: 42 V - 1,5 A.
• Die Verwendung eines anderen Ladegeräts kann das Produkt beschädigen oder andere
• Laden Sie das Produkt niemals unbeaufsichtigt.
die Gefahr, dass er eine geringere Leistung bietet und infolgedessen das Produkt
dem Aufladen eine Stunde lang abkühlen.

175
Konformitätserklärung
Er entspricht den folgenden Richtlinien: 2006/42/EG
Niederspannungsrichtlinie
Verwandte Standards:
EN ISO 12100:2010, EN
Seriennummer: YYYY2020XXXXXXX to YYYY2020XXXXXXX
Vor- und Nachname: Emanuele Summa
Name des Unternehmens: M.T. Distribution s.r.l.
Datum: 01/12/2020
bescheinigt
Produktmarke:
Ducati
PRO-I EVO
Elektroroller
Emanuele Summa
Direktor

176
Instrukcja obsługi
ę
ćę-
dawcą lub odwiedź stronę internetową www.ducatiurbanemobility.it
Polish

177
Spis treści
1.
2.
3.
4.
5.
6.
7.
8.
9.
10.
11.
12.
13.
14.
15.
16.
17.
18.
19.
20.
ąństwa
ść opakowania
Opis produktu
Informacje o elementach sterujących / Panel sterowania
Montaż i konfiguracja
Skł
Ładowanie i aktywacja akumulatora
Regulacja hamulców
Zasięg
żenia ogólne
ż
ść
ęgnacja
ą
Tabela kodów błędów

178
1. Instrukcje dotyczące bezpieczeństwa
ężęponiż
Zachowaj tę instrukcjęłości lub dla nowych użytkowników.
• Firma nie ponosi żśąłaściwego
uż
ę
ą. Użżając
ństwu innych osób.
ęąącymi
ącymi użąę, że postę
źęąć
wypadków.
żży: rękawic antypoś
na ł
• Osoba kierująca hulajnogą musi mieć możliwość łatwego ustawienia obu stóp na
podeśąc kierownicę na odpowiedniej wysokości.
ł
ąż
• Ten produkt nie może być użśęcej niż jedną osobę.
• Niewłaściwe użń
instrukcji może spowodować poważ
żąć
ć ani naprawiać
żu ognia lub źródeł ciepła.
• Unikaj użżytych, wadliwych i/lub nieoryginalnych akumulatorów.
żąć
ąęęciem
ła poinstruowała go odnośnie:
3. hamowania

179
2. Szybkie wprowadzenie
życiu nałści.
• Aby uruchomić hulajnogę, naciś
• Sprawdź wskaźnik naładowania akumulatora: jeśładowany,
nałąą
ładowania.
• Sprawdź ciśśli hulajnoga nie jest w stanie pokonać co
ąga prędkość maksymalną tylko w
ącach użytkowania, prawdopodobne jest, że koła nie są
ęśnienia w
ści.
• Ustaw hulajnogę na pł
• Połóż dłonie na kierownicy. Stań na podeście jedną stopą, a drugą delikatnie się odepchnij.
ęć, umieść obie stopy na podeście i naciśnij manetkę
ąc hulajnogęęł
skręcaj kierownicą.
ć hulajnogęęśnij hamulec
źwignię hamulca po lewej stronie kierownicy.
śży ją całć. Próbująść
żężeń.
• Jeść tryb prędkośłąłą
• Jeśą lub w nieoświetlonych miejscach naciś
łąć światłę odblaskową.
Dla włńładaj kask i nakolanniki, aby chronić się
ążywaniem kasku lub innego wyposażenia ochronnego
ponosi wyłążytkownik hulajnogi.
Ukłśłąę, gdy prędkość
Z uwagi na bezpieczeństwo począ
OSTRZEŻENIE
180
ść opakowania
• Hulajnoga
• Akcesoria:
- 4 śruby
- Zapasowa dętka
- Adapter do pompowania opon
• Ładowarka
łożeniu hulajnogi kierownicę należćą odpowiednich śrub.

181
4. Opis produktu
panel sterowania
drążek kierownicy
ład-
ania
światła hamowania
nóżładowania
silnik
podest
hamulec
światł
ś
ładania

182
5. Informacje o elementach sterujących / Panel sterowania
1
75
3
4
9
6
8
10
2
A
1. Prędkośświetla aktualną prędkość
łł
3. Światła: lampka kontrolna reflektora
4. Bluetooth: lampka kontrolna łąści Bluetooth.
śęędkość
śęędkość
śęędkość
łej prędkośę po
łej prędkoś
9. Temperatura: jeśli jest włą
silnika.
10. Awaria: jeśli jest włąź możąłędów.

183
ąś
włąć / wyłąć hulajnogę.
• Jak włąć / wyłąć światła: naciśłąć. Gdy światła są
włąśłąć.
• Tryb / prędkość: naciść tryb:
- E: do 6 km/h
- D: do 20 km/h
- SPORT: do 25 km/h
Ukłśłąę, gdy prędkość
km/h.
żenie o niskim napięęcie spadnie
poniżśężenie dźwiękowe.
OSTRZEŻENIE
A

184
żkęą, podnieś drążek
kierownicy, ustaw dźwignię
ętej.
łóż ręśruby, nie dokręcając
ich, a następnie uż
ęcić i
ć kierownicę.
Ustaw kierownicę na drąż
ę
ńłąą
upewnić się, żła. Aby
ćą, skontaktuj
sięą.
6. Montaż i konfiguracja
00

185
Chwiejny drążek kierownicy
Jeśli drążek kierownicy chwieje się, można dokręcić śruby systemu skłą
Składanie:
łąęąący: naciś
pociągnij dźwignięąń drążek kierownicy do wewną
upewnij się, ż
ładanie:
Odblokowanie drążka kierownicy od błotnika: naciść kierownicę,
podnieś drążąc dźwignię do wewnąłą
hulajnogęą.
7. Składanie i przenoszenie
Składanie ładanie

186
ąślepkę
łącego się po
lewej stronie podestu.
2. Podłąę ł
3. Gdy akumulator bęłni
naładowany, wyciąę ładowarki.
ńł
świeci się
ś hulajnogęąc ją jedną lub obiema ręążek kierownicy.
8. Ładowanie i aktywacja akumulatora
UWAGA
1 2 3

187
łasnego
ńładaj kask i nakolanniki, aby chronić się
łąęą i sprawdźładowania akumulatora.
Regulacja hamulca
Jeśężony, użć go w
ć napięcie linki hamulca,
a następnie skróć odsłonięty odcinek linki i dokręćś
luźny, wykonaj odwrotnąść w celu naciągnięcia linki hamulca i wydłużenia jej
odsłoniętego odcinka.
9. Regulacja hamulców
Linka hamulca

188
ężą to:
łć więą odległość w
łościach.
żytkownika: im więła użę
odległość niewymagająca doł
łę
Prędkośćłynna, ciągłżliwia pokonanie więłości.
ąęg. Niżędkość
pokonać więą odległość.
ładowanie akumulatora i prawidłą
ęąę
Jeśżłuż
łładowania.
Następnie, co 2-3 miesiące ponownie nałśli
hulajnoga nie jest użę
ąłż
żąż
ą
ą hulajnogęąąę,
że hulajnoga jest wyłąłońł
ż
ani innych żrąłoby to spowodować
ąę
żywaj pistoletów na wodę pod ciśnieniem ani nie myj jej
pod strumieniem wody bieżą
łaniem wody.
łą.
10. Zasięg
11. Przechowywanie i czyszczenie

189
12. Ostrzeżenia ogólne
żdym użyciem sprawdź hamulce, ciśłę
śli usłźwięż
ń używania produktu i skontaktuj sięł
• Zabrania sięłyby wpłynąć
na jej sprawnośćć jej konstrukcjęć sięń.
• Pamiętaj, aby wyłąć
• Nie prowadźśniegu lub we mgle.
• Chrońą lub innymi płynami.
ż
ły sięśli produkt jest uż
ich pobliż
ćęą.
Instrukcje dotyczące zachowania podczas jazdy
• Nie używaj telefonu ani nie sł
• Jedź tylko wtedy, gdy naturalne ośąść,
gwarantująń
oświetleniowych pamiętaj o włąświatełłoż
odblaskowej.
ę obiema rękami.
• Jedź, stojąście.
ę
ędkośćżć.
ćąśćęty
żęć manetkę
ęciem hamowania.
• Nie ścigaj się
• Zachowaj minimalną odległośćństwa równą

190
13. Konfiguracja aplikacji
• Ustawienie jednostki miary prędkoś
• Ustawienie trybu uruchamiania
• Ustawienie funkcji tempomatu
• Ustawienie koloru światł
śęściowej i cał
świetlenie stanu naładowania akumulatora
świetlenie prędkoś
świetlenie trybu prędkości
świetlenie temperatury koła napędowego
źćć aplikację Ducati Urban
e-Mobility
191
ę
łąęą i aktywuj opcję
3. Uruchom aplikacjęęłąąą
łoś
śli użłć i
ćąc kod weryfikacyjny.
Poniżł
192
Poniżłąą:
łówny
sparowana
Procent naładowania aku-
mulatora hulajnogi
Prędkość
łość
łość
Rejestruj trasę
łąłąę
żytkowania
Mapa
Ustawienia
193
ń
Informacje dotyczące „Tempomatu”:
łąęę na stałej prędkoś
śniętąęę
ł dźwiękowy, co bęć, że nie jest już
śłąć funkcję, ponownie naciśnij manetkęś
hamulec.
śli aktywny, umoż
naciśnięśśątkowego odepchnięcia się stopą.
Profil użytkownika
Ję
Jednostka prędkości
Tempomatu ON / OFF
Tryb ON / OFF
Blokada silnika ON / OFF
Informacje
użytkownika
194
ąę
ństwa.
Uż
jak kaski i nakolanniki.
Nie uż
żć
śnie więcej niż jedna osoba.
ż
w ciąży nie mogą używać tej hulajnogi
ł
regulowana ustawą L 27/12/2019 nr 160
14. Nauka jazdy na hulajnodze

195
ła
uż
wynosi: 20 kg.
ła
uż
wynosi: 100 kg.
Nie jeźdź
życiu lekarstw.
Nie używaj telefonu ani nie sł
Jedź ostroż
nierównoś
podłożłużśnieg,
w nieoświetlonych miejscach i w nocy, lub na
196
Nie uż
ści
łatwopalnych i/lub wybuchowych substancji,
ń.
ę
ąącym w miejscu
ć
siężna jeźć
ęż
kierownicy.
Nie wjeżdżżdżaj po schodach na
197
źąc obie ręce na kierownicy.
Nigdy nie jedźąc
tylko jedną stopę na podeście.
ęą obok
Nie jedź
kałuż

198
Uważaj na głowężdżania pod
żąą
prędkością nie kręć gwałtownie kierownicą.
ćąśniej,
ć
ężnicowanej
ęć manetkę
ęciem
hamowania.
ęąą
prędkością żład
schodów, krawężników, wybojów.

199
5m
ł
średnio po
ńże on być mocno
Zachowaj minimalną odległość
ństwa równą 5 m od innych

200
ż
Upewnij się, że hulajnoga, łładowania są suche.
Gdy akumulator hulajnogi jest w pełni naładowany, dioda LED na ł
łłń
Używaj tylko oryginalnej ładowarki. Nieoryginalne ładowarki mogą spowodować
ąć siężeń.
Akumulatora hulajnogi nie można ładowaćłładowanie akumulatora
skraca jego żywotnośćżenia.
Hulajnogę należy ładowaćłów łatwopalnych
łł
15-25°C, ale nigdy poniżej 0°C lub powyż
Nie ładuj akumulatora hulajnogi w miejscu narażśłanie promieni
słżu ognia.
Nie ładuj akumulatora hulajnogi tuż po jej użładowaniem akumulatora
ę, aż hulajnoga się schł
ł
łładowania prądem stałym żadnych metalowych
żłące łłowo
ć sięłaściwie go konserwować. Aby nie dopuścić do
ę
źródeł ciepła. Nie narażłanie ujemnych temperatur. Zbyt wysokie lub
ą spowodowaćładowanie się akumulatora.
łładowania się akumulatora.
ąć ładowaćłładowany.
łuża się żywotnośćładowania
żna kontynuowaćłć kierowcę
na utratę
Pamięści ładowania akumulatora w regularnych odstę
nawet jeśłużżywana. Zapobiegnie to
ąącym sięłuż
niskim napięciem.
Środki ostrożności dotyczące obchodzenia się z akumulatorem:
łada sięą procesy
ł biorą
środowiska. Nie jedź hulajnogą, jeś
nadmierne ciepł
ęę
ąą
wyłążytkownik końcowy.

201
Nie wolno:
Otwierać ani demontować akumulatora, narażaććć ani
ć do niego żćż
ąąć
ęta dotykał
nadmiernie ładowaćładowywaćć
ćżaćąłżać
ł
ć akumulatora w śął
narażaćłśredniąę słąć akumulatora
wewnąśłanie światła
słć lub ponownie montować
ćć
do włć hulajnogęął
używać ładowarki innej niż oryginalna.
Użążą
starannością i w pełśąąącymi
użytkowania, obsłładowo, są
określone we wł
Użytkownik jest równieżą
śś
ń
żżłej
ą
Użytkownik musi dokładnie ocenićą spowodować,
żę
ędkoś
że być użytkowana wyłą
ukońśłż poniżej 18 roku życia musi nosić odpowiedni
kask ochronny. Młży poniżej 18 roku żę
łej.
łżnych od
niewłaś
stronie
łą L 27/12/2019 nr 160
16. Odpowiedzialność

202
17. Codzienna konserwacja i pielęgnacja
Czyszczenie i przechowywanie
• Jeśąąą. Jeśli plamy
sięą, nałóż na nie pastęębów, nastęąębów usuń
ąą. Jeśli na plastikowych
ąń je, używając papieru ściernego lub innego
podobnego materiału. Uwagi: Aby uniknąć poważńść hulajnogi
ąą ani żrą
myj hulajnogi strumieniem wody pod wysokim ciś
się, że hulajnoga jest wyłąładujący odłąśęta,
ponieważ wypływ wody może spowodować porażenie prądem lub inne poważne
problemy. Nieużywaną hulajnogęą
i chłąłuż
ływanie światła słą
ę opon i wpływają negatywnie na żywotność
• Sprawdź hamulce i ich regulację.
• Sprawdź ciśś
1. Nie używaj akumulatorów innych modeli lub marek, ponieważ mogą one stanowić
żństwa.
łężaj na
ąłanie temperatur powyż
źródeł ciepłęcia się metalowych
żżeniami ciała lub
śmiercią.
ę wody do akumulatora może spowodować
wewnęćżenie pożarem lub wybuchem. Jeśś
do akumulatora nie dostała siężć go do
żądu.
4. Aby uniknąćżaru, do ładowania akumulatora używaj
wyłą
5. Niewłaśżę do poważnego
śących
ć środowisko naturalne, ściś
ą
6. Po każdym użyciu hulajnogi całkowicie nałłużyć jego
żywotność
50°C lub jest niżżł
łużśłanie promieni
słż możć do
żaru. Jeśżywać
dłużż 30 dni, nałści i
łodnym miejscu. Pamiętaj, aby ładować akumulator co
60 dni, by uchronićęą gwarancją. Aby
łużyć żywotnośćłłkowicie się

203
Uwaga: po pełnym naładowaniu akumulatora hulajnoga bę
180 dni.
łużonym okresem braku ładowania są nieodwracalne i
nie są objęą gwarancjążna ponownie
ładowaćężu akumulatora niewykwalifikowanym osobom,
ponieważ możć do porażenia prążnego
żń

204
18. Dane techniczne
Obudowa
Silnik
Instalacja elektryczna
Wymiary
Prędkość
Hamulec
Silnik
Akumulator
ętego
Opony
Światła
ęciowe
Limit prądu
Bluetooth
Typ silnika
Maksymalne obciążenie
Stopień ochrony
ładowania
Zasięg
łą L 27/12/2019 nr 160
Użytkownik
Maksymalne
Hamulce
ś
łożonego
Stop aluminium
12kg
ędkość
14.5kg
1050 x 440 x 480mm
ętką
światła LED
1120 x 160 x 520mm
Standardowa ładowarka UE, 42 V 1.5 A
15A
Funkcjonalnośćą
100kg
-10°C / 40°C
IP54
Okoł
od 14 roku żż
Sprawdź obowiąą
żżności od wagi kierowcy, warunków dro-
żżności od wagi kierowcy, warunków drogowych
Zintegrowany kolorowy wyś
1050 x 440 x 1150mm

205
19. Rozwiązywanie problemów
Testy do wykonania
• Po ewentualnym upadku sprawdźła prawidł
łają prawidłć,
ęąc jąężeby
upewnić się, że reaguje prawidłowo.
• Sprawdźą na swoich miejscach i są
• Sprawdźżycia opon i ciśnienie.
• Sprawdźążyte hamulce i linki.
Błąd
ła
Tylne koło nie obraca się
ę
Po nał
wyłąę
Akumulator nie ładuje się lub
hulajnoga nie włąę
się
Przyczyna
ładowany
Nieprawidłłanie hamulców
łą
ładowany akumulator
ładowarką
i sterowania
Rozwiązanie
Naładuj akumulator
Regulacja hamulców
Zwolnij manetkę-
ż silnik się ochł
Poprośą swojego
ę
Poprośą swojego
ę
Poprośą swojego
ę
ń ładowarkę
Poprośą swojego
ę
Poprośą swojego
ę

206
20. Tabela kodów błędów
E.1
E.2
E.3
E.4
E.5
E.6
E.7
E.8
Wskazania
Usterka silnika
Błąd sygnału jednostki sterującej
Usterka układu półącej
Błąądu
Usterka ukłądu
Błąd napięcia akumulatora
Nieprawidłłanie dźwigni hamulca
Naciśnięż do maksymalnego
wychylenia spowoduje, że hulajnoga włąę tempomatu
na kilka sekund i bęć tę samą prędkość nawet po
źwigni.
Sprawdźł
pojeź
UWAGA
UWAGA

207
UWAGA
Postępowanie z urządzeniem elektrycznym lub elektronicznym po zakończeniu
że produkt
nie powinien byćł
ć
ącego sięę
Zapewniając prawidłowąę tego produktu, pomoż
śłyby
wyniknąćłaściwego postę
Recykling materiałów pomaga chronić
ł
możćęącej się
ążł on
gospodarstwa domowego. Należy je poddać odpowiedniemu segregowaniu, które
śż
lub, pośędąąśli takie istnieją
śżę
żćłych
łużę
mogą byćą
nowego.
ęą
ćąąące
ochrony śł
obowiąących w kraju uż
Jeśży je
wyjąć i poddać

208
UWAGA
Postę
że baterii/
akumulatora nie wolno usuwać
może być używany w połą
Jeśęcej niżę
ołę
oł
Zapewniając prawidłowąęć potencjalnym
negatywnym konsekwencjom dla ś
łyby wyniknąćłaściwego postę
Recykling materiałów pomaga chronićędów
ści lub ochrony danych wymagają stałego połą
wewnęą baterią/akumulatorem, mogą być
łu serwisowego.
ącego
sięąęęą prawidłowo
usunięte również wewnę
ł
ążćę
ącej sięąż
Na podstawie wł
ącym postęę
selektywnej.

209
OSTRZEŻENIA
ęłęścią instrukcji
obsługi.
Rok produkcji: 2020
Uwaga:
• Aby naładować tę hulajnogęą, należy stosowa棥ą
ładowarkęąępującym napięciu wyjściowym: 42 V - 1,5 A.
łą
może stanowićżenie dla użytkownika.
• Nigdy nie ł
łćładowanie
ąże być ładowane wyłą
ładowania w temperaturach niżż
że akumulator bęże spowodować
obrażenia ciała użytkownika.
• Produkt może być używany wyłą
żżż
że akumulator bęże spowodować
ążenia ciała użytkownika
ążć
ą
ł
• Nie ładuj go w miejscu nasłż
• Nie ładuj hulajnogi tuż po jej użłżąę
schł
• Jeśli wyjeżdżłużłą
ęęściowo naładowaną
nałąęściowo naładowane.
ąęęściowo nałą
tym stanie aż
210
Deklaracja zgodności
Niżej podpisana spółka: MT Distribution S.r.l.
łochy
ż
ępują
Dyrektywa 2014/30/UE w sprawie kompatybilnoś
Dyrektywa niskonapięciowa
Powią
EN ISO 12100:2010, EN
wersja 2.2.2, EN301489-1 wersja 2.2.3, EN301489-17 wersja 3.2.2, EN61000-6-1:20017,
Numer seryjny : YYYY2020XXXXXXX do YYYY2020XXXXXXX
Imię
Stanowisko: Dyrektor
Firma: M.T. Distribution S.r.l.
łochy Dnia: 01/12/2020
Poświadcza
Marka produktu:
Nr modelu produktu:
Ducati
PRO-I EVO
Emanuele Summa
Dyrektor
Imported and distributed by M.T. Distribution Srl
Calderara di Reno, Bologna
www.mtdistribution.it
Errors and omissions excepted
Scarica l’app Ducati Urban e-Mobility per usare al meglio questo prodotto
Download the app Ducati Urban e-Mobility for a better use of the product