Loading ...
Loading ...

3
REV 4 - 1709221030
L-C2-214
INSTALLATION & SETUP
PLANNING THE LOCATION OF YOUR POST GRILL
IN-GROUND PROCEDURE
Read instructions carefully
all the way through before
beginning the installation.
1. Dig a hole for the post and
extension approximately
18" deep and 10-12" in
diameter.
Note: The actual depth of
the hole should be
such that the cooking
surface is 34-45"
above ground level.
2. Pour the concrete into the
hole approximately 3-5"
below ground level.
3. While the concrete is still wet, carefully lower the grill
post and attached extension into the hole.
4. Orient the grill per plan, then level the grill and
support it so that it remains in position while the
concrete dries.
This grill is designed FOR OUTDOOR USE ONLY.
DO NOT use this unit under unprotected fl ammable surfaces. DO NOT use this appliance inside a
building, garage, or any other enclosed area. It must not be used in or on recreational vehicles or boats.
Important: This unit is NOT insulated, and therefore during use it must be located with a minimum of 18" of
side and back clearance from unprotected combustible materials such as wood, plastic, or stucco
with wood framing.
THIS UNIT SHOULD NOT BE LOCAED IN A FULLY ENCLOSED AREA OF ANY KIND.
CAUTION: Metal edges are sharp; use adequate
hand protection such as gloves when
assembling and confi guring the grill.
Carefully unpack your grill and check the parts.
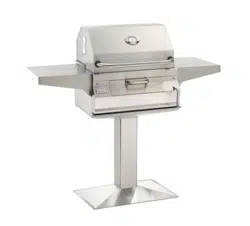
SECURING THE PATIO MOUNT GRILL
Important: BEFORE USE, the patio mount base must
be securely fastened to a stable, level
surface to ensure the grill remains fi xed
and upright at all times.
Locate the patio mount base in the planned grill
location and mark the 4 holes. Drill the marked holes
to a
1
/
2
" diameter x 1
1
/
2
" depth. Insert the lag shields
(see PARTS LIST) into the holes, being sure that they
are fl ush with the ground.
Align the holes on the patio mount base over the lag
shields in the ground. Secure the base with the lag
screws (see PARTS LIST) using a
7
/
16
" nut driver.
ATTACHING THE IN-GROUND POST
EXTENSION
1.
Attach the extension to the bottom of the grill post so
that the open portion is toward the back of the grill and
the fi ve (5) holes in the extension line up with the fi ve
(5) weld-nuts in the post.
2. From outside the joined post
and extension, insert one of the
1
/
4
x 20-
5
/
8
" bolts (supplied)
into each of the fi ve (5) bolt
holes and tighten each using a
7
/
16
" socket driver or wrench
(see Fig. 3-1).
Note: There is one (1) hole on
each side of the post,
except the back, which
has two (2) holes located on either side of the
extension opening.
Fig. 3-1
Bolts
Weld-nut
To grill
Ground level
Concrete level
Post
(back view)
Fig. 3-2
Loading ...
Loading ...
Loading ...