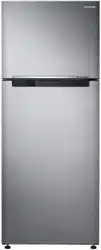
Samsung SR341MLS Top Mount Fridge
Product's Documents
Below are documents related to this product, you can read online or download:
- Owner's manual - (English) Read Online | Download pdf
User Manual for Samsung SR341MLS
Table of contents
GETTING READY TO INSTALL THE REFRIGERATOR
Congratulations on the purchase of your Samsung Refrigerator. We hope you will enjoy the many state-of-the-art features and efficiencies that this new appliance has to offer.
 • This refrigerator must be properly installed and located in accordance with the manual before it is used.
• Use this appliance only for its intended purpose as described in this instruction manual.
• We strongly recommend that any servicing be performed by a qualifi ed individual.
• Please dispose of the packaging material for this product in an environmentally friendly manner.
• Pull the power plug out of the socket before changing the interior light of the refrigerator.
- Otherwise, there is a risk of electric shock.
Selecting the best location for the refrigerator
• Select a location without direct exposure to sunlight.
• Select a location with level (or nearly level) fl ooring.
• Select a location with enough space for the refrigerator doors to open easily
• Allow suffi cient space to install the refrigerator on a fl at surface.
- If your refrigerator is not level, the internal cooling system may not work correctly.
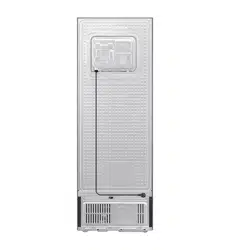
- Overall space required in use. Refer to drawing and dimension as below.


The figure above shows a RT38*.


 Remove paper on spacer and then attach two spacers (Gray block) on the back side of refrigerator for better performance. Make sure two spacers fi x like below image when you install the refrigerator. It is improving the refrigerator performance.
Allow sufficient space to the right, left, back and top for air circulation. This will help reduce power consumption and keep your energy bills lower. Do not install the refrigerator where the temperature will go below 10 °C. Please ensure that appliance can be moved freely in the event of maintenance & service.
 When installing, servicing, or cleaning behind the refrigerator, be sure to pull the unit straight out and push back in straight after finishing. Also, make sure your fl oor supports the full-load refrigerator. Otherwise, it may cause fl oor damage.
Please tie up the extra length of the power cord at the back of the refrigerator so as not to be touched on the fl oor preventing the power cord from being crushed by the rollers upon relocation.
FLOORING
For proper installation, this refrigerator must be placed on a level surface of hard material that has the same height as the rest of the fl ooring. This surface should be strong enough to support a fully loaded refrigerator (or approximately 100 kg). To protect the fl oor fi nish, cut a large section of the cardboard carton and place it under the refrigerator where you are working.
Pulling or pushing the refrigerator may damage the fl oor. Moving the refrigerator after installation may damage the floor.

Be careful : do not damage the cover leg while moving the refrigerator. The cover leg protects the wire and hose . If it is damaged, the refrigerator may also be damaged.

LEVELLING THE REFRIGERATOR
If the front of the appliance is slightly higher than the rear, the door can be opened and closed more easily

Case 1) The appliance tilts down to the left.
• Turn the left adjusting leg in the direction of the arrow until the appliance is level.
Case 2) The appliance tilts down to the right.
• Turn the right adjusting leg in the direction of the arrow until the appliance is level.
Standtable

Optional Standtable set base of refrigerator, when you use it you can not turn the adjusting leg. (There is no Standtable according to the model).
SETTING UP THE REFRIGERATOR
Now that you have your new refrigerator installed and in place, you are ready to set up and enjoy the full features and functions of the appliance. By completing the following steps, your refrigerator should be fully operational. If not, fi rst check the power supply and electricity source or try the troubleshooting section at the back of this user guide. If you have any further questions, contact your Samsung Electronics service center.
1. Place the refrigerator in an appropriate location with reasonable clearance between the wall and the refrigerator. Refer to installation instructions in this manual.
2. Once the refrigerator is plugged in, make sure the interior light comes on when you open the doors.
3. Set the temperature control to the coldest temperature and wait for an hour. The freezer should get slightly chilled and the motor should run smoothly.
4. After powering the refrigerator, it will take a few hours to reach the appropriate temperature. Once the refrigerator temperature is suffi ciently cool, you can store food and drink in the refrigerator.
USING THE CONTROL PANEL (DISPLAY TYPE)


Each time you press the button, a short beep will sound.
1 Power Cool
1. Power Cool When you press the button, the Indicator ( ) will light up and the refrigerator will speed up the time.
2. This function will be activated for several hours and then return to the previous temperature.
3. This function switches off automatically. When the Power Cool process is completed, the Power Cool indicator switches off and the freezer switches back to the previous temperature setting. To deactivate this function, press the Power Cool button.
When you use the Power Cool function, the coolong of the refrigerator will be speeded up for several hours.
When you use this function the energy consumption of the refrigerator will increase. Remember to turn it off when you do not need it and return the freezer to your original temperature setting. If you need to freeze large amount of food stuff, set the temperature of the freezer compartment to Freezer max Cold and the temperature of refrigerator to 1~2 °C (Display model) or Normal~5 (nonDisplay model) at least 24 hours before.
2 Fridge
Press the Fridge button to set the fridge to desired temperature from the range 1 °C to between 1 °C and 7 °C. Default set temperature is set on 2 °C and each time you press the Fridge button, temperature will changing following order and temperature indicator will display the desired temperature.
If you need to freeze large amount of food stuff, set the temperature of the freezer compartment on Freezer max Cold and the temperature of the refrigerator on 1~2 °C (Display model) or Normal~5 (nonDisplay model) at least 24 hours before.

3 Ice Off
If you do not want to make more ice, press the Ice On/Off button, and the indicator will light up. Default set Ice On/Off function is ON. We recommend you stop ice making if the following occur:
- There is enough ice in the ice bucket.
- You want to save water and energy.
- The water tank is empty
CONTROLLING THE TEMPERATURE

We recommend to set the temperature controller of the freezer and the refrigerator on Normal in order to have a stable performance of the appliance. When food in the refrigerator is frozen or if you want to increase the temperature of freezer, set the Freezer Temperature Controller on 1~3.
• When the ambient temperature is under 10 °C, set the Freezer Temperature Controller on 8~9 to make ice.
• When the ambient temperature is higher than 35 °C, set the the Freezer Temperature Controller on Normal to make ice.
Adjusting the Freezer Temperature


If you want to lower the temperature of the freezer, set the temperature controller of the freezer on 6~9. If you want to increase the temperature of the freezer, set the temperature controller on 1~4.
• When the ambient temperature is under 10 °C, set the Freezer Temperature Controller on 8~9. Otherwise the performance of the refrigerator may be caused problems.
• When the ambient temperature is higher than 35 °C, do not set the Freezer Temperature Controller on 8~9. Otherwise the performance of the refrigerator may be caused problems.
Adjusting the Fridge Temperature


When the food in the refrigerator is not as fresh as desired or if you want to lower the temperature of the refrigerator, set the Temperature Controller of the fridge on 5~6 or the Temperature of Display model on 1. When food in the refrigerator is frozen or if you want to increase the temperature of the freezer, set the Temperature Controller of the fridge on 1~3 or the Temperature of Display model to 3~7.
• When the ambient temperature is under 10 °C, do not set the Fridge Temperature Controller on 1~2 or the Temperature of Display model on 5~7. Otherwise the performance of the refrigerator may be caused problems.
• When the ambient temperature is higher than 35 °C, set the Fridge Temperature Controller on 4~6 or the Temperature of Display model on 1~2. Otherwise the performance of the refrigerator may be caused problems.
MAKING ICE (OPTIONAL)
TWIST ICE MAKER
Making Ice Cubes
Remove the ice cube tray by pulling it towards you. Fill the tray with water up to the maximum water level marked on the rear of the tray. Slide the tray back into the holder, taking care not to spill the water. Wait until the ice cubes are formed.
Removing the Ice Cubes

Make sure that the ice cube storage bin is in place under the ice cube tray. If not, slide it into place.
Twist one of the levers fi rmly in the clockwise direction until the tray twists slightly. Result : The ice cubes fall into the storage bin. Repeat Step 2 for the other half of the tray, if necessary. Remove the storage bin by:
• Lifting it slightly
• Pulling it towards you

Danger of explosion
• Glass bottles containing liquids that can freeze should never be stored in the freezer as the glass will explode when the contents freeze.
TRAY TYPE (OPTIONAL)
Making ice cubes
Fill up the ice tray with water and that till it reaches the maximum level mark on the rear of the tray. Put the ice tray in the freezer.

Removing the ice cubes
Hold both ends of the ice tray, remove the ice cubes from the tray by twisting it gently

USING WATER DISPENSER (OPTIONAL)
With the water dispenser, you can obtain chilled water easily without opening the refrigerator door.
If you push continually the dispenser lever for about 1 minute, the dispenser will stop to work. To get more water, push the lever CAUTION again. The dispenser is designed with an operating time of about 1 minute and a capacity of about 1 L at each use.
Lift up and pull out the water tank.
• Hold the handgrips on both sides to lift out the water tank.
• Clean the inside of water tank before using it for the fi rst time.
• After disassembling the water talk, wipe up the inside of refrigerator until it is clean and dry.

After putting back the water tank, do not disassemble the shelf below the water talk. It may cause a personal injury or material damage.
For more space, empty the water off the water tank, remove the lid completely, place the water tank back and use it to store food.
Fill the water tank with water, ensuring that it is in a stable position, allowing for the extended water supply outlet.
• Fill with water up to 5 L. If it is fi lled higher than this, it may overfl ow when the lid is closed.
• It is impossible to fi ll the tank with water while it is positioned in the refrigerator.
Method 1.
Fill the water lifting the round lid in the arrow direction to open.

Method 2.
Please fill the water after holding and lifting the large lid to open it.

Close the refrigerator door after fitting the water tank.
• Confirm that the dispenser cock is outside after closing the door.

Fix water tank on the shelf inside the fridge. If not, water tank may not be operate correctly. Do not use the refrigerator without the water tank. If not, it may cause an effi ciency problem. While fi xing the water tank, be careful that your fi ngers will not be caught.
Only fill the tank with water (mineral water or purifi ed water) and do not use any other liquid.
Be careful that the tank will not drop while you are moving the refrigerator because you may get hurt if the water tank is filled with water.
Do not disassemble the internal pump which is connected to the water tank. Be careful to not damage the hose and nozzle of the water tank. The dispenser can not be operated if it is disassembled or damaged.
Place a glass underneath the water outlet and push gently against the dispenser lever with your glass. Make sure the glass is in line with the dispenser to prevent the water from bouncing out.
When you do not use the water dispenser for 2~3 days (especially during the summer), the dispensed water may have a funny smell or taste. If this occurs, we recommend that you discard the first 1~2 glasses for better tasting water. If you have just installed the Refrigerator, pour out the fi rst six glassfuls of water to fl ush out impurities in the water supply system.
Make sure water flows cleanly before drinking. Make sure that no water is in the water tank when you are going on a long vacation or business trip.
Please wait 1 second before removing the cup after dispensing water to prevent spills. Please push the dispenser lever 1~10 seconds when you use it fi rst time due to air with in the hose.
Using the Water dispenser
When you turn on the refrigerator, let the ice maker make ice for 1 to 2 days. Over that period of time, throw out the first 1 or 2 buckets of ice the freezer makes to ensure all impurities have been removed from the water system.


* The figure above shows the Auto Ice Maker option model.
When upper Ice Tray full, switch the upper and lower ice tray.
Test button
• In case ice does not come out, pull out the ice bucket and press test button located on right side of ice maker.

Some parts in the picture may differ from your refrigerator, depending of the model and option (for example ice tray, auto ice maker, twice ice maker, cool pack, shelf or water dispenser).
• If you plan to go away for a signifi cant time, empty the refrigerator and turn it off. Wipe the excess moisture from the inside of the appliance and leave the doors open. This helps keep odour and mold from developing.
• If the refrigerator is not to be used for a long period of time, pull out the power plug.
• To get more space in the freezer compartment, you can remove applicable fi tting(s) such as cool pack(s), shelf(s), twist Ice maker(s), ice storage bin(s) and their supporter(s) which can be removed without aid of a tool. It does not affect thermal and mechanical characteristics. A declared storage volume of freezer compartment is calculated with above things removed.
• If you want to remove both ice maker kits, you have to remove right one fi rst. (only for ice maker option model)
• If you do not want to use water dispenser, you can remove water tank. (only for dispenser model)
• To get the best energy effi ciency of this product, please leave all selves, drawers and baskets on their original position like as 15 page illustration.
• The lower guard of the freezer compartment is only two star section. So, the lower guard shall be placed on the original position for proper performance.
• The Alarm function of the display model works when door of the fridge is open. Please also check if the freezer door is closed, because alarm does not ring when the freezer door is opened. In the case of a non-display model, the alarm does not ring even if the doors of the fridge and the freezer are open. Check if the doors are closed.
REMOVING THE REFRIGERATOR ACCESSORIES
While assembling, put the freezer shelf, refrigerator shelves and cool pack in the correct position and do not put them upside down. It may cause a personal injury or material damage.

1. Pull out the ice tray and box and then pull out the right side of support tray ice. Same steps to left side. (Only for ice max option model)

Be careful when you pull out the ice tray support because it will protrude up to you suddenly. Be careful when you disassemble and assemble the ice tray support because the upper side of it has a sharp edge. It may occur finger injury.

To assemble, place the ice tray support above the slots with the right side higher. Hold it underneath in the middle and push the ice tray support until it snaps into place.

2. Lift up the freezer shelf or cool pack and pull it forward and then pull out the ice tray and box. Pull out the support tray ice. (Only for freezer shelf or cool pack option model)

3. Remove ice tray and then lift up the freezer shelf, and pull it forward. (Only for ice tray option model)

4. Pull the the refrigerator shelves towards you.
• To remove the refrigerator shelves when it is possible to open the doors widely, pull the shelves forward, lift them up and then pull out.
• To remove the refrigerator shelves when it is impossible to open the doors widely, pull the shelves forward, lift them up and tilt in order to pull them out.
• When you put the shelves back, make sure the side with the label “Front” on it face the front of the refrigerator.
5. Lift up the cool pack and pull it forward. (Only for auto ice maker option model)

6. Pull it out while pressing the end of the sill on the low temperature catalyzing deodorizer.

7. Lift up and pull out the door guards

Before removing any accessories, make sure that no food is in the way. When possible, remove the food altogether to reduce the risk of accidents.
Do not use Benzene, Thinner or Clorox™ for cleaning. They may damage the surface of the appliance and can create a risk of fire. Do not spray the refrigerator with water while it is plugged in, as it may cause an electric shock. Do not clean the refrigerator with benzene, thinner or car detergent for risk of fire.
1. Unplug the power cord of the refrigerator.
2. Slightly dampen a soft lint-free cloth or paper towel with water.
Do not use any kind of detergent to clean the refrigerator because that can discolor or damage the refrigerator.
3. Wipe the inside and outside of refrigerator until it is clean and dry.
4. Plug the power code of the refrigerator.
REPLACING THE INTERIOR LIGHT
For LED lamp, please contact service engineer to replace it.
The appliance is not operating at all or the temperature is too high.
• Check that the power plug is correctly connected.
• Is the temperature control on the front panel correctly set?
• Does sun shine on the appliance or are there heat sources nearby?
• Is the back of the appliance too near to the wall?
The food in the refrigerator is frozen.
• Is the temperature control on the front panel set to the coldest temperature?
• Is the surrounding temperature too low?
• Did you store the food with a high water content in the coldest part of the fridge?
There are unusual noises.
• Check that the appliance is installed on a stable, level floor.
• Is the back of the appliance too near to the wall?
• Have any foreign objects fallen behind or under the appliance?
• Is the noise coming from the compressor in the appliance?
• A ticking sound may be heard inside the appliance; this is normal. This sound occurs when the various accessories contract or expand.
The front corners and sides of the appliance are warm and condensation starts to form.
• Heat-proof pipes are installed in the front corners of the appliance to prevent condensation from forming. When the surrounding temperature rises, this may not always be effective. However, this is not abnormal.
• In very humid weather, condensation may form on the outer surface of the appliance when the moisture in the air comes into contact with the cool surface of the appliance.
Ice Maker is not producing ice.
• Did you wait for 12 hours after installation of the refrigerator before making ice?
• Did you manually stop the ice making function?
• Is the freezer temperature too warm? Try setting the freezer temperature lower.
• Did you fill the water tank with water?
• Did you check fi tting the water tank correctly ?
Water dispenser is not functioning.
• Is the water tank frozen because the fridge temperature is too low? Try selecting a warmer setting on the Digital display.
• Did you fill with water in water tank?
• Did you check fi tting the water tank correctly ?
You can hear a liquid bubbling in the appliance.
• This is the refrigerant, which cools the inside of the appliance.
There is a bad smell inside the appliance.
• Has a food item spoiled?
• Make sure that strong smelling food (for example, fi sh) is wrapped so that it is airtight.
• Clean out your freezer periodically and throw away any spoiled or suspect food.
There is a layer of frost on the appliance walls.
• Are the air outlet vents blocked by food stored inside the refrigerator.
• Space the food out as much as possible to improve ventilation.
• Is the door fully closed?
Condensation forms on the inside wall of the appliance and around vegetables.
• Food with a high water content is stored uncovered with a high humidity level or the door has been left open for a long time.
• Store the food with a cover or in sealed containers.