Loading ...
Loading ...
Loading ...
10
Cleaning Method:
■ Nonabrasive plastic scrubbing pad and mildly abrasive
cleanser:
Clean as soon as cooktop, grates and caps are cool.
■ Dishwasher (grates only, not caps):
Use the most aggressive cycle. Cooked-on soils should be
soaked or scrubbed before going into a dishwasher.
■ Gas Grate and Drip Pan Cleaner Part Number 31617:
See the “Assistance or Service” section to order.
SURFACE BURNERS
See the “Surface Burners” section.
OVEN DOOR EXTERIOR
Cleaning Method:
■ Glass cleaner and a soft cloth or sponge:
Apply glass cleaner to soft cloth or sponge, not directly on
panel. Do not soak soft cloth or sponge. Gently clean door
because scrubbing may remove nameplate.
■ Affresh
®
Kitchen and Appliance Cleaner Part Number
W10355010 (not included):
See the “Assistance or Service” section to order.
OVEN CAVITY
Food spills should be cleaned when oven cools. At high
temperatures, foods react with porcelain and staining, etching,
pitting or faint white spots can result.
On some models, the oven door can be removed. See the “Oven
Door” section rst.
Cleaning Method:
■ Steel-wool pad
■ Oven cleaner: Follow product label instructions.
OVEN RACKS AND ROASTING RACKS
Cleaning Method:
■ Steel-wool pad
Oven Light
The oven light is a standard 40 W appliance bulb. When the oven
door is closed, press OVEN LIGHT to turn on the light. Before
replacing, make sure the oven and cooktop are cool and the
control knobs are off.
To Replace:
1. Unplug range or disconnect power.
2. Turn bulb counterclockwise to remove from socket.
3. Replace bulb.
4. Plug in range or reconnect power.
Oven Door
For normal range use, it is not suggested to remove the oven
door. However, if removal is necessary, make sure the oven is off
and cool. Then, follow these instructions. The oven door is heavy.
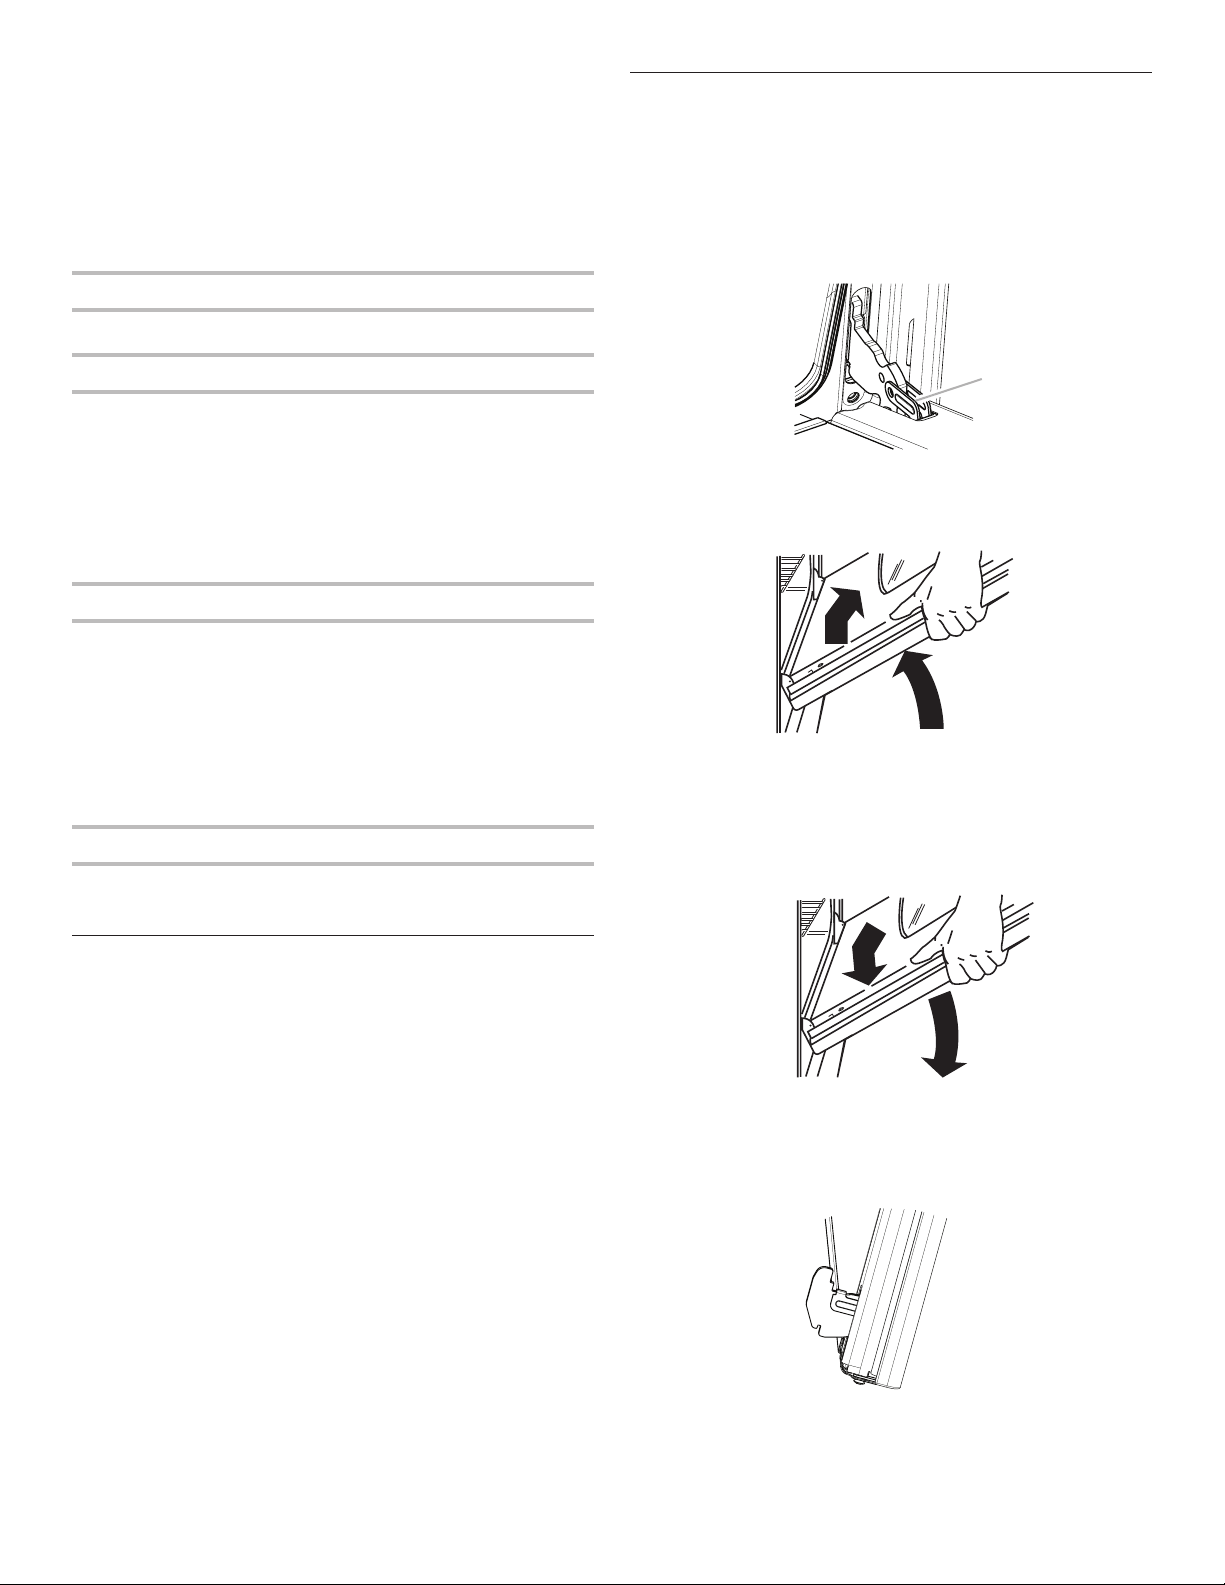
To Remove:
1. Open the oven door. Insert the hinge locks into both hinge
hangers. See following illustration. Do not unlock hinges while
the door is removed from the range.
2. Grasp the door on the sides with your ngers on the front of
the door and your thumbs on the inside surface.
3. Pull door straight up, then toward you. Do not unlock the
hinges until the door is replaced on the range.
To Replace:
1. Grasp the door on the sides with your ngers on the front of
the door and your thumbs on the inside surface.
2. Hold oven door so that the top edge of each door slot is
horizontal. Insert door hinge into the hinge slots.
3. Tilt top of door toward range. Insert bottom door hinge notch
down onto front frame edge.
A
A. Hinge lock
Loading ...
Loading ...
Loading ...