Loading ...
Loading ...
Loading ...
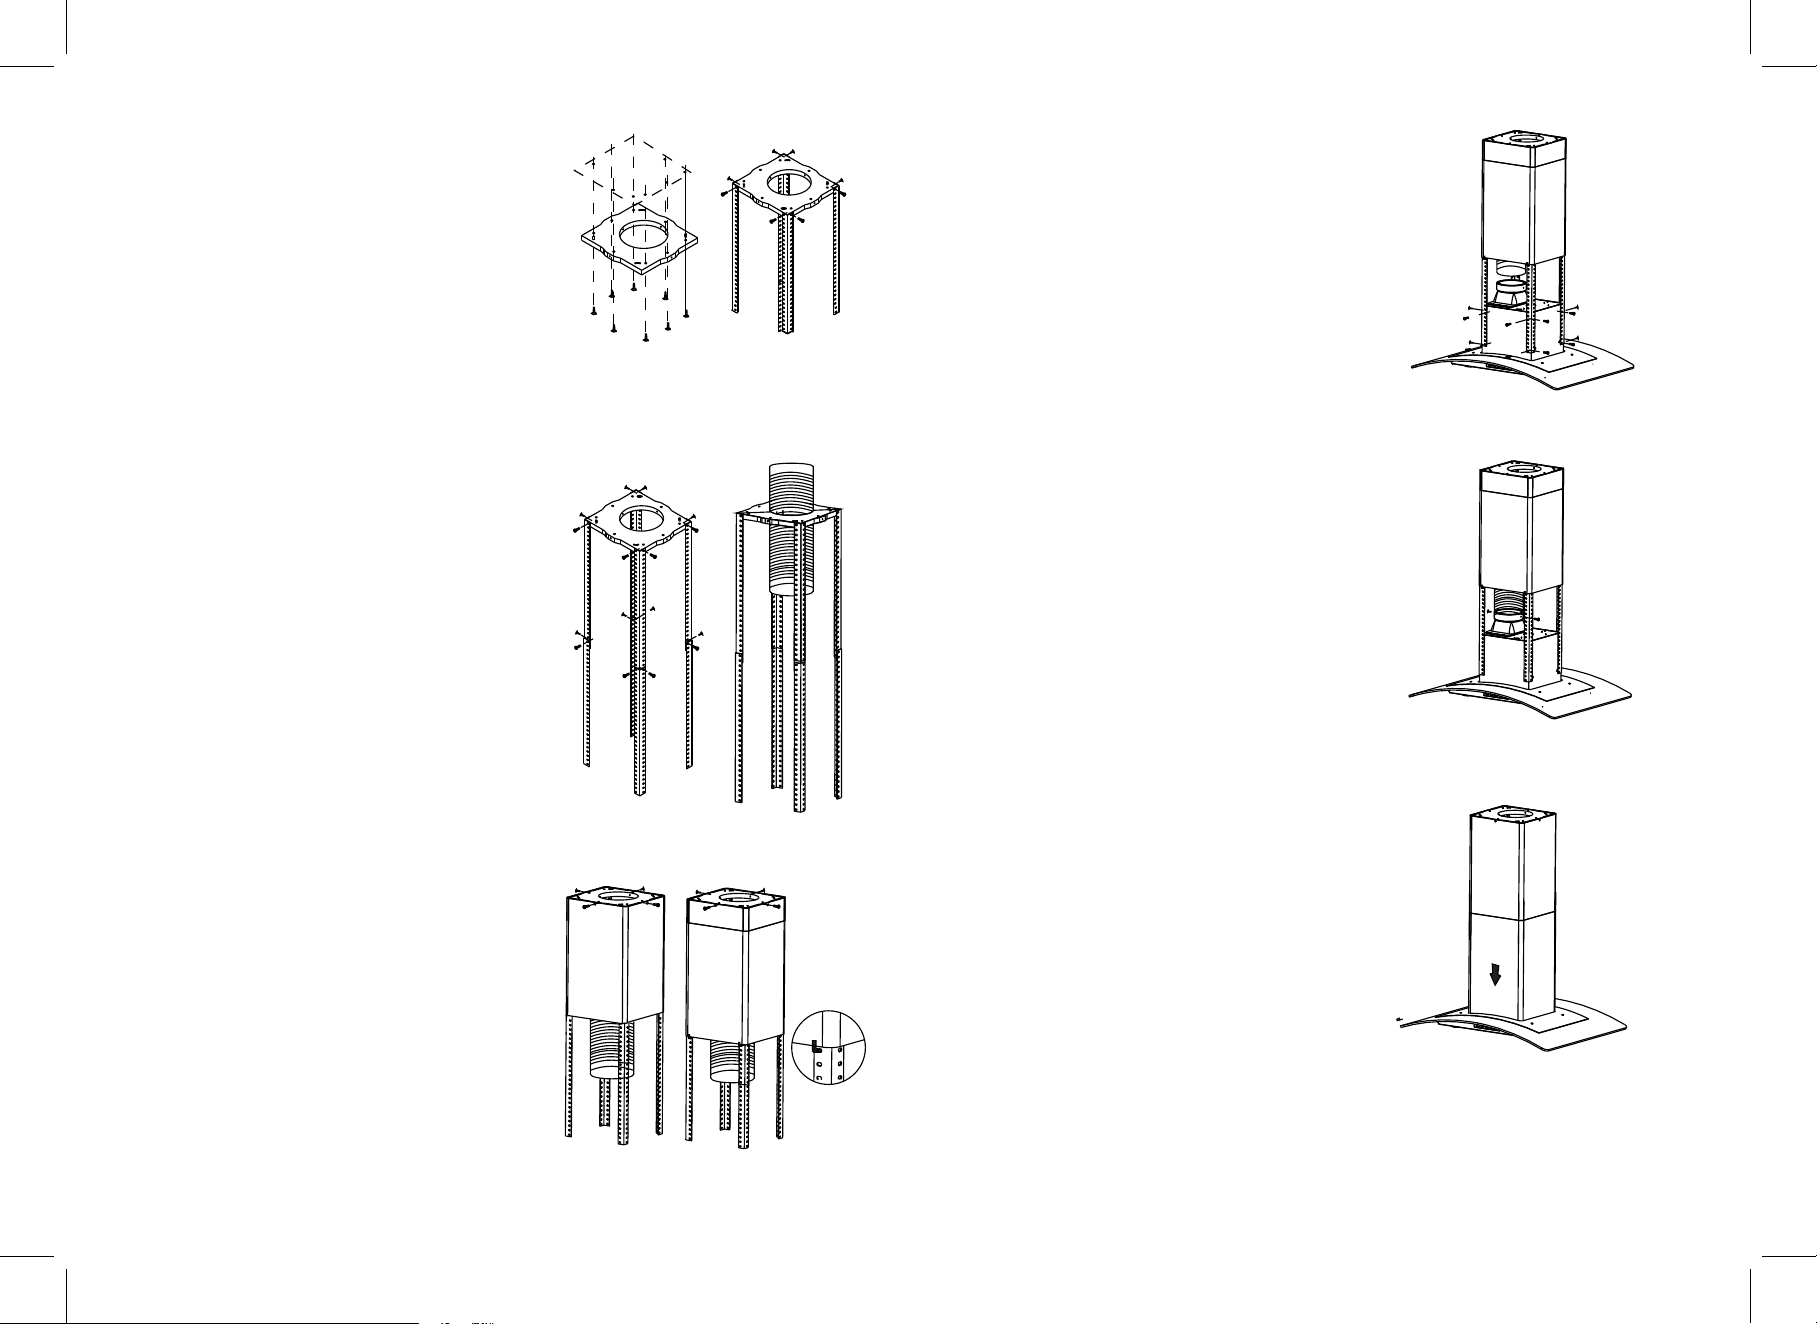
7. Attach the ceiling bracket (L) using the (8)
long screws (D) (the supplied screws may not
work with all installations, please check with
your installation professional).
8. Attach (4) support frame brackets (N) to the
ceiling mounting bracket (L). Each support
bracket will use (2) M5X8 big screws (E) and
(2) M5 washers (G).
14. Place the range hood underneath the
support frames and align the holes of the
support frame to the holes in the range hood.
WARNING: THIS WILL TAKE AT LEAST TWO PEOPLE.
Screw in (4) M5X8 big screws (E) through
the support frames into the pre-aligned
holes in the range hood on all four corners.
15. Install the round flexible duct exhaust hose
to the round vent air flap, and secure with
(2) ST2.9X10 small screws (B) and tape or a
hose clamp and tape. Note: If you are choosing
the ductless/recirculating mode do not install
the duct exhaust hose.
16. Pull the power cord up through the ceiling cut out
and plug into an outlet. You may need to access
your ceiling. An extension cord may be required.
As electrical box locations may vary, please make
the proper accommodations during the installation
process.
17. Remove the S-hook and lower the bottom duct
on the top of the range hood in the grooved slot.
Go to operating instructions.
9. Measure the distance that the bottom of the
range hood will be from the top of your range
(see previous page for reference). Attach another
(4) support brackets (N). Each support bracket will
use (4) M5X8 big screws (E) and (4) M5 washers (G).
10. Install the 6" round flexible duct exhaust hose (O).
Assemble ventilation to outside ducting using duct tape
and or trapping. Note: If you are choosing the
ductless/recirculating mode do not install the duct
exhaust hose.
11. Slip inner duct up through the support frames
and over the ceiling mount bracket. Be sure the
duct slides over the (4) mounting holes on each side.
12. The duct should cover the (4) mounting holes
on the sides of the ceiling bracket. Screw in
(4) M4X8 (C) screws through the predrilled holes
in duct work into the (4) mounting holes.
13. Slip outer duct cover (K) through the support
frames and then temporarily over the inner duct.
Use S-Hook (E) to temporarily hold the duct cover
in place while securing the range hood motor
assembly. After the range hood motor assembly
is attached, you will remove the S-hook for final
assembly of the outer duct cover.
.
.
7.
14.
15 -16.
17.
8.
9. 10.
11-12. 13.
— 5 — — 6 —
Loading ...
Loading ...