Loading ...
Loading ...
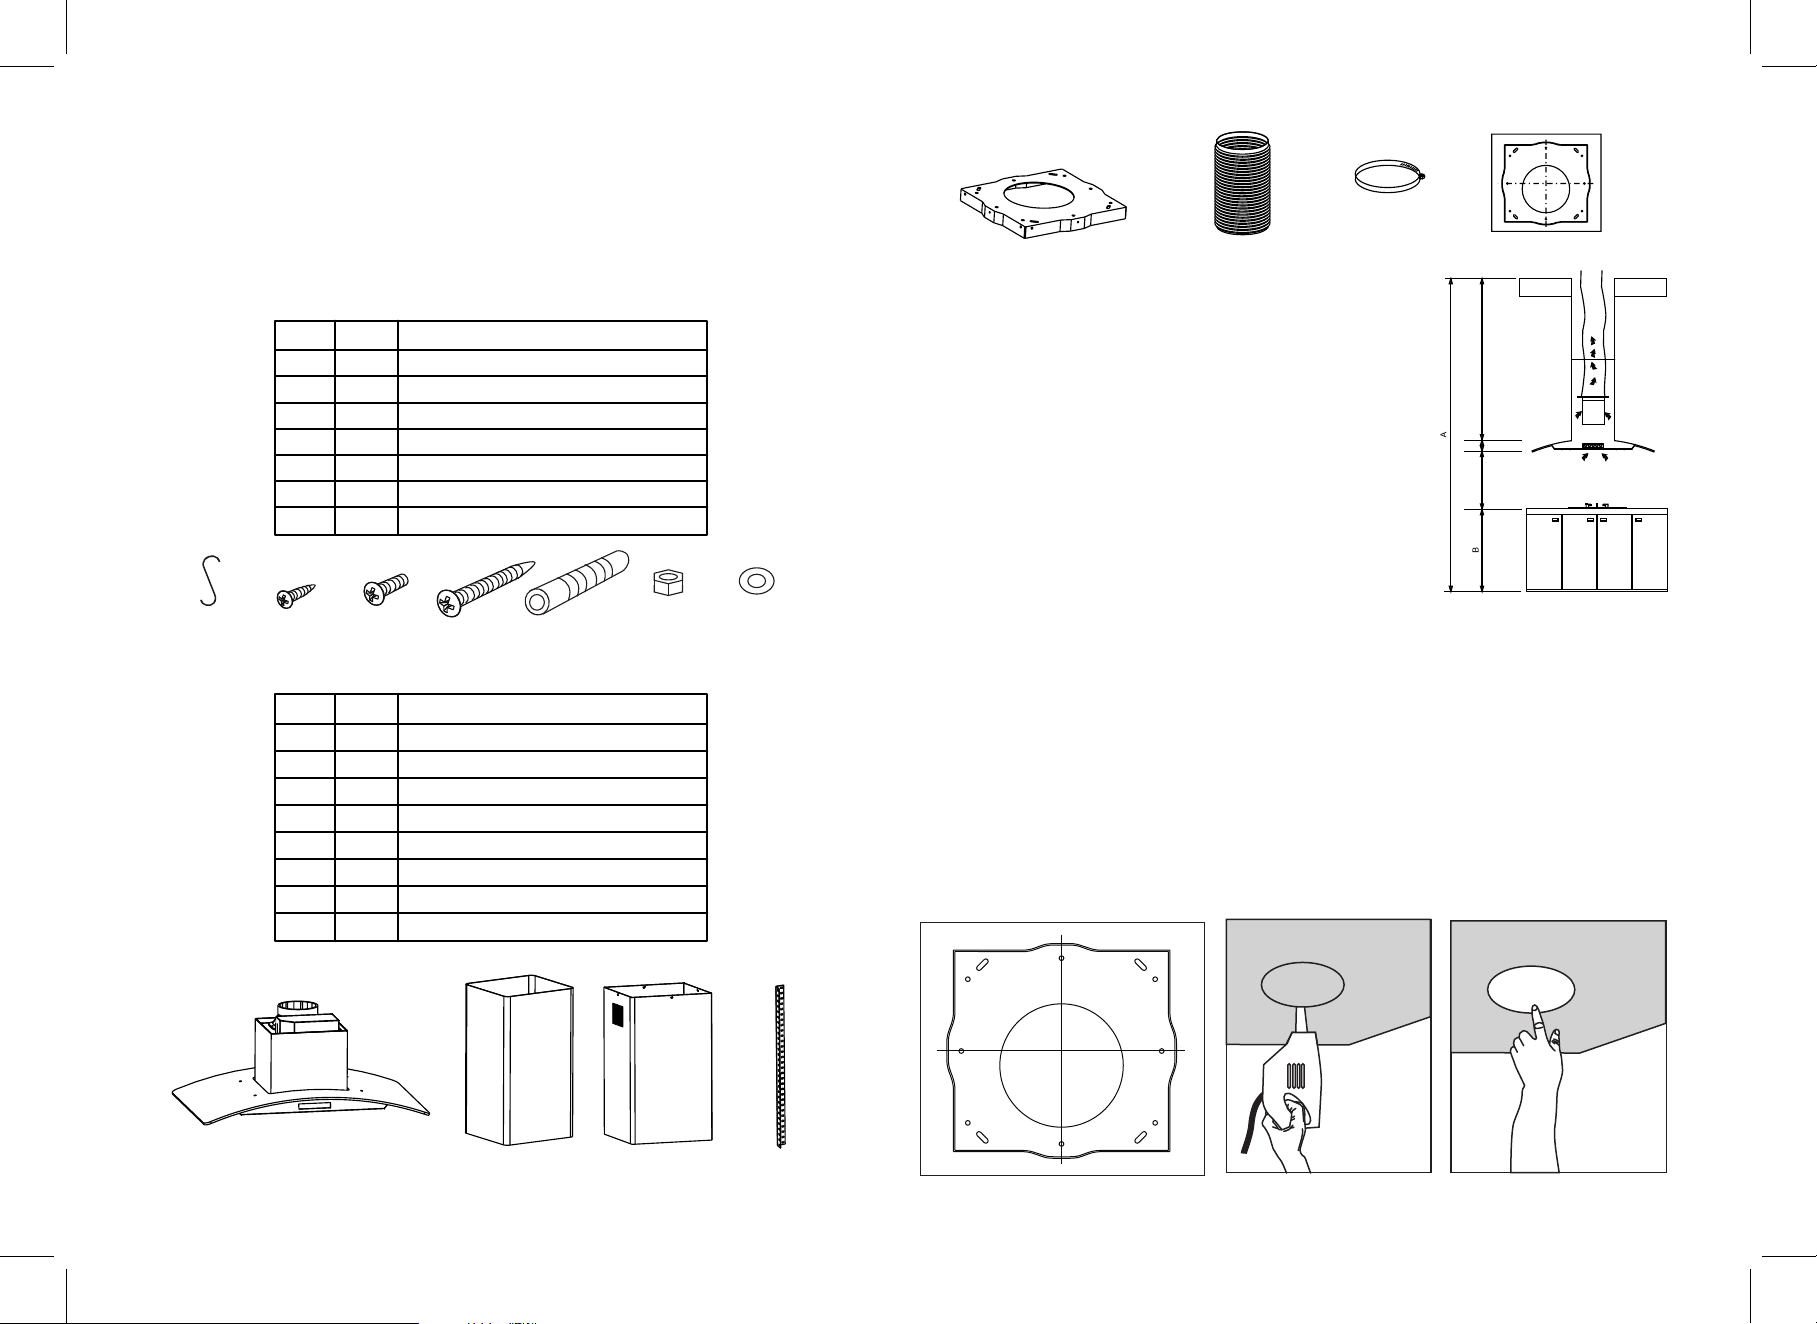
MOUNTING INSTRUCTIONS
B
A
QTY DESCRIPTION
B
x1 S-HOOK
C
x2 ST2.9X10 SMALL SCREWS
D
E
F
G
x4 M4X8 SCREWS
KEY
x8
x32
x16
x8
M4X35 LONG SCREWS
M5X8 BIG SCREWS
M5 HEX NUTS
M5 WASHERS
HARDWARE LIST
J
J
QTY DESCRIPTION
K
x1 INNER DUCT
L
x1
OUTER DUCT
M
x1
CEILING BRACKET
KEY
x1
HOSE CLAMP(S-240-ISMF-36 only)
PARTS LIST
N
N
O
x8
SUPPORT BRACKET
P
P
x1
FLEXIBLE DUCT EXHAUST HOSE
Q
K
x1
RANGE HOOD
x1 CEILING BRACKET GUIDE
A B C D E F G
Parts not supplied
Step 9.
• Duct tape
• Preinstalled ventilation system and ductwork
• Preinstalled outside duct cap or weatherproofing
Installing the range hood
This installation is for mounting the product to a ceiling.
Ensure your ceiling has the proper support to hold the
range hood weight. These instructions are general
guidelines, please consult a professional installation
specialist regarding the best type of mounting hardware
and support system based on your ceiling construction.
All island range hoods must be installed and supported
by studs and joists in your ceiling. All homes constructions
are different and installations will vary.
1. Begin installation by removing the filters and removing any tape on the air flow flappers.
2. Remove the protective film from range hood and ducting.
When handling the ducting please wear
protective gloves to avoid sharp edges.
3. If your model has an electronic touch sensor control panel, remove the protective plastic film
covering the control panel (applicable to some models).
4. Find the center of the ceiling where you are installing the range hood and trace a 6" circle.
You can use the ceiling bracket guide(L) to position the 6" circle. Ensure there are no studs
where the opening is being made.
5. Using a sabre or jig saw, cut out the drywall for a 6'' hole.
6. This island range hood must be supported by ceiling studs or joists to the ceiling.
Back
Front
Right
Left
X (Total length)
C (25.6 in-29.5 in) 3.1 in)
X=A-(B+C+3.1 in)
L O M Q
— 3 —
— 4 —
Loading ...
Loading ...
Loading ...