Loading ...
Loading ...
Loading ...
8
KEY LOCK
COOLING SYSTEM
CLEANING AND MAINTENANCE
EXTERIOR SURFACES
INTERIOR SURFACES
ACCESSORIES
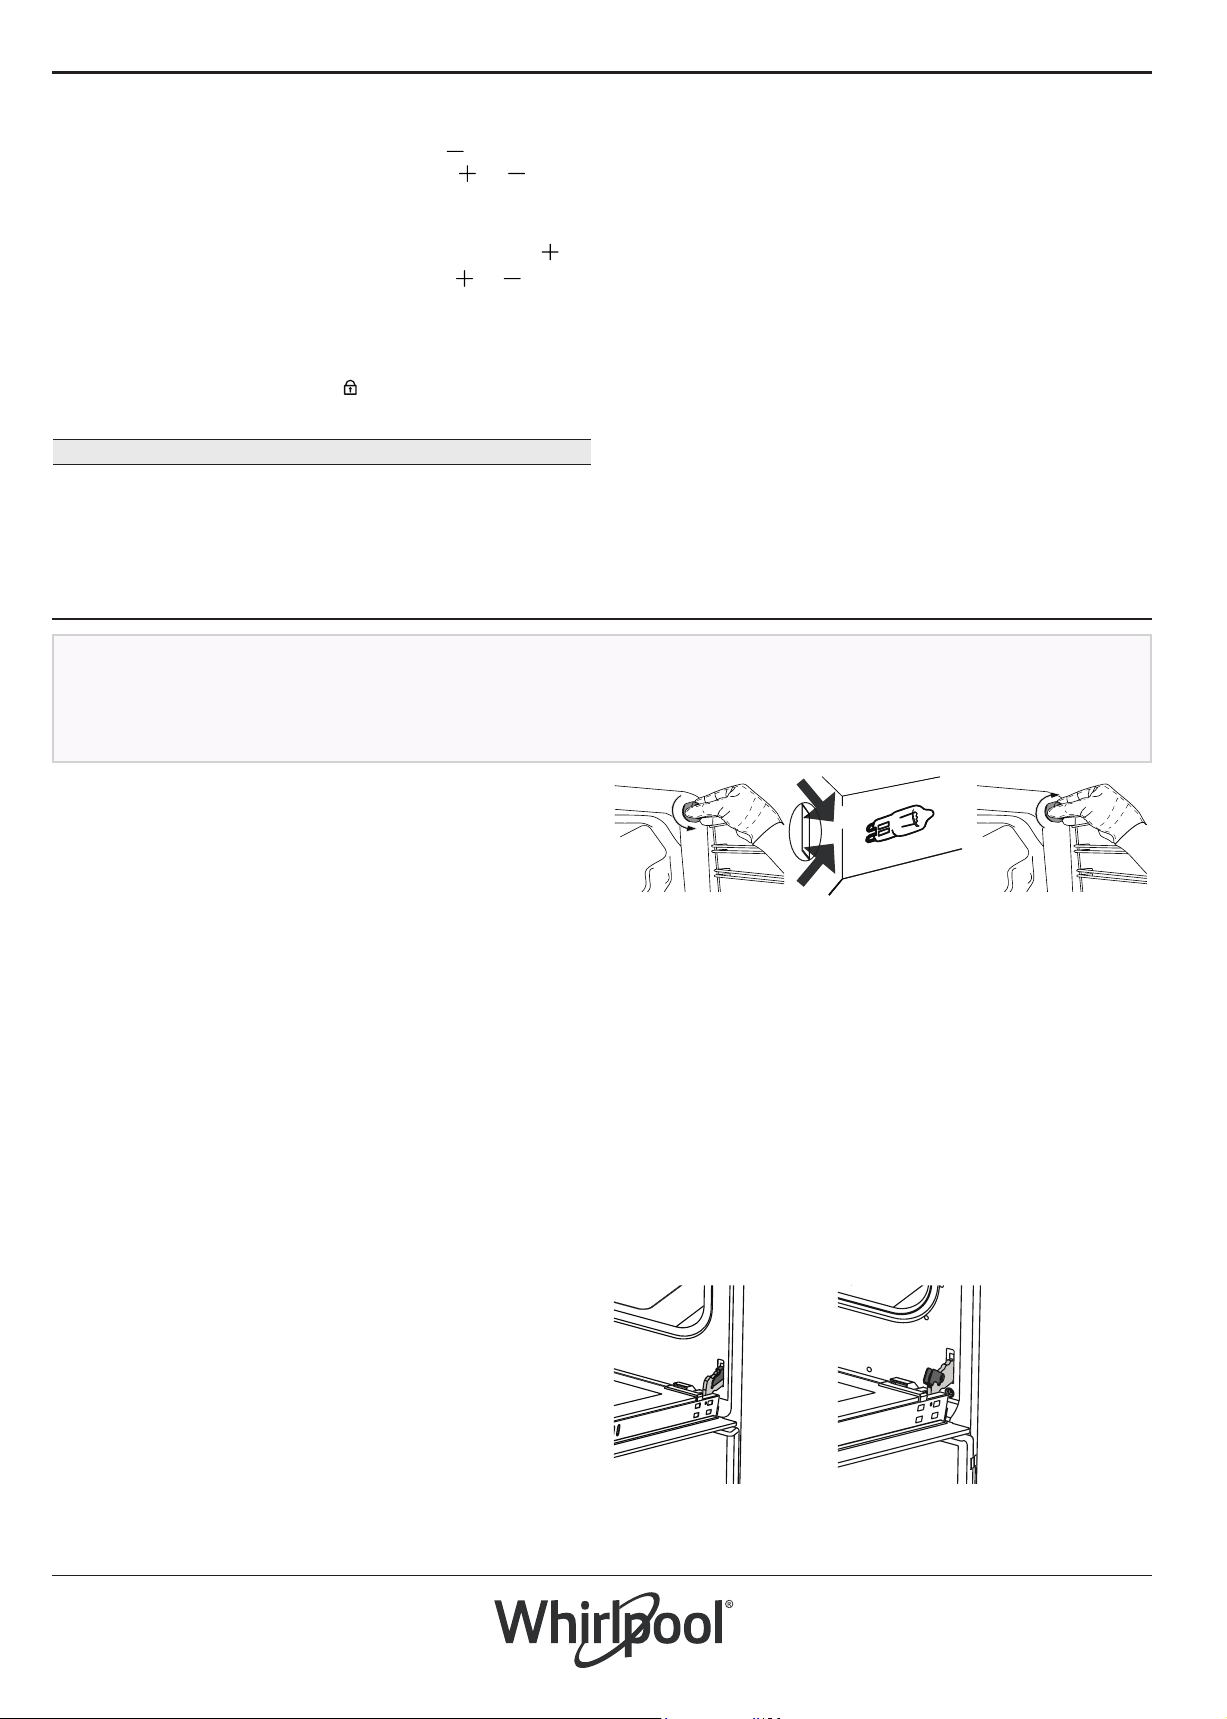
REPLACING THE LAMP
REMOVING AND REFITTING THE DOOR
The key lock will be active within 30 seconds after the
last button pression. The icon will appear on display.
To deactivate it, long press the time button.
Once the function has been activated, the LED
thermostat will switch on signalling that the preheating
process has begun.
At the end of this process, the LED thermostat
switches off indicating that the oven has reached the
set temperature: at this point, place the food inside and
proceed with cooking.
Please note: placing the food in the oven before preheating
has finished may have an adverse effect on the final cooking
result.
The cooling fan may switch itself on every so often
during cooking in order to reduce energy consumption.
Once cooking is complete and the oven has been
switched off, the cooling fan may continue to run for a
certain period of time.
Make sure that the oven has
cooled down before carrying out
any maintenance or cleaning.
Do not use steam cleaners.
Do not use wire wool, abrasive
scourers or abrasive/corrosive
cleaning agents, as these could
damage the surfaces of the
appliance.
Wear protective gloves.
The oven must be disconnected
from the mains before carrying
out any kind of maintenance work.
• Clean the surfaces with a damp microfibre cloth. If
they are very dirty, add a few drops of pH-neutral
detergent. Finish off with a dry cloth.
• Do not use corrosive or abrasive detergents. If any
of these products inadvertently comes into contact
with the surfaces of the appliance, clean
immediately with a damp microfibre cloth.
• After every use, leave the oven to cool and then
clean it, preferably while it is still warm, to remove
any deposits or stains caused by food residues. To
dry any condensation that has formed as a result of
cooking foods with a high water content, let the
oven to cool completely and then wipe it with a cloth
or sponge.
• Clean the glass in the door with a suitable liquid
detergent.
• The oven door can be removed to facilitate
cleaning.
Soak the accessories in a washing-up liquid solution
after use, handling them with oven gloves if they are
still hot. Food residues can be removed using a
washing-up brush or a sponge.
• Disconnect the oven from the power supply.
• Unscrew the cover from the lamp, replace the bulb
and screw the cover back on the lamp.
• Reconnect the oven to the power supply.
Please note: Only use 15-25 W/220-240 V type G9, T300°C
halogen bulbs. The bulb used in the product is specifically
designed for domestic appliances and is not suitable for
general room lighting within the home (EC Regulation
244/2009).
Light bulbs are available from our After-Sales Service.
When using halogen bulbs, do not handle them with your
bare hands as your fingerprints could cause damage. Do not
use the oven until the lamp cover has been refitted.
To remove the door, open it fully and lower the catches
until they are in the unlock position.
Set the hinge lock to the widest angle. Adjust both
hinges connecting oven door to the oven to the same
position.
OPTIONS
ALARM TONE
BRIGHTNESS
To set the alarm tone, long press button .
To select the desired tone, press buttons or , then
press the time button to confirm.
To set the brightness of display, long press button .
To select the desired tone, press buttons or , then
press the time button to confirm.
4. PREHEATING
Loading ...
Loading ...
Loading ...