Loading ...
Loading ...
Loading ...

Troubleshooting Chart
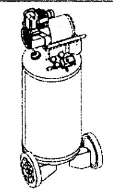
WL6000 Series
C_npca_.or wig not 1. NO elecb'icat pow_
2. Blown fu_e
3. mruker open
4. "ll_ermaaoverload open
5. FreBure swttdl bad
6. Check vaNO dehKtive
Motor h_ but Gtnnot mn or 1, Po_r font a_, line vo)t age incorrect
runs slowiy 2, Shortad or open mot o¢ winding
3. Def_lvt check valve or uidoad_
Futes blowkircuit breaker trips 1. Inco_ect size fuse, dt'_Jit overloaded
rer_atedly
2. Defe_t bar check valve ot unloader
Netq_r use aN ex(_foe_
cord wfl_ I_/s prod_-t
Th_mal overload ixotector 1. LOWvohage
cutso_1 repeatedly 2. Clogged ml_fi)t_
3. LKI_ of proper vQntflatlon/room temperature
IC_Ohigh
4. Check valve mMfunctlon
KnOCkS.rattles, exce*Wve 1. Leaking. bfokef_ or loose valves or restrk_ed air
vibration passage
2, D_ledi_ pressure swttdl unloader
5. De|_lvl bo_lng on e_ifflt rk. or molo¢ shaft
4. Cylinder or piston ring isworn or scored
S. LOGSebolt_ tank not lewl
Tank pressure drops when I. Loose connections (fittings, tubing, etc.)
comprea_o,"shuts off 2. Lo_.e dcain cock
3. Check valw leaking
Air output Iowe_ than 1. Ooggad Intake filter
normal4ow _charge pressure 2. Air teaks in Piping (on ml_'hl_e or in outside
system)
3. 9token Inlet valves
4, Piston ring brok_
5. Cylinder or pbton r;ng isworn or scored
Excr]_lve nloht ure in diSCharge 1, ExCessivewater In tank
air 2. High humidity
Comp*tssor rum continuously 1. Def_iv_ pressure switch
2. Excessiveair u'.a_e
ExCest_veSta_ling Mid 1+ Ez_:es_lvecondlm_at Ion In tank
stopping (auto start) 2. Air leaks In Piping (on mKh_nt or In outside
sy_tam)
3. Tank che(k valve leaking
At_leaking from unidader on
pr_s_.ure sw_tch
Check valve _lu_k in an open position
1. Plugged in? Chm:k _aker or motor m_ridad
2, R,_la_lr b_ fuse
3. Re_.et,determine r_us_ of prold_m
4, Motor will restart when
5. Repidce
6. Remo_ and repl_ check valw
1, G'_ck €onnecUora. check with voltmeter
2, Repl_o_ motor
3. Repidce or repair
1. Check for p_oper fi_l., u_ tlme_lelay fuse. Dit_onne_t other
electrical appliances from ckcuit or operate c_npres_or on its own
branch circuit
2. R_placeorre air
Do not dl_nemblt check wl_
_ wlth _ir in t_lP_, bleed tank
1. G'_k with voltmeter
2. Clean ltlter (See Malntenar_e _e_inn)
3. Move comprel_or t 0 well ve_tilat e_ area
4+ Repl_.e
DO not _l_lmblt Ch_._ vlhml
_fh _Ir in t_ bleed tank
I. Repla<e
2. Repla_.eor repair asn_<ltllary
J+ Repla(e
4 Replace or repair at ne_s_ry
5+ Tighten bo)_. _bim tank to level potition
1• Check al) connections with soap and w_tar solution and t_ghten
2. Tighten
5. Disassemble cherk valve i_sem bly, clean or _eplace
1, Clean or replace
2• Replace leaking comp0_ent_ or tighten _S t_ssa_
3 HaVe authorized servke representative repair unit
4 Replace
5 Repl_Ke
I. Drain tank
2. Move to area of I_s humidity; use ai_ line filter
I. Repine switch
2, Decrease air _a_e_ (ompr_of n0t large enou_lh for air tequir ement
1 Drain moce often
2• Replac I Jeakln_ (_lporlents or tighlan as fl_e_iry
3 Re la(eorle irasnecess_ry
_DO rmt d/_nemb/e chedl v_/ve
v_th air in tank., bl_ed tank
Remov_ and replace check wive
www.chpow_r.€om
Loading ...
Loading ...
Loading ...