Loading ...
Loading ...
Loading ...
6
Before you begin
Before you begin
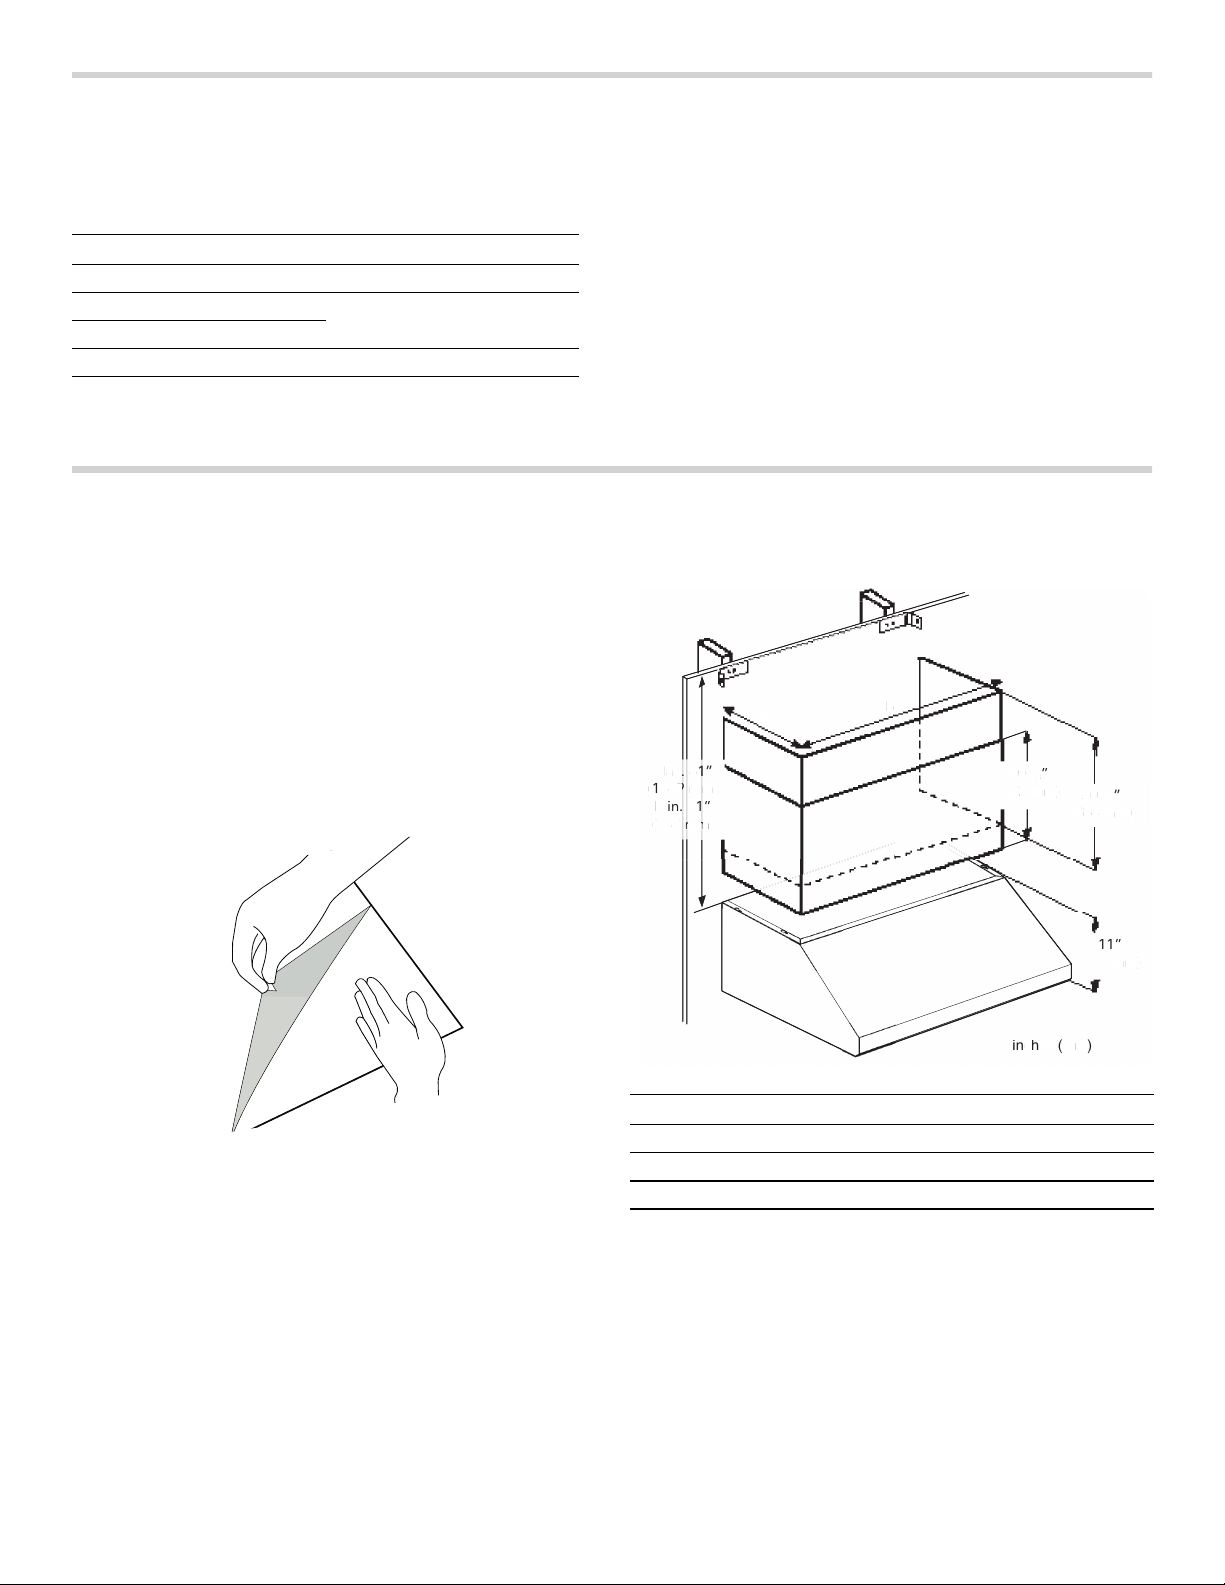
On some models, optional duct covers and telescoping
extensions may be used to fill the space between the
hood and ceiling in wall mount installations.
Parts Included
▯ Harware bag (1):
▯ 5 x 45 mm installation screws (4)
▯ 5.4 x 75 mm installation screws (4)
▯ 4.2 x 8 mm installation screws (11)
▯ 10 x 60 mm drywall anchors (4)
▯ 8 x 40 mm anchors (4)
▯ Torx adapter 20
▯ Upper duct cover brackets (2)
▯ Mounting template (1)
Installation Procedure
Installation Procedure
Telescopic duct cover installation
IMPORTANT: Secure the hood to the wall after installing
the duct cover mounting bracket, but before installing the
telescoping duct cover extension.
Securing the telescoping chimney extension bracket
1.
Carefully remove the protective film from the duct
cover and hood assembly prior to the start of the
installa-tion. Use one hand to maintain the duct cover
steady while the other hand removes the protective
film.
2.
Ensure that the minimum height of 30" (762 mm) from
the bottom of the hood to the cooking surface will be
maintained.
3.
Locate two studs at the mounting brackets location.
4.
Mark the range hood vertical centerline. Make sure the
line run through the very top of the ceiling.
5.
Locate the mounting template in an 90° angle against
the recently made centerline.
Model Duct Cover
HMWB30WS DC30MTW
HMWB361WS DC36MTW
HMWB36WS
HMWB481WS DC48MTW
Model A B
30" (762 mm) 11 3⁄4" (298 mm) 29 3⁄4" (756 mm)
36" (914 mm) 11 3⁄4" (298 mm) 35 3⁄4" (908 mm)
48" (1219 mm) 11 3⁄4" (298 mm) 48" (1219 mm)
w
NN
LQFKHVPP
"
#
.BYw
NN
.JOw
NN
w
NN
w
NN
w
N
N
L
Q
F
K
H
V
P
P
"
#
.
B
Y
w
N
N
.
J
O
w
N
N
N
N
w
N
N
N
w
NN
Loading ...
Loading ...
Loading ...