Loading ...
Loading ...
Loading ...
9
ENGLISH
OPERATION
WARNING: To reduce the risk of serious personal
injury, turn unit off and remove the battery pack
before making any adjustments or removing/
installing attachments or accessories. An
accidental start-up can causeinjury.
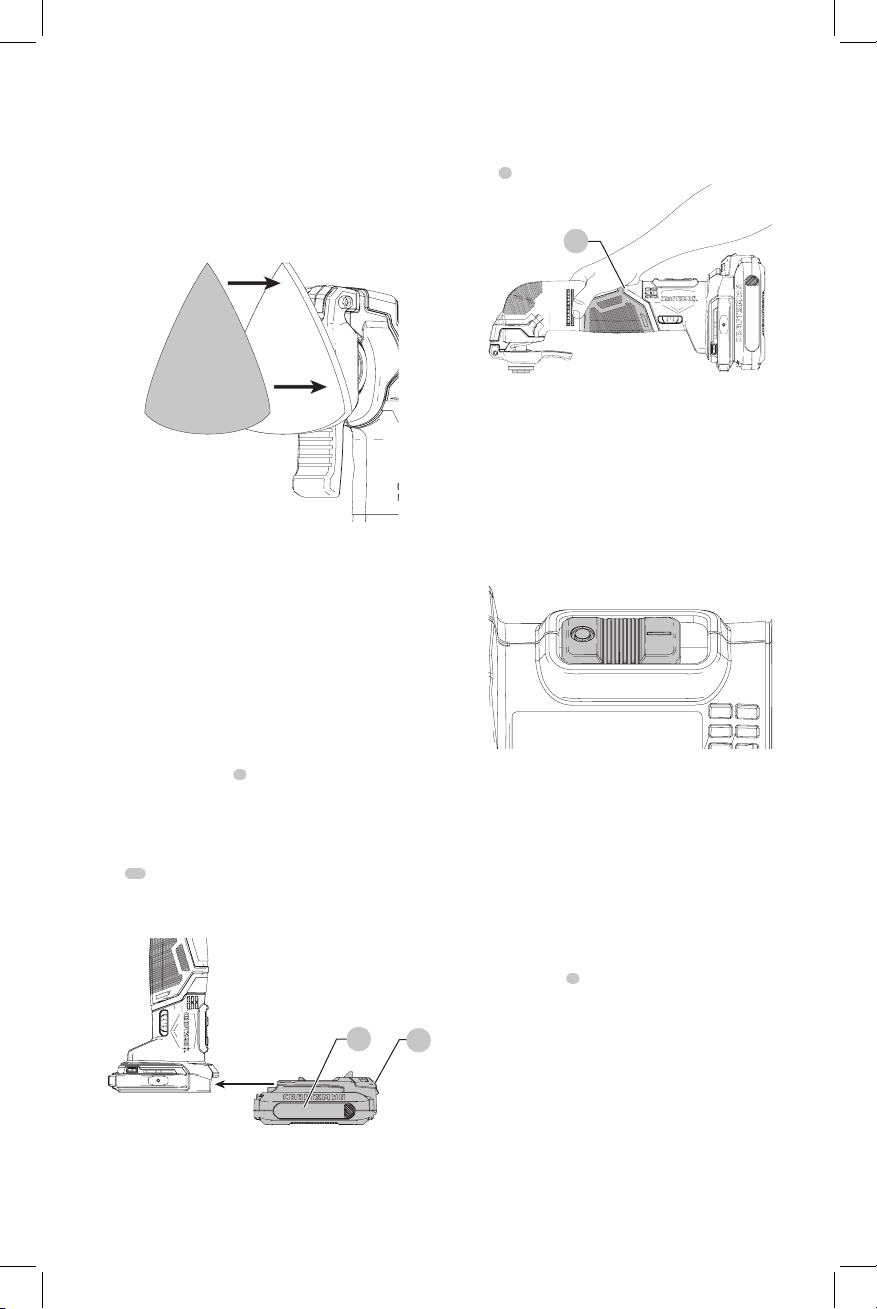
Installing and Removing the Battery Pack
(Fig. F)
NOTE: For best results, make sure your battery pack is
fullycharged.
To install the battery pack
5
into the tool handle, align the
battery pack with the rails inside the tool’s handle and slide
it into the handle until the battery pack is firmly seated in
the tool and ensure that it does notdisengage.
To remove the battery pack from the tool, press the release
button
10
and firmly pull the battery pack out of the tool
handle. Insert it into the charger as described in the charger
section of thismanual.
Fig.F
5
10
Proper Hand Position (Fig. G)
WARNING: To reduce the risk of serious personal injury,
ALWAYS use proper hand position as shown.
WARNING: To reduce the risk of serious personal
injury, ALWAYS hold securely in anticipation of a
suddenreaction.
Proper hand position requires one hand on the main
handle
3
.
Fig. G
3
Switch (Fig. H)
CAUTION: Because the tool has a separate speed dial
for setting the speed (8000–18000 OPM), the tool will
start at the speed where the variable speed dial is set.
Be sure switch is fully OFF before installing the battery.
• Install the battery.
• To turn the tool ON, push the slide switch forward.
• To turn the tool OFF, push the slide switchbackward.
Fig. H
Variable Speed Dial (Fig. H, I)
CAUTION: Because the tool has a separate speed dial
for setting the speed (8000–18000 OPM), the tool will
start at the speed where the variable speed dial is set.
Be sure switch is fully OFF before installing the battery.
To operate the tool, select the speed setting you wish with
the speed dial, shown in Figure H, and slide the ON/OFF
switch forward. The speed setting can be adjusted either
with the tool on or off.
The numbered positions,1 through 6 inscribed on the
variable speed dial
2
, do not indicate any precise speed
but are good reference points. The higher the number, the
higher the tool speed.
The approximate speed at each setting is:
3. Firmly press the base with the sanding sheet
attached against a flat surface and briefly switch
the tool on. This provides for good adhesion
between the platen and the sanding sheet and
also helps to prevent premature wear.
NOTE: When the tip of the sanding sheet becomes
worn, detach the sheet from the platen, rotate
and reapply.
Fig. E
Loading ...
Loading ...
Loading ...