Loading ...
Loading ...
Loading ...
ENGLISH
8
ASSEMBLY AND ADJUSTMENTS
WARNING: To reduce the risk of serious personal
injury, turn unit off and remove the battery pack
before making any adjustments or removing/
installing attachments or accessories. An
accidental start-up can causeinjury.
WARNING: Risk of lacerations or burns. Do not touch
the sharp edges of accessories at any time. Do not
touch work piece or blade immediately after operating
the tool. They can become very hot. Handle carefully.
Always allow accessories and work piece to cool
before handling.
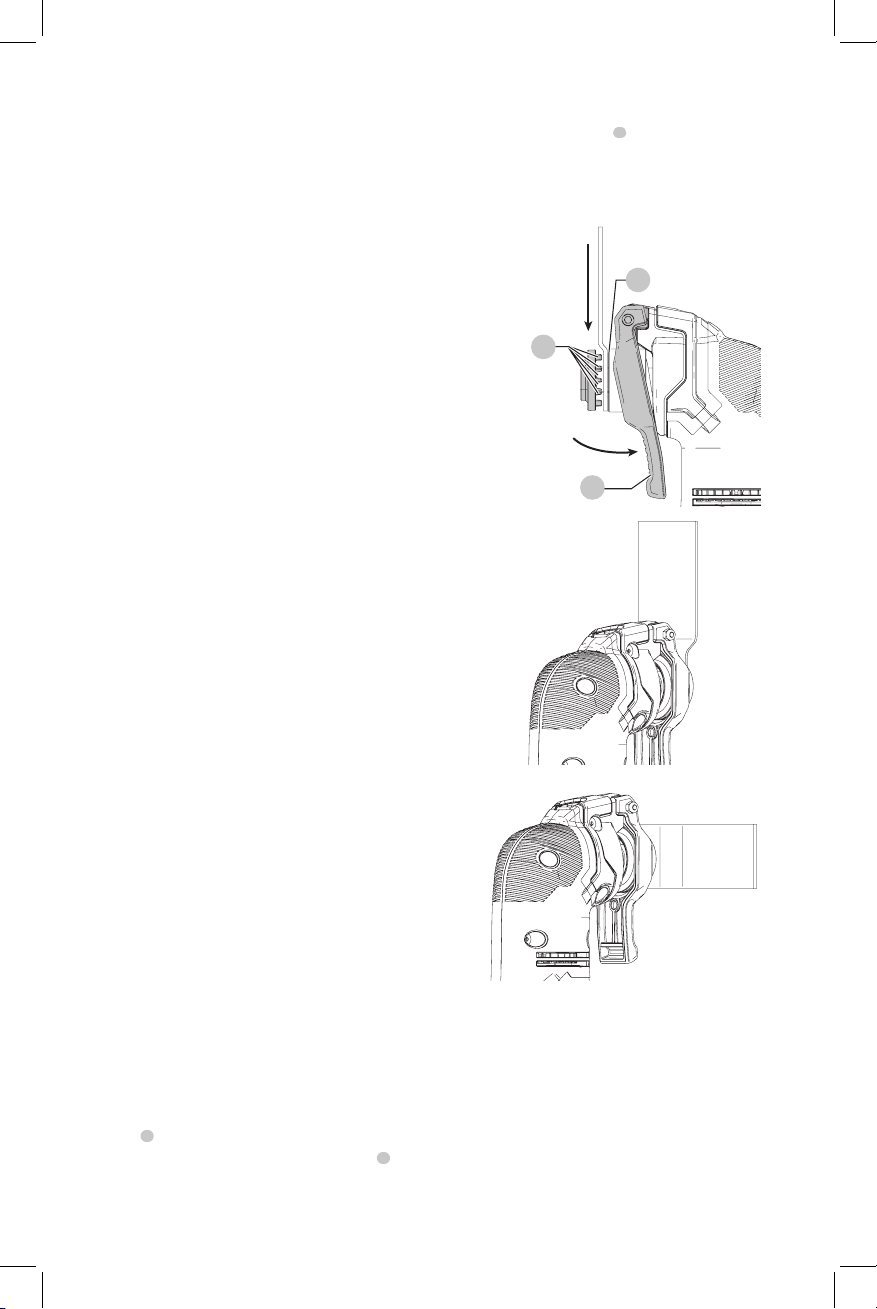
Installing/Removing Accessories (Fig.B–D)
The tool features an exclusive Tool-Free System for faster
accessory changes and adjustments without the need for
wrenches or hex keys like other oscillating tool systems.
1. Grasp the tool and squeeze the Tool-Free accessory
clamp's
4
lever.
2. Clean any residual debris from the tool shaft
8
and
the Tool-Free accessory clamp holder.
3. Release the Tool-Free accessory clamp lever.
4. Slide the accessory between the shaft and the
accessory holder making sure the accessory
engages all of the pins
9
on the holder and is flush
with the shaft as shown in Figure B.
5. Some accessories, such as scrapers and blades can
be mounted at an angle if required as shown in as
shown in Figures C and D.
Fig. B
4
8
9
Fig. C
Fig. D
Installing/Removing Sanding Sheets
(Fig.E)
A diamond shaped platen uses a hook and loop adhesion
system to attach the sanding sheets. The platen allows you
to use it on large flat surfaces and tight spots or corners.
1. Attach the sanding platen accesory as described under
Installing/Removing Accessories.
2. Align the edges on the sanding sheet with the
edge of the sanding platen and press the sanding
sheet onto the platen.
SAVE THESE INSTRUCTIONS FOR
FUTURE USE
COMPONENTS FIG. A
Intended Use
This oscillating multi-tool is designed for professional detail
sanding, plunge cutting, flush cutting, removal of excess
materials and surface preparation applications.
DO NOT use under wet conditions or in presence of
flammable liquids orgases.
This oscillating multi-tool is a professional power tool.
DO NOT let children come into contact with the tool.
Supervision is required when inexperienced operators use
thistool.
Wall Mounting
These chargers are designed to be wall mountable or to sit
upright on a table or work surface. If wall mounting, locate
the charger within reach of an electrical outlet, and away
from a corner or other obstructions which may impede
air flow. Use the back of the charger as a template for
the location of the mounting screws on the wall. Mount
the charger securely using drywall screws (purchased
separately) at least 1" (25.4 mm) long, with a screw head
diameter of 0.28–0.35" (7–9mm), screwed into wood to an
optimal depth leaving approximately 7/32" (5.5 mm) of the
screw exposed. Align the slots on the back of the charger
with the exposed screws and fully engage them in theslots.
Versatrack™
CRAFTSMAN chargers can be mounted to the wall using
CRAFTSMAN Versatrack™ Trackwall. Hooks and accessories
are sold separately. Please refer to the Versatrack™
Trackwall accessory sheet for furtherinformation.
Loading ...
Loading ...
Loading ...