Loading ...
Loading ...
Loading ...
©2017 Hestan Commercial Corporation
26
EN
Be sure to do this only when completely cooled down. DO NOT use a metal scraper on the tiles, or put a
lot of pressure on the tile faces as they may crack. Alternatively, you can turn on the sear burner to burn
everything off.
NOTICE: Avoid directing water into the Sear Burner as this may fill up the inside of the burner housing
with water, not allowing it to burn properly. Water intrusion could also damage the ceramic tiles. Water
damage to your Sear Burner is not covered by the warranty.
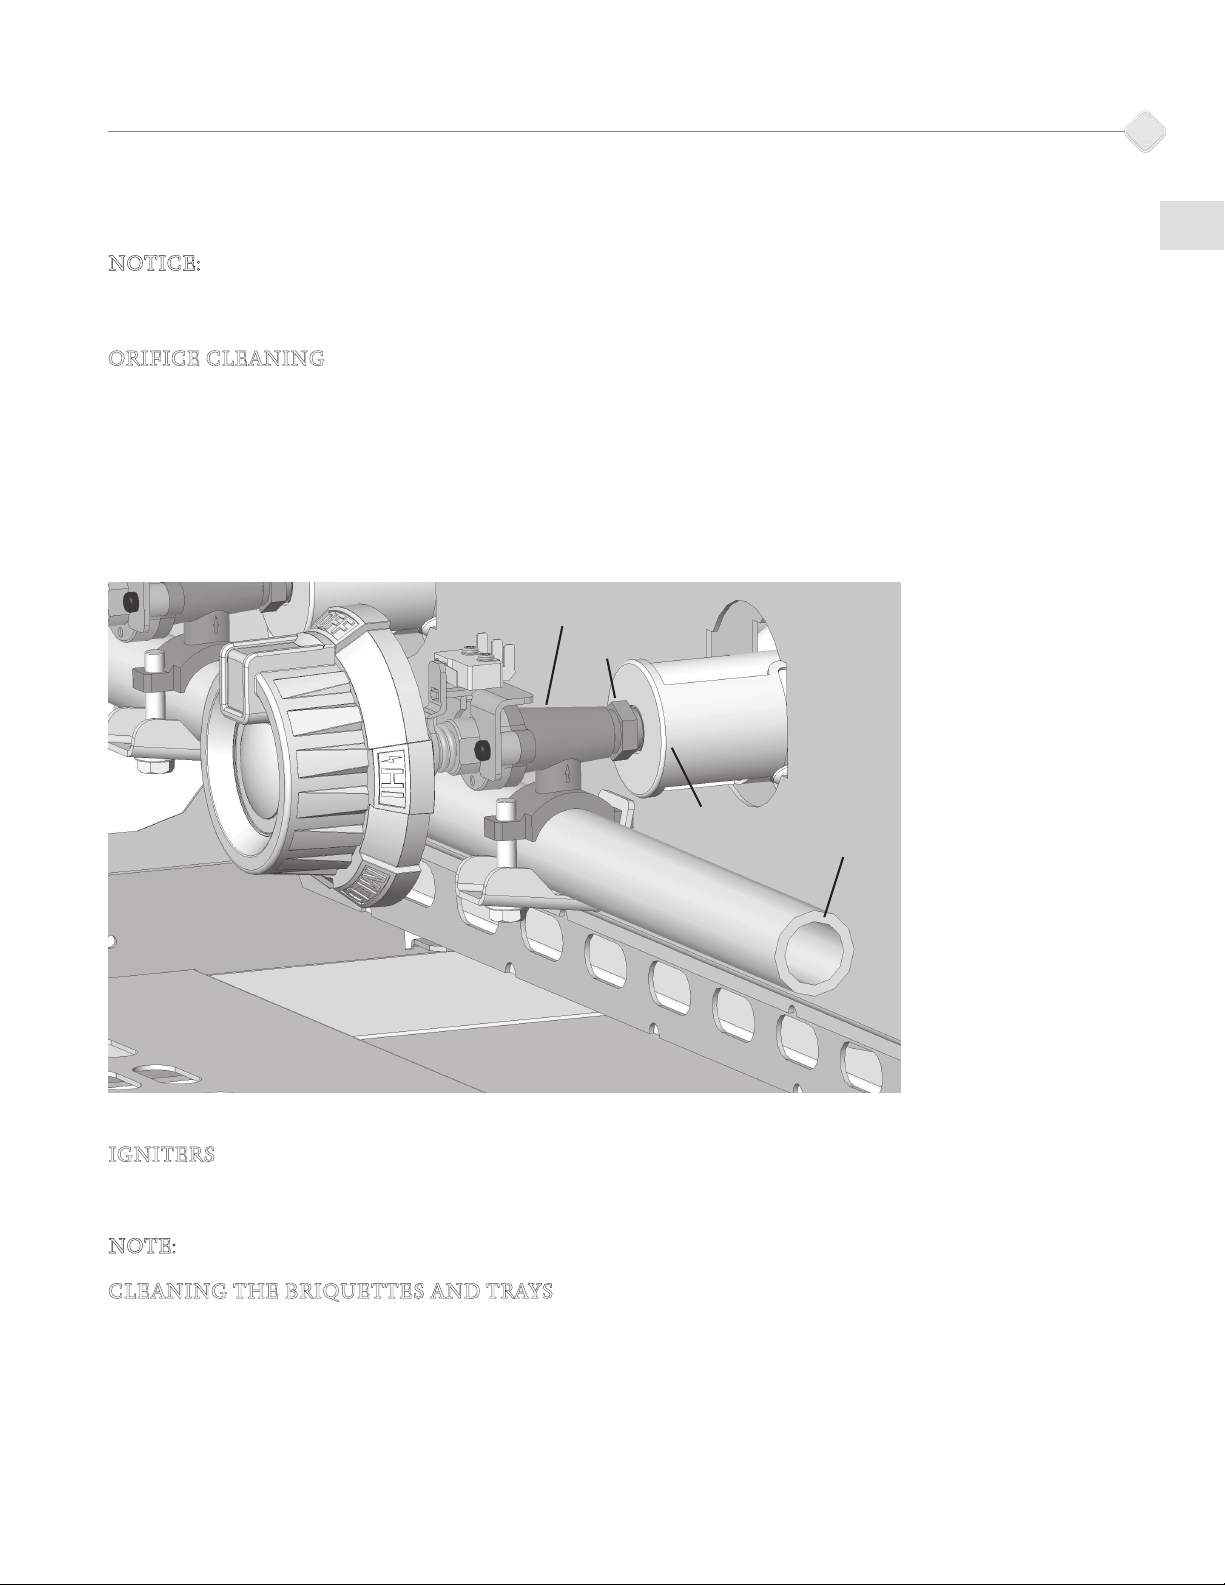
ORIFICE CLEANING
You will need to remove the burner first. It may also be helpful to remove the control panel to get a better
look at the orifice (see Fig. 9). Take note of how far the orifice is tightened onto the valve. With the
burner removed, remove the orifice from the valve and shine a flashlight through the opening to ensure
there is no blockage. Use a sewing needle to clear any debris. Be extremely careful not to enlarge the hole
or break off the needle. Once clean, be sure to carefully thread the orifice onto the valve by hand, then use
a wrench or deep socket wrench to tighten it securely to the same position as before. Replace the burner
as per previous instruction.
IGNITERS
The hot-surface igniters on your Aspire grill do not require any maintenance and are well protected from
debris falling on them.
NOTE: Rough handling of the igniter can crack the ceramic body, causing it to fail. Handle with care.
CLEANING THE BRIQUETTES AND TRAYS
After allowing the grill to cool completely, turn the radiant tray upside-down and operate the grill on high
for 30 minutes. The trays are “double sided” and can be left this way to burn off any encrusted food or
grease. The trays can occasionally be scrubbed clean with mild soap & water and a plastic bristle brush.
Allow them to cool completely, never handle hot trays. Replace the briquette trays, ensuring that they sit
level and do not rock. Light all of the burners and check for proper flame characteristics.
Figure 9
CLEANING AND MAINTENANCE
(continued)
VALVE
ORIFICE
AIR
SHUTTER
MANIFOLD
PIPE
Loading ...
Loading ...
Loading ...