Loading ...
Loading ...
Loading ...

-12-
UNIT PREPARATION
After carefully unpacking and reading the instructions for installing your stove, you will need to perform the
following steps:
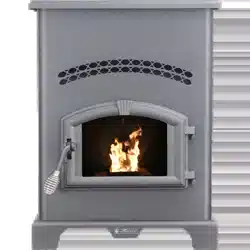
• Attach the included spring handle to the door handle by screwing it on in a respective location.
• Attach the electrical cord to the back of the stove rst; then plug it into a 110-volt outlet (an outlet surge
protector is highly recommended).
PERFORMING AN INITIAL TEST
This test is used at the factory where the stoves are assembled to test the functionality of the control and the stove
before the unit is shipped. To perform this test, press and hold the OFF and AUGER DELAY buttons simultaneously
for 3 seconds. To advance through the test, press any key unless otherwise noted in the test step.
1. Exhaust Fan Output Test – The display will show “drft”. The exhaust fan is turned on full then reduced to a level
just above the typical minimum pressure switch setting. The ON LED indicates whether the pressure sensor
is detected. If the pressure switch is not detected, the fan ramps to full on for two seconds then returns to
the previously established level if the pressure switch closes. If the Draft Fan Fuse is not blown and the fuse
detection circuit is functioning, the Draft Fan LED will be lit and the other three top row LEDs will be off.
2. Room Fan Output Test - The display will show “rfan”. The room fan is turned on full. If the Room Fan Fuse is not
blown and the fuse detection circuit is functioning, the Room Fan LED will be lit and the other three top row
LEDs will be off.
3. Ignitor Output Test - The display will show “ignt”. The ignitor motor is turned on full. If the Ignitor (AUX) Fuse is
not blown and the fuse detection circuit is functioning, the Aux LED will be lit and the other three top row
LEDs will be off.
4. Auger Output Test - The display will show “augr”. The auger motor is turned on full. If the Auger Fuse is not
blown and the fuse detection circuit is functioning, the Heat Range LED will be lit and the other three top
row LEDs will be off.
5. Hopper Switch Test – The display will show “hppr”. The “ON” LED is lit. If the hopper switch is open (lid is open),
the “HEAT RANGE” LED will turn on. If the lid is closed, the “HEAT RANGE” LED will be off.
6. Thermostat Input Test – The display will show “stat”. If the thermostat input is closed, the ON LED will turn on,
otherwise it will be off.
7. Flue gas Thermistor Test – The display will show the ue gas temperature in degrees F.
8. AC Frequency Test - Displays the measured AC Frequency in hertz (59-60) followed by the letter ‘H’.
9. Watchdog Reset – The watchdog timer is tested to ensure that the board can be reset. The message “BYE”
is displayed until the watchdog resets the board.
PERFORMING A “DRY RUN”
Perform a “dry run” on your stove prior to making the exhaust/inlet connections and starting your stove for the
rst time.
1. Check that there is no fuel or ANY foreign material in the hopper or burn-pot.
2. Check that the viewing door and hopper lid is securely closed.
3. Press the “ON” button on the control panel. Verify that the ON LED is lit (blinking) and the display shows HR-1.
Also the LED above the HEAT RANGE and the AUTO MODE indicator should be lit. If any other LED’s are lit or
ashing, consult the “Display Indicators” in this manual.
4. You should hear the exhaust (draft) fan running immediately and the auger should begin turning continuously
for 1 minute.
5. The auto fuel ignitor (located inside the backwall of the burnpot) should begin to glow red/orange after 3
minutes.
6. The Room Fan will not operate at this time since the unit must reach a factory preset temperature.
Do not open the viewing door, the auto-start igniter will get very hot during this test. The stove will automatically
shut down after approximately 23 minutes.
Operation
Loading ...
Loading ...
Loading ...
