Loading ...
Loading ...
Loading ...
Surface Cookin
LOCATIONSOF THE BURNERS
[] [] [] [] [] [] [] [] [] [] [] [] [] [] [] [] [] [] [] [] [] []
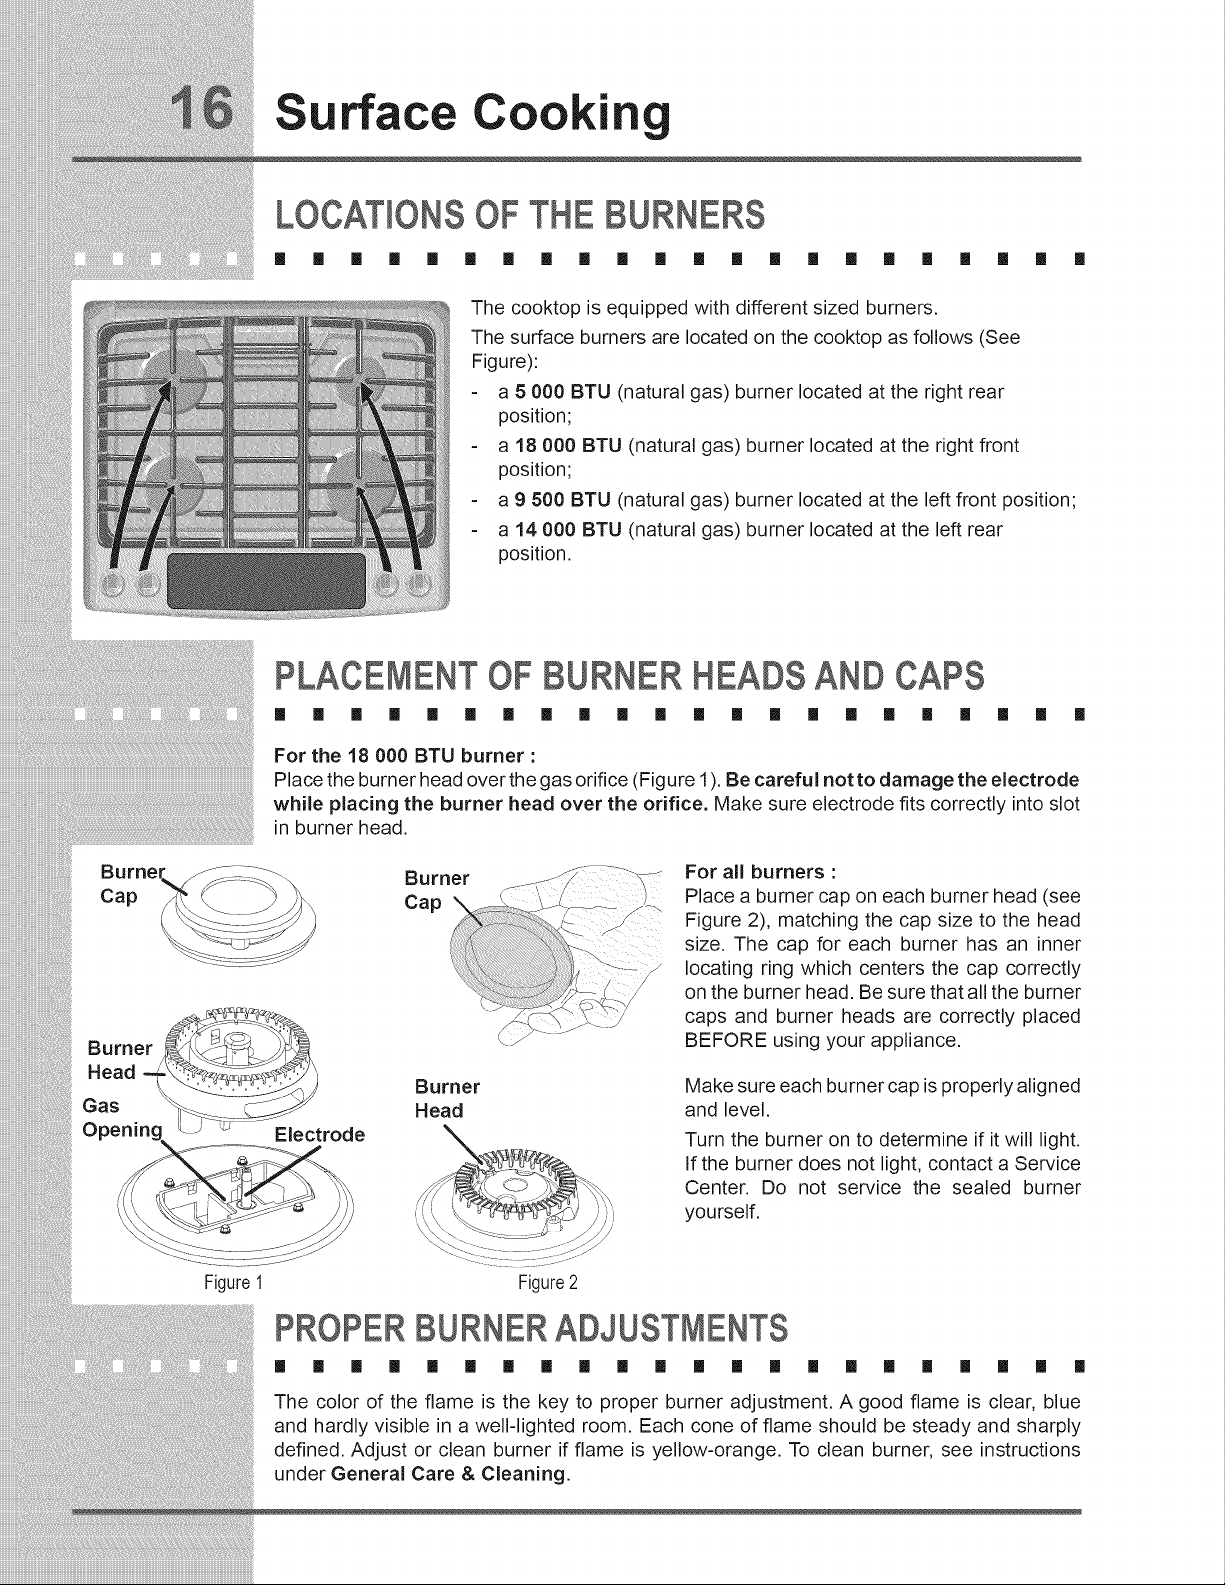
The cooktop is equipped with different sized burners.
The surface burners are located on the cooktop as follows (See
Figure):
a 5 000 BTU (natural gas) burner located at the right rear
position;
a 18 000 BTU (natural gas) burner located at the right front
position;
a 9 500 BTU (natural gas) burner located at the left front position;
a 14 000 BTU (natural gas) burner located at the left rear
position.
PLACEMENT OF BURNER HEADS AND CAPS
[] [] [] [] [] [] [] [] [] [] [] [] [] [] [] [] [] [] [] [] [] []
For the 18 000 BTU burner :
Place the burner head over the gas orifice (Figure 1). Be careful not to damage the electrode
while placing the burner head over the orifice. Make sure electrode fits correctly into slot
in burner head.
Burner __
Electrode
Burner
Cap J
Burner
Head
For all burners :
Place a burner cap on each burner head (see
Figure 2), matching the cap size to the head
size. The cap for each burner has an inner
locating ring which centers the cap correctly
on the burner head. Be sure that all the burner
caps and burner heads are correctly placed
BEFORE using your appliance.
Make sure each burner cap is properly aligned
and level.
Turn the burner on to determine if it will light.
If the burner does not light, contact a Service
Center. Do not service the sealed burner
yourself.
Figure1 Figure2
PROPER BURNER ADJUSTMENTS
[] [] [] [] [] [] [] [] [] [] [] [] [] [] [] [] [] [] [] [] [] []
The color of the flame is the key to proper burner adjustment. A good flame is clear, blue
and hardly visible in a well-lighted room. Each cone of flame should be steady and sharply
defined. Adjust or clean burner if flame is yellow-orange. To clean burner, see instructions
under General Care & Cleaning.
Loading ...
Loading ...
Loading ...