Loading ...
Loading ...
Loading ...
Page 5
iNSTALL THE HOOD (Non-Ducted Hoods Only - Steps 3 thru 8)
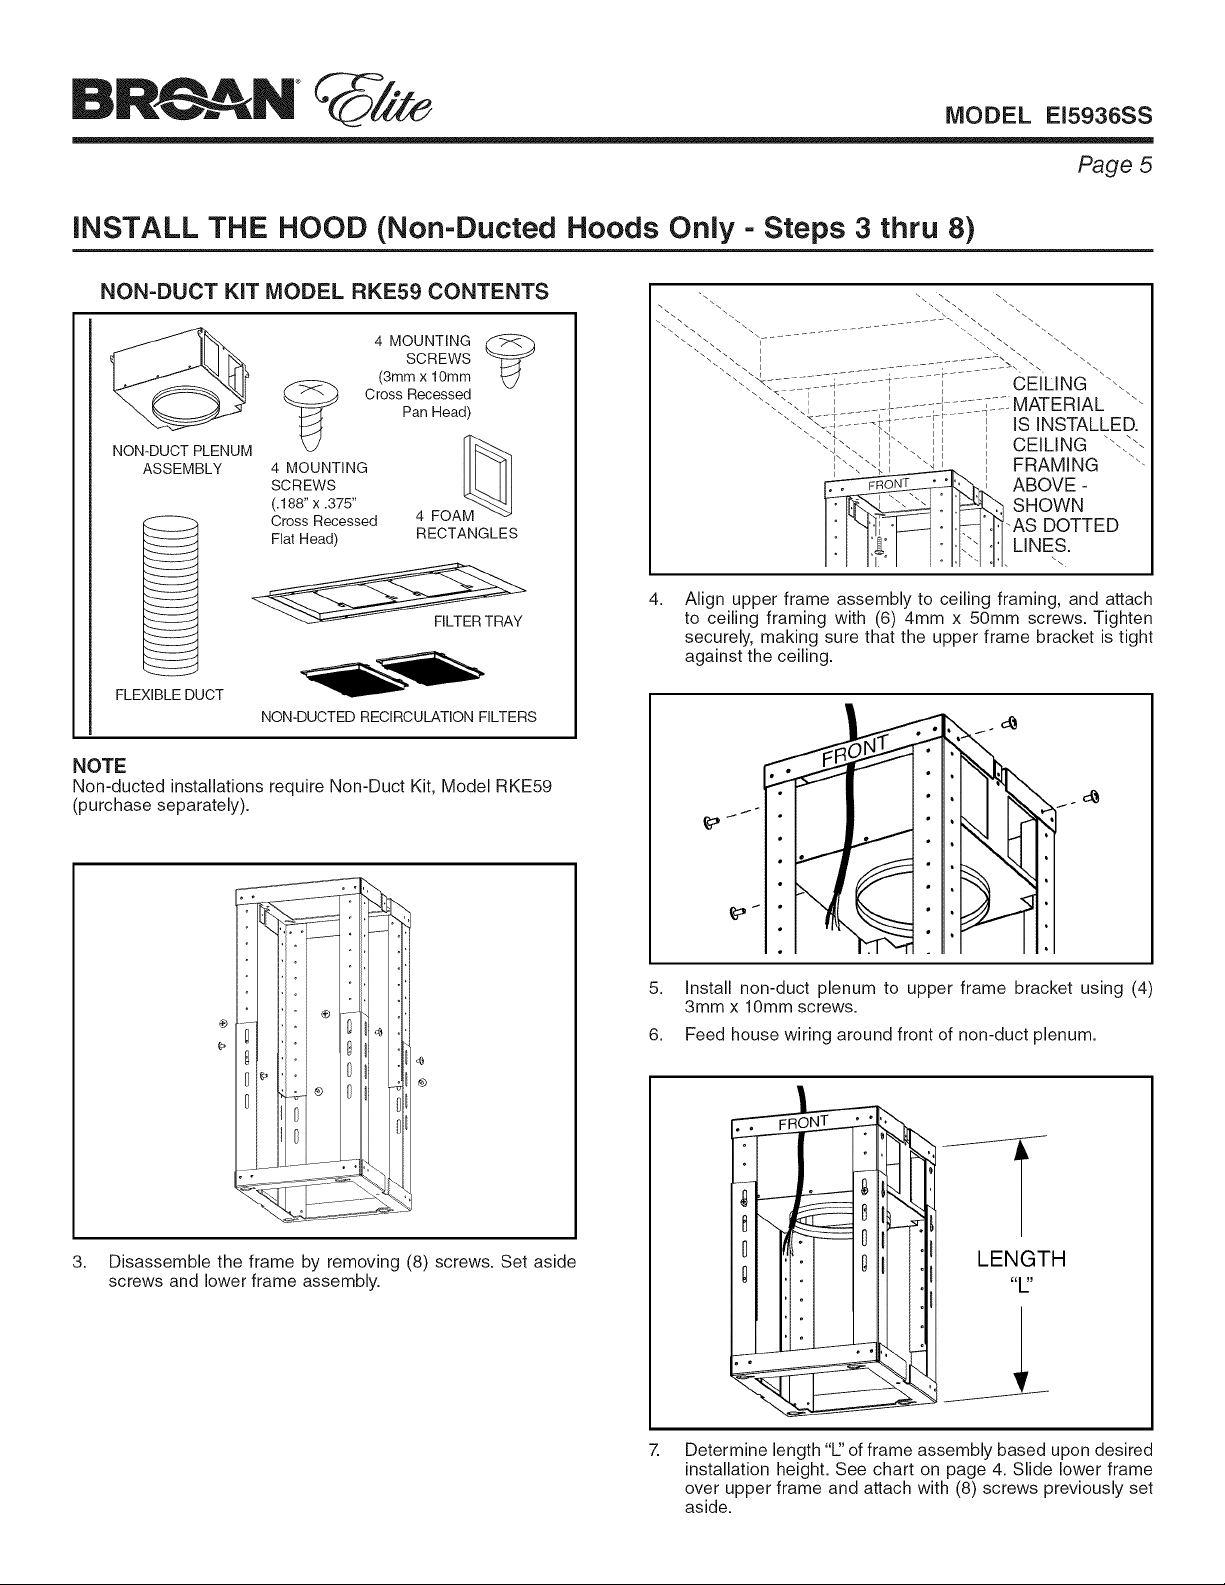
NON=DUCT KiT MODEL RKE59 CONTENTS
NON-DUCTPLENUM
ASSEMBLY
4 MOUNTING
SCREWS
(.188"x .375"
CrossRecessed
FlatHead)
4 MOUNTING (_
SCREWS
(3mm x 10mm
Cross Recessed
Pan Head)
4 FOAM
RECTANGLES
FILTER TRAY
FLEXIBLE DUCT
NON-DUCTED RECIRCULATION FILTERS
NOTE
Non-ducted installations require Non-Duct Kit, Model RKE59
(purchase separately).
®
4_
@
3. Disassemble the frame by removing (8) screws. Set aside
screws and lower frame assembly.
4.
Align upper frame assembly to ceiling framing, and attach
to ceiling framing with (6) 4mm x 50mm screws. Tighten
securely, making sure that the upper frame bracket is tight
against the ceiling.
5. Install non-duct plenum to upper frame bracket using (4)
3mm x 10mm screws.
6. Feed house wiring around front of non-duct plenum.
7.
J j-
LENGTH
Determine length %:' of frame assembly based upon desired
installation height. See chart on page 4. Slide lower frame
over upper frame and attach with (8) screws previously set
aside.
Loading ...
Loading ...
Loading ...