Loading ...
Loading ...
Loading ...
ENGLISH
10
OPERATION
WARNING: To reduce the risk of serious personal
injury, turn unit off and remove the battery pack
before making any adjustments or removing/
installing attachments or accessories. An
accidental start-up can causeinjury.
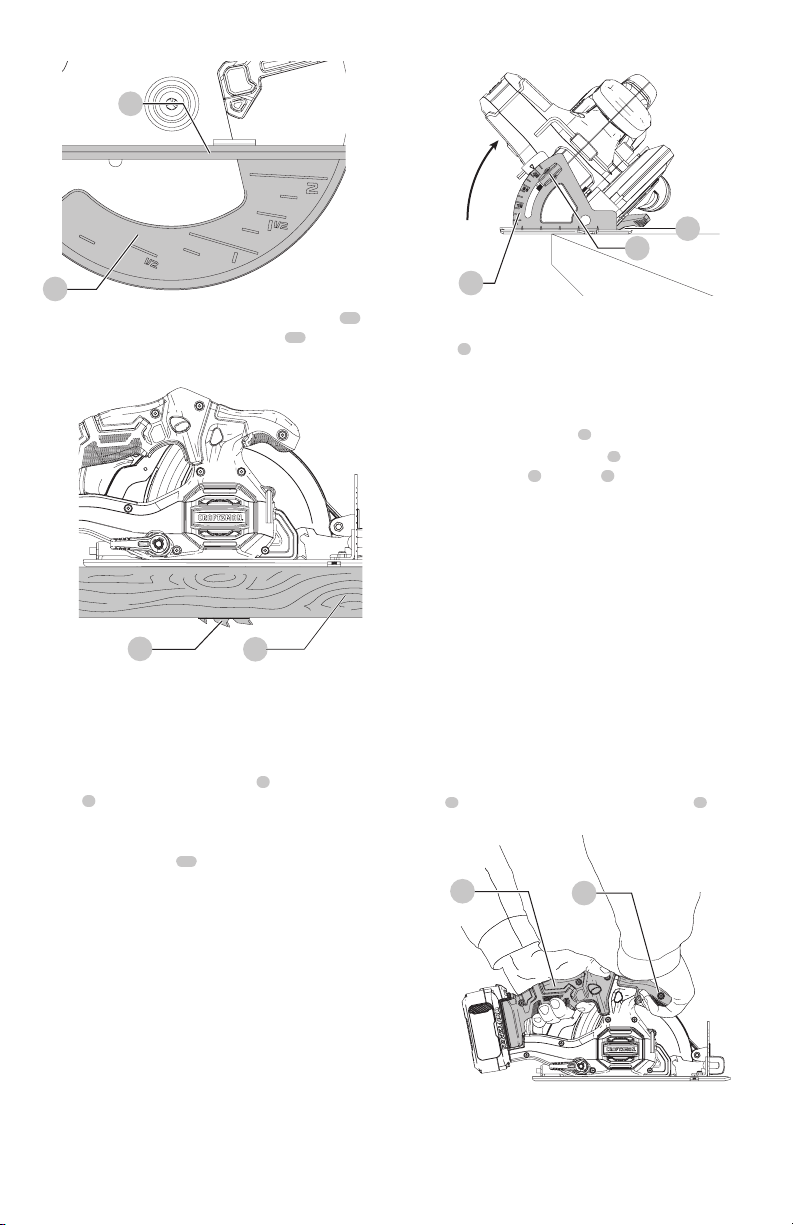
Proper Hand Position (Fig. L)
WARNING: To reduce the risk of serious personal injury,
ALWAYS use proper hand position as shown.
WARNING: To reduce the risk of serious personal
injury, ALWAYS hold securely in anticipation of a
suddenreaction.
Proper hand position requires one hand on the main
handle
3
and one hand on the secondary handle
4
.
Fig.L
3
4
Fig.I
5
7
3. Set depth adjustment of saw such that one tooth
18
of
the blade projects below the workpiece
19
as shown
in FigureJ.
Fig.J
18
19
4. Tighten the depth adjustment knob to lock the saw
shoe inplace.
Bevel Angle Adjustment (Fig. A, K)
This tool can be set to bevel angles between 0° and 50°.
1. Loosen the bevel adjustment knob
9
to unlock the saw
shoe
5
.
2. Move the saw shoe into the desired position
corresponding with the bevel angle markings on
thebevel angle scale
(
10
)
.
3. Tighten the bevel adjustment knob to lock the saw shoe
inplace.
4. Confirm the accuracy of the setting by checking the
bevel angle of an actual cut on a scrap piece ofmaterial.
Fig.K
9
10
5
Shoe Adjustment for 90° Cuts (Fig. A)
The shoe
5
has been set by the factory to assure that the
blade is perpendicular to the shoe at 0° bevelsetting.
If realignment is needed:
1. Adjust the saw to 0°bevel.
2. Retract lower blade guard
7
.
3. Loosen bevel adjustment knob
9
. Place a square
against the blade
6
and shoe
5
to adjust the
90°setting.
Loading ...
Loading ...
Loading ...