Loading ...
Loading ...
Loading ...
9
ENGLISH
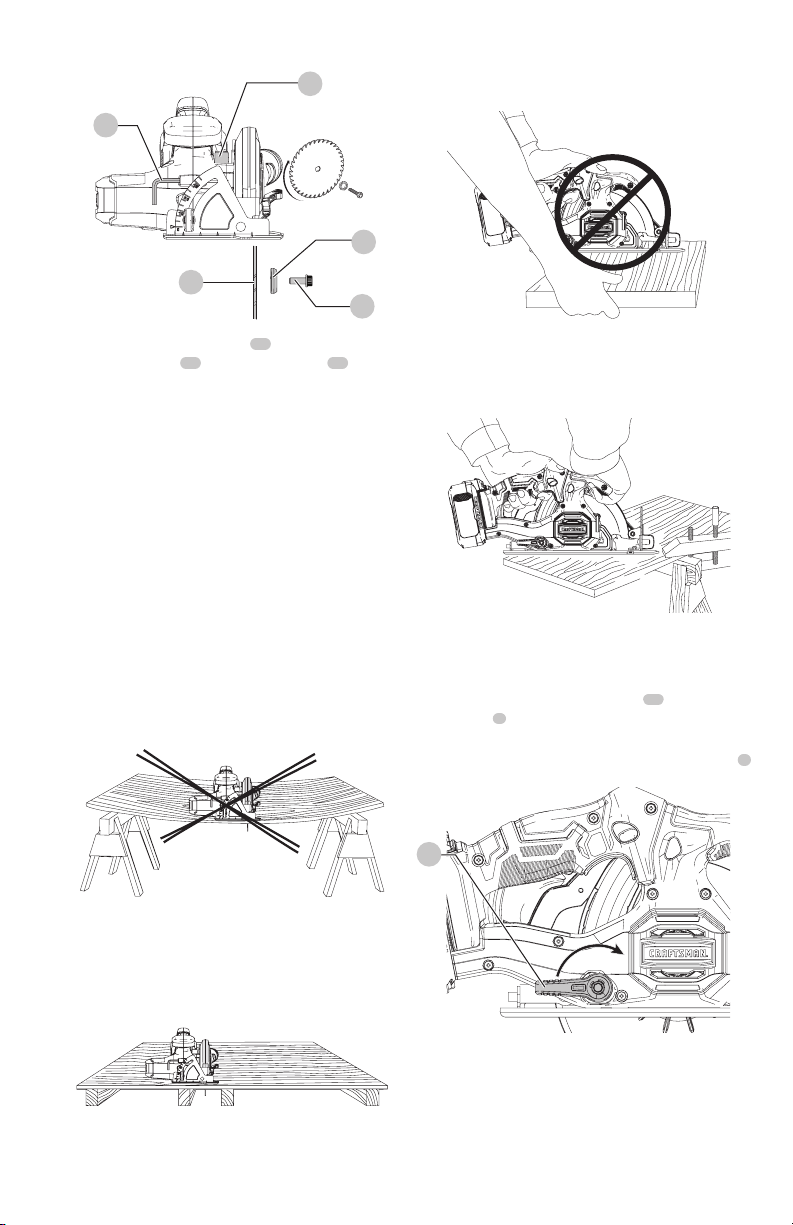
Fig.C
12
11
6
17
14
2. Depress the spindle lock button
14
while turning the
blade retaining bolt
12
with the hex wrench
17
until
the blade lock engages and the blade stopsrotating.
NOTE: Blade wrench is stored on the saw as shown in
FigureC.
Tighten the blade retaining bolt securely with the
hexwrench.
NOTE: Bolt has a left-handed thread. To loosen, turn
clockwise. To tighten, turncounterclockwise.
NOTE: Never engage the blade lock while the saw is
running, or engage in an effort to stop the tool. Never turn
the tool on while the blade lock is engaged. Serious damage
to your saw willresult.
Supporting Large Panels/Securing
Workpiece (Fig. D–G)
Support large panels to minimize the risk of blade pinching
and kickback. Large panels tend to sag under their own
weight as shown in FigureD.
Fig.D
Supports must be placed under the panel on both sides,
near the line of cut and near the edge of the panel
(FigureE).
Fig.E
WARNING: To reduce the risk of injury Never hold the
piece being cut with your hands or lay it across your
leg (FigureF).
Fig.F
Secure the workpiece to a stable platform as shown in
FigureG. It is important to support the work properly to
minimize body exposure, blade binding, or loss ofcontrol.
Fig.G
Cutting Depth Adjustment (Fig. H–J)
The depth of cut should be set according to the thickness of
theworkpiece.
1. Loosen the depth adjustment lever
13
to unlock the
saw shoe
5
.
2. Align the saw shoe with the desired depth of cut
indicated on the scale markings on the lower guard
7
.
Fig.H
13
Loading ...
Loading ...
Loading ...