Loading ...
Loading ...
Loading ...
Page 8
SET UP & USE
PREPARATION FOR USE
ASSEMBLY INSTRUCTIONS:
Remove all contents from the box and you
should end up with four separate pieces
1. Main heater unit
2. Base
3. Decorative chrome plate/lid
4. Remote control
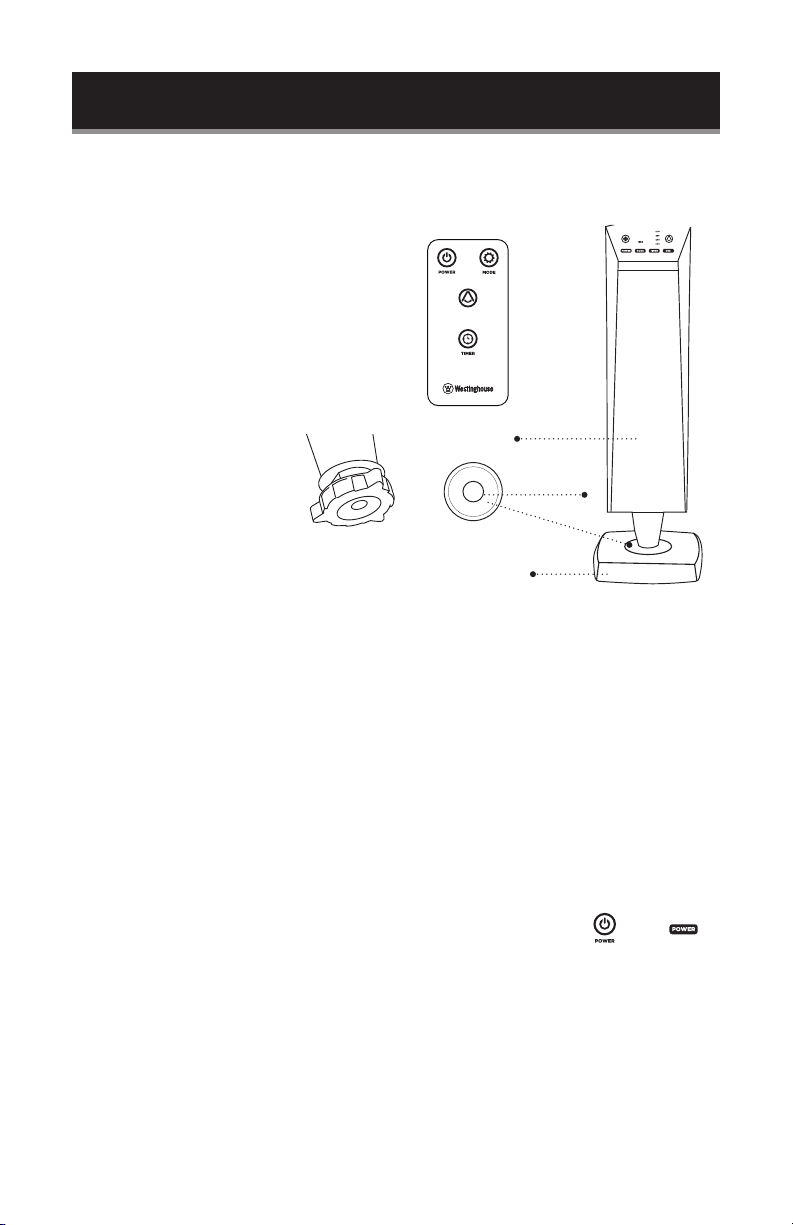
At the base of the main
heater unit, you will see a
threaded collar/wheel. Turn
the threaded collar/wheel
counter clockwise until it
comes off entirely from the
main heater unit.
Take the decorative chrome plate/lid and
lay it over the hole on the top of the base
Slide the main heater unit thru the hole in the base, being sure that the at sides of
the post line up with the at sides of the base
Take the threaded collar/wheel and thread it back on, turning in a clockwise position
until tight on the underside of the base
Place the heater on a rm, level surface and plug the unit directly into a 120V AC
standard electrical out.
Turn on the red power switch located at the back of the unit.
Before attempting to use remote control, please pull out the insulating lm to
activate included lithium battery. (see drawing on page 9)
OPERATING INSTRUCTIONS
POWERING ON / OFF
Turn the heater ON from the red power switch at the back of the
unit and then press the POWER button on the control panel or
on the supplied remote control.
NOTE: Once POWER button on control panel or remote
is pushed to OFF, heating element will stop but fan will continue for an
additional 30 seconds. This is normal.
NOTE: When nished completely, also turn off red power switch on back of unit.
Control
Panel
Remote
Control
750
OSC
750
OSC
750
OSC
Main
Heater
Unit
Chrome
Plate / Lid
Base
750
OSC
Collar / Wheel
Post
Loading ...
Loading ...
Loading ...