
Loading ...
Loading ...
Loading ...
OPERATION
19
OPERATING THE POLE SAW
PREPARATION FOR CUTTING
• Wear non-slip gloves for maximum grip and protection.
• Maintain a proper grip on the unit whenever the motor is running. Use your right hand to rmly
grip the rear handle while your left hand has a rm grip on the pole shaft.
• Hold unit rmly with both hands. Always keep your left hand on the pole shaft and your right
hand on the rear handle, so your body is to the left of the chain line. Never use a left-handed
(cross-handed) grip, or any stance that places your body or arm across the chain line.
• Never stand directly under the limb you are cutting.
• Be certain the collars are fully tightened before operating equipment; check them periodically
for tightness during use to avoid serious injury.
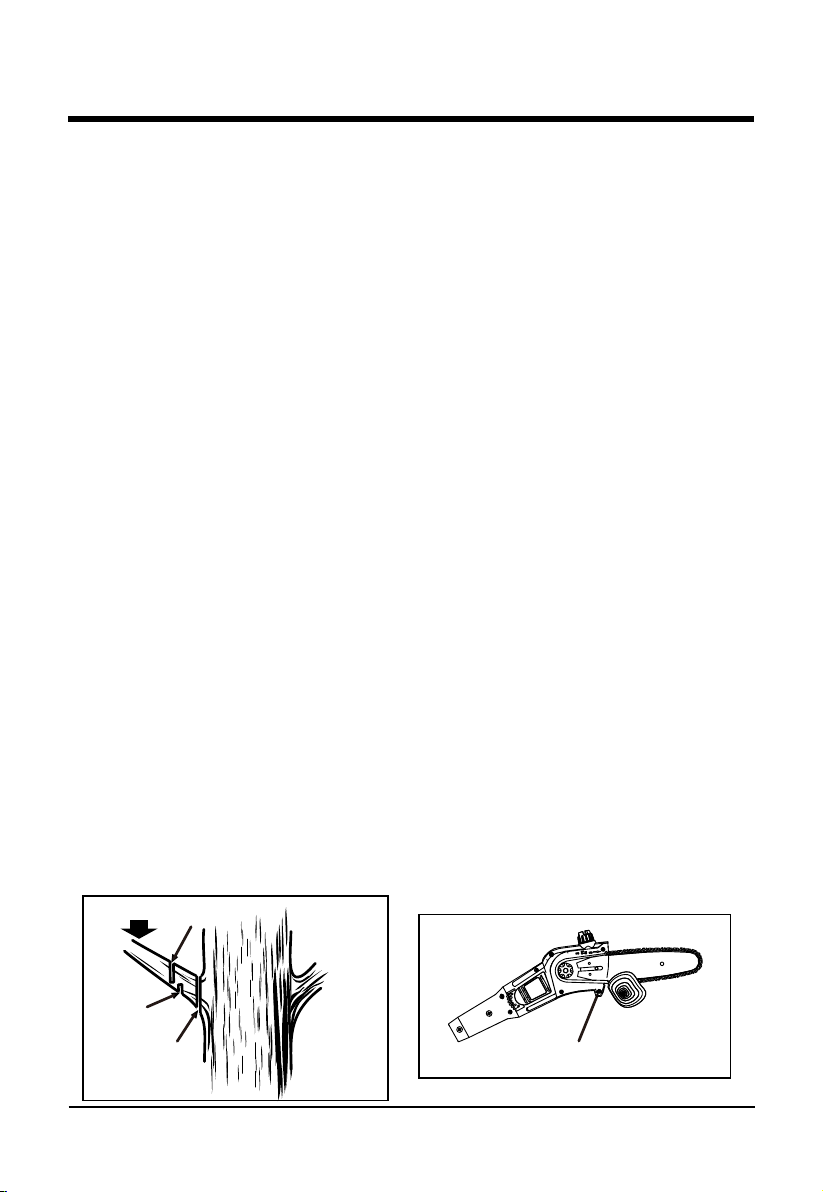
BASIC CUTTING PROCEDURE (FIG.10&11)
Follow the steps below to prevent damage to tree or shrub bark. Do not use a back-and-forth
sawing motion.
• Make a shallow rst cut (1/4 of limb diameter) on the underside of the limb close to the main
limb or trunk.
• Make a second cut from the top side of the limb outboard from the rst cut. Continue the cut
through the limb until the limb separates from the tree. Be prepared to balance the weight of
the tool when the limb falls.
• Make a nal cut close to trunk.
NOTE: For second and nal cuts (from top of limb or branch), hold front cutting guide against the
limb being cut. This will help steady the limb and make it easier to cut. Allow chain to cut for you;
exert only light downward pressure. If you force the cut, damage to the bar, chain, or motor can
result.
• Release the trigger as soon as the cut is completed.
Failure to follow proper cutting procedures will result in the bar and chain binding and becoming
pinched or trapped in the limb. If this should happen:
• Stop the motor and disconnect from power supply.
• If the limb can be reached from the ground, lift the limb while holding the saw. This should
release the “pinch” and free the saw.
• If the saw is still trapped, call a professional for assistance.
FIG.10
FIG.11
LOAD
Second Cut
First Cut
1/4 Diameter
Final Cut
Cutting Guide
Loading ...
Loading ...
Loading ...