Loading ...
Loading ...
Loading ...
11-Installation
NZ AU
26
11.1 Preparation
▶ Take the appliance out of the packaging.
▶
keep them out of childrens reach. While opening the package, water drops may be
seen on plastic bag and porthole. This normal phenomenon results from water tests
in the factory.
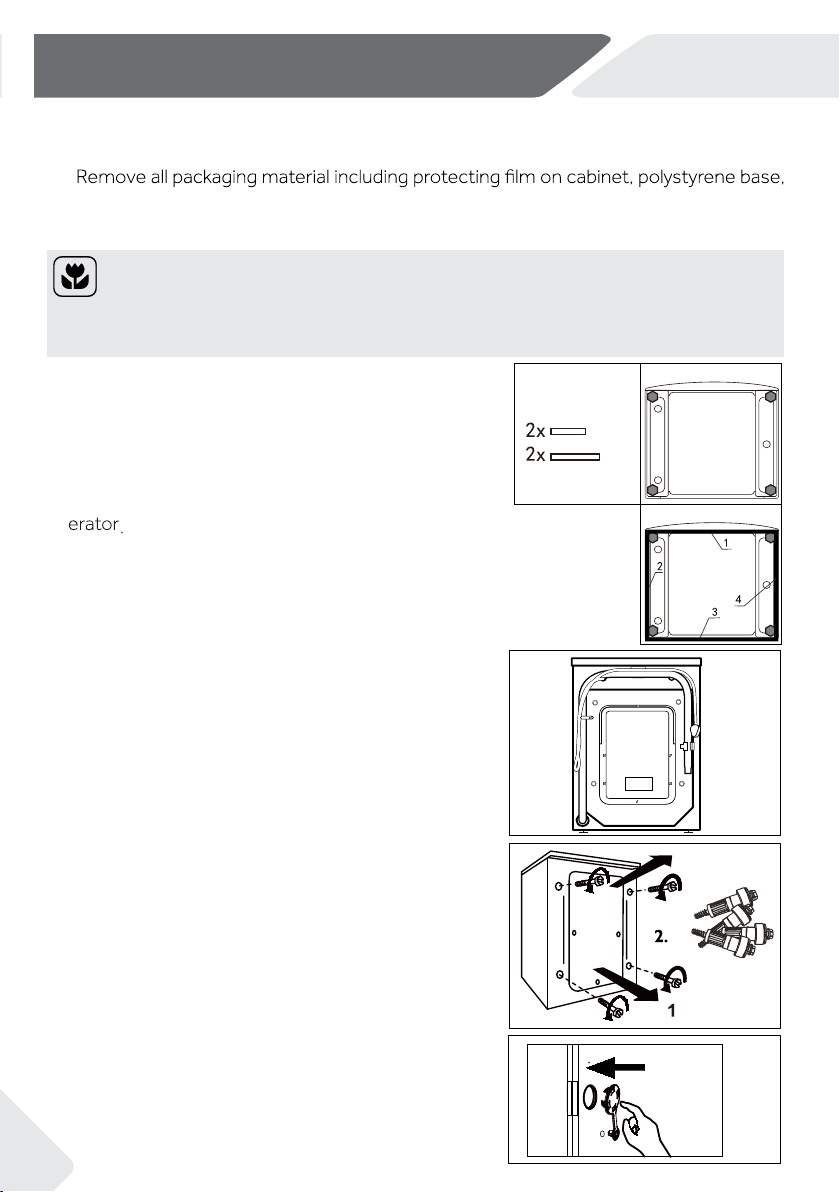
11.3 Dismantle the the transportation bolts
The transport protection on the rear side is designed
for clamping anti-vib ration components inside the ap-
pliance during transportation to prevent inner damage.
All elements (T1-T4, Fig. 11-2) must be removed before
use.
1.Remove all 4 bolts (T1 - T4) (Fig. 11-3).
(Fig. 11-4).
Note: Packaging disposal
Keep all packaging materials out of children´s reach and dispose them in an environmen-
tally friendly manner.
11.2 OPTIONAL: Install noise reduction pads
1.
2.
3.
11-1
11-2
11-3
1.When opening the shrink package,you will find four
noise reduction pads.These are used for reducing
noise(Fig. 11-1).
-trop ,edis sti ot nwod enihcam gnihsaw eht yaL .2
hole pointing upwards, bottom side towards op-
3.
Take out the noise reduction pads and remove the
double-sided adhesive protective film;
paste around
the bottom
;
the noise reduction pads under the w-
ashing machine cabinet as shown in Figure 3(two
longer pads in position 1 and 3, two shorter pads in
position 2 and 4). Finally set the machine upright again.
T1
T2
T3
T4
K eep the transportation bolts in a safe place for later use.
If the machine is to be moved to another location,replace
transportation bolts contrariwise to prvent damage.
2. Fill the transportation bolt holes with blanking plugs
General informa tion and tips:
11-4
Loading ...
Loading ...
Loading ...