Loading ...
Loading ...
Loading ...
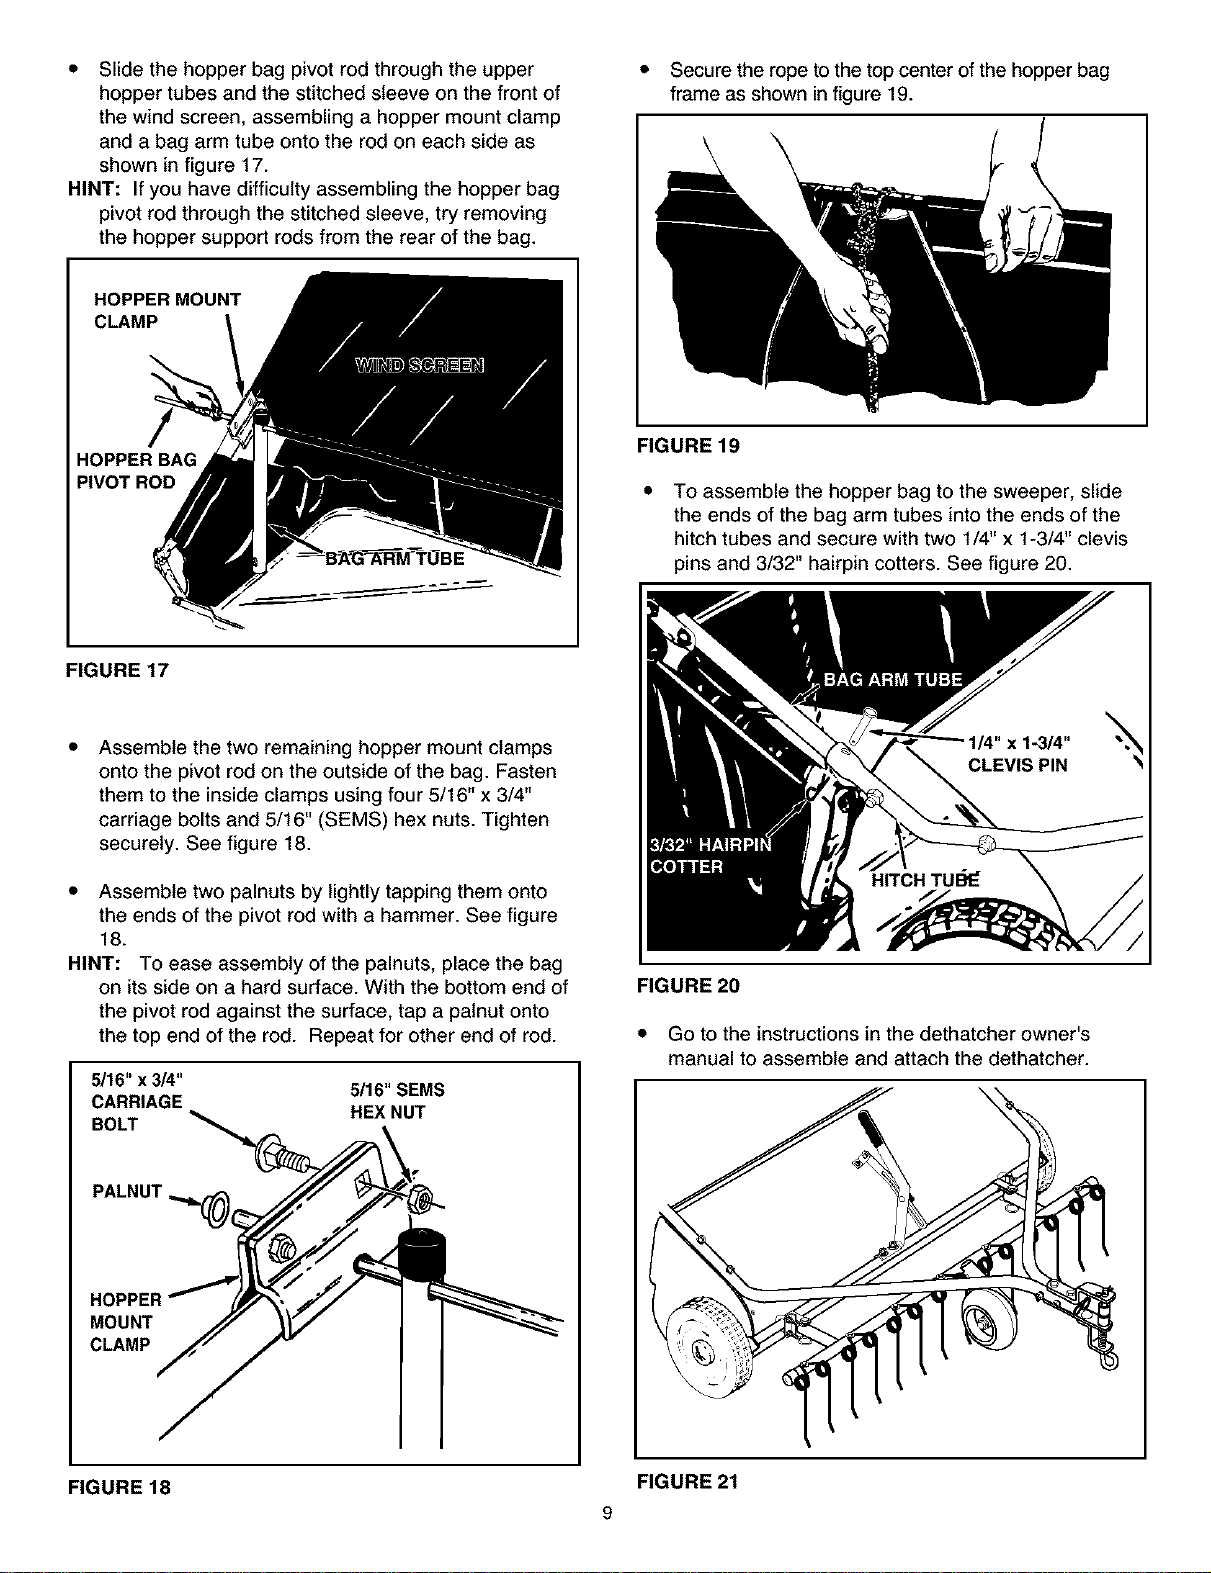
• Slidethehopperbagpivotrodthroughtheupper
hoppertubesandthestitchedsleeveonthefrontof
thewindscreen,assemblingahoppermountclamp
andabagarmtubeontotherodoneachsideas
showninfigure17.
HINT:Ifyouhavedifficultyassemblingthehopperbag
pivotrodthroughthestitchedsleeve,tryremoving
thehoppersupportrodsfromtherearofthebag.
• Securetheropetothetopcenterofthehopperbag
frameasshowninfigure19.
HOPPER MOUNT
CLAMP
HOPPER BAG
PIVOT ROD
FIGURE 19
• To assemble the hopper bag to the sweeper, slide
the ends of the bag arm tubes into the ends of the
hitch tubes and secure with two 1/4" x 1-3/4" clevis
pins and 3/32" hairpin cotters. See figure 20.
FIGURE 17
Assemble the two remaining hopper mount clamps
onto the pivot rod on the outside of the bag. Fasten
them to the inside clamps using four 5/16" x 3/4"
carriage bolts and 5/16" (SEMS) hex nuts. Tighten
securely. See figure 18.
• Assemble two palnuts by lightly tapping them onto
the ends of the pivot rod with a hammer. See figure
18.
HINT: To ease assembly of the palnuts, place the bag
on its side on a hard surface. With the bottom end of
the pivot rod against the surface, tap a palnut onto
the top end of the rod. Repeat for other end of rod.
5/16" x 3/4" 5/16" SEMS
CARRIAGE HEX NUT
BOLT
PALNUT
HOPPER
MOUNT
CLAMP
FIGURE 20
• Go to the instructions in the dethatcher owner's
manual to assemble and attach the dethatcher.
FIGURE 18 FIGURE 21
9
Loading ...
Loading ...
Loading ...