Loading ...
Loading ...
Loading ...
13
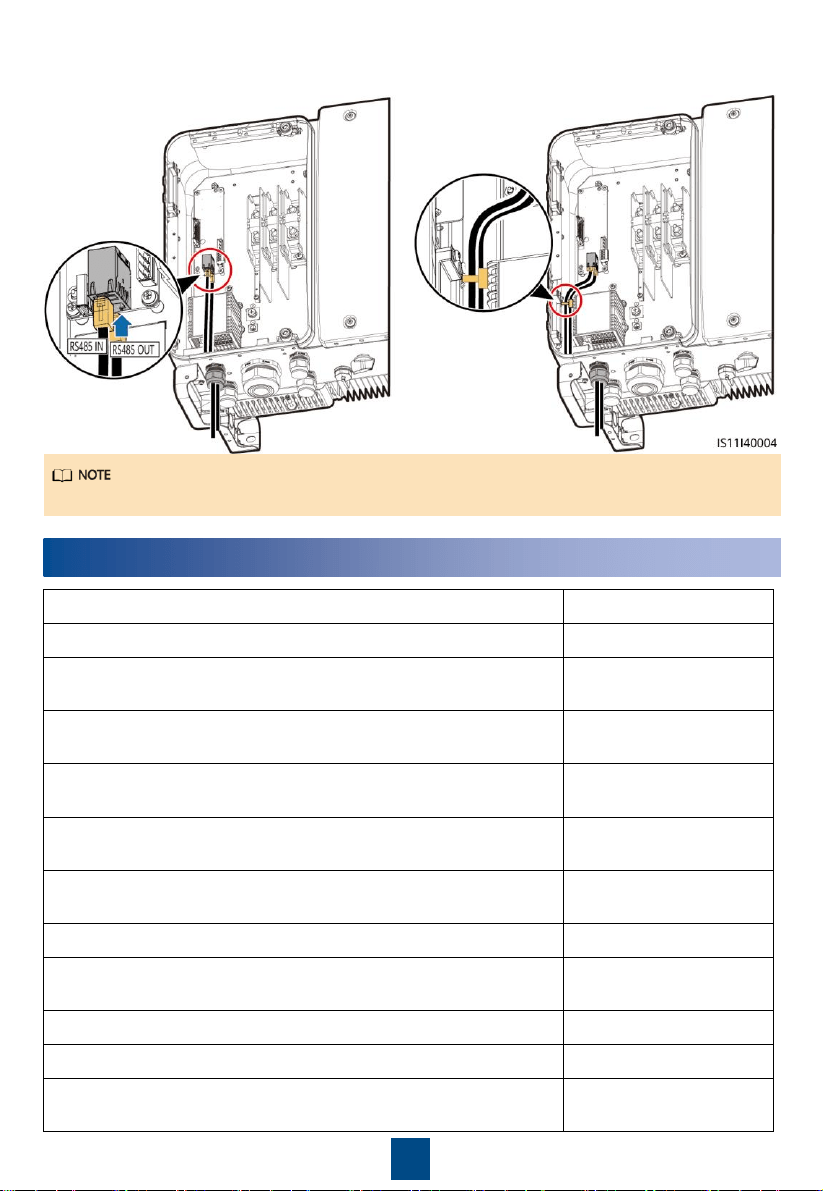
3. Insert the RJ45 connector into the RJ45 network
port in the SUN2000 maintenance compartment.
4. Bind the communications cable.
5. Tighten the thread-lock sealing nut and seal the cable gland.
Tie the communication cables with the cables on internal side of the maintenance compartment.
5
Verifying the Installation
1.
The SUN2000 is installed correctly and securely.
Yes
□
No
□
N/A
□
2.
The DC switches and downstream AC switch are OFF.
Yes
□
No
□
N/A
□
3. All ground cables are connected securely, without open circuits or
short circuits.
Yes
□
No
□
N/A
□
4.
AC output power cables are connected correctly and securely,
without open circuits or short circuits.
Yes
□
No
□
N/A
□
5.
DC input power cables are connected correctly and securely,
without open circuits or short circuits.
Yes
□
No
□
N/A
□
6.
The RS485 communications cable is connected correctly and
securely.
Yes
□
No
□
N/A
□
7.
Check that all used cable glands at the bottom of the enclosure
are sealed, and that the thread-lock sealing nut is tightened.
Yes
□
No
□
N/A
□
8.
The AC terminal cover is reinstalled.
Yes
□
No
□
N/A
□
9.
The maintenance compartment door is closed and the door
screws are tightened.
Yes
□
No
□
N/A
□
10.
Unused DC input terminals are sealed.
Yes
□
No
□
N/A
□
11.
Unused USB ports are plugged with watertight caps.
Yes
□
No
□
N/A
□
12.
Unused cable glands are plugged and the thread-lock sealing
nuts are tightened.
Yes
□
No
□
N/A
□
Loading ...
Loading ...
Loading ...