GEAppliances.com
©
LJ
c./3
Safety Im/ructions .............. :2-5
Operating Instructions
Broiling ......................... 14
Clock, Kitchen Timer and
Control i,ock ..................... 17
Convection Oven .............. 1.0-23
Roasting Guide ................. 23
Timed Features .............. 21, 22
Cookware ......................... 7
ix)wer Oven ..................... 13
Oven Controls ................ 10, 11
Probe ........................... 16
Sabbath Feature .................. 30
Self Cleaning ................. 26, 27
Slow Cook, Pizza
and Warming Features ......... 24-25
Special Features ............... 28--29
Surface Units ................... 6-9
Thermostat Adjustment--
Do It Yourself .................... 18
Timed Baking and
Roasting Features ................. 15
Upper Oven ..................... 12
Care and Cleaning ........... 31-37
Troubleshooting Tips. ........ 38-41
Accessories. ..................... 42
Consumer Support
Consumer Support ....... Back Cover
Warranty ........................ 43
PB970
PB975
PB976
Write themodelandserial
numbershere:
Model #
Serial#
You can find them on a label
behind the storage drawer
on the range flame.
49-80528-1 12-08Jfl
IMPORTANTSAFETYINFORMATION.
READALLINSTRUCTIONSBEFOREUSING.
WARNING!
For your safety, the information in this manual must be followed to minimize the risk of fire, electric
shock, or toprevent property damage, personal injury, or loss of life.
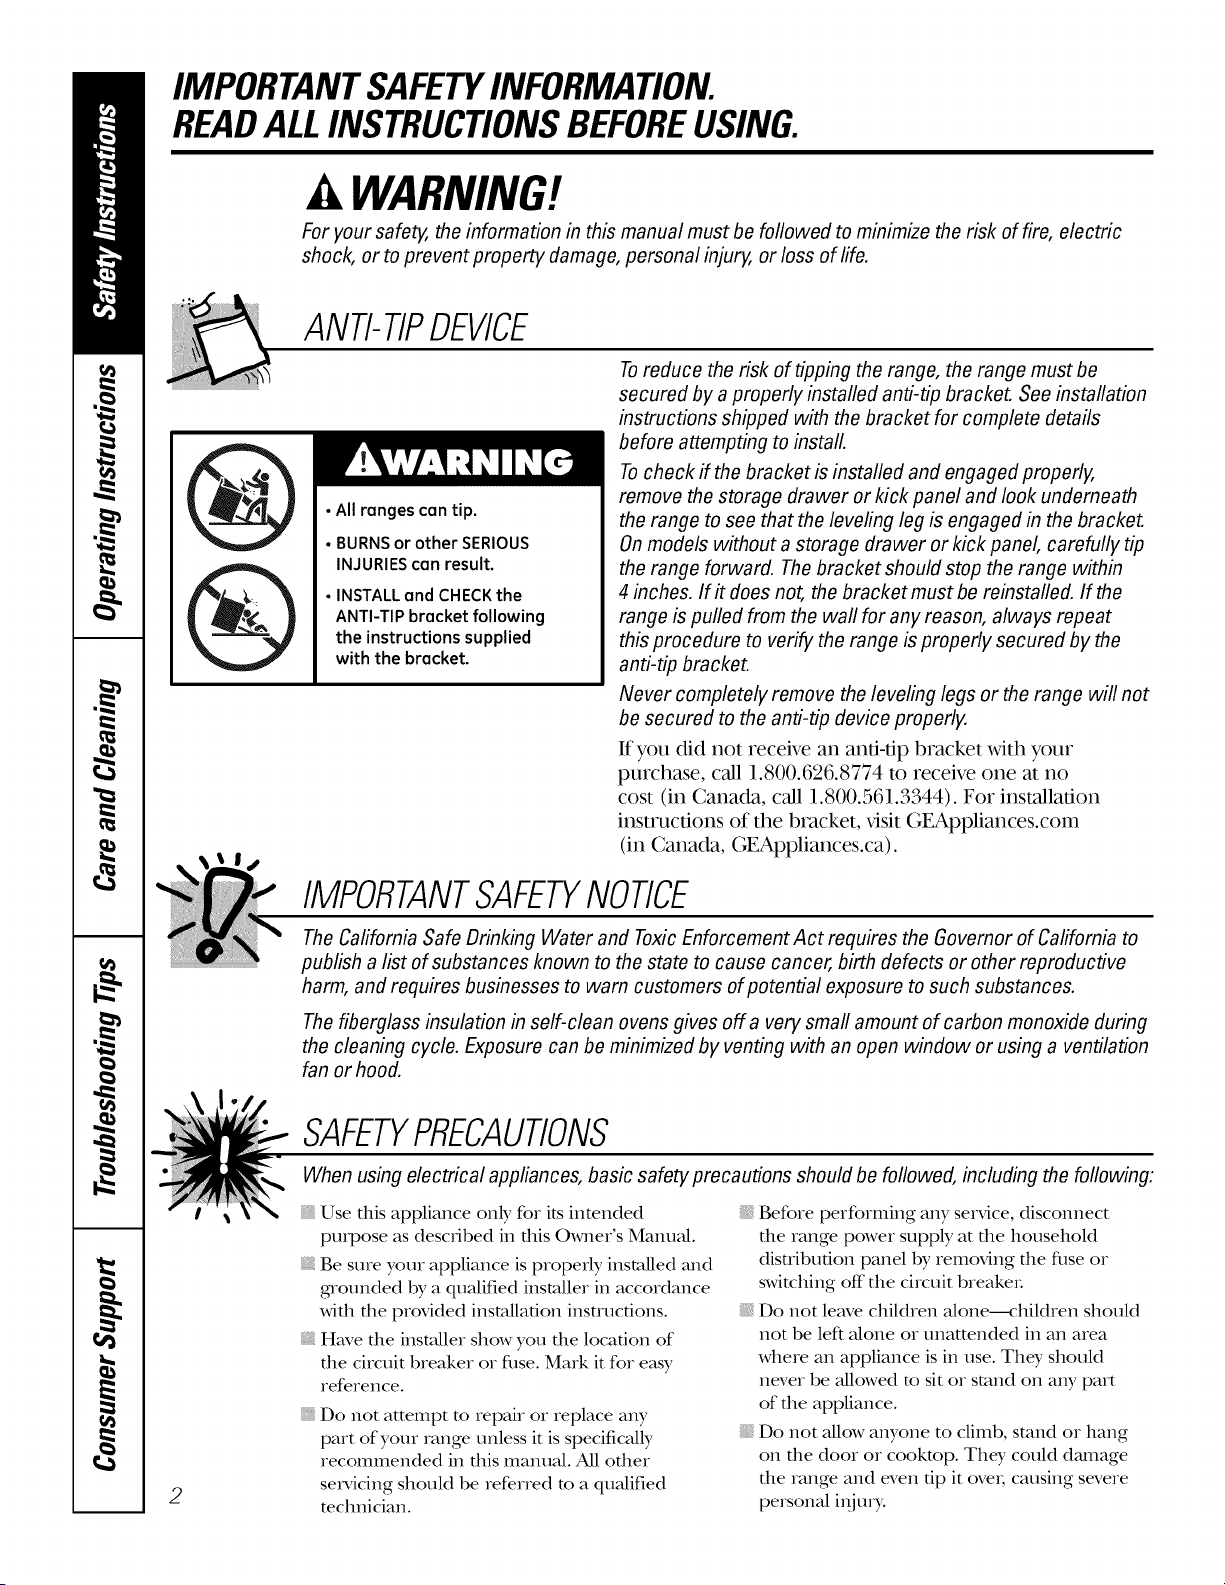
ANTI-TIPDEVICE
• All ranges can tip.
• BURNSor other SERIOUS
INJURIEScan result.
• INSTALLand CHECKthe
ANTI-TIP bracket following
the instructions supplied
with the bracket.
Toreduce the risk of tipping the range, the range must be
secured by a properly installed anti-tip bracket. See installation
instructions shipped with the bracket for complete details
before attempting to install.
Tocheck if the bracket is installed and engaged properly,
remove the storage drawer or kick panel and look underneath
the range to see that the leveling leg is engaged in the bracket.
On models without a storage drawer or kick panel, carefully tip
the range forward. The bracket should stop the range within
4 inches. If# does not, the bracket must be reinstalled. If the
range is pulled from the wall for any reason, always repeat
this procedure to verify the range is properly secured by the
anti-tip bracket.
Never completely remove the leveling legs or the range will not
be secured to the anti-tip device properly.
It you did not receive an anfi-dp bracket with your
purchase, call 1.800.626.8774 to receive one at 11o
cost (in Canada, call 1.800.561.3344). For installation
instructions of the bracket, x,isit GEAppliances.com
(in Canada, GEAppliances.ca).
IMPORTANTSAFETYNOTICE
The Cafifomia Safe Drinking Water and ToxicEnforcement Act requires the Governor of California to
publish a list of substances known to the state to cause cancer, birth defects or other reproductive
harm, and requires businesses to warn customers of potential exposure to such substances.
The fiberglass insulation in self-clean ovens gives off a very small amount of carbon monoxide during
the cleaning cycle. Exposure can be minimized by venting with an open window or using a ventilation
fan or hood.
2
SAFETYPRECAUTIONS
When using electrical appliances, basic safety precautions should be followed, including the following:
Use dais appliance only for its intended
propose as described in flds Owner's Manual.
Be sure your appliance is properly installed and
gnounded by a quMified installer in accordance
with the provided installation insmlcfions.
Have the installer show you the location of
the circuit breaker or filse. Mark it for easy
reference.
Do not attempt m repair or replace any
part of your range unless it is specificMly
recommended in rids malmal. All other
servicing should be referred m a qualified
mchnician.
Before performing any service, discolmect
the range power supply at the household
disnibufion panel by removing the fllse or
switching off"the circuit breakeL
Do not leave children alone--<:hildren should
not be left alone or unattended in an area
where an appliance is in use. They should
never be allowed m sit or stand on any part
of the appliance.
Do not allow anyone to climb, stand or hang
on the door or cooktop. They could dmnage
the range and even dp it oveL causing severe
personal i_ijmT.
GEAppliances.com
A WARNING!
SAFETYPRECAUTIONS
Do not operate the oven or cooktop controls if the glass is broken. Food splatter or cleaning solution
may penetrate a broken control panel or cooktop and create a risk of electrical shock. Contact a
qualified technician immediately should your glass control panel or cooktop become broken.
Do not store flammable materials in an oven
or near file cooktop.
CAUTION:Itemsofinterestto
children should not be stored in cabinets
above a range or on file back of a range--
children climbing on the range to reach items
could be seriously i_ijured.
Never wear loose-fitting or hangdng gamlents
while using the appliance. Be careflfl when
reaching for imms stored over the range.
Flammable mamrial could be ignited if
brought in contact with hot surface units or
heating elements and may cause severe burns.
Use only diT pot holdeis--moist or damp
pot holders on hot surfaces may result in
burns flom swam. Do not let pot holdeI_
much hot surface units or heating elements.
Do not use a towel or other bulky cloth in
place of pot holders.
Do not use wamr on gve_tsefires. Never pick
up a flaming pan. Turn the conuols off:
Smother a fl_uning pan on a surface unit
by covering the pan completely with
a well-fitting lid, cookie sheet or fiat nay.
Use a multi-purpose dxT chemical or
foam-type fire extinguisheL
Flaming grease outside a pan can be put
out by covering it with baking soda o_;if
available, by using a multi-purpose d_T
chemical or foam-type fire extinguisheL
Flame in file oven can be smofllered
complemly by closing die oven door and
turning the oven off" or by using a multi-
purpose dry chemic_d or foam-_,pe fire
exfinguisheL
For your safetT,never use your appliance
for wamfing or heating the room.
Do not let cooking grease or odler flammable
mamrials accumulam in or near the range.
Do not touch die surface units, die heating
elements or the inmrior surface of the oven.
These surfaces mW be hot enough m burn
even though they are dark in coloL During and
after use, do not touch, or let clothing or other
flammable materials contact the surface units,
areas nearby the surface units or any interior
area of the oven; allow sufficient time for
cooling first.
Pomnfially hot surfaces include die cookmp,
areas facing the cooktop, oven vent opening,
surfaces near the opening, crevices around the
oven dooL
REMEMBER:The inside surface of file oven
may be hot when the door is opened.
Do not store or use combustible mamrials,
gasoline or other flmmnable vapoI_ and liquids
in die vicinity of dfis or any odler appliance.
Keep file hood and grease filters clean
m mainmhl good venting and m avoid
grease fires.
Teach children not to play widl die conuols
or any other part of the range.
Ahvays keep dish towels, dish cloths, pot
holdets and other linens a safe distance
flom your range.
Ahvays keep wooden and plastic utensils and
canned food a safe distance from your range.
Ahvays keep combustible wall coverings,
curtains or drapes a safe distance flom
your range.
COOKMEATANDPOULTRYTHOROUGHLY...
Cookmeat andpoultrythoroughly--meat toat leastanINTERNALtemperatureof 160°Fandpoultrytoat least
an INTERNALtemperatureof 180°ECookingto thesetemperaturesusuallyprotectsagainstfoodbomeillness.
3
IMPORTANTSAFETYINFORMATION.
READALLINSTRUCTIONSBEFOREUSING.
RADIANTSURFACEUNITS
Useproper pan size--select cookware having flat bottoms large enough to cover thesurface unit heating
element.Theuseofundersized cookware will exposeaportion of thesurface unit todirect contact andmay
result in ignition of clothing. Proper relationship of cookware tosurface unit will also improve efficiency.
Never lem'e die surface units unattended at
high heat settings. Believers cause smoking
and greasy spillovers ttlat may catch on fire.
Only certain types of glass, gktssA:eramic,
earfllenware or other glazed containers are
suitable for cookmp setMce; ottlers may break
because of tile sudden change in mmpetaune.
To minimize tile possibilit T of burns, igmidon
of flammable mamrials and spillage, file handle
of a container should be atrned toward tile
center of file range without extending over
nearby surface units.
Always turn tile surface units off before
removing cookware.
When preparing flaming foods under tile
hood, utrn tile fan on.
Use care when touching the cookmp.
Tile _ass surface of tile cookmp will retain
heat after tile controls have been turned off:
Keep an eye on foods being flied at high or
medium high heat settings.
Foods for flying should be as dry as possible.
Frost on frozen foods or moisutre on flestl
foods can cause hot fat m bubble tap and
over the sides of the pan.
Use little fat for eft>clive shallow or deep
fat flTing. Filling the pan me fltll of fat can
cause spillovers when food is added.
If a combination of oils or fats will be used
in flTing, stir togettler before heating, or
as fats melt slowly.
Ah,vaysheat fat slowl); and watch as it heats.
Use a deep fat tllemlomemr whenever
possible m prevent overbearing fat beyond
the smoking point.
Avoid scratching tile glass cookmp. Tile
cookmp can be scratched with imms such
as sharp insmmlents, rings or otherjewehT,
and rivets on clottling.
Iarge scratches or impacts to glass doors or
cookmps can lead m broken or shattered glass.
Do not operate tile radiant surface units if tile
glass is broken. Spillovers or cleaning solution
may penetram a broken cookmp and cream a
risk of elecuical shock. Contact a qualified
technician immediamly should your glass
cookmp become broken.
Never use the glass cookmp surface as a
cutting board.
Do not place or store imms that can melt or
catch fire on file glass cooktop, even when it
is not being used.
Be carefltl when placing spoons or otller stirring
umnsils on glass cooktop surfi_cewhen it is in use.
Tile?, may become hot and could cause burns.
Clean tile cookmp with caution. If a wet
sponge or cloth is used to wipe spills on a hot
smTace unit, be careflfl m avoid steam burns.
Some cleaners can produce noxious flmles if
applied m a hot surface.
NOTE:We recommend that you avoid wiping
any surface unit areas undl tile?, have cooled
and file indicator light has gone off: Sugar
spills are the exception to this. Please see the
Cleaningtheglass cooktopsecdon.
When tile cooktop is cool, use only tile
CERAMA BRYTE®Ceramic Cookmp Cleaner
and file CERAMA BRYI'E Ceramic Cooktop
Cleaning Pad m clean the cookmp.
To avoid possible damage to file cooking
surface, do not apply cleaning cream m
the glass surfime when it is hot.
Aider cleaning, use a dtT cloth or paper towel
m remove all cleaning cream residue.
Read and follow all insnucdons and warnings
on the cleaning cream labels.
Do not use plastic wrap to cover food. Plastic
may melt Ohm tile surface and be vetT difficult
m remove.
4
GEAppliances.com
WARNING!
OVEN
Stand away from the range when opening the oven door. Hot air or steam which escapes can cause
bums to hands, face and/or eyes.
Do not heat unopened food containei_.
P_essu_e could build up and the containe_
could bu_st, causing an i_jm>
Keep the oven vent unobstructed.
Keep the oven flee flom g,re_ksebuildup.
Place the oven iack in the desired position
while the oven is cool. If iacks must be handled
when hot, do not let pot holder contact the
heating elements.
When using cooking or Ioasdng bags in the
oven, follow the manufactu_e_"s directions.
Pulling out the Iack m the stop-lock is a
convenience in lifting heax3,foods. It is also
a precaution against bums fiom touching
hot suefaces of the door o, oven walls.
Do not use the oven m dxT newspapers.
If ove_heamd, dley can catch on fiIe.
Do not use the oven foI a sm_age a_ea. Items
sm_ed in an oven can igmim.
Do not leave papeI products, cooking umnsils
or food in the oven when not in use.
Do not use aluminum foil m line oven bottoms,
except as suggested in this manual. Imp_ope_
installation of aluminum foil may result in a
_-iskof elecwic shock o_ fire.
SELF-CLEANINGUPPEROVENANDLOWEROVEN
Do not use oven cleaners. No commercial oven cleaner or oven liner protective coating of any kind
should be used in or around any part of the oven. Residue from oven cleaners will damage the inside
of the oven when the self-clean cycle is used.
Do not clean the doo_ gasket. The dooI gasket
is essential fo, a good seal. Ca_e should be
token not m _t]b, damage o_ move the gasket.
BefoIe self-cleaning the oven, _emove shin>
silve_-coloIed oven _acks (on some models)
and all otheI cookwme.
G_ay poicelain-coated oven Iacks (on some
models) mW be cleaned in the oven du_ing
the self-clean cycle.
Be suie m Mpe up excess spillage befo_e
starting the self-cleaning operation.
If the self-cleaning mode malfimcdons, mm
the oven off and disconnect the power supply.
Have it serviced by a qualified technician.
Clean only pa_ts listed in this Owne_"s Manual.
READANDFOLLOWTHISSAFETYINFORMATIONCAREFULLY.
SAVETHESEINSTRUCTIONS
5

Aboutthe radiantsurface units.
NOTE:Throughoutthis manual,featuresand appearancemay varyfromyourmodel
SURFACE %_
_OOKING _
Never cook flirecfly on the glass,
Always use cookware,
Always place the pan in the center of
the surface unit you are cooking on,
IIIIIIII ............
Do not stifle cookware across the
control or cooktop surface because it
can scratch theglass. Theglass is
scratch-resistant, not scratchproof.
About the radiant surface units
The xadiant cooktop feaulies heating
units behead1 a smoodl glass surface.
Gooktop temperatures increase with
die number of suxface units that axe
on. _qth 3 or 4 units m_ned on, su_face
mmperamres aie high. Always use
caudon when touching the cookmp.
An indicami light will come on when the
su_face unit is m_ned on.
The appiopfiate HOTSURFACEindicator
light will glow when its corresponding
radiant element is turned on and will
remain on until the surface has cooled
below 150°E
NOTE'.
Hot surface indicator light will:
"_,Comeonwhenthesurfaceunitis
turnedon.
Stayonevenaftertheunitisturnedoff.
glowbrightlyuntiltheunithascooled
below150°F.
NOTE:A slightodorisnormalwhenanew
co&topisusedforthefirsttime.It iscausedby
theheatingofnewpartsandbsulatingmaterials
andwilldisappearb ashorttime.
NOTE:Onmodelswithlight-coloredglass
cooktops,itisnormalforthecookingzonesto
changecolorwhenhotorcoolingdown.Thisis
temporaryandwilldisappearastheglasscools
toroomtemperature.
It is safe to place hot cookware flom die
oven oI su_face on the glass cookmp
when the surface is cool.
Even after die su_face units a_e tinned
off, the glass cooktop retains enough
heat m continue cooking. To avoid
overcooking, remove pans flom the
surface units when the food is cooked.
Avoid placing anything on the suIface
unit un61 it has cooled complemly.
Waterstains(mineraldeposits)areremovable
usingthecleaningcreamorfurlstrengthwhite
vinegar
, Useofwindowcleanermayleaveaniridescent
filmonthecooktop.Thecleanbgcreamwifl
removethisdiscoloration.
, Don'tstoreheavyitemsabovethecooktop.
If theydropontothecooktop,theycancause
damage.
, Donotusethesurfaceasacuttingboard.
Temperature Limiter
Every radiant surface unit has a
mmpe_ature limim_.
The mmpe_atme limim_ promcts the
glass cookmp flom getting too hot.
The mmperamre limimr may cycle die
units off for a time if:
Thepanboilsdry.
Thepanbottomisnotflat.
Thepanisoffcenter
Thereisnopanontheunit.
6
Selectingtypesofcookware. OEApp,a,oes.oom
The following information will help you choose cookware which will give good performance on glass cooktops.
(i/i i ¸¸
iiiii_ iiiii!iii
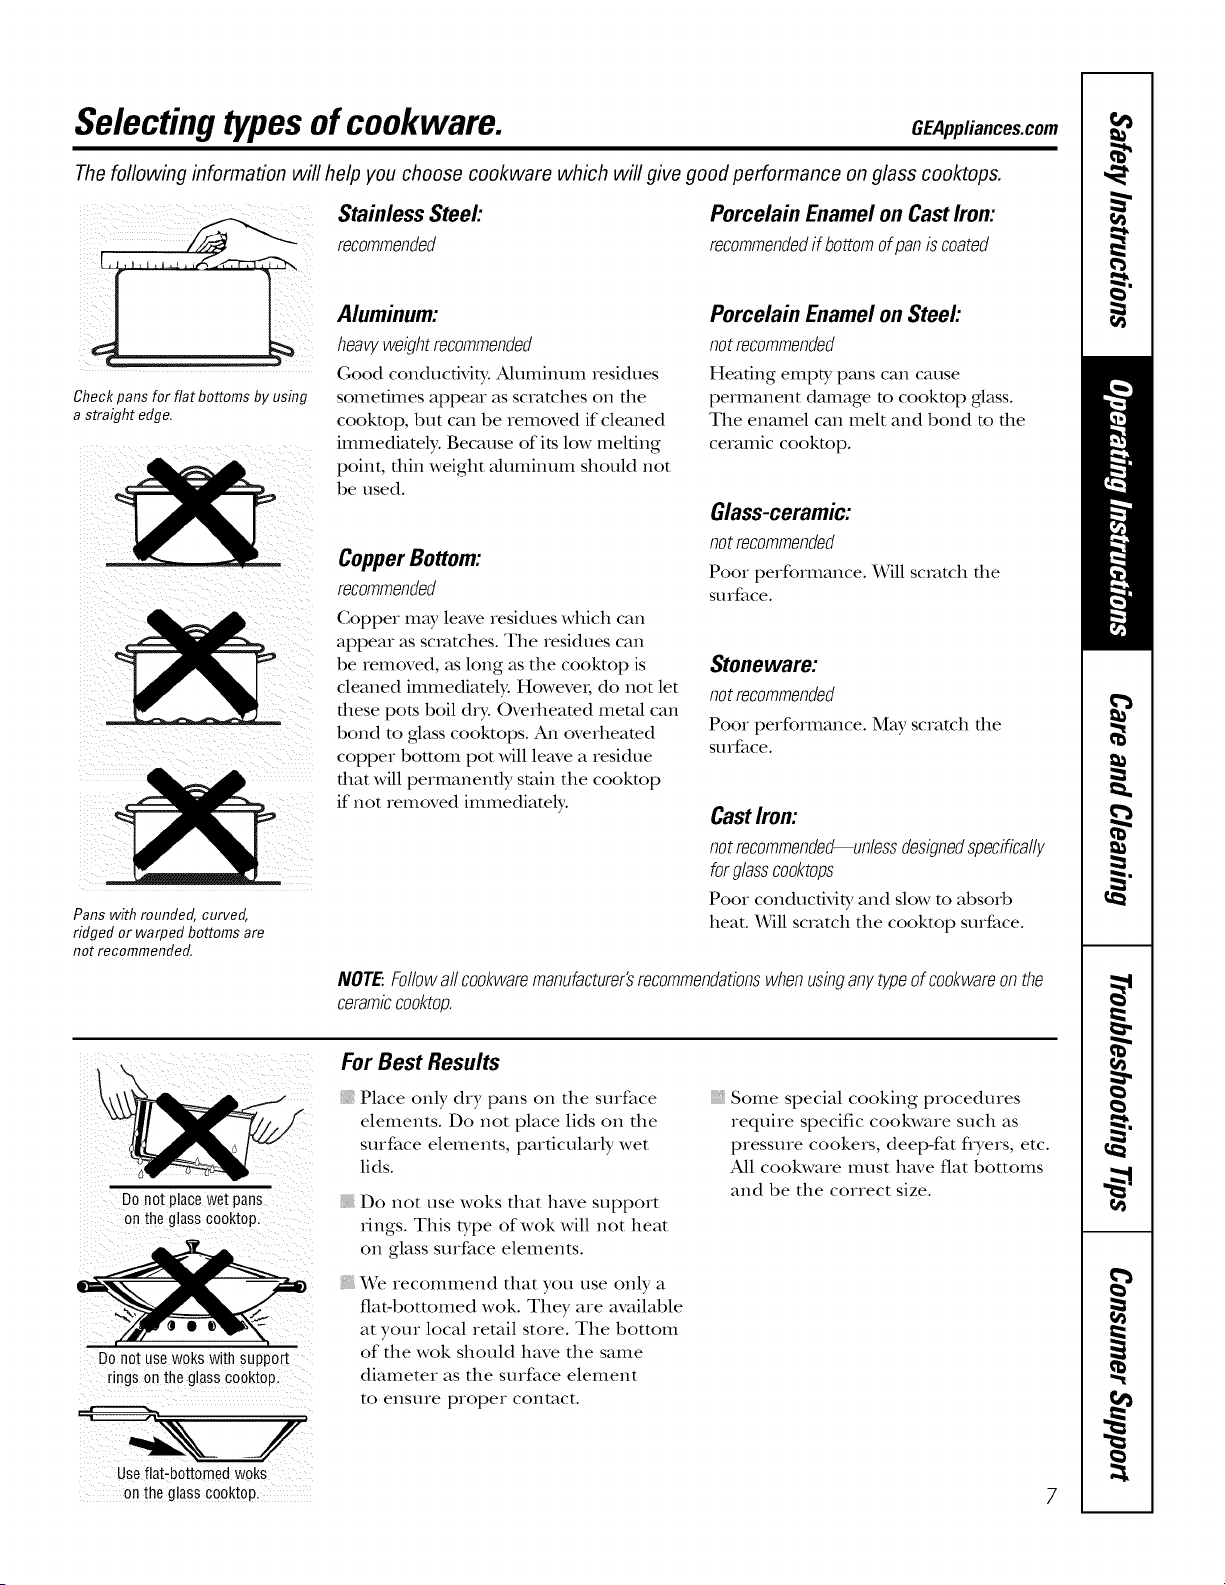
Check pans for flat bottoms by using
a straight edge.
Pans with rounded, curved,
ridged or warped bottoms are
not recommended.
Stainless Steel:
recommended
Porcelain Enamel on Cast Iron:
recommendedif bottomofpaniscoated
Aluminum:
heavyweight recommended
Good conductMty. Aluminum residues
sometimes appear as scratches on tile
cookmp, but call be removed if cleaned
immediately: Because of its low melting
point, thin weight aluminum should not
be used.
CopperBottom:
recommended
Copper may leave residues which call
appear as scratches. Tile residues call
be removed, as long as tile cooktop is
cleaned immediately. Howevei, do not let
these pots boil dry. Overheamd metal call
bond to glass cooktops, zMl overheamd
copper bottom pot will leave a residue
that will permanently stain tile cookmp
if not removed immediamly.
Porcelain Enamel on Steel:
not recommended
Heating empty pans call cause
permanent damage m cookmp glass.
Tile enamel call melt and bond m the
ceramic cookmp.
Glass-ceramic:
not recommended
Pool performance. Will scratch file
soIface.
Stoneware:
not recommended
Pool performance. May scratch file
soIface.
Cast Irom
not recommended--unless designedspecifically
forglassco&tops
Pool conductivib_ and slow to absorb
heat. Will scratch tile cooktop surface.
NOTE:Followallcookwaremanufacturer'srecommendationswhenusbganytypeofcookwareonthe
ceramiccooktop.
I,
Donotplacewetpans
ontheg!asscooktop.
DOnotusewokswith support
ringsonthe glasscooktop.
For Best Results
Place only dry palls on tile surface
elements. Do not place lids on tile
surface elements, particularly wet
lids.
{ Do not use woks that have support
rings. This type of wok will not heat
on glass surface elements.
We recommend that you use only a
fiat-bottomed wok. They are available
at your local retail store. Tile bottom
of tile wok should have tile same
diameter as tile surface element
to ensure proper contact.
, Some special cooking procedures
require specific cookware such as
pressure cookers, deep-fat flyers, etc.
All cookware itlust have fiat bottoiIls
and be tile correct size.
Use flat-bottomed woks
onthe glass cooktop_ 7
Usingthesurface units.
4 6
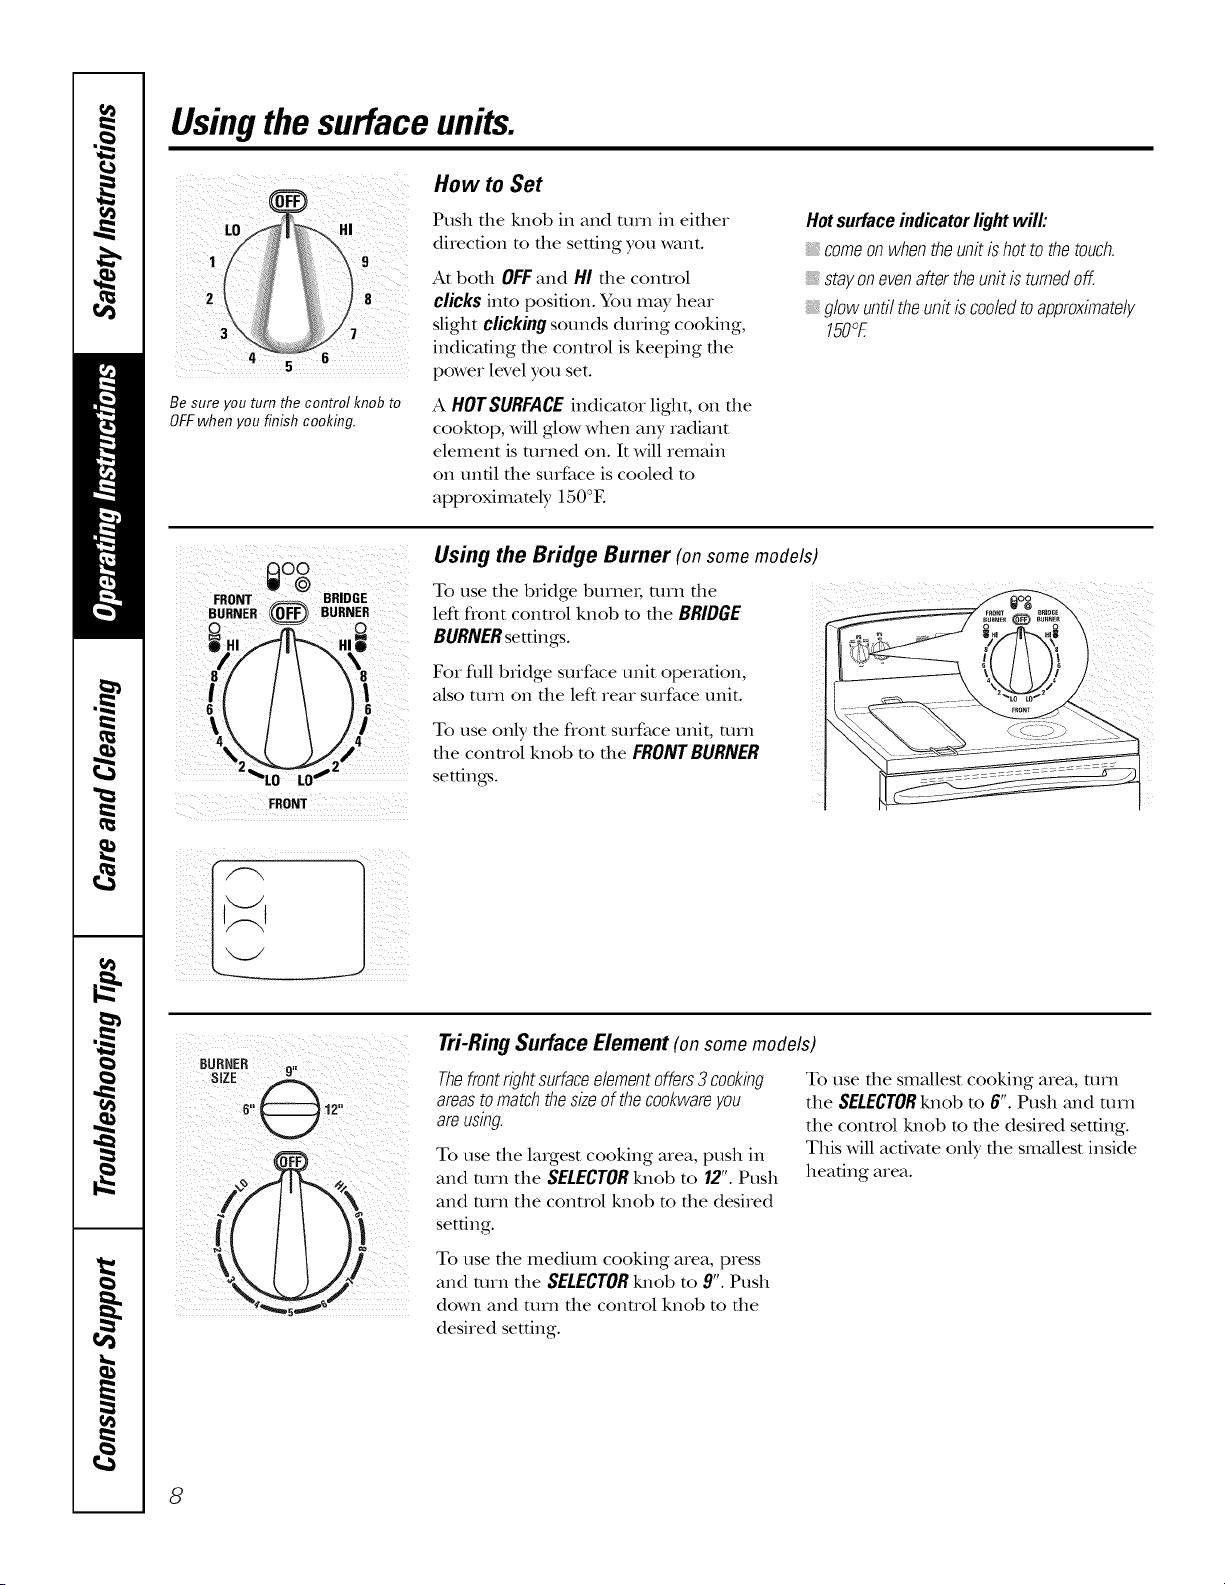
Be sure you turn the control knob to
OFFwhen you finish cooking.
How to Set
Push the !ulob in and turn in ekher
direction to the setting you want.
At both OFFand HI the conuol
clicks into posi6on. You may hear
slight clicking sounds during cooking,
indicating the conuol is keeping the
power level you set.
A HOTSURFACEindicator light, on file
cookmp, will glow when any radiant
element is turned on. It will remain
on until the surface is cooled m
approximately 150°E
Hotsurfaceindicatorlightwill:
: comeonwhentheunitishottothetouch.
stayonevenaftertheunitisturnedoff.
glowuntiltheunitiscodedtoapproximate/;/
150°E
FRONT
Using the Bridge Burner (on some models)
To use the bridge burnei; turn the
left flont conuol knob m the BRIDGE
BURNERsettings.
For flfil bridge surface unit operation,
also mrn on the left rear surface unit.
To use only the flont surface unit, turn
tile control knob to tile FRONT BURNER
settings.
/I
Tri-Ring Surface Element (on some models)
Thefrontrightsurfaceelementoffers3 cookbg
areastomatchthesizeofthecookwareyou
areusbg.
To use the laIgest cooking area, push in
and mrn the SELECTORlulot) to 12".Push
and mrn the control knot) to the desired
setdng.
To use the medium cooking area, press
and mrn the SELECTORlmob to 9".Push
down and ttlln the control knob to the
desired setting.
To use die smallest cooking area, turn
the SELECTORknob m 6". Push and mrn
the control lmob m the desired setting.
This will activate only tile sm;dlest inside
headng area.
8
GEApplianees.com
0%
OFF
WARMING ZONE
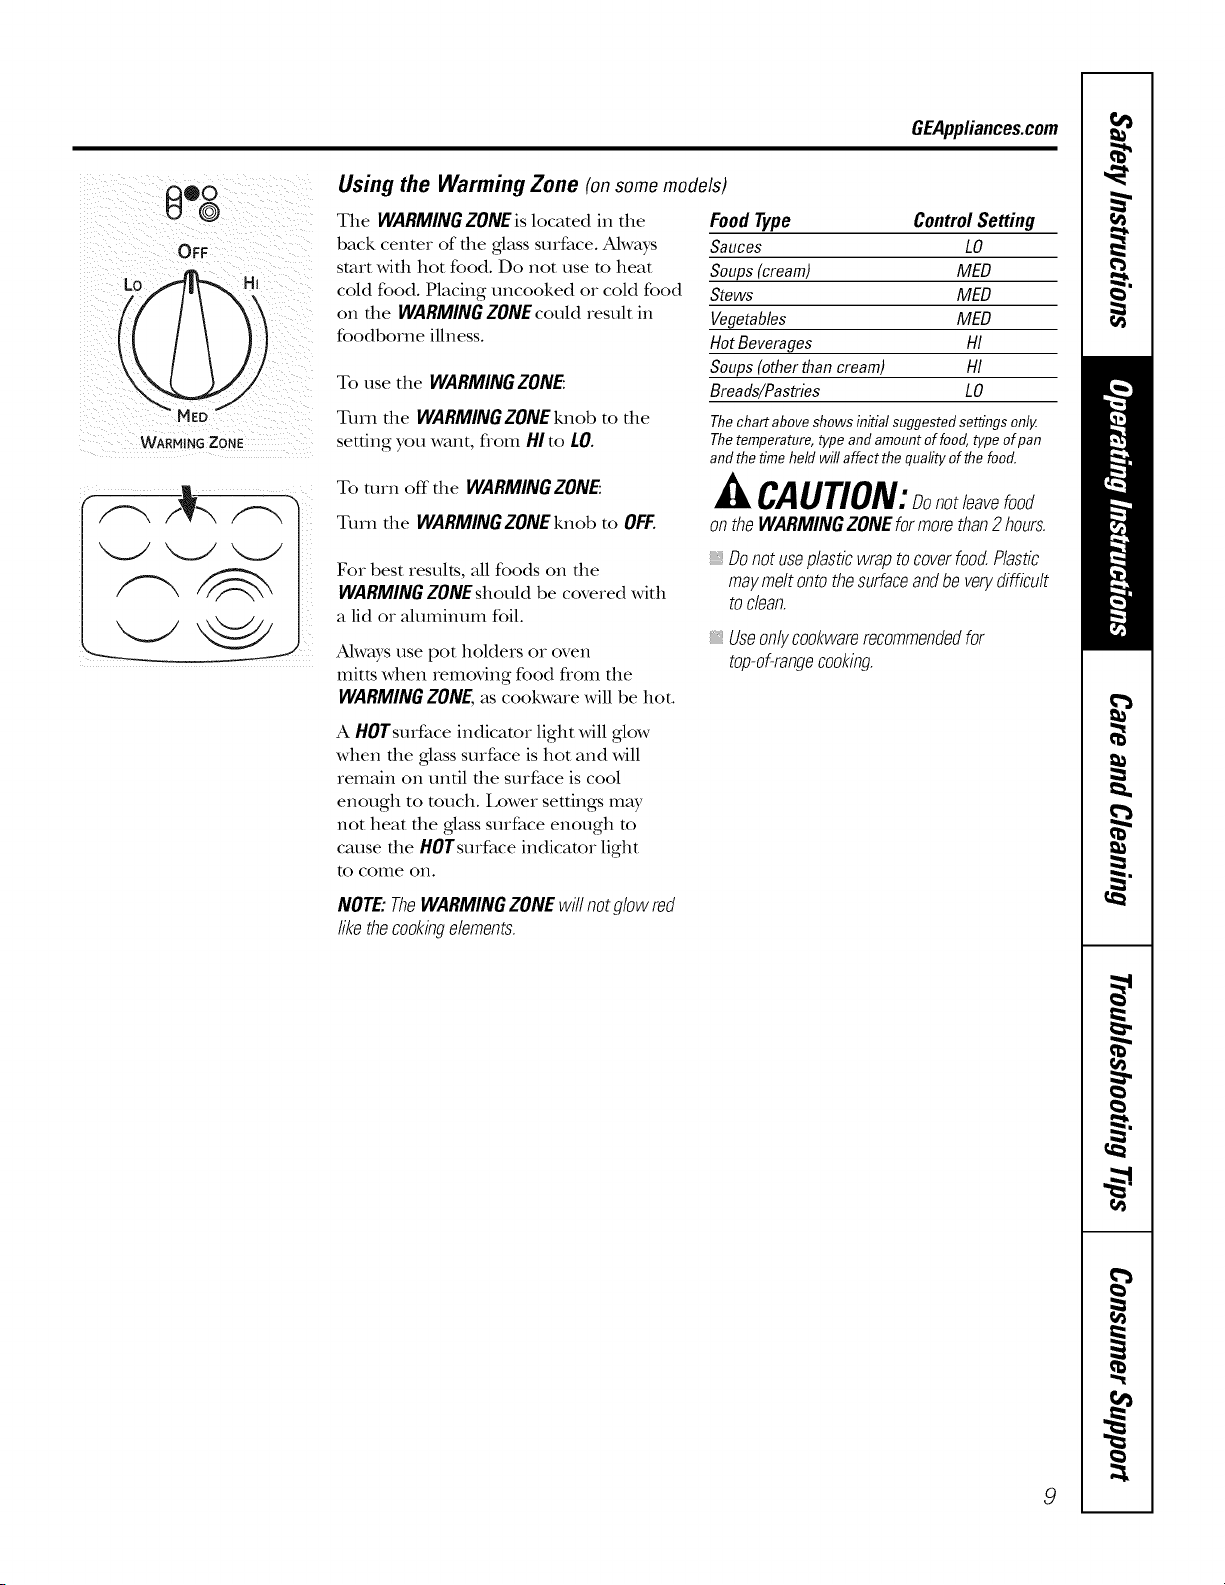
Using the Warming Zone (on some models)
The WARMINGZONEislocated in die
back centeR of die glass surface. Always
start wifll hot food. Do Riot use to heat
cold food. Placing uncooked or cold food
on die WARMINGZONEcould result in
foodborne illness.
To use the WARMING ZONE:
Turn the WARMING ZONE knob to the
setting you want, flonl HIto LO.
To mrn off the WARMINGZONE:
Turn the WARMINGZONEknob to OFF.
Food Type Control Setting
Sauces LO
Soups(cream) MED
Stews MED
Vegetables MED
HotBeverages HI
Soups (otherthan cream) HI
Breads/Pastries LO
Thechartabove showsinitial suggested settingsonly.
Thetemperature,type and amountof food, type ofpan
andthe time held will affect the quality ofthe food.
CAUTION:Donotleavefood
ontheWARMINGZONEformorethan2 hours.
For best results, all foods on the
WARMINGZONEshould be covered with
a lid or ahmlinum foil.
Always use pot holders or oven
mitts when Removing food flom the
WARMING ZONE, as cookware will be hot.
A HOTsurface indicator light will glow
when die glass surface is hot and will
remain on until the surface is cool
enough to much. l,ower settings RnW
not heat the glass surface enough m
cause the HOTsurface indicator light
to colIle ORI.
Donotuseplasticwraptocoverfood.Plastic
maymeltontothesurfaceandbeverydifficult
toclean.
_,Useonlycookwarerecommendedfor
top-of-rangecooking.
NOTE:TheWARMINGZONEwillnotglowred
likethecookbgelements.
9

Usingthe ovencontrols.
NOTE:Throughoutthismanual,featuresandappearancemayvary fromyourmodel.
FmeaaytUraerSyandappe
UpP,:dOv,:NI
_ SETTINGS
OvenControl,
0
0
@
@
0
0
-- TrueTemp
FqFqsqFqD
%Fq %D
ClockandTimerFeaturesandSettings
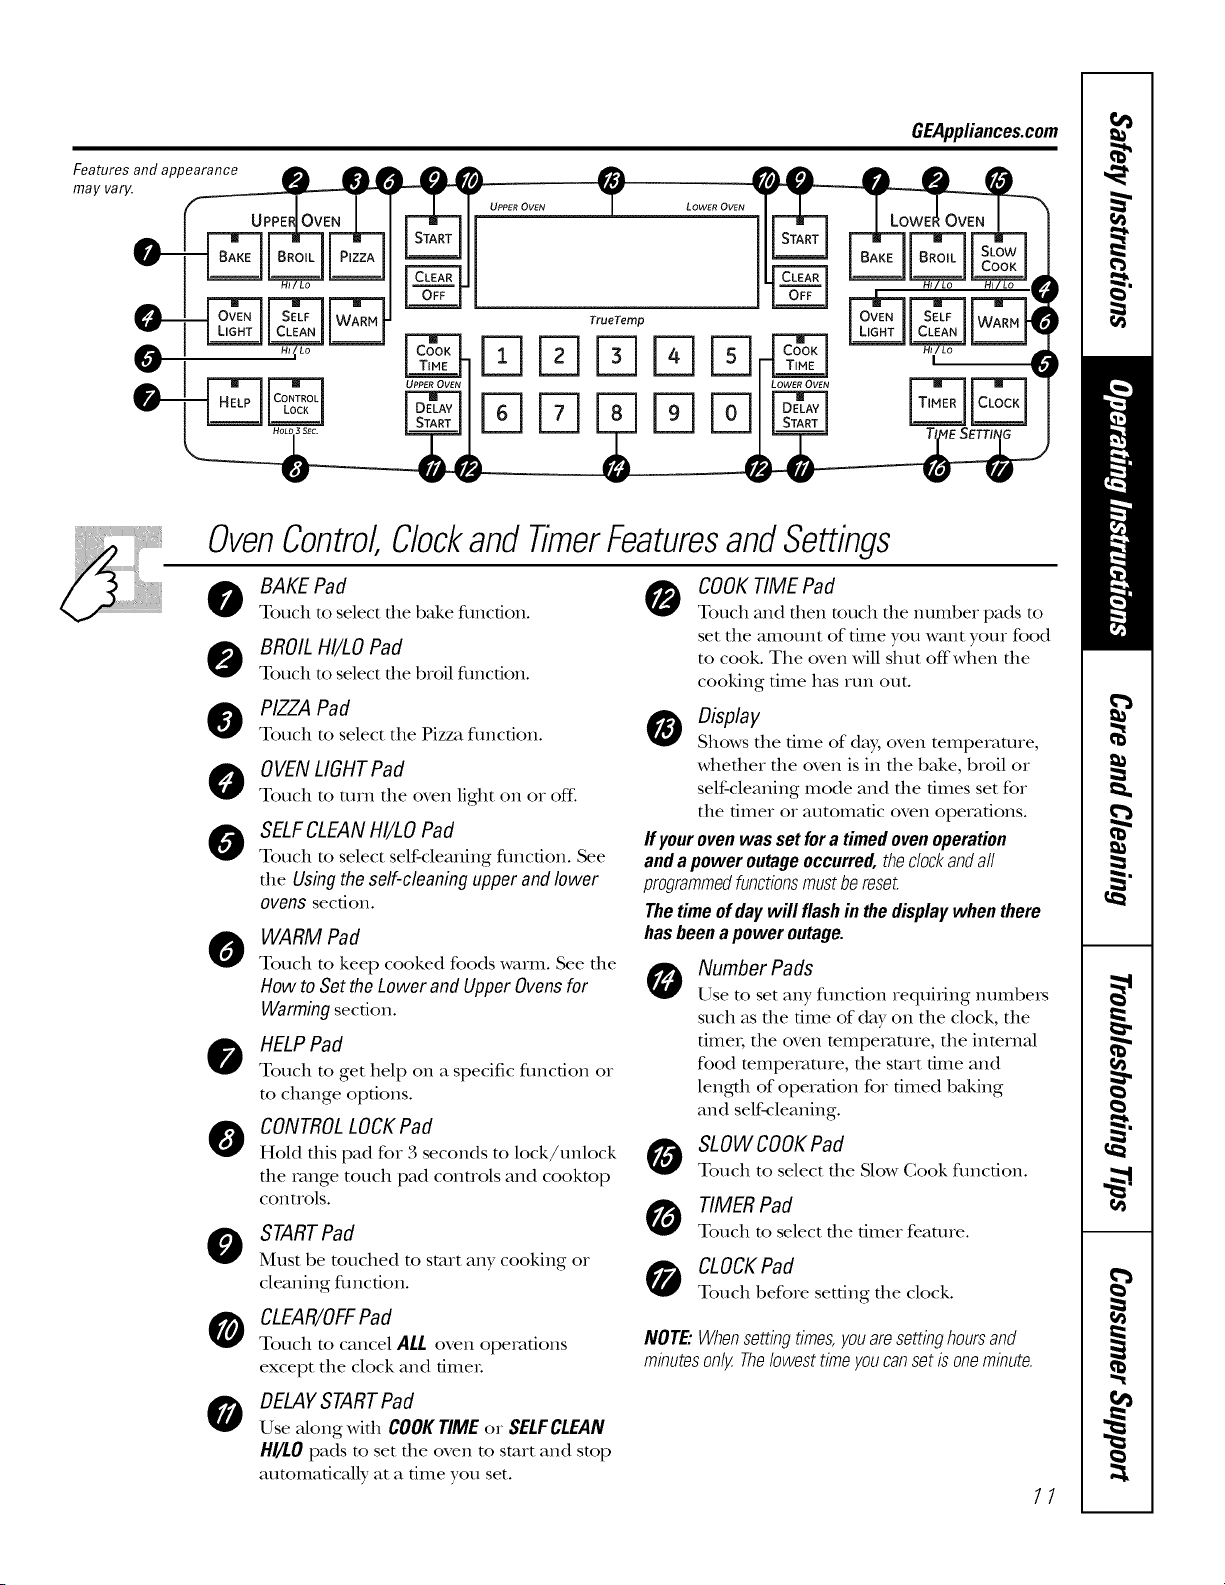
BAKE Pad
Touch to select the bake fimcfion.
BROILHI/LO Pad
Touch to select the broil fimcfion.
PIZZA Pad
Touch to select the Pizza fimcfion.
0 VENLIGHTPad
Touch to turn tile oven light on or off:
SELFCLEANHI/LO Pad
Touch to select self-cleaning function. See
tile Using the self-cleaning upper and lower
ovens section.
WARM Pad
Touch to keep cooked foods warm. See tile
How to Set the Lower and Upper Ovens for
Warming secdon.
HELPPad
Touch to get help on a specific fimcdon or
to change options.
TIMER/CLOCKPad
Touch to select tile timer feature or to set
tile clock. Touch once for fimeL Hold for
3 seconds to set clock.
O
CONTROLLOCKPad
Hold this pad for 3 seconds to lock/unlock
the range touch pad conuols and cooktop
controls.
STARTPad
Must be touched to start any cooking or
cleaning fimcfion.
CLEAR/OFFPad
Touch to cancel ALL oven operations
except tile clock and fimeL
,o 0
DELAYSTARTPad
Use along with COOKTIMEor
SELFCLEANHI/LO pads to set tile oven
to start and stop automatically at a time
yOtl set.
O
COOKTIME Pad
Touch this pad alld then totlch the ntlnlber
pads to set tile amount of time you want
your food m cook. Tile oven will shut off"
when tile cooking time has mn out.
0 Display
Shows tile time of da), oven temperature,
whefller file oven is in file bake, broil or
self-cleaning mode and the times set for
tile timer or automatic oven operations.
Number Pads
Use to set ;-:myfunction requi_ing numbei_
such as the time of d W on the clock, the
fime_, tile oven mmperature, tile inmrnal
food mmpemture, the start time and
length of operation for timed baking
and self-cleaning.
If your oven was set for a timed oven operation
and a power outage occurred, the dock andall
programmedfunctions mustbereset.
The time of day will flash in the display when there
has been a power outage.
CONVECTIONBAKE Pad
Touch to select baking with tile convection
flmcfion.
CONVECTIONROAST Pad
Touch to select roasting with tile
convection fimcdon.
SLOWCOOKPad
Touch to select tile Slow Cook function.
PROBEPad
Touch when using tile probe to cook food.
NOTE:Whensettbgtimes,youaresettbghoursand
mbutesonly.Thelowesttimeyoucansetisonembute.
GEAppliances.com
_ _ TrueTemp
l ITIITI
I
i
OvenControl,ClockandTimerFeaturesandSettings
0
0
@
0
0
0
BAKE Pad
Touch to select the bake fimcfion.
BROILHI/LO Pad
Touch to select the broil fimcfion.
PIZZA Pad
Touch to select the Pizza fimcfion.
0 VENLIGHTPad
Touch to mm tile oven light on or off.
SELFCLEANHI/LO Pad
Touch to select self-cleaning fimcfion. See
the Usingtheself-cleaningupperandlower
ovens section.
WARM Pad
Touch to keep cooked foods warm. See the
How toSettheLower andUpperOvensfor
Warmingsection.
HELPPad
Touch to get help on a specific fimcdon or
to change options.
CONTROLLOCKPad
Hold this pad for 3 seconds to lock/unlock
the range touch pad controls and cooktop
controls.
STARTPad
Must be touched to start any cooking or
cleaning fimcfion.
CLEAR/OFFPad
Touch to cancel ALL oven operations
except the clock and fimeL
0
COOKTIME Pad
Touch and then touch the number pads to
set the amount of time you want your food
to cook. The oven will shut off when the
cooking time has mn out.
0 Display
Shows the time of day, oven temperature,
whether the oven is in the bake, broil or
self-cleaning mode and the times set for
the timer or automatic oven operations.
If yourovenwas set fora timed ovenoperation
andapoweroutageoccurred,thedockandall
programmedfunctionsmustbereset.
Thetimeof daywill flashin thedisplaywhenthere
hasbeenapoweroutage.
0
Number Pads
Use to set any function requi_ing numbe_
such as the time of d W on the clock, the
fime_; the oven temperature, the internal
food temperature, the start time and
length of operation for timed baking
and self-cleaning.
SLOWCOOKPad
Touch to select the Slow Cook function.
TIMER Pad
Touch to select tile timer feature.
CLOCKPad
Touch before setting tile clock.
NOTE:Whensettbgtimes,youaresettbghoursand
mbutesonly.Thelowesttimeyoucansetisonembute.
0
DELAYSTARTPad
Use along widl COOKTIMEor SELFCLEAN
HI/LOpads to set the oven to start and stop
automatically at a time you set.
11
Usingthe upperoven.
Toavoid possible bums, place the racks in the desired position before you turn the oven on.
7 )
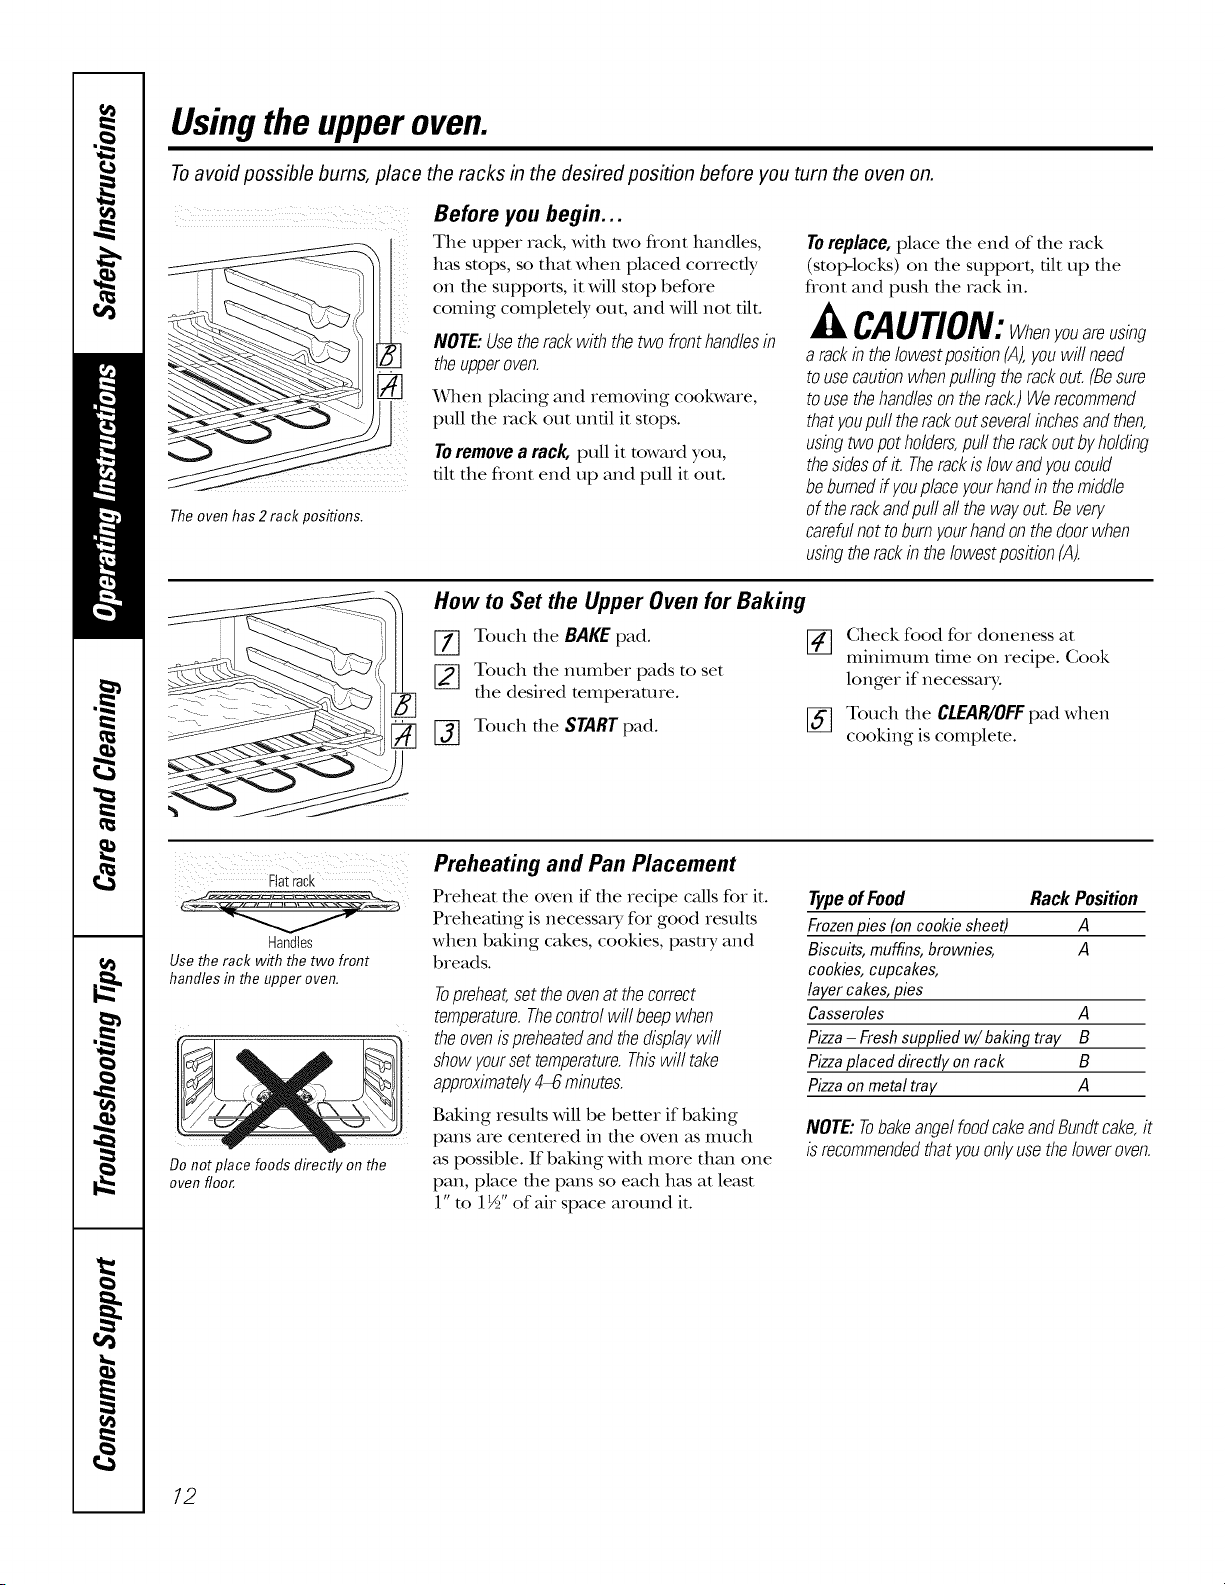
Theoven has 2 rack positions.
Before you begin...
The upper rack, with two front handles,
has stops, so that when placed correctly
on the supports, it will stop before
coming completely out, and will not flit.
NOTE:Usetherackwiththetwo fronthandlesin
theupperoven.
When placing and removing cookware,
pull fl_e _v_ckout unfll it stops.
Toremovea rack, pull it toward you,
flit the flont end up and pull it out.
Toreplace,place file end of file rock
(stoI>locks) on file support, flit up file
flont and push the rack in.
JkCAUTION:Whenyouareusing
a rackintheIowestposition(A),youwillneed
tousecautionwhenpullingtherackout.(Besure
tousethehandlesontherack.)Werecommend
thatyoupulltherackoutseveralbchesandthen,
usbgtwopotholders,pull therackoutbyholding
thesidesofit. Therackislowandyoucould
beburnedffyouplaceyourhandinthemiddle
of therackandpullall thewayout.Bevery
carefulnottoburnyourhandonthedoorwhen
usbgtherackb theIowestposition(A).
How to Set the Upper Oven for Baking
[] Touch the BAKEpad. []
[_ Touch the number pads to set
the desired tempe_v_ture.
[-_ Touch the START pad.
Check food for doneness at
mmmmm flme on recipe. Cook
longer if necessary:
[_ Touch the CLEAglOFFpad when
cooking is complete.
_!_ii i _i_>}_ i i i iiiii 111111117511
Flatrack
Handles
Use the rack with the two front
handles in the upper oven.
Do not place foods directly on the
oven floor.
Preheating and Pan Placement
Preheat the oven if the recipe calls for it.
Preheating is necessa_ Tfor good results
when baking cakes, cookies, pasu T and
breads.
Topreheat,settheovenatthecorrect
temperature.Thecontrolwill beepwhen
theovenispreheatedandthedisplaywill
showyoursettemperature.Thiswilltake
approximately4_ mbutes.
Baking results Mll be better if baking
pans are centered in file oven as much
as possible. If baking with more than one
pan, place the pans so each has at least
l"m 1½" of air space around it.
Typeof Food Rack Position
Frozenpies(oncooldesheet) A
Biscuits,muffins,brownies, A
cookies,cupcakes,
layercakes,pies
Casseroles A
Pizza- Freshsuppfiedw/baking tray B
Pizzaplaced directly onrack B
Pizzaonmetal tray A
NOTE:TobakeangelfoodcakeandBundtcake,it
isrecommendedthatyouonlyusetheloweroven.
12
Usingthe lower oven. GEAppliances.com
Toavoid possible bums, place the racks in the desired position before you turn the oven on.
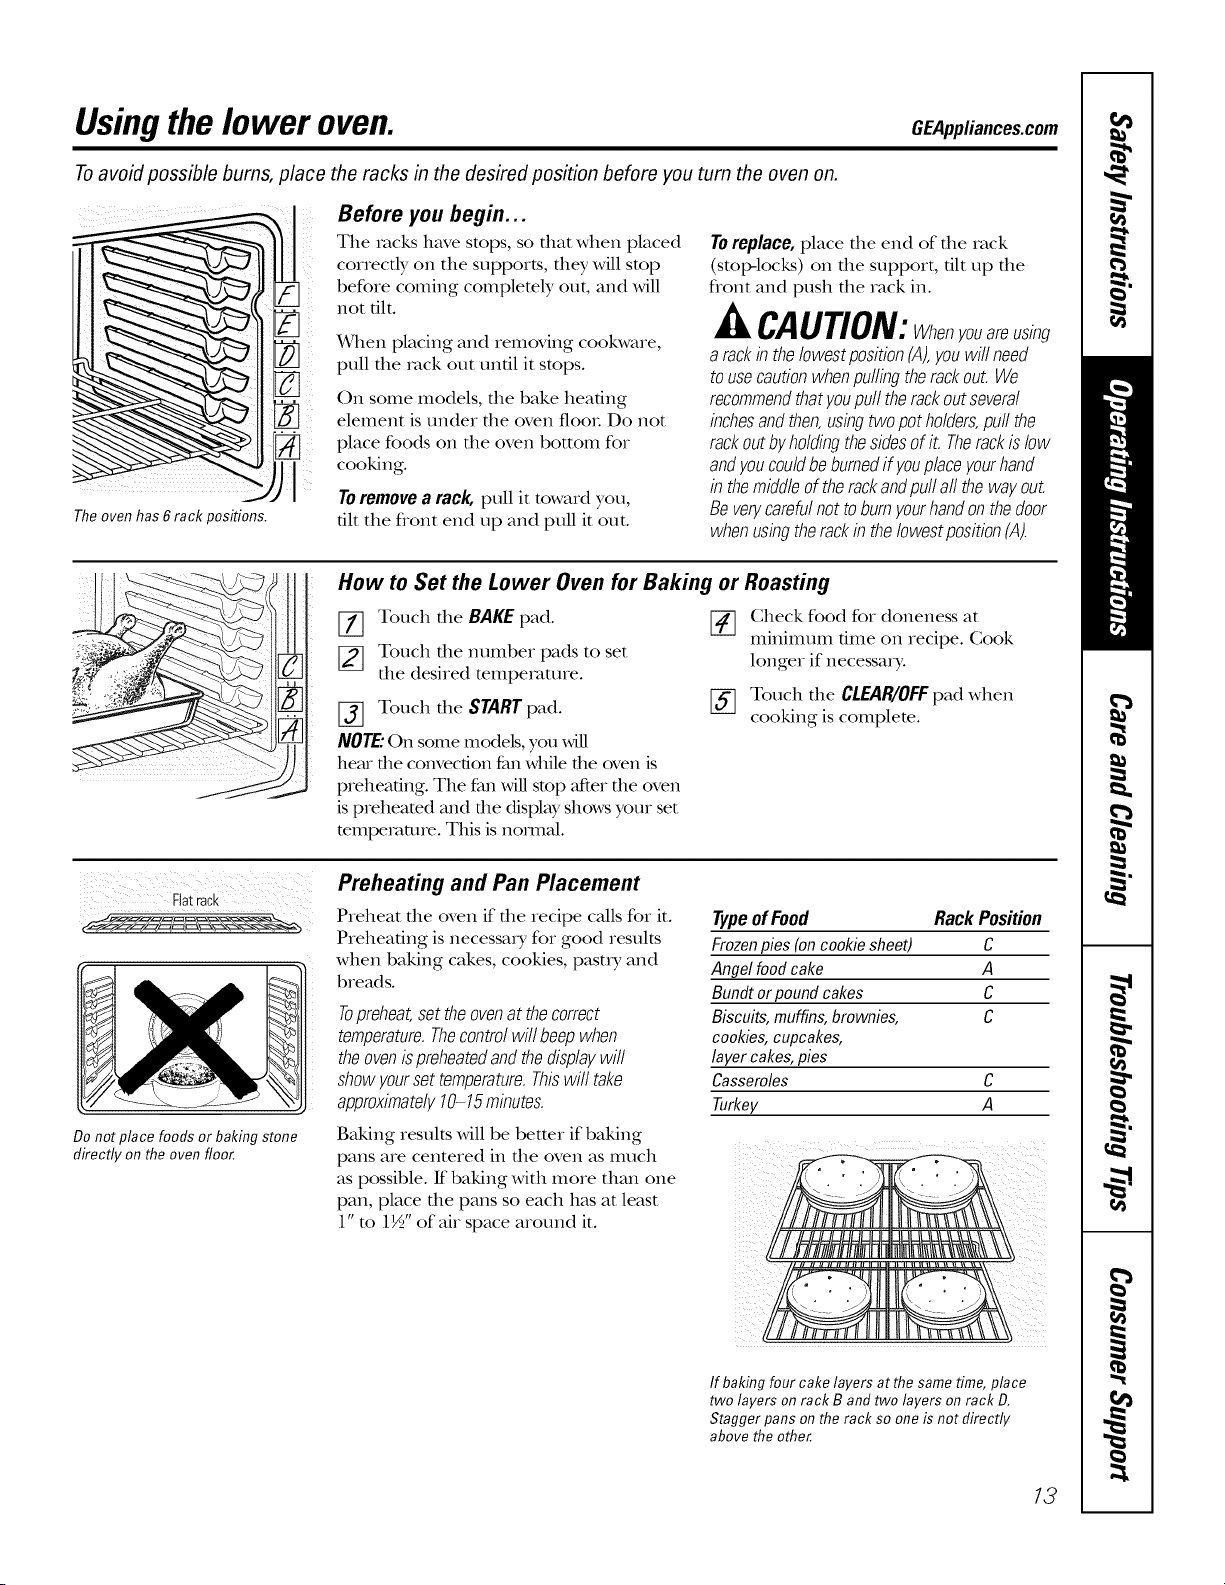
The oven has 6 rack positions.
Before you begin...
The racks have stops, so that when placed
correcdy on the supports, they will stop
before coming complemly out, and will
not flit.
x4qlen placing and removing cookware,
pull the rock out until it stops.
On some models, tile bake heaflng
element is under the oven flooL Do not
place foods on tile oven bottom foi
cooking.
Toremovea rack, pull it toward you,
flit the flont end up and pull it out.
Toreplace,place die end of die rack
(stop-locks) on die support, flit up die
front and push the rack in.
CAUTION:Whenyouareusing
a rackintheIowestpositionfA),youwillneed
tousecautionwhenpullingtherackout.We
recommendthatyoupull therackoutseveral
bchesandthen,usingtwopotholders,pullthe
rackoutbyholdingthesidesofit. Therackislow
andyoucouldbeburnedifyouplaceyourhand
b themiddleoftherackandpullall thewayout.
Beverycarefulnottoburnyourhandonthedoor
whenusbgtherackin theIowestposition(A).
How to Set the Lower Oven for Baking or Roasting
[77 Touch tile BAKE pad.
[_ Touch the number pads to set
the desired temperature.
[_ Touch tile START pad.
NOTE."On some models, you will
hem the convection fan while the oven is
preheaflng. The fan Mll stop after die oven
is preheated and die display shows your set
mmpemmre. This is nomlal.
Check food for doneness at
mmmmm time on recipe. Gook
longer if necessary:
[_ Touch tile CLEAglOFFpad when
cooking is complete.
Flat rack
Do not place foods or baking stone
directly on the oven floor.
Preheating and Pan Placement
Preheat file oven if file recipe cMls for it.
Preheating is necessary for good results
when baking cakes, cookies, pasu y and
breads.
Topreheat,settheovenat thecorrect
temperature.Thecontrolwill beepwhen
theovenispreheatedandthedisplaywill
showyoursettemperature.Thiswilltake
approximately10-15minutes.
Typeof Food Rack Position
Frozenpies(oncookie sheet) C
Angel foodcake A
Bundt or pound cakes C
Biscuits,muffins,brownies, C
cookies,cupcakes,
layercakes,pies
Casseroles C
Turkey A
Baking results will be better if baking
pans are centered in tile oven as much
as possible. If baking with more allan one
pan, place the pans so each has at least
1" to 1½" of air space around it.
If baking four cake layers at the same time, place
two layers on rack B and two layers on rack D.
Stagger pans on the rack so one is not directly
above the other
13
Usingthe upperandlower ovens.
If yourrangeis connectedto208volts,
raresteaksmaybebroiledbypreheating
thebroiler andpositioning theovenrack
oneposition highe_
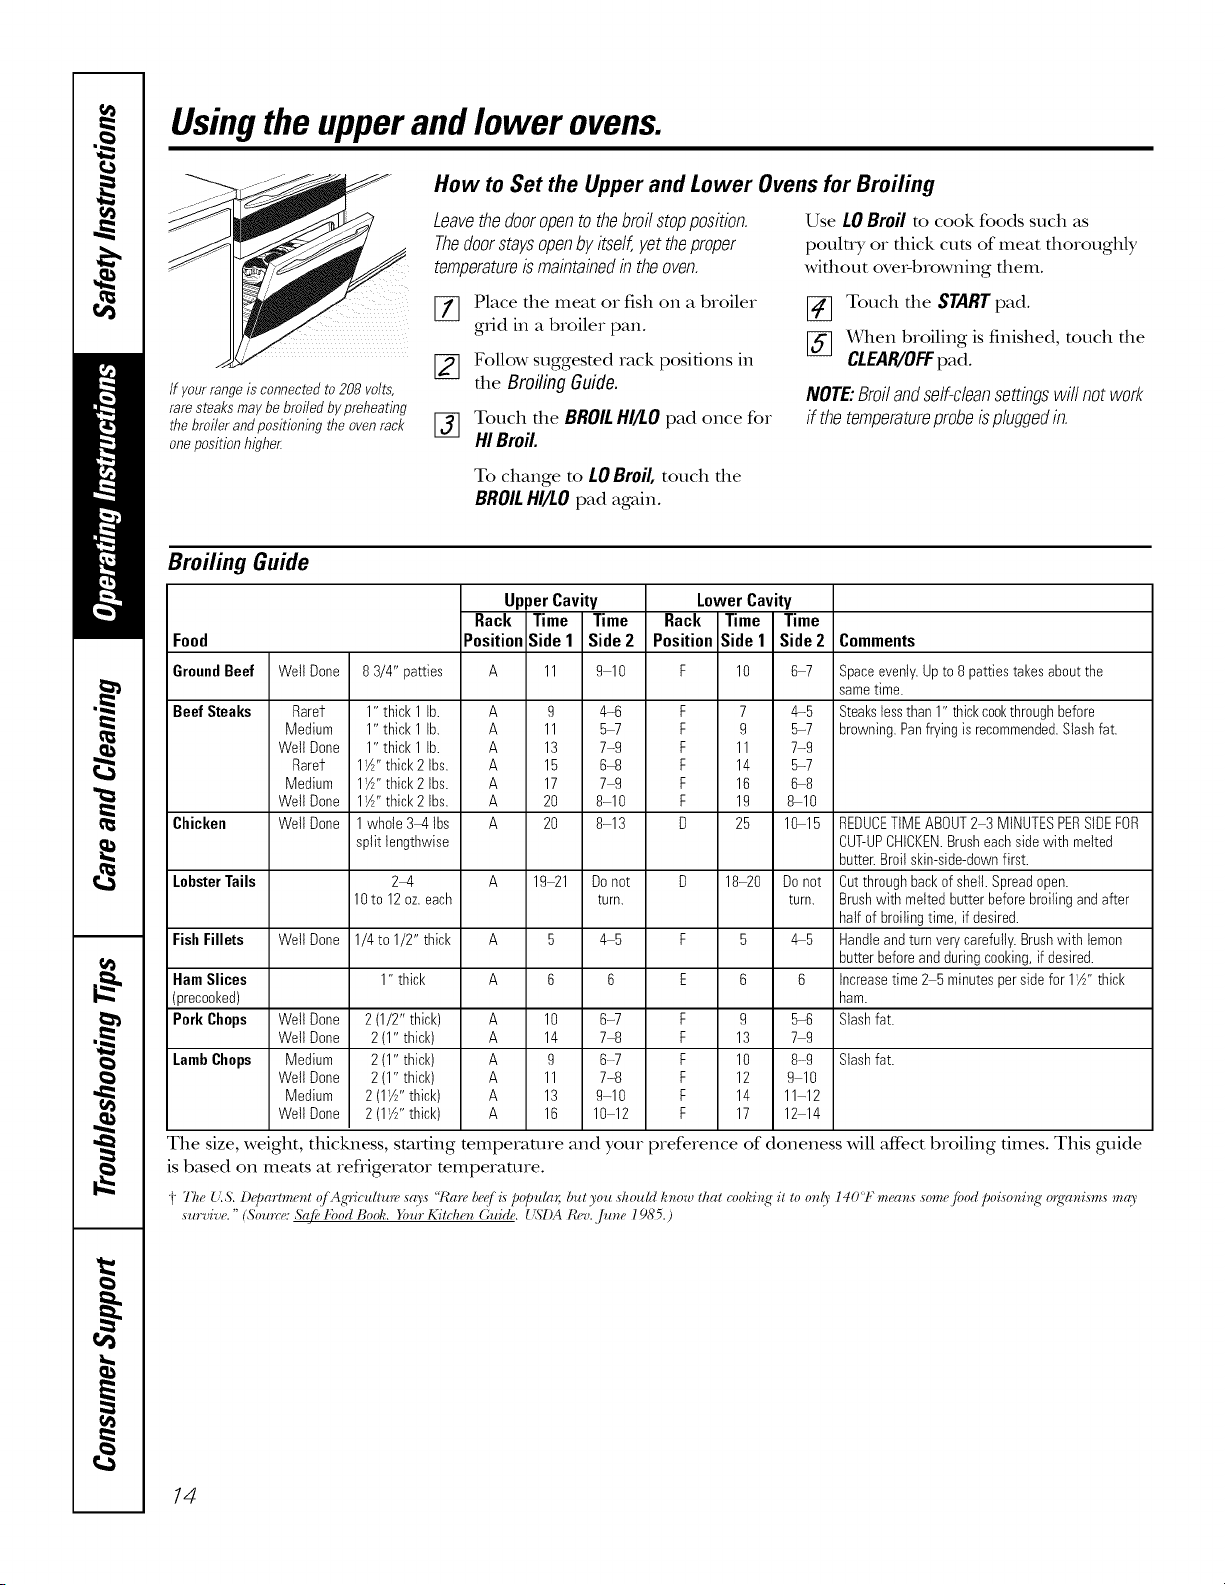
How to Set the Upper and Lower Ovens for Broiling
Leavethedooropentothebroilstopposition.
Thedoorstaysopenbyitself,yettheproper
temperatureismaintabedb theoven.
[_ lace the meat or fish oil a broiler
grid in a broiler pan.
[_ Follow suggested rack positions in
the Broilin9 Guide.
[_] Touch the BROIL HI/LO pad once for
HIBroil.
Use LO Broil to cook foods such as
poulu y or dlick cuts of meat dloroughly
wifllout ore>browning them.
[_ Touch the START pad.
[_ _rhen broiling is finished, touch the
CLEAP_IOFFpad.
NOTE:Broil andself-cleansettingswill not work
if the temperatureprobeisplugged in.
To change to LOBroil,touch the
BROILHI/LOpad again.
Broiling Guide
Food
UpperCavity LowerCavity
Rack Time Time Rack Time Time
Position Side1 Side2 Position Side1 Side 2 Comments
GroundBeef
Beef Steaks
Chicken
LobsterTails
Fish Fillets
Ham Slices
(precooked)
Pork Chops
LambChops
Well Done
Rarer
Medium
Well Done
Rarer
Medium
Well Done
Well Done
Well Done
Wetl Done
Well Done
Medium
Wetl Done
Medium
Well Done
83/4" patties A 11 9 10 F 10 6-7
1" thick 1 lb. A 9 4-6 F 7 4-5
1" thick 1 lb. A 11 5_ F 9 5-7
1" thick 1 lb. A 13 7-9 F 11 7-9
I'Z" thick 2 Ibs. A 15 6-8 F 14 5-7
I_A''thick2 Ibs. A 17 74 F 16 6-8
I_A''thick2 Ibs. A 20 8-10 F 19 8-10
1whole 34, Ibs A 20 8-13 D 25 10-15
split lengthwise
24, A 19 21 Donot D 18-20 Donot
10to 12oz.each turn. turn.
1/4to 1/2" thick A 5 4 5 F 5 4 5
1" thick
2(1/2" thick) A 10 6-7 F 9 5-6
2 (1"thick) A 14 74 F 13 7 9
2 (1"thick) A 9 6-7 F 10 8-9
2 (1"thick) A 11 7-8 F 12 9 10
2 (1W' thick) A 13 9-10 F 14 11-12
2 (1W' thick) A 16 10 12 F 17 12 14
Spaceevenly.Upto 8 patties takesaboutthe
sametime.
Steakslessthan 1" thickcookthroughbefore
browning.Panfryingis recommended.Slashfat.
REDUCETIMEABOUT2 3 MINUTESPERSiDEFOR
CUT-UPCHICKEN.Brusheachsidewith melted
butter.Broil skin-side-downfirst.
Cutthroughbackof shell.Spreadopen.
Brushwith meltedbutterbeforebroiling andafter
half of broilingtime, if desired.
Handleandturnverycarefully.Brushwith lemon
butterbeforeandduring cooking,if desired.
Increasetime 2 5minutespersidefor 1W' thick
ham.
Slashfat.
Slashfat.
The size, weight, thickness, starting mmperamre and your preference of doneness will aft_ct broiling times. This guide
is b_tsed on meats at refiigeramr mmperature.
i "l'l_e{'.s. l)_JJartment (j Ag'riculture says "/Carebe(,[i_ popul(n; but you should know that (_,oldng"it to only 140'1" mean,s some fbod poisoning" o_gwnisms "frO'
survive. " (Sou_re: &{fbkbod Boofi. Your Kitchen Guide. __S'I)ARev.,/une 19S5.)
14
Usingthe timedbakingand mastingfeatures.Con omomodol )OEApplia.oes.oom
NOTE: Foods that spoil easily--such as milk, eggs, fish, stuffings, poultry and pork--should not be allowed to sit for
more than 1hour before or after cooking. Room temperature promotes the growth of harmful bacteria. Be sure that
the oven light is off because heat from the bulb will speed harmful bacteria growth.
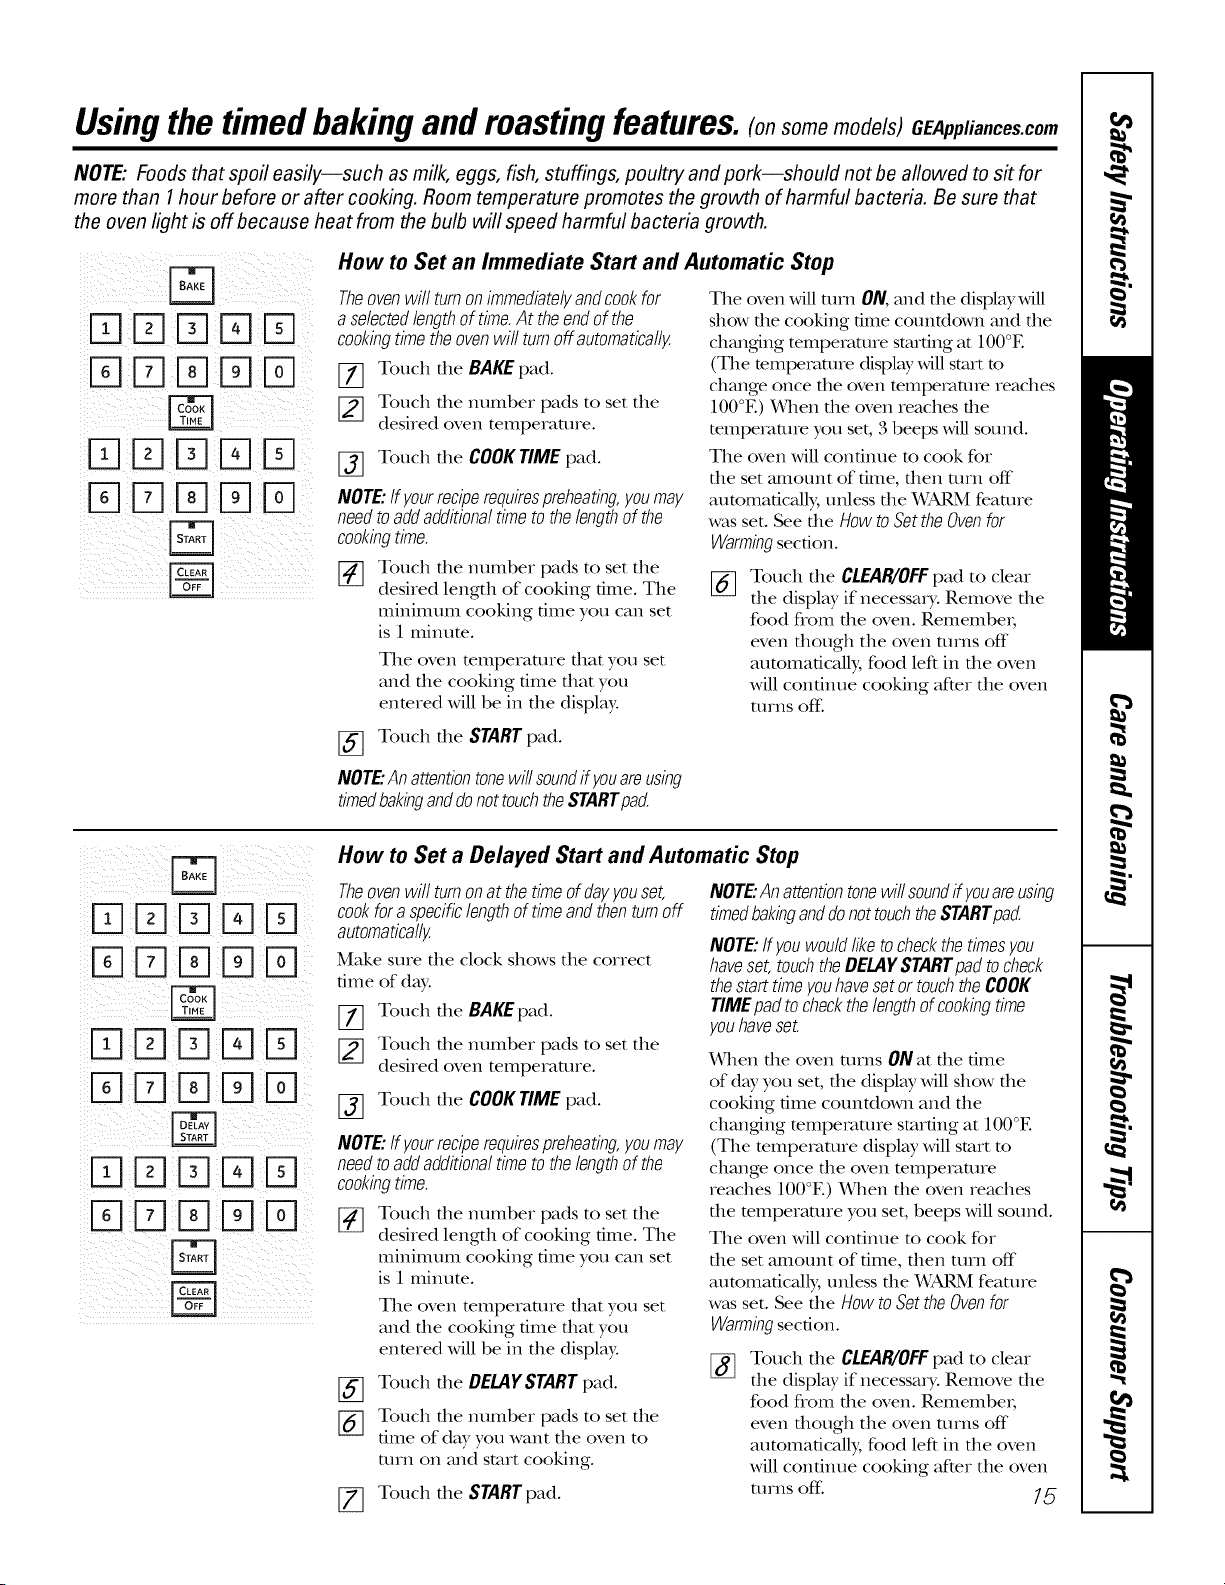
How to Set an Immediate Start and Automatic Stop
Theovenwill turnonimmediatelyandcookfor
a selectedlengthof time.At theendofthe
cookbgtimetheovenwill turnoff automatically
[77 Touch the BAKEpad.
Touch the number pads to set tile
desired oven temperaune.
Touch tile COOKTIMEpad.
%
NOTE:ffyourreciperequirespreheating,youmay
needtoaddadditionaltimetothelengthofthe
cookbgtime.
[] Touch tile nmnber pads to set tile
desired length of cooking time. Tile
minimunl cooking time you can set
is 1 minute.
Tile oven mmperamre that you set
and the cooking dine that you
entered will be in the display.
[_] Touch tile START pad.
NOTE"Anattentiontonewillsoundif youareusing
timedbakinganddonottouchtheSTARTpad.
Tile oven will utrn ON, and die display will
show die cooking dine countdown and die
changdng temperature starting at IO0°E
(The temperature display will start to
change once tile oven mmpemttne reaches
100°E) _&qlen tile oven reaches tile
mmpemnne you set, 3 beeps will sound.
Tile oven will continue m cook for
the set amount of time, tbetl turn off
attmmafically, unless the WARM feaune
was set. See the HOWto Set the Oven for
Warmingsection.
%
Touch tile CLEAR/OFFpad to cleat
tile display if necessaD,. Remove tile
food from the oven. RemembeL
even though tile oven turns off
atttomadcally, food left ill tile oven
will continue cooking after tile oven
turns off.
DDD D
%DD D
DDD D
DDDDD
DDD D
DDDDD
B
How to Set a Delayed Start and Automatic Stop
Theoven will turnon at the time ofday youset,
cookfor aspecific lengthof time and thenturn off
automatically
Make sure tile clock shows tile correct
time of day:
[77 Touch tile BAKEpad.
_] Touch tile nmnber pads to set tile
desired oven temperaUne.
[_ Touch tile COOKTIME pad.
NOTE:ffyourreciperequirespreheating,youmay
needtoaddadditionaltimetothelengthofthe
cookbgtime.
[_ Touch tile ntunber pads to set tile
desired length of cooking time. Tile
minimunl cooking time you can set
is 1 minute.
Tile oven mmperamre that you set
and the cooking dine that you
enmred will be in the display.
Touch tile DELAYSTARTpad.
%
%
Touch tile munber pads to set tile
time of day you want tile oven to
mrn on and start cooking.
Touch tile STARTpad.
NOTE"Anattentiontonewillsoundif youareusbg
timedbakbganddonottouchtheSTARTpad.
NOTE:ffyouwouldliketocheckthetimesyou
haveset,touchtheDELAYSTARTpadtocheck
thestarttimeyouhavesetor touchtheCOOK
TIMEpadtocheckthelengthofcookingtime
youhaveset.
When die oven Utrns ON at file time
of day you set, die display will show die
cooking time countdown and file
changdng temperature starting at 100°E
(Tile temperature display Mll start to
change once die oven temperature
reaches 100°E) When die oven reaches
die temperature you set, beeps Mll sound.
Tile oven Mll continue to cook for
file set amount of time, fllen turn off
autoulaficMly, unless file _SkRM feature
was set. See file HOWto Set the Ovenfor
Warmingsection.
Touch tile CLEAR/OFFpad to cleat
tile display if necessaD,. Remove tile
food from the oven. Remember;
even though tile oven turns off
atttomadcally, food left ill tile oven
will continue cooking after tile oven
utrns off: 75
Usingtheprobe on thelower convectionoven.(onsome models)
Formany foods, especially roasts and poultry, internal food temperature is the best test for doneness. The
temperature probe takes the guesswork out of roasting by cooking foods to the exact doneness you want.
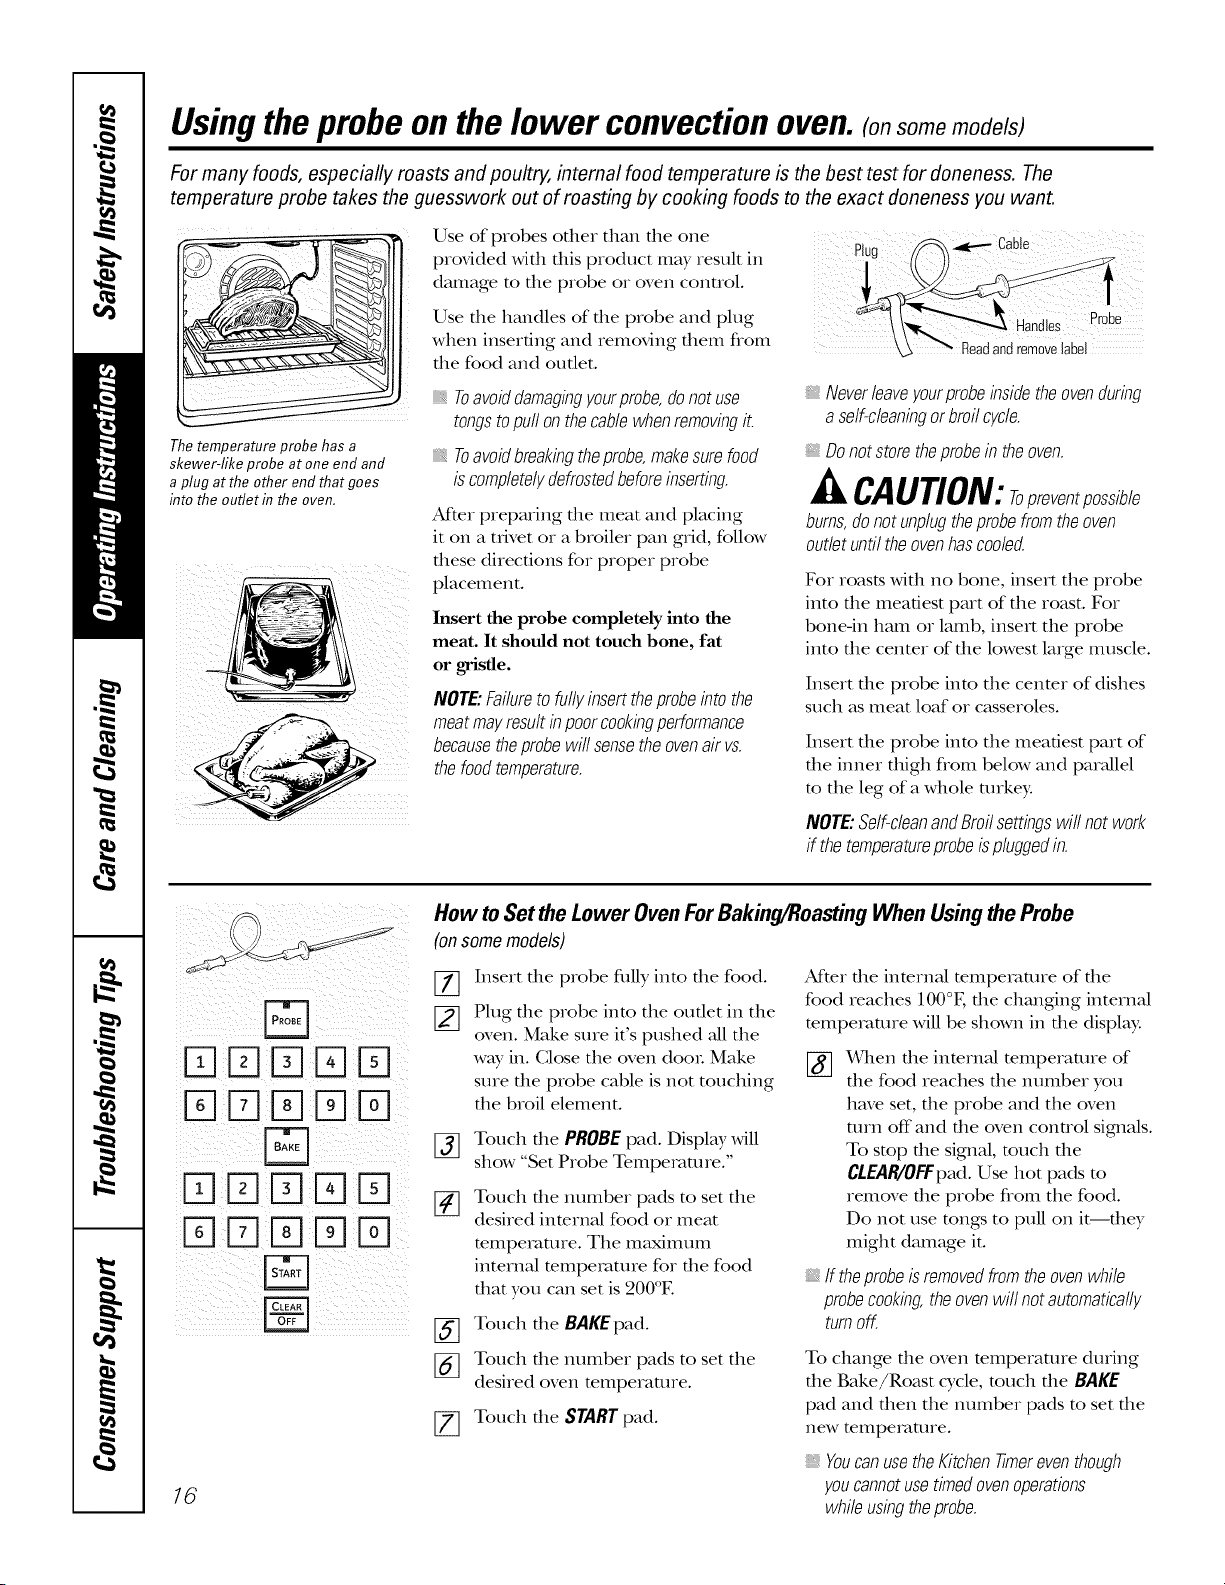
Thetemperature probe has a
skewer-fike probe atone end and
a plug atthe other end thatgoes
into the ouflet in the oven.
Use of probes other than the one RU _CaSe
provided with this product may result in
'_ "" Readandremovela
damage to the probe or oven control.
Use the handles of the probe and plug Probe
when inserting and removing them flom _bel
the food and outlet.
Toavoiddamagingyourprobe,donotuse
tongstopullonthecablewhenremovingit.
Toavoidbreakbgtheprobe,makesurefood
iscompletelydefrostedbeforeinserting.
AfYerpreparing die meat and placing
it on a trivet or a broiler pan grid, follow
these directions for proper probe
placement.
Insert the probe completely into the
meat. It should not touch bone, fat
or gristle.
NOTE:Failuretofullyinserttheprobebto the
meatmayresultb poorcookbgperformance
becausetheprobewillsensetheovenair vs.
thefoodtemperature.
_,Neverleaveyourprobebsidetheovendurbg
a self-cleanbgorbroilcycle.
_, Do notstore theprobe in the oven.
£t CAUTION:Topreventpossible
bums,donotunplugtheprobefromtheoven
outletuntiltheovenhascooled.
Fox roasts widl no bone, insert the probe
into the meatiest part of the roast. Fox
bone-in ham or lamb, insert the probe
into the center of the lowest lmge muscle.
Insert the probe into the center of dishes
such as meat loaf or casseroles.
Insert the probe into the meatiest part of
the inner thigh flom below and parallel
to the leg of a whole turke):
NOTE:Self-cleanandBroilsettbgswillnotwork
if thetemperatureprobeispluggedin.
DDDD
%DDDD
DD%D
%DD D
16
How to Set the Lower Oven For Baking/Roasting When Using the Probe
(onsomemodels)
%
Insert the probe fldly into the food.
Plug file probe into the oudet in the
oven. Make sure it's pushed all the
way in. Close the oven dooL Make
sure the probe cable is not touching
the broil element.
[_] Touch the PROBEpad. Display will
show "Set Probe Tempemmx e.'
[_ Touch the number pads to set the
desired internal food or meat
temperature. The maxinmm
internal temperature for the food
that you can set is 200°E
[_ Touch the BAKEpad.
_] Touch the number pads to set the
desired oven temperature.
[_ Touch the STARTpad.
After the internal temperature of the
food reaches 100°E the changing internal
temperature will be shown in the display:
_(&qlenthe internal temperature of
the food reaches the number you
have set, the probe and the oven
mrn off"and the oven control signals.
To stop the signal, much the
CtEAR/OFFpad. Use hot pads m
remove the probe from the food.
Do not use rungs to pull on it--they
might damage it.
If theprobeisremovedfromtheovenwhile
probecooking,theovenwillnotautomatically
turnoff.
To change die oven mmperamre during
the Bake/Roast cycle, much the BAKE
pad and then the number pads m set the
new temperature.
_,YoucanusetheKitchentimereventhough
youcannotusetimedovenoperations
whileusbgtheprobe.
Usingthe clock, kitchentimerand controllock. OEAppliancescom
) /
(on some models)
(on some models)
Make sure the clock is set to the
correcttimeofdag.
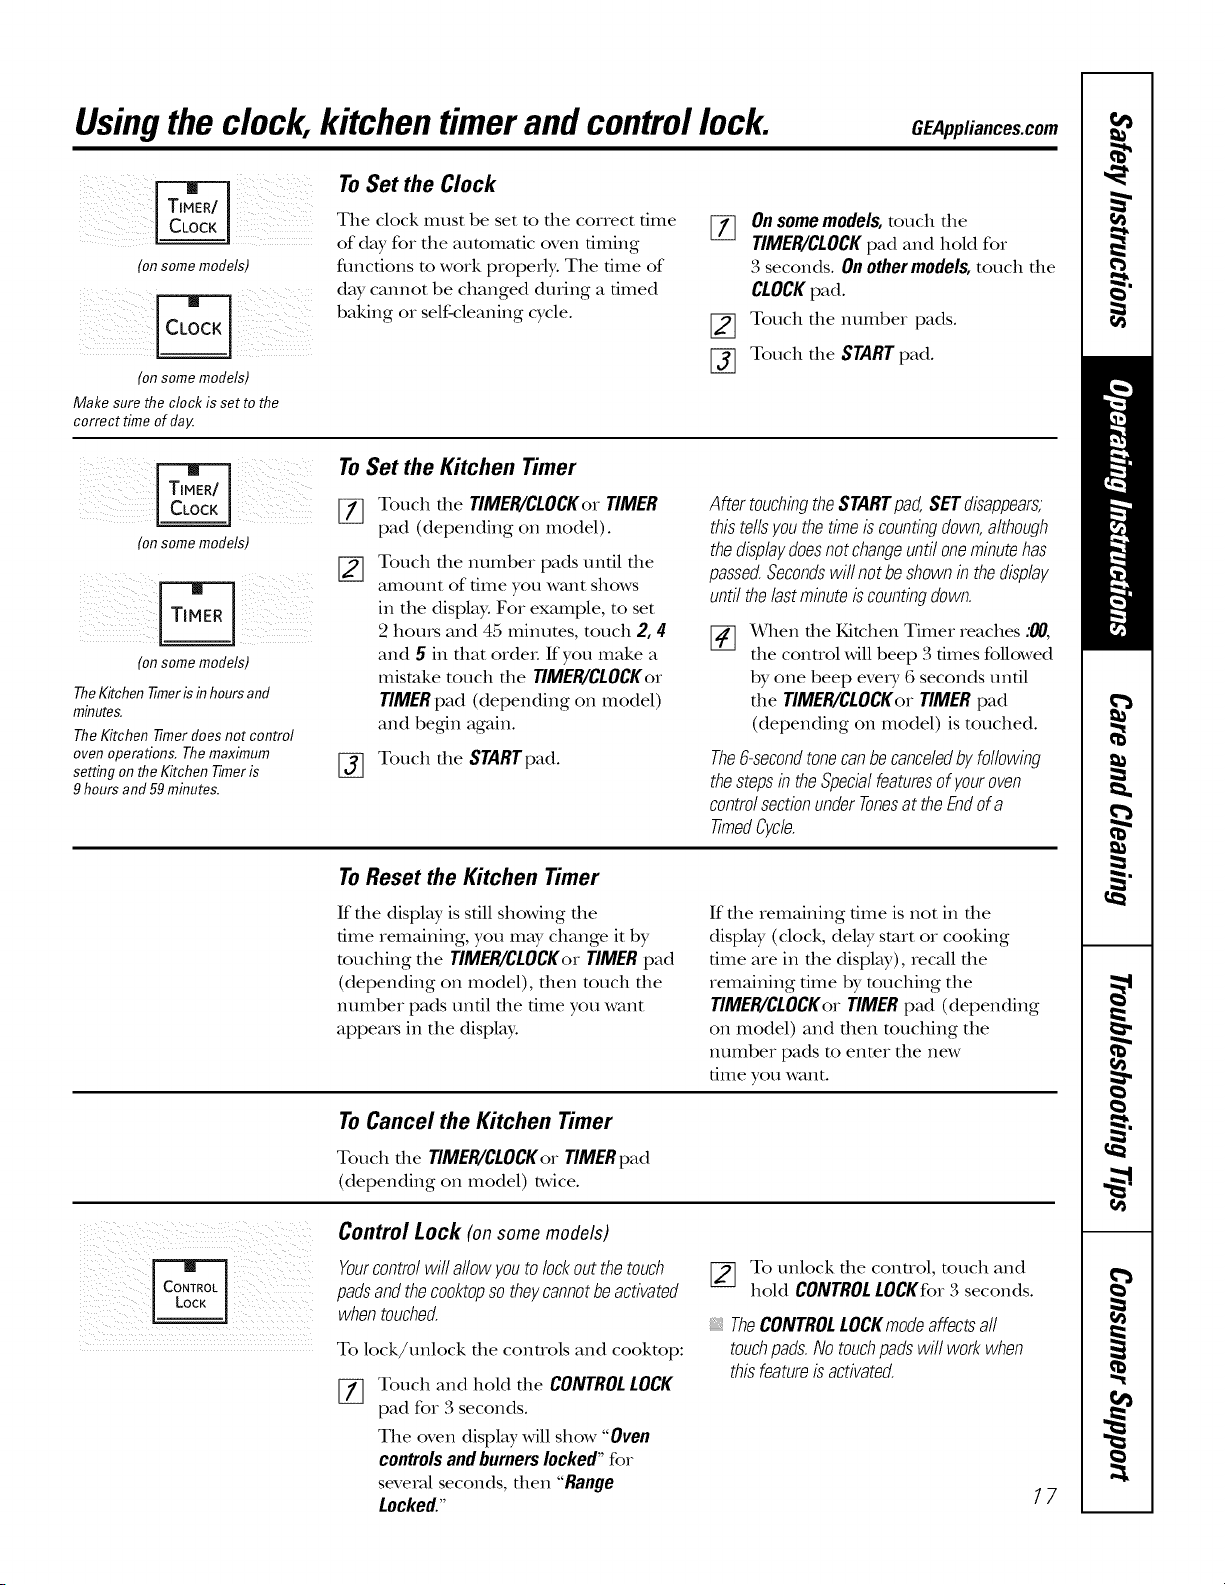
To Set the Clock
The clock must be set to file correct time
of day for tile automatic oven timing
fimcfions to work properly. Tile time of
day cannot be changed during a timed
baking or self-cleaning cycle.
%
[]
%
On somemodels, touch tile
TIMER/CLOCKpad and heM for
3 seconds. On other models, touch the
CLOCKpad.
Touch tile immber pads.
Touch tile START pad.
(on some models)
Ionsome models)
TheKitchen timer is inhours and
minutes.
TheKitchen timer does not control
oven operations. Themaximum
setting onthe Kitchen Timeris
9 hours and59minutes.
To Set the Kitchen Timer
[_ Touch the TIMER/CLOCKerTIMER
pad (depending on model).
Touch tile number pads until tile
amount of time you want shows
in the display: For example, to set
2 houls and 45 minutes, touch 2, 4
and 5 ill fllat ordeL If you make a
mistake touch tile TIMER/CLOCKor
TIMERpad (depending on model)
and beg,in again.
[_ Touch tile STARTpad.
AftertouchbgtheSTARTpad,SETdisappears,
thistellsyouthetimeiscountingdown,although
thedisplaydoesnotchangeuntiloneminutehas
passed.Secondswillnotbeshownb thedisplay
untilthelastmbute iscountingdown.
[]
x_qlen file Kitchen Timer reaches :00,
tile control will beep 3 times followed
by one beep every 6 seconds until
tile TIMER/CLOCKor TIMER pad
(depending on model) is touched.
The6-secondtonecanbecanceledbyfollowing
thestepsb theSpecialfeaturesofyouroven
controlsectionunderTonesat theEndofa
timedCycfe.
To Reset the Kitchen Timer
If file display is sdll showing file
time remaining, you may change it by
touching tile TIMER/CLOCKer TIMER pad
(depending on model), then touch tile
number pads until tile time you want
appea_s in tile displ W.
If file remaining time is not in die
display (clock, delay start or cooking
time are in tile display), recall tile
remaining time by touching tile
TIMER/CLOCKer TIMER pad (depending
on model) and then touching tile
number pads menmr tile new
time you want.
To Cancel the Kitchen Timer
Touch tile TIMER/CLOCKorTIMERpad
(depending on model) twice.
Control Lock (on some models)
Yourcontrolwillallowyoutolockoutthetouch
padsandthecooktopsotheycannotbeactivated
whentouched.
To lock/unlock die conUols and cookmp:
Touch and heM tile CONTROLLOCK
pad for 3 seconds.
Tile oven display will show "Oven
controlsandburnerslocked"for
several seconds,then "Range
Locked."
To unlock tile control, touch and
hoM CONTROL LOCKfor 3 seconds.
TheCONTROLLOCKmodeaffectsall
touchpads.Notouchpadswill workwhen
thisfeatureisactivated.
77
Adjusttheupperorlower oventhermostat--Do it yourself!
Youmay find that your new oven cooks differently than the one it replaced. Use your new oven for afew weeks to
become more familiar with it. If you still think your new oven is too hot or too cold, you can adjust the thermostat
yourself.
Do not use thermometers, such as those found in grocery stores, to check the temperature setting of your oven.
These thermometers may vary 2040 degrees.
NOTE: This adjustment will only affect baking and roasting temperatures; it will not affect broiling or self-cleaning
temperatures. The adjustment will be retained in memory after a power failure.
,rq
FqFqDr-qFq
FqFqE]Dr-q
Fq
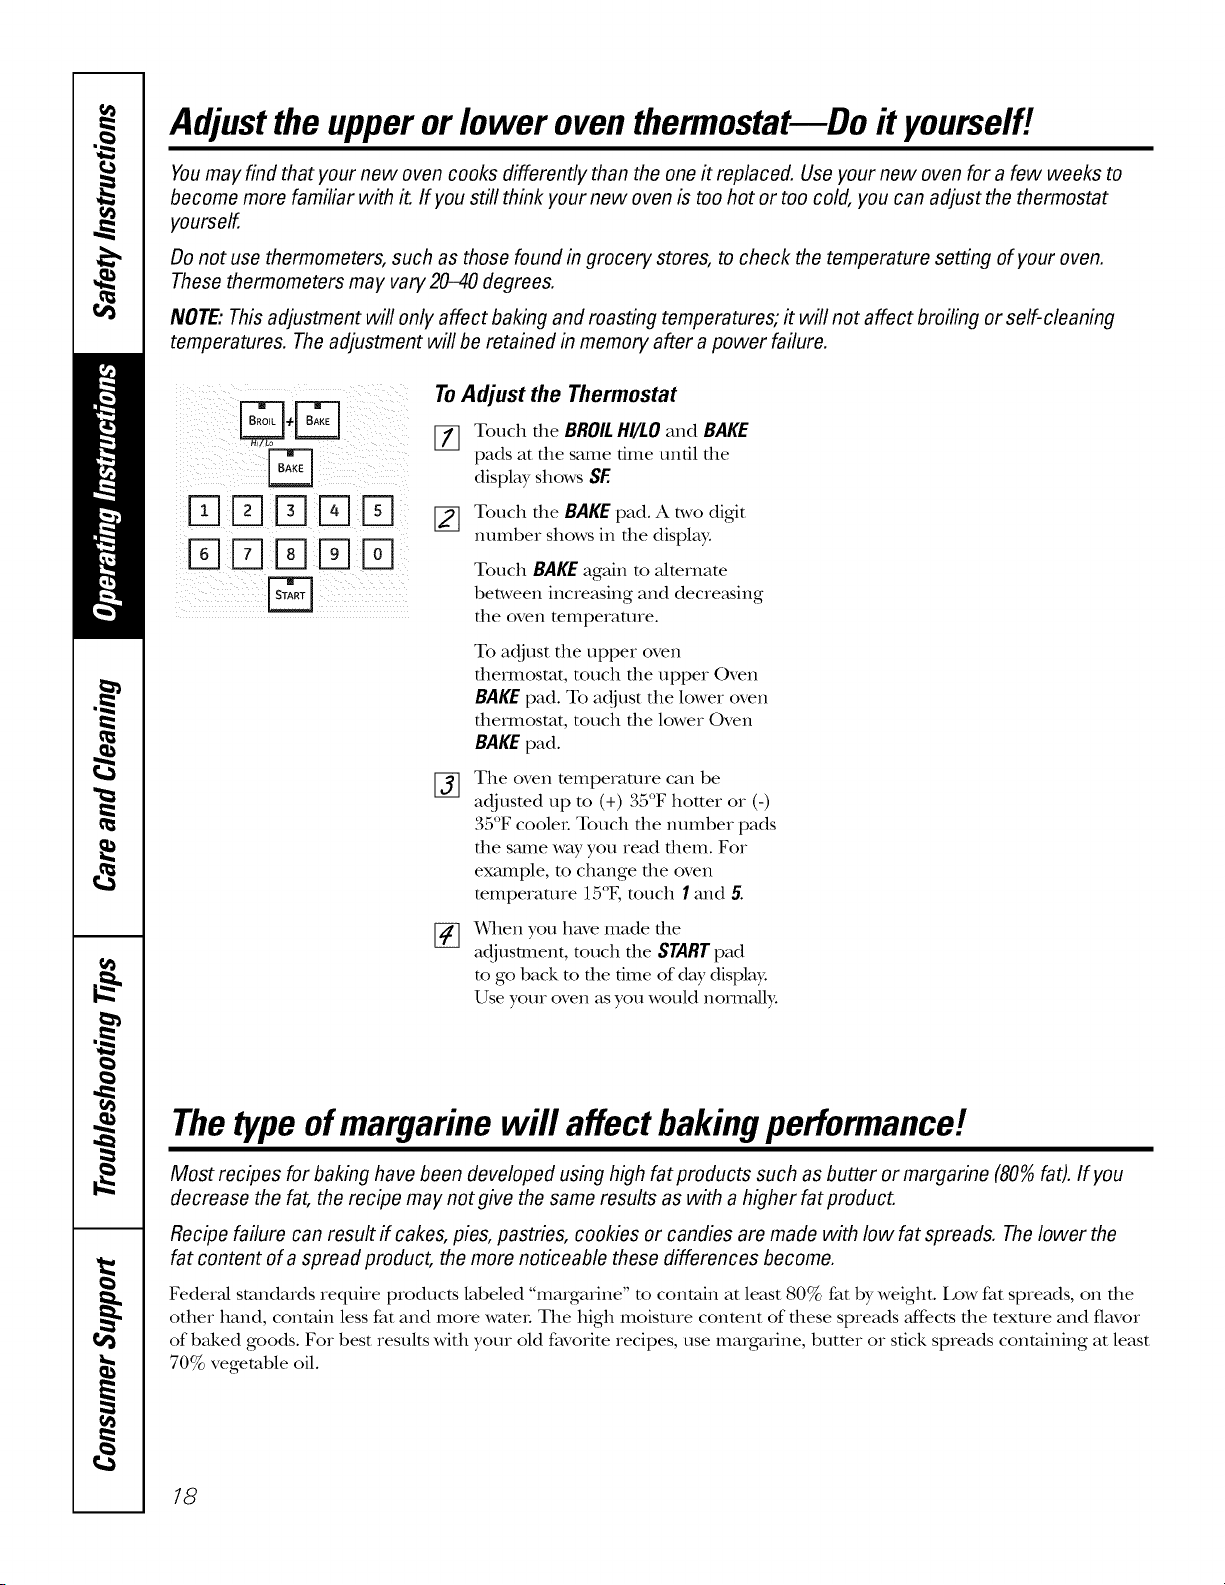
To Adjust the Thermostat
[_ Touch the BROILHI/LO and BAKE
pads at the same time until the
display shows SE
[_ Touch the BAKEpad. A two digit
number shows in the display:
Touch BAKEagain to alternate
between increasing and decre_tsing
the oven temperature.
To adjust the upper oven
dlex_nostat, touch file upper Oven
BAKEpad. To adjust the lower oven
tbemlostat, touch the lower Oven
BAKEpad.
%
The oven temperature can be
35"
adjusted lap to (+) , ; F hotter or (-)
35°F cooleL Touch the number pads
the s_une way you read them. Fox
example, m change the oven
mmperaune 15°F, much I and 5.
x_qlen you have made the
adjustment, touch the STARTpad
to go back to the time of day display.
Use your oven as you would noml_fll):
Thetypeofmargarine will affect bakingperformance!
Most recipes for baking have been developed using high fat products such as butter or margarine (80%fat). If you
decrease the fat, the recipe may not give the same results as with a higher fat product.
Recipe failure can result if cakes, pies, pastries, cookies or candies are made with low fat spreads. Thelower the
fat content of a spread product, the more noticeable these differences become.
Federal standards require products labeled "margarine" m contain at least 80% fat by weight. Low fat spreads, on the
other hand, contain less fat and more WamL The high moisture conmnt of these spreads Jf_cts the texture and flavor
of baked goods. Fox best results with your old favorite recipes, use margarine, butmr or stick spreads containing at least
70% vegetable oil.
18
Using the convection oven. (on some models) GEAppliances.com
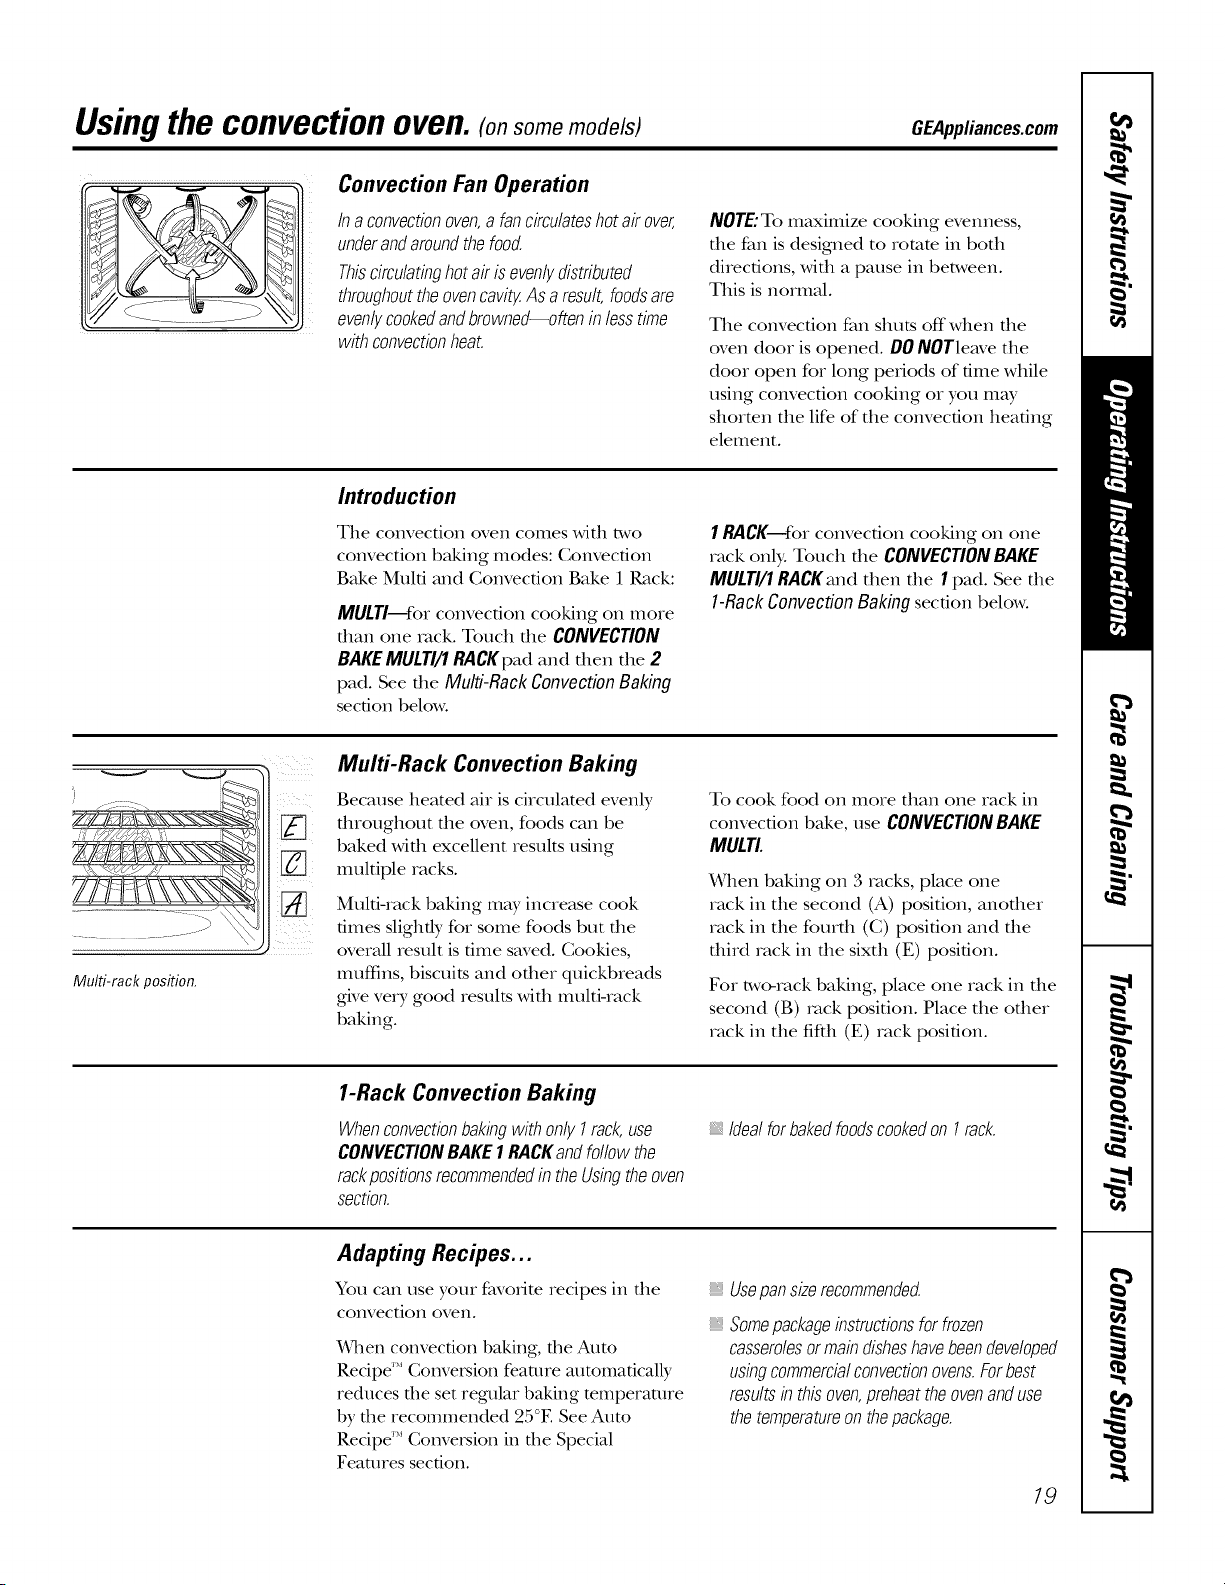
Convection Fan Operation
Inaconvectionoven,a fancirculateshotair over,
underandaroundthefood.
Thiscirculatinghotairisevenly,distributed
throughouttheovencavity.Asa result,foodsare
evenlycookedandbrowned--ofteninlesstime
withconvectionheat.
NOTE:To maximize cooking evenness,
the fan is designed to romm in both
directions, with a pause in between.
This is normal.
The convection fan shuts offwhen file
oven (loot is opened. DO NOTleave the
door open for long periods of time while
using convection cooking or you may
shorten the life of the convection heating
element.
Introduction
The convection oven comes wit1 two
convection baking modes: Com'ecfion
Bake Multi and Convection Bake 1 Rack:
MULTI--Ibr convection cooking on more
dtan one tack. Touch dte CONVECTION
BAKEMULTI/1 RACKpad and dten dte 2
pad. See tire Multi-Rack Convection Baking
section below.
1RACK--fbr convection cooking on one
rack only. Touch rite CONVECTIONBAKE
MULTI/1RACKanddter_dte 1pad. Seedte
l-RackConvectionBakingsection below.
Multi-rack position.
Multi-Rack Convection Baking
Because heated air is circulated evenly
fltroughout fire oven, foods can be
baked Mflt excellent results using
multiple racks.
Multi-rack baking may increase cook
times slighdy for some foods but dte
overall result is time saved. Cookies,
muffins, biscuits and other quickbreads
give vetT good results with multi-rack
baking.
To cook food on more than one rack in
convection bake, use CONVECTIONBAKE
MULTI.
When baking on 3 tacks, place one
rack in the second (A) position, anodter
rack in the fourdt (C) position and tire
third rack in the sixth (E) position.
For two-rack baking, place one rack in dte
second (B) rock position. Place the other
rack in the fifth (E) rack position.
1-Rack Convection Baking
WhenconvectionbakingwithonlyI rack,use
CONVECTIONBAKE1RACKandfollowthe
rackpositionsrecommendedintheUsbgtheoven
Section.
IdealforbakedfoodscookedonI rack.
Adapting Recipes...
You can use your favorite recipes in the
convection oven.
¼]len convection baking, the Auto
Recipe'" Convepsion feature atttomaticalb_
reduces rhe set regular baking temperature
by the recommended 25°E See Auto
Recipe'" Conversion in rhe Special
Features section.
Usepan size recommended.
, Somepackagebstructionsforfrozen
casserolesormab disheshavebeendeveloped
usbgcommercialconvectionovens.Forbest
resultsb thisoven,preheattheovenanduse
thetemperatureonthepackage.
19
Usingthe convectionoven.(on some models)
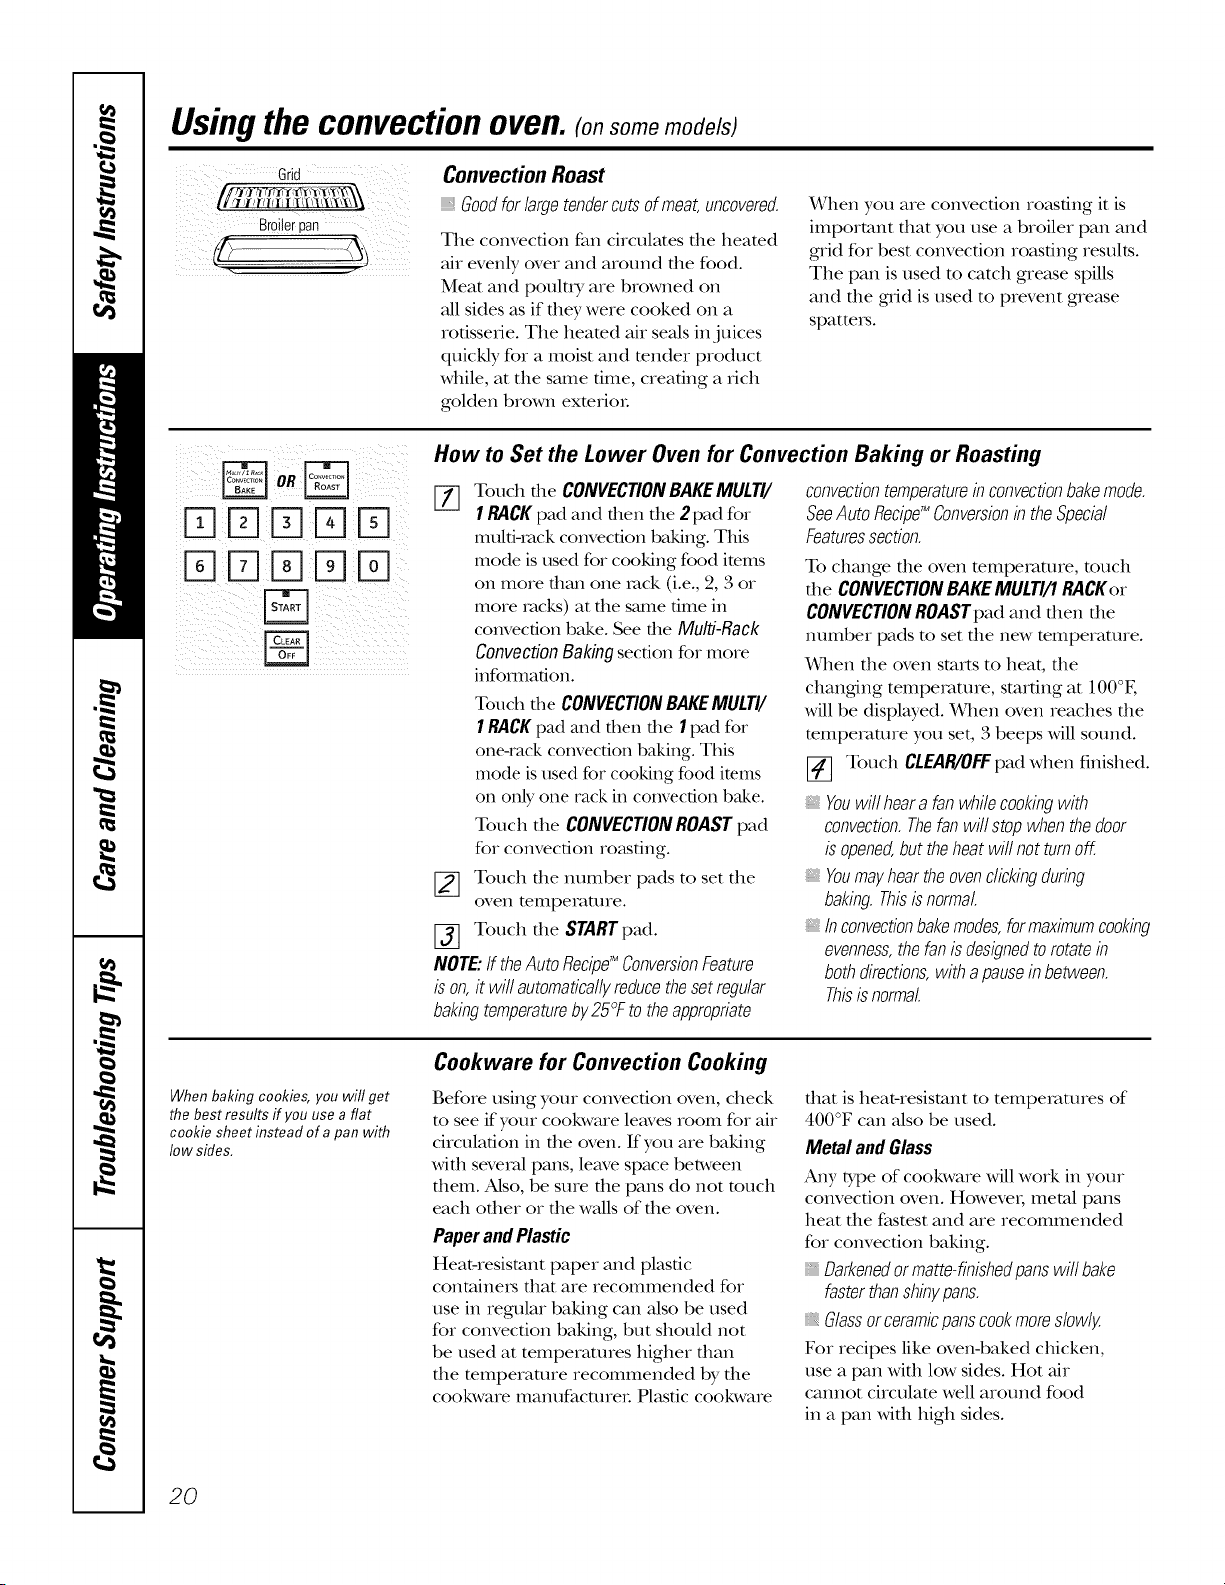
Grid
Broilerpan
Convection Roast
Goodforlargetendercutsofmeat,uncovered.
The convection fan circulates the heated
air evenly over and around the food.
Meat and poult D, are browned on
all sides as if they were cooked on a
rotisserie. The heamd air seals ill juices
quickly for a moist and render product
while, at the same time, creating a rich
golden brown exmrioL
When you are convection roasting it is
important fllat you use a broiler pail and
grid for best convection roasting results.
The pail is used to catch grease spills
and file grid is used to prevent grease
spatteI_.
K1K1K]K]KI
K]KIK]K]K]
How to Set the Lower Oven for Convection Baking or Roasting
[-_ Touch file CONVECTIONBAKEMULTI/
1RACK pad and fllen tile 2pad for
mulfiqack convection baking. This
mode is used for cooking food items
on more titan one rock (i.e., 2, 3 or
more racks) at tile same time ill
convection bake. See tile Multi-Rack
Convection Baking section for more
infomlafion.
Touch the CONVECTIONBAKEMULTI/
1RACKpad and then tile I pad fox"
one-rack convection baking. This
mode is used for cooking food ire.ms
on only one rack in convection bake.
Touch the CONVECTIONROASTpad
for convection roasting.
[_ Touch tile number pads to set tile
oven telIlperat/lIe.
[_ Touch tile STARTpad.
NOTE: If theAuto Recipg_ConversionFeature
is on, it will automaticallyreducethe set regular
bakingtemperatureby 25°F to the appropriate
convectiontemperatureb convectionbakemode.
SeeAutoRecipg_Conversionb theSpecial
Featuressection.
To change die oven mmperamre, touch
file CONVECTION BAKEMULTI/1 RACKer
CONVECTION ROASTpad and fllen file
nunlber pads to set tile new temperature.
When tile oven starts to heat, tile
changing tempemune, starting at 100°E
will be displwed. When oven reaches tile
mmpemune you set, 3 beeps will sound.
[_] Touch CLEAR/OFFpad when finished.
Youwill hear afan while cookingwith
convection.Thefan will stop when thedoor
is opened,but theheat wit not turn off.
, Youmay hear the ovenclicking during
baking.Thisisnormal.
b convectionbakemodes,formaximumcooking
evenness,the fan is designedtorotate b
bothdirections,with apausein between.
Thisisnormal.
When baking cookies, you wit get
the best results ff you use a flat
cookie sheet instead of a pan with
low sides.
Cookware for Convection Cooking
Before using your convection oven, check
m see if your cookware leaves room for air
circulation ill tile oven. If you are baking
with several palls, leave space between
them. Also, be sure tile palls do not much
each other or the waUsof the oven.
PaperandPlastic
Heat-resistant paper and plastic
containeI5 that are recommended for
use ill regular baking call also be used
for convection baking, but should not
be used at temperatures higher than
tile mmperaune recommended by tile
cookware Illan/lfacUlreI: Plastic cookware
dlat is heat-resistant to tempelvmnes of
400°F call also be used.
Metal and Glass
Aaly 10,pe of cookware will work ill your
convection oven. Howevei; metal palls
heat file fi,tstest and are iecomnlended
for convection baking.
, Darkenedor matte-finished pans will bake
faster thanshby pans.
Glassorceramicpans cookmore slowly.
For recipes like oven-baked chicken,
use a pail with low sides. Hot air
cannot circulam well around food
ill a pail with high sides.
20
Usingthe timedfeatures
forconvectioncooking.(onsome models)
GEAppliances.com
Youwill hear a fan while cooking with these features. Thefan will stop when the door is opened, but the heat
will not turn off.
NOTE: Foods that spoil easily--such as milk, eggs, fish, stuffings, poultry and pork--should not be allowed to sit
for more than 1hour before or after cooking. Room temperature promotes the growth of harmful bacteria. Be sure
that the oven light is off because heat from the bulb will speed harmful bacteria growth.
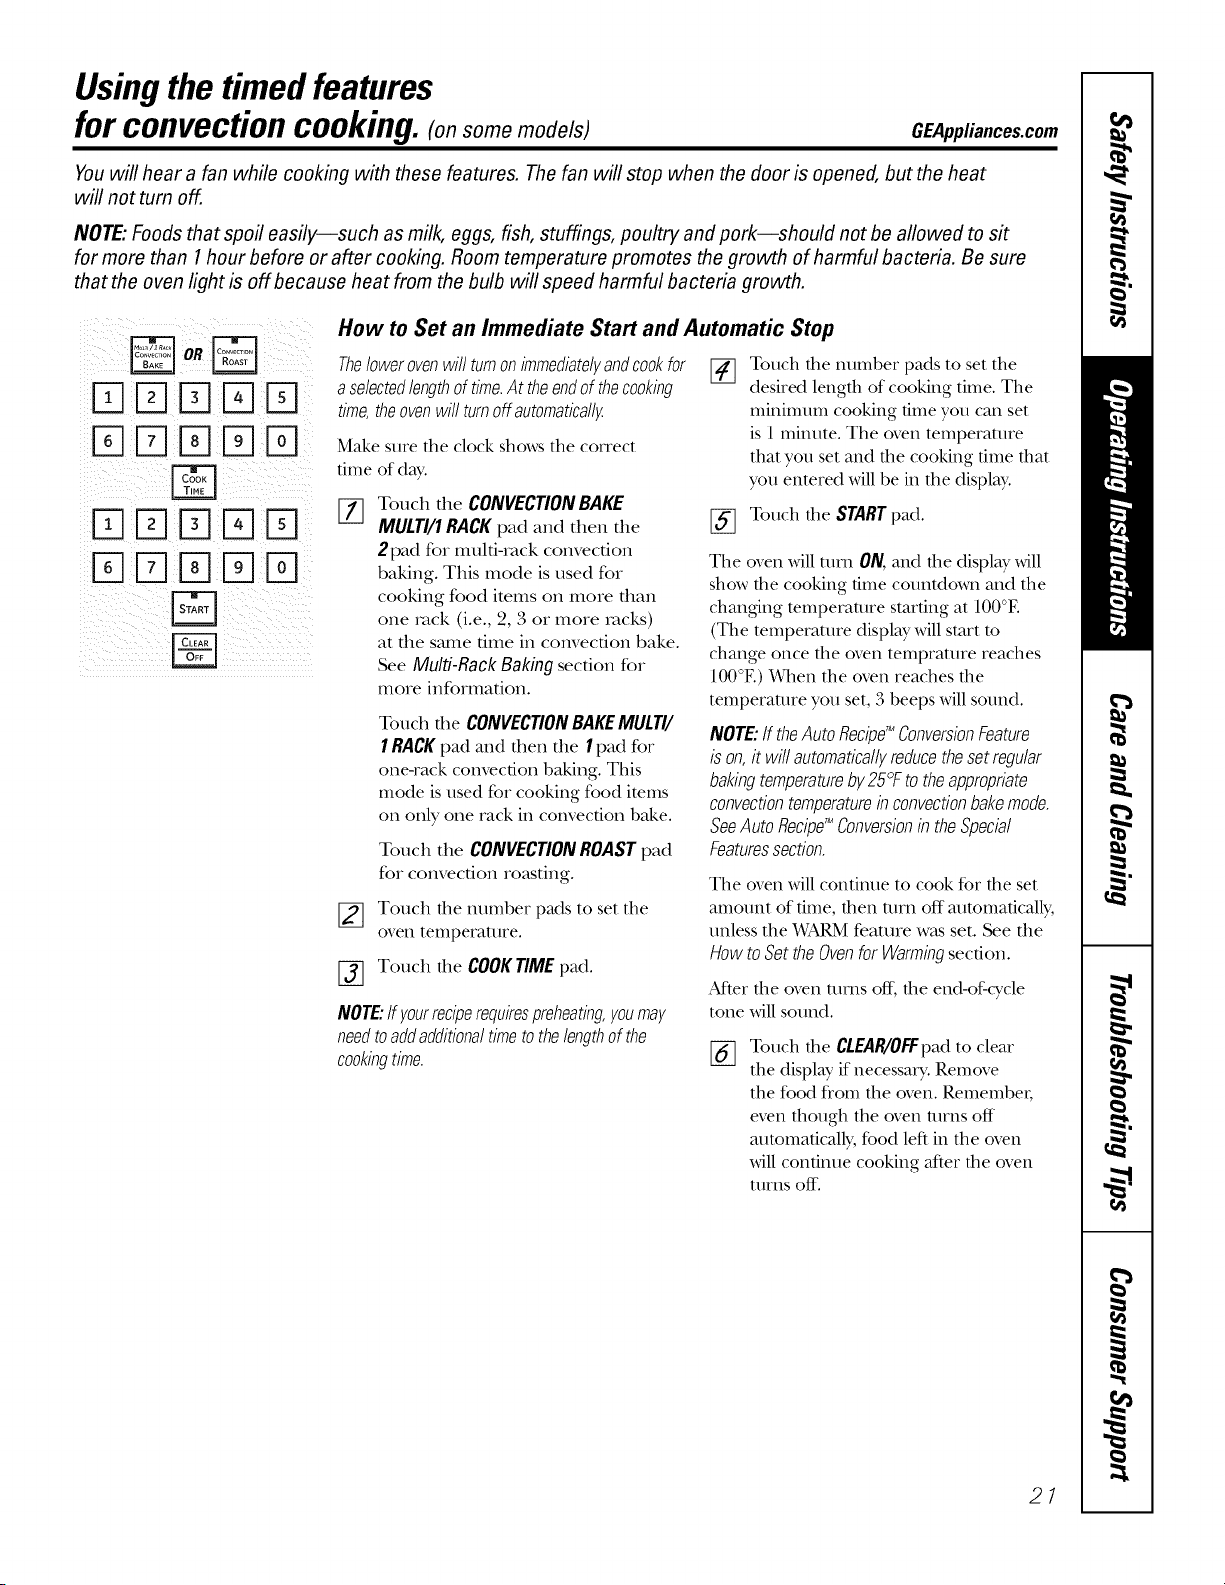
DDDDD
%DDDD
DDDD
%DDDD
B
How to Set an Immediate Start and Automatic Stop
Thelowerovenwillturnonimmediatelyandcookfor
aselectedlengthoftime.Attheendof thecookbg
time,theovenwillturnoffautomatically.
Make sure tile clock shows tile COITect
time of day'.
%
Touch the CONVECTION BAKE
MULTI/1 RACK pad and then the
2 pad for multi-rock convection
baking. This mode is used for
cooking food items on more than
one rock (i.e., 2, 3 or more racks)
at the stone time ill convection bake.
See Multi-Rack Baking section for
more information.
Touch the CONVECTIONBAKEMULTI/
1RACKpad mad then file 1pad for
one-rack convection baking. This
mode is used for cooking food items
on only one rack in convection bake.
Touch tile CONVECTIONROASTpad
for convection resisting.
Touch the number pads to set tile
oveI1 [empei'att/i'e.
Touch file COOKTIMEpad.
NOTE:Ifyourreciperequirespreheating,youmay
needtoaddadditionaltimetothelengthofthe
cookingtime.
FT1
Touch the number pads to set tile
desired length of cooking time. Tile
minimum cooking time you can set
is 1 minute. Tile oven temperature
that you set and the cooking time that
you entered will be in the display'.
[_ Touch the STARTpad.
Tile oven will mm ON, mid die display' Mll
show die cooking time countdown mid file
chmlging temperature starting at 100°E
(Tile temperature display' will start to
change once file oven temprature reaches
100°E) When file oven reaches file
temperature you set, 3 beeps will sound.
NOTE:ff theAutoRecipg_ConversionFeature
ison,it willautomaticallyreducethesetregular
bakingtemperatureby25°Ftotheappropriate
convectiontemperatureb convectionbakemode.
SeeAutoRecipg_Conversionb theSpecial
Featuressection.
Tile oven will continue to cook fbr file set
mnount of time, then Ulrn off automatically,
unless the _&fARMfeature W_LSset. See the
How to Set the Ovenfor Warmingsection.
Mter file oven rams off, file end-of:cycle
tone will sound.
%
Touch tile CLEAR/0R:pad to clear
tile display' if necessary. Remove
the food fl'om the oven. RemembeI;
even though the oven turns off
automatically, food left in the oven
will continue cooking after the oven
01I'ns off-.
27
Usingthe timedfeaturesforconvectioncooking.(onsome models)
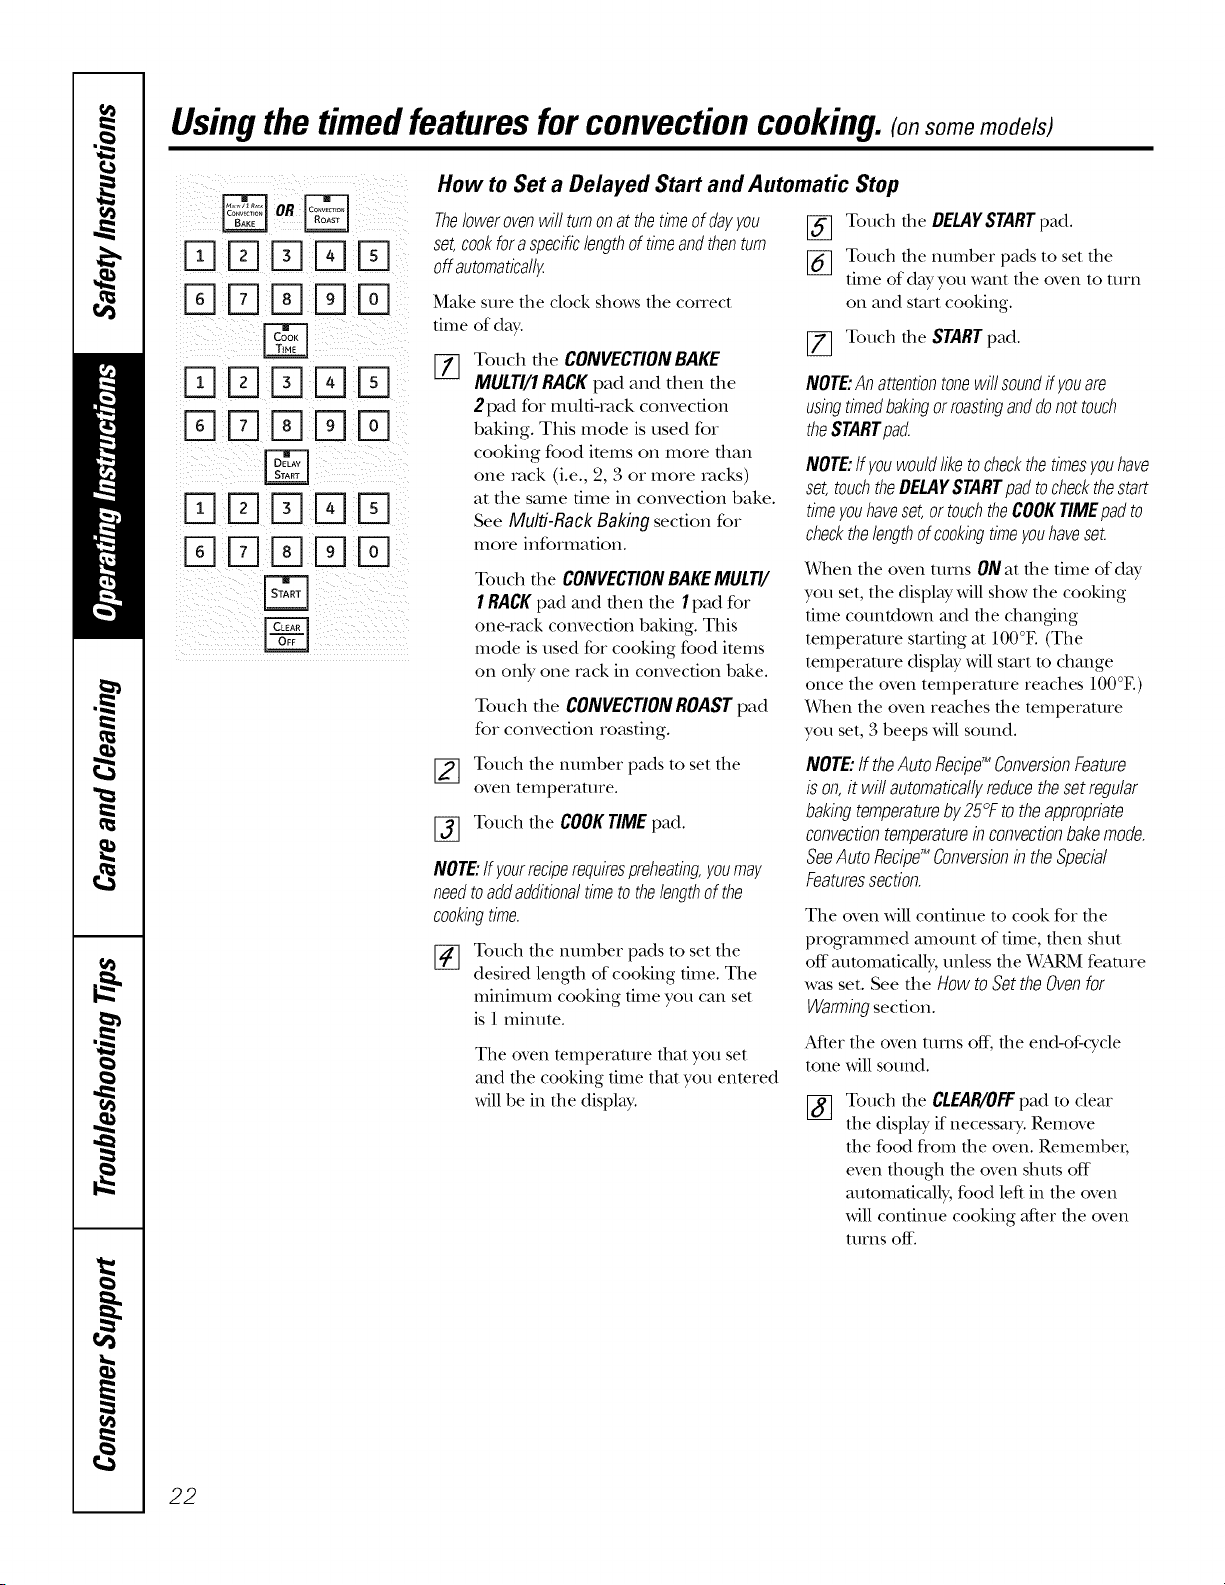
DDD D
%DD D
DDD D
%DD D
DDD%D
%D% D
How to Set a Delayed Start and Automatic Stop
Thelower ovenwill turnon at thetimeof dayyou
set,cookfor a specificlengthof timeandthenturn
off automatically
Make sure tile clock shows tile COITect
time of day'.
%
Touch the CONVECTIONBAKE
MULTI/1RACKpad and then the
2 pad for multi-rock convection
baking. This mode is used for
cooking food items on more than
one rock (i.e., 2, 3 or more racks)
at the stone time in convection bake.
See Multi-RackBakingsection for
more information.
Touch die CONVECTIONBAKEMULTI/
1RACKpad m_d then fl`ie1pad for
one-rack convection baking. This
mode isused for cooking food items
on only one rack in convection bake.
Touch the CONVECTIONROASTpad
for convection ro_ksting.
[_ Touch the DELAYSTARTpad.
[_ Touch the number pads to set the
time of day you want the oven to turn
on and start cooking.
[_ Touch the STARTpad.
NOTE:Anattentiontonewillsoundffyouare
usingtimedbakingorroastinganddonottouch
theSTARTpad
NOTE:ffyouwouldliketocheckthetimesyouhave
set,touchtheDELAYSTARTpadtocheckthestart
timeyouhaveset,ortouchtheCOOKTIMEpadto
checkthelengthofcookingtimeyouhaveset.
When die oven rams ONat die time of day
you set, die display' will show die cooking
time countdown mM the chm`iging
temperature starting at 100°E (The
temperature display' will start m change
once the oven temperature reaches 100°E)
When the oven reaches the temperature
you set, 3 beeps will sound.
_] ouch the number pads to set the
oveI`i tempeFattlt'e.
[-_ Touch the COOK TIME pad.
NOTE:Ifyourreciperequirespreheating,youmay
needtoaddadditionaltimetothelengthofthe
cookingtime.
Touch the number pads to set the
desired length of cooking time. The
ininimunt cooking time you can set
is 1 milmte.
The oven temperature that you set
and the cooking time that you entered
will be in the display'.
NOTE:If theAutoRecipg_ConversionFeature
ison,it willautomaticallyreducethesetregular
bakingtemperatureby25°Ftotheappropriate
convectiontemperatureb convectionbakemode.
SeeAutoRecipg_Conversionb theSpecial
Featuressection.
The oven will contitme to cook for die
programmed amount of time, fllen shut
off automatically, unless the _¥ARM feature
x,v_tsset. See the HOWtO Set the Oven for
Warmingsection.
Mter die oven rams off, die end-of:cycle
tone will sound.
Touch the CLEAR/OFFpad to cleat"
the display' if necessaD'. Remove
the food fl'om the oven. RemembeI;
even though the oven slmts off
aummaticMly, food left in the oven
will colit.ixtilecooking after the oven
turns off.
22
Using the convection oven. (on some models) GEAppliances.com
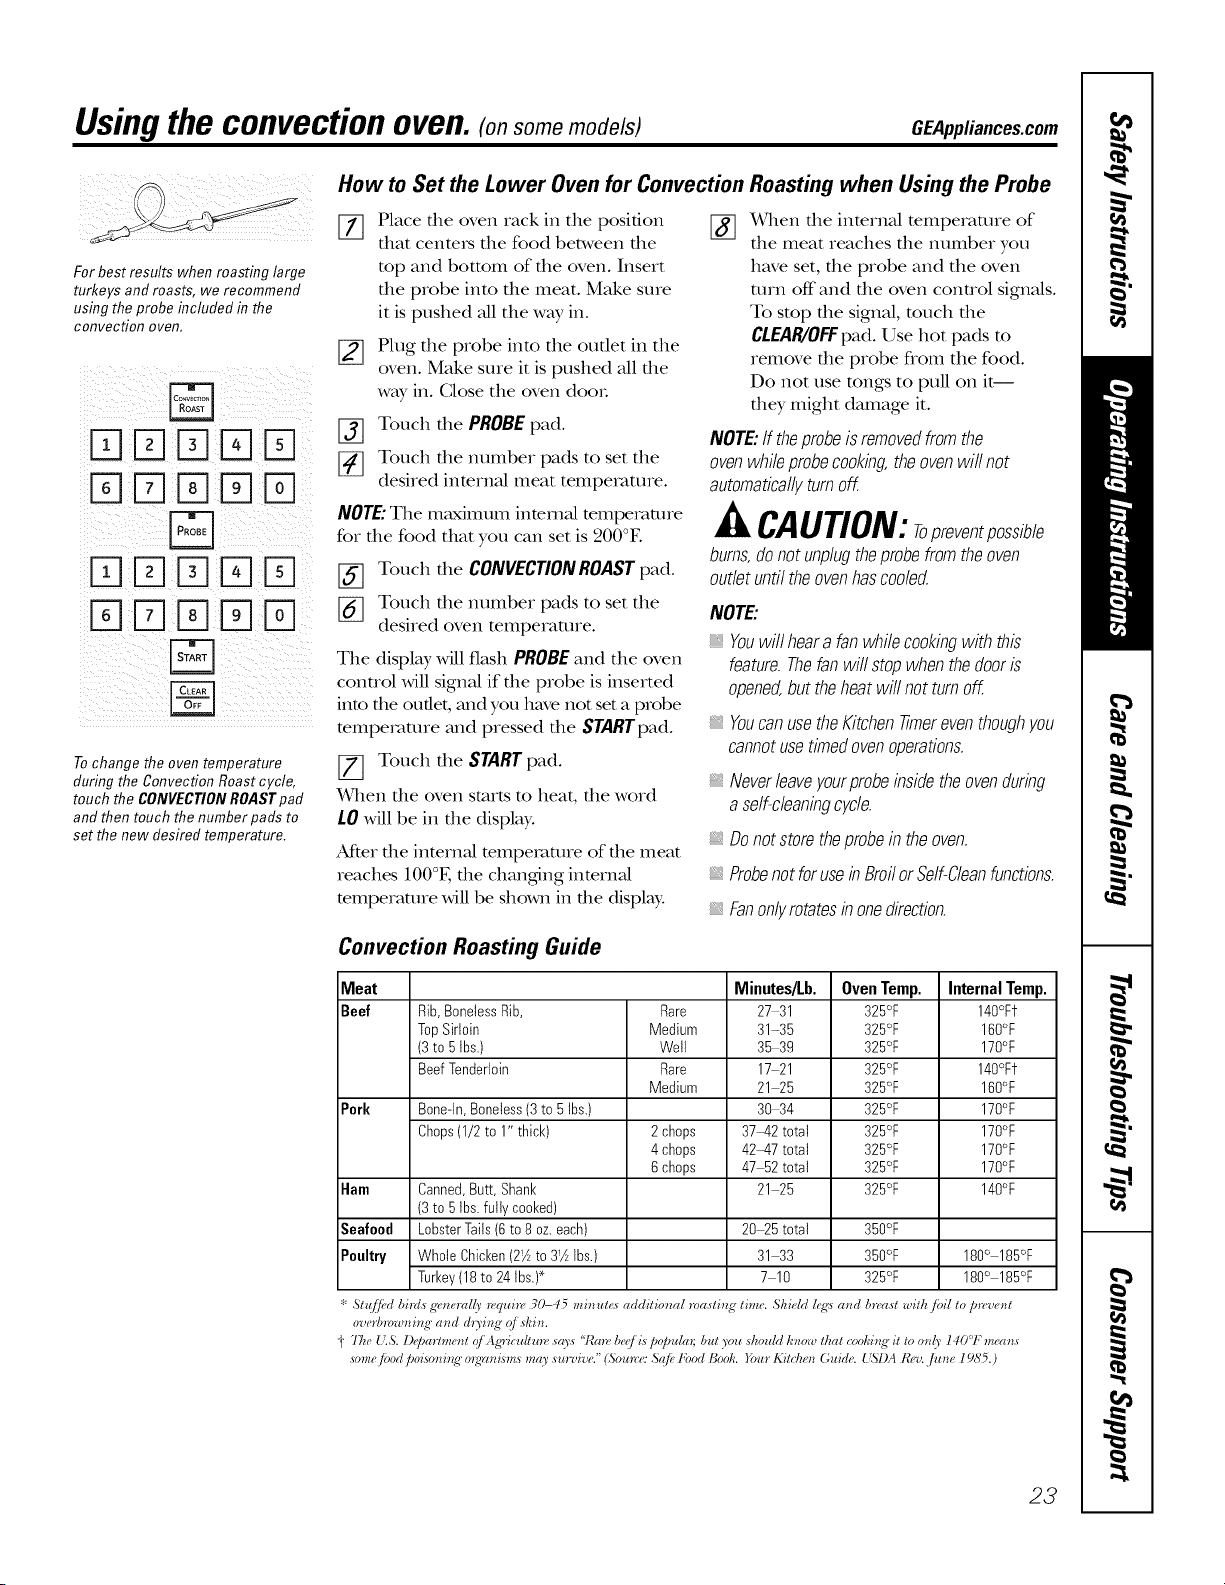
For best results when roasting large
turkeys and roasts, we recommend
using the probe included in the
convection oven,
D %DD
To change the oven temperature
during the Convection Roast cycle,
touch the CONVECTION ROAST pad
and then touch the number pads to
set the new desired temperature.
How to Set the Lower Oven for Convection
[77 Place the oven rack in the position [_]
that centers the food between the
top and bottom of the oven. Insert
the probe into the meat. Make sure
it is pushed all the way in.
%
Plug file probe into the outlet in the
oven. Make sure it is pushed all file
way in. (]lose the oven dooL
Touch the PROBE pad.
Touch the number pads to set the
desired internal meat temperature.
NOTE:The maximum inmmal mmpemmre
for the food that you can set is 200°F.
[_] Touch the CONVECTIONROASTpad.
[_ Touch the number pads to set the
desired oven temperature.
The displ W will flash PROBEand the oven
conuol will signal if the probe is inserted
into the outlet, and you have not set a probe
mmpemmre and pressed the STARTpad.
[7] Touch the STARTpad.
_qlen the oven starts m heat, the word
LOwill be in the displW.
At_er the internal temperature of the meat
reaches 100°E the changdng internal
temperature will be shown in the display.
Convection Roasting Guide
Roasting when Using the Probe
X_qlen the internal temperature of
the meat reaches the number you
have set, the probe and the oven
mrn off"and the oven control signals.
To stop the signal, much the
CtEAR/OFF pad. Use hot pads m
remove the probe from the food.
Do not use tongs to pull on it--
they might damage it.
NOTE:If theprobeisremovedfromthe
ovenwhileprobecookbg,theovenwillnot
automaticallyturnoff.
CAUTION:Topreventpossible
bums,donotunplugtheprobefromtheoven
outletuntiltheovenhascooled.
NOTE'.
, Youwillhearafanwhilecookingwith this
feature.Thefanwillstopwhenthedooris
opened,buttheheatwillnotturnoff.
_,YoucanusetheKitchentimereventhoughyou
cannotusetimedovenoperations.
_,Neverleaveyourprobebsidetheovendurbg
a self-cleanbgcycle.
_,Do not store theprobe in the oven.
Probenotforuseb BroilorSelf-Cleanfunctions.
Fanonlyrotatesin onedirection.
Meat Minutes/Lb. Oven Temp. Internal Temp.
Beef Rib,BoneiessRib, Rare 27 31 325°F 140°Ft
TopSirloin Medium 31-35 325°F 160°F
(3to 5Ibs.) Well 35-39 325°F 170°F
BeefTenderloin Rare 17 21 325°F 140°Ft
Medium 21 25 325°F 160°F
Perk Bone-In,Boneless(3to 5Ibs.) 30-34 325°F 170°F
Chops(1/2 to 1" thick) 2chops 37_42total 325°F 170°F
4chops 42_47total 325°F 170°F
6chops 47 52total 325°F 170°F
Ham Canned,Butt, Shank 21 25 325°F 140°F
(3to 5Ibs.fully cooked)
Seafood LobsterTails(6to 8 oz.each) 20_5 total 350°F
Poultry WholeChicken(21A to 31AIbs.) 31 33 350°F 180° 185°F
Turkey(18to 24Ibs.)* 7 10 325°F 180° 185°F
* Stz{/fd biTds g*')_eral(r 7_qai)_, 30-45 mi)_ut*,_ additio)ml roastb_g" time. Shidd/,,g:_ a)_d bn'ast with/oil to p_'ve)_t
overbww_ti_ N" a_td d_FbN" q/ shb_.
"i' 77w {'.S. I)_,partme_tt q/ Agricalhm, sq_'s "t'mv be,j is poptdaT; but you should know that cookbtg"it to o_t6' 140 'F m_a_ts
,ome /bod poi_m_i_g"o_g_mi_m,_may survive." (5<,unw 5q/b I'bod Book. _3m l,,'itche_tGuide. ( %I)A I¢t_v../u_te l 9S5.)
23
Usingtheslow cook,pizzaand warming features.
E]FBE]E]
FqE]r Fq q
E]E]%E]E]
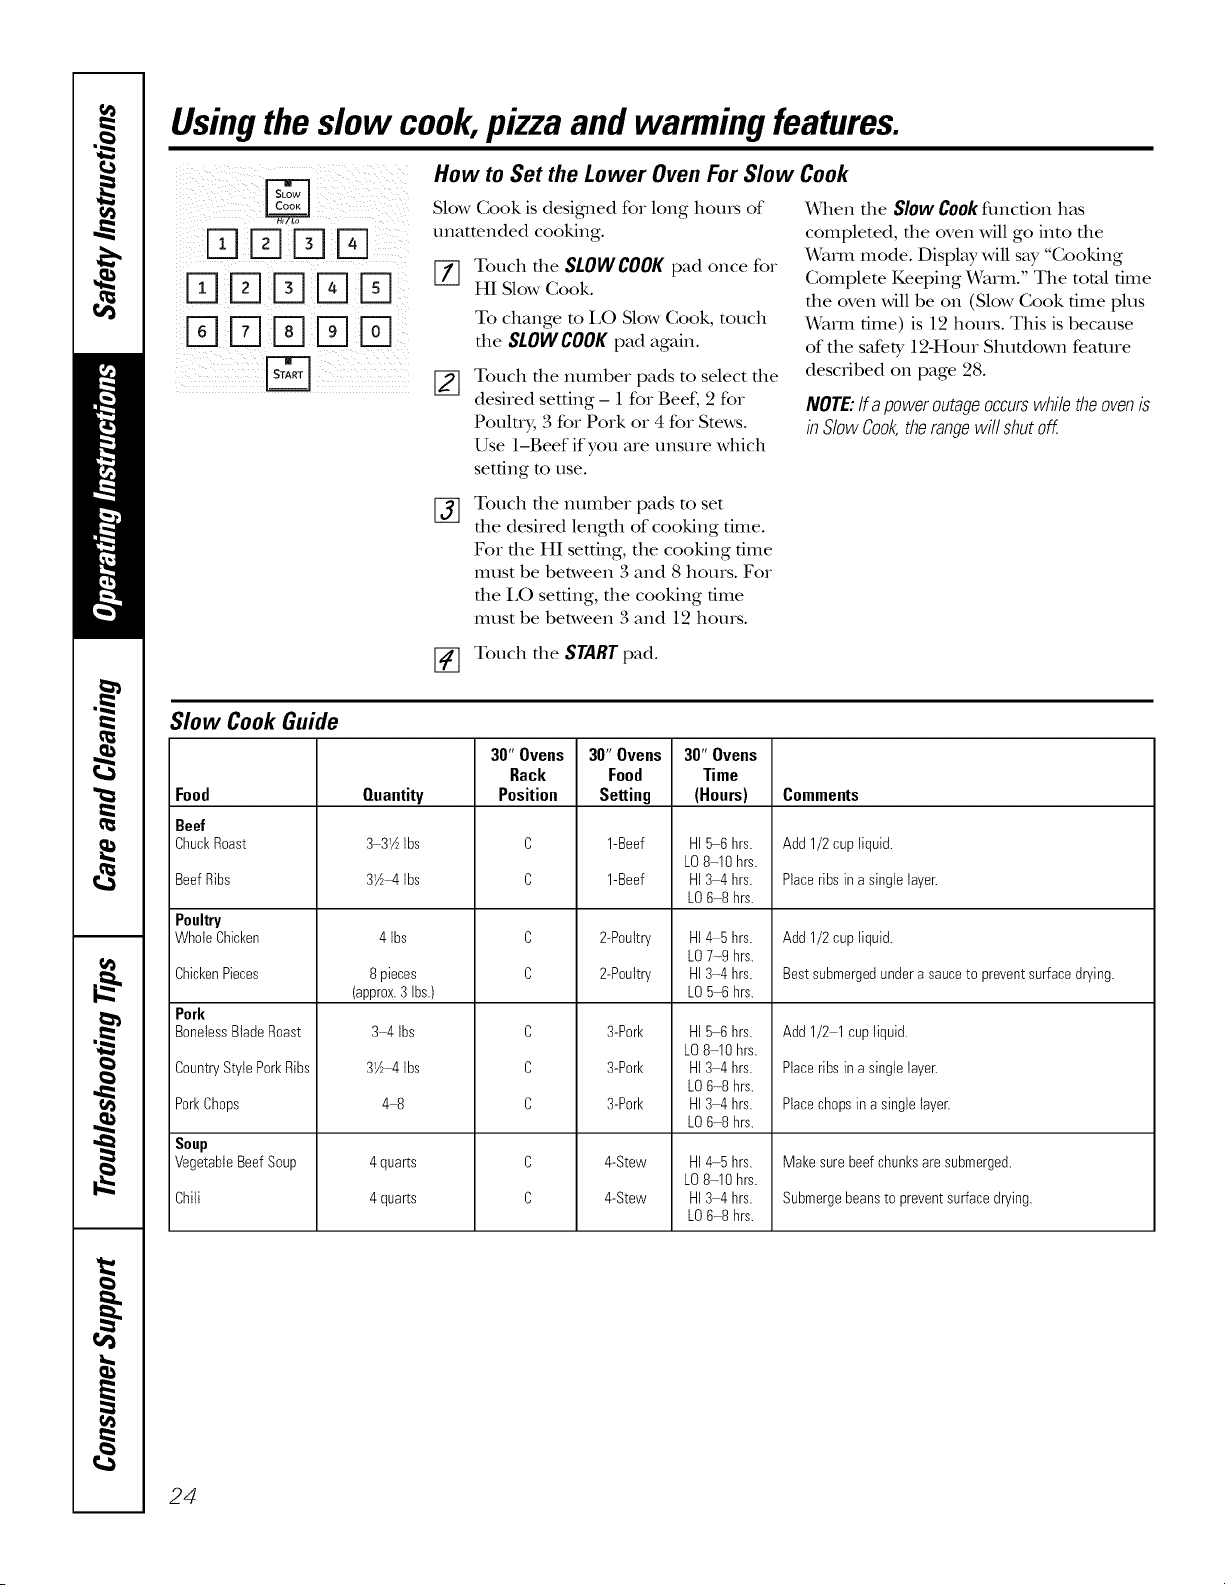
How to Set the Lower Oven For Slow Cook
Slow Cook is designed for long horns of
unattended cooking.
Touch the SLOWCOOK pad once for
HI Slow Cook.
To change to I.O Slow Cook, touch
the SLOWCOOKpad again.
Touch the number pads to select the
desired setting - 1 for Beef, 2 for
Poultry, 3 for Pork or 4 for Stews.
Use 1-Beef if you are unsure which
setting to use.
%
Touch the number pads to set
the desired length of cooking time.
Fox the HI setting, the cooking time
must be between 3 and 8 hours. For
the LO setting, the cooking time
must be between 3 and 12 hours.
When the Slow Cook flmcfion has
completed, file oven Mll go into file
Warn1 mode. Display Mll say "Cooking
Complete Keeping Warm." The total time
file oven will be on (Slow Cook time plus
Warn1 time) is 12 horns. This is because
of the safety 12-Hour Shutdown feature
described on page 28.
NOTE:Ifapoweroutageoccurswhiletheovenis
b SlowCook,therangewillshutoff.
_] Touch the STARTpad.
Slow Cook Guide
Food
Beef
ChuckRoast
BeefRibs
Poultry
WholeChicken
ChickenPieces
Pork
BonelessBladeRoast
CountryStylePorkRibs
PorkChops
Soup
VegetableBeefSoup
Chili
Quantity
3 3_½Ibs
31½_4Ibs
4 Ibs
8 pieces
(approx.3Ibs.)
3 4 Ibs
31A_4tbs
4_
4 quarts
4 quarts
30"Ovens
Rack
Position
C
C
C
C
C
C
C
C
C
30"Ovens
Food
SeRing
1-Beef
1-Beef
2-Poultry
2-Poultry
3-Pork
3-Pork
3-Pork
4-Stew
4-Stew
30"Ovens
Time
(Hours)
HI5-6 hrs.
LO8-10 hrs.
HI3 4hrs.
LO6-8 hrs.
HI_5 hrs.
LO7-9 hrs.
HI3-4 hrs.
LO5 6 hrs.
HI5-6 hrs.
LO8-10 hrs.
HI3 4hrs.
LO6-8 hrs.
HI3 4hrs.
LO6-8 hrs.
HI4-5 hrs.
LO8-10 hrs.
HI3 4hrs.
LO6-8 hrs.
Comments
Add 1/2cup liquid.
Placeribs ina singlelayer.
Add 1/2cup liquid.
Bestsubmergedunderasauceto preventsurfacedrying.
Add 1/2 1cupliquid.
Placeribs ina singlelayer.
Placechopsin a singlelayer.
Makesurebeefchunksare submerged.
Submergebeansto preventsurfacedrying.
24
GEAppliances.com
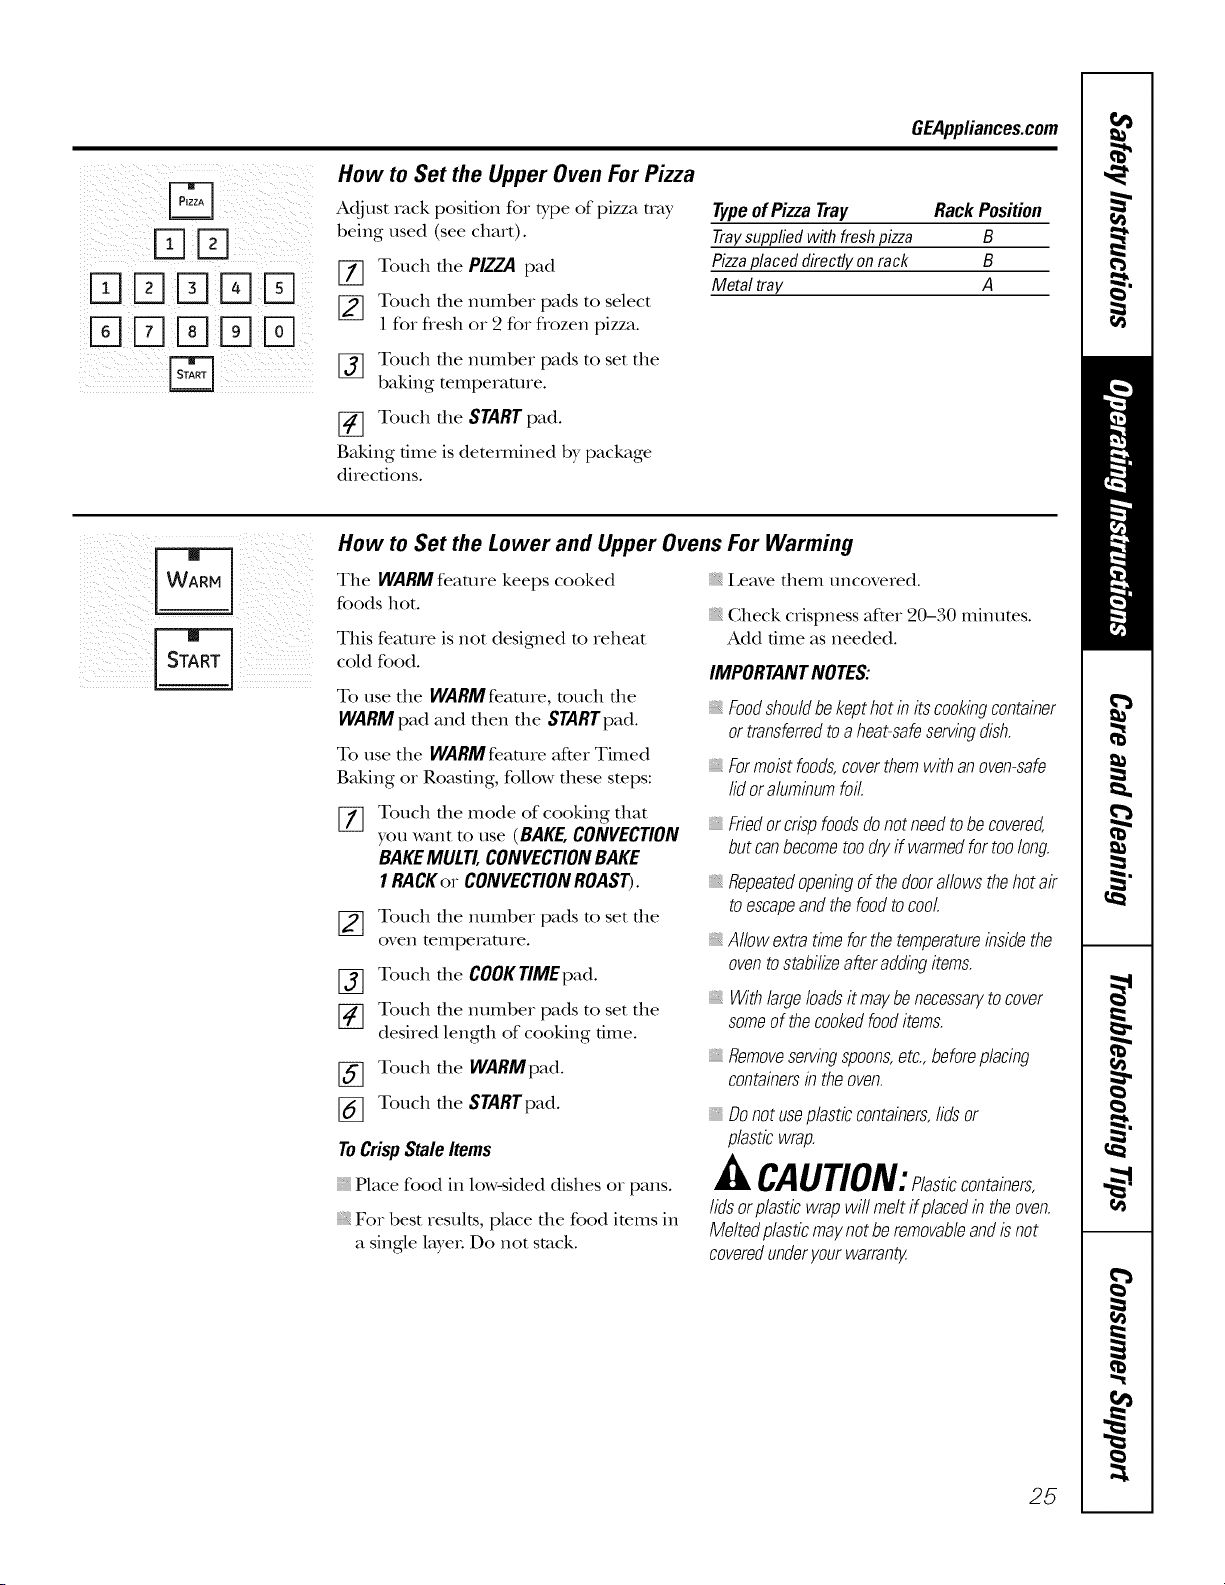
How to Set the Upper Oven For Pizza
Adjust rack position for b,pe of pizza m_y
being used (see chart).
[-i7 Touch the PIZZA pad
[_ Touch the number pads to select
1 for flesh or 2 for flozen pizza.
[_ Touch the number pads to set the
baking temperature.
[_ Touch the STARTpad.
Baking time is determined by package
directions.
Typeof Pizza Tray Rack Position
Traysuppfiedwith freshpizza B
Pizzaplaced directly onrack B
Metal tray A
How to Set the Lower and Upper Ovens For Warming
The WARMfeature keeps cooked I,eave them uncovered.
foods hot.
Check crispness after 20-30 minutes.
This feature is not designed m reheat
cold food.
To t;lsethe WARMfeature, much the
WARMpad and then the STARTpad.
To use the WARMfeature after Timed
Baking or Roasting, follow these stops:
[_ Touch the mode of cooking that
you want m use (BAKE,CONVECTION
BAKEMULTI,CONVECTIONBAKE
1RACKor CONVECTIONROAST).
[_ Touch the number pads to set the
oven mmpe_wture.
[_] Touch the COOKTIMEpad.
[-_ Touch the number pads to set the
desired length of cooking time.
[_ Touch the WARMpad.
[_ Touch the STARTpad.
To Crisp Stale Items
Place food in low-sided dishes or pans.
For best results, place fl_e food items in
a single layeL Do not stack.
Add time as needed.
IMPORTANTNOTES:
Foodshouldbekepthotb itscookbgcontainer
ortransferredtoa heat-safeservingdish.
Formoistfoods,coverthemwithanoven-safe
lidoralumbumfoil.
Friedorcrispfoodsdonotneedtobecovered,
butcanbecometoodryif warmedfortoolong.
Repeatedopenbgofthedoorallowsthehotair
toescapeandthefoodtocool,
Allowextratimeforthetemperaturebsidethe
oventostabilizeafteraddingitems.
Withlargeloadsitmaybenecessarytocover
someof thecookedfooditems.
Removeservingspoons,etc.,beforeplacing
containersintheoven.
Donotuseplasticcontainers,lidsor
plasticwrap.
CAUTION:elasticcontainers,
lidsorplasticwrapwillmeltifplacedb theoven.
Meltedplasticmaynotberemovableandisnot
coveredunderyourwarran_
25
Usingtheself-cleaning upperand lower ovens.
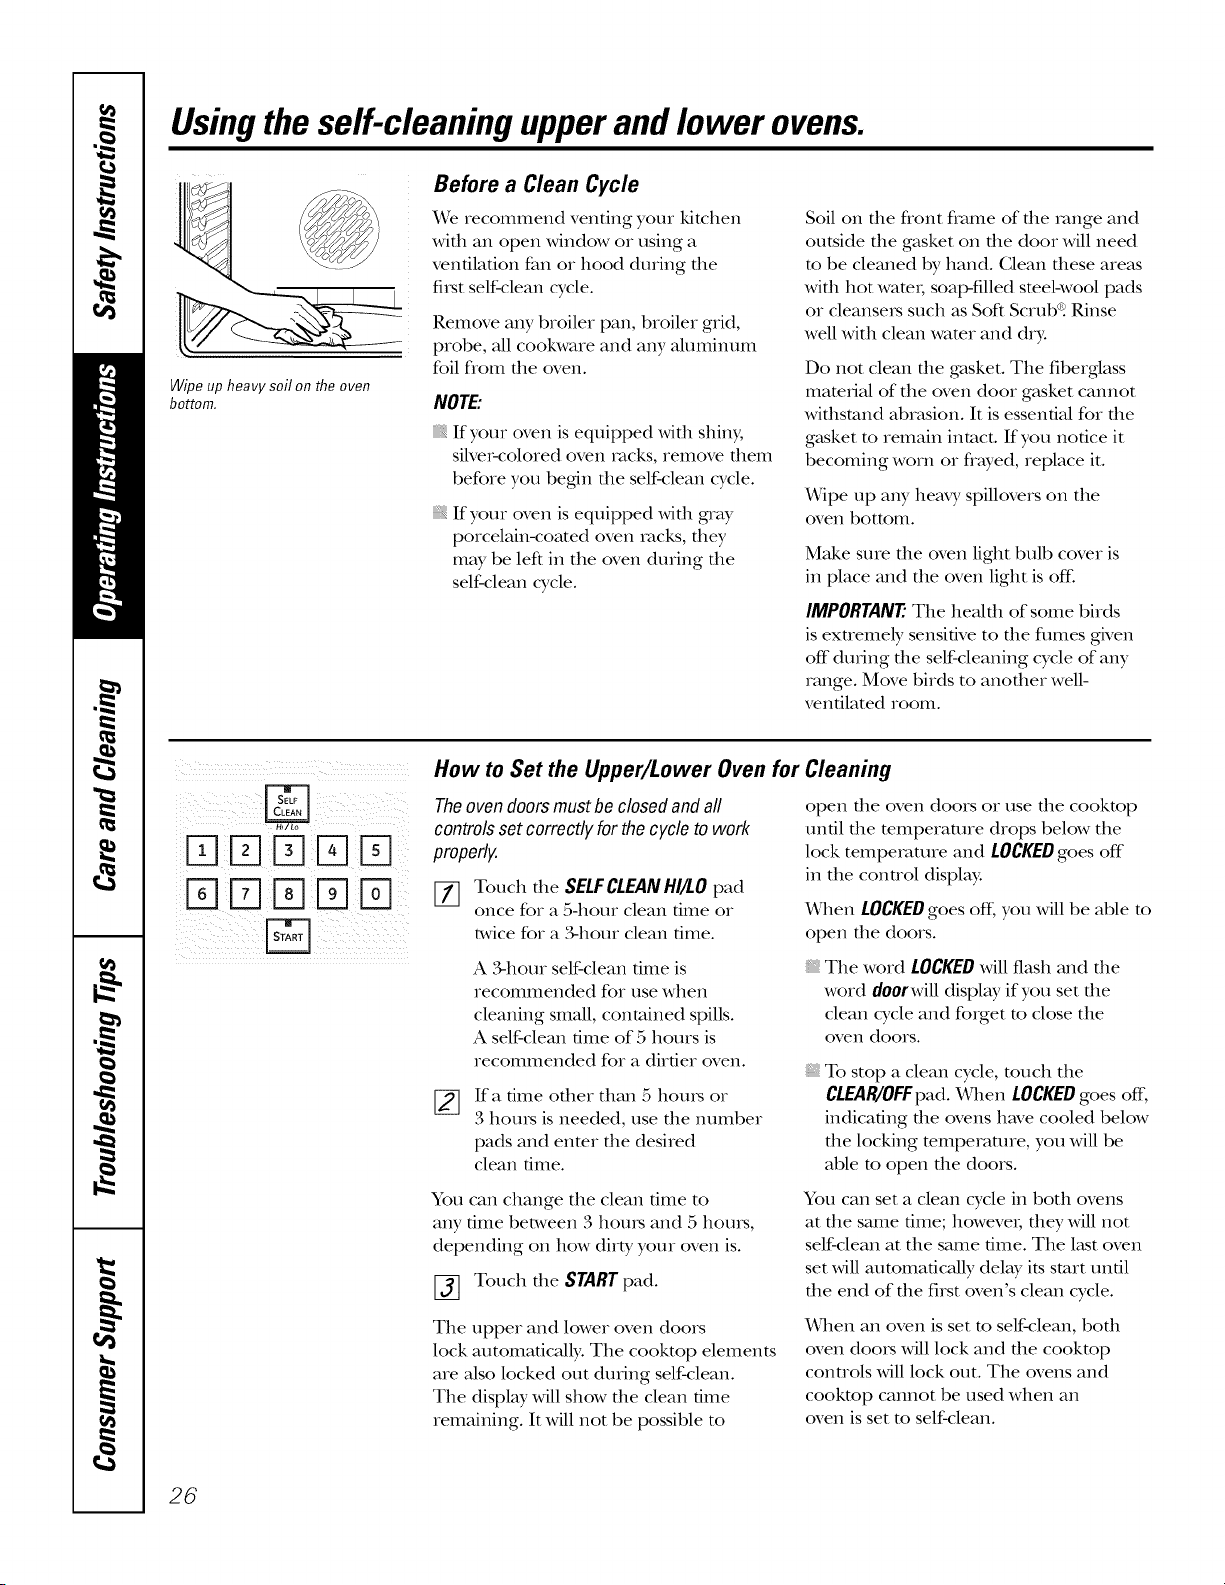
Wipeupheavysoilontheoven
bottom.
Before a Clean Cycle
We recommend venting your kitchen
with an open window or using a
ventilation fan or hood during the
fi_st self-clean cycle.
Remove any broiler pan, broiler grid,
probe, all cookware and any aluminum
foil flom tile oven.
NOTE'.
If your oven is equipped widl shin)/,
silver-colored oven tacks, remove them
before you begdn the self-clean cycle.
If your oven is equipped widl gray
porcelain-corned oven tacks, dley
may be left in the oven during the
self-clean cycle.
Soil on file flont flame of file range and
outside tile gasket on die door will need
m be cleaned by hand. Clean these areas
with hot wamt; soap-filled smel-wool pads
or cleansers such as Soft Scrubq Rinse
well with clean wamr and dry.
Do not clean die gasket. The fiberglass
mamfial of the oven door gasket cannot
withstand abrasion. It is essential for the
g_tsket m remain intact. If you notice it
becoming worn or flayed, replace it.
Wipe up any hemT spillovers on the
oven bottom.
Make sure tile oven light bulb cover is
in place and the oven light is of£
IMPORTANT The healfll of some birds
is exnemely sensitive to die fumes gNen
off during file self-cleaning cycle of any
range. Move birds to another well-
ventilated room.
iii)ij)iliI )}i!i j(iiii
iD K]D D D
How to Set the Upper/Lower Oven for
The oven doors must be closed and all
controls set correctly for the cycle to work
properly.
[77 Touch die SELFCLEANHI/LO pad
once for a 5-hour clean time or
t_,vicefor a 3-hour clean time.
A 3-hour self-clean dine is
recommended for use when
cleaning small, contained spills.
A self-clean dine of 5 hours is
recommended for a dirtier oven.
Ifa time other than 5 horns or
3 horns is needed, use tile number
pads and enter the desired
clean time.
You can change the clean time to
any time between 3 horns and 5 horns,
depending on how dirty your oven is.
[_] Touch tile STARTpad.
The upper and lower oven doors
lock automaticMly. The cooktop elements
are also locked out during self-clean.
The display will show the clean time
remaining. It will not be possible to
Cleaning
open file oven doors or use die cookmp
until die mmperamre drops below tile
lock temperature and LOCKEDgoes off
in the conuol display.
x_qlen LOCKEDgoes ofL you will be able to
open the doors.
The word LOCKEDwill flash and tile
word doorwill display if you set the
clean cycle and forget to close the
oven dools.
To stop a clean cycle, much the
CLEAR/OFFpad. When LOCKEDgoes off;
indicating the ovens have cooled below
die locking temperature, you Mll be
able to open die doors.
You can set a clean cycle in both ovens
at file same time; however; dley Mll not
self-clean at the same time. The last oven
set Mll automaficMly delay its start until
the end of the first oven's clean cycle.
When an oven is set m self-clean, bodl
oven doors Mll lock and die cooktop
controls Mll lock out. The ovens and
cooktop camlot be used when an
oven is set m self-clean.
26
GEAppliances.com
The oven doors must be closed and all controls set correctly for the cycle to work properly.
@
DDD%D
%DD D
DDD D
%DD D
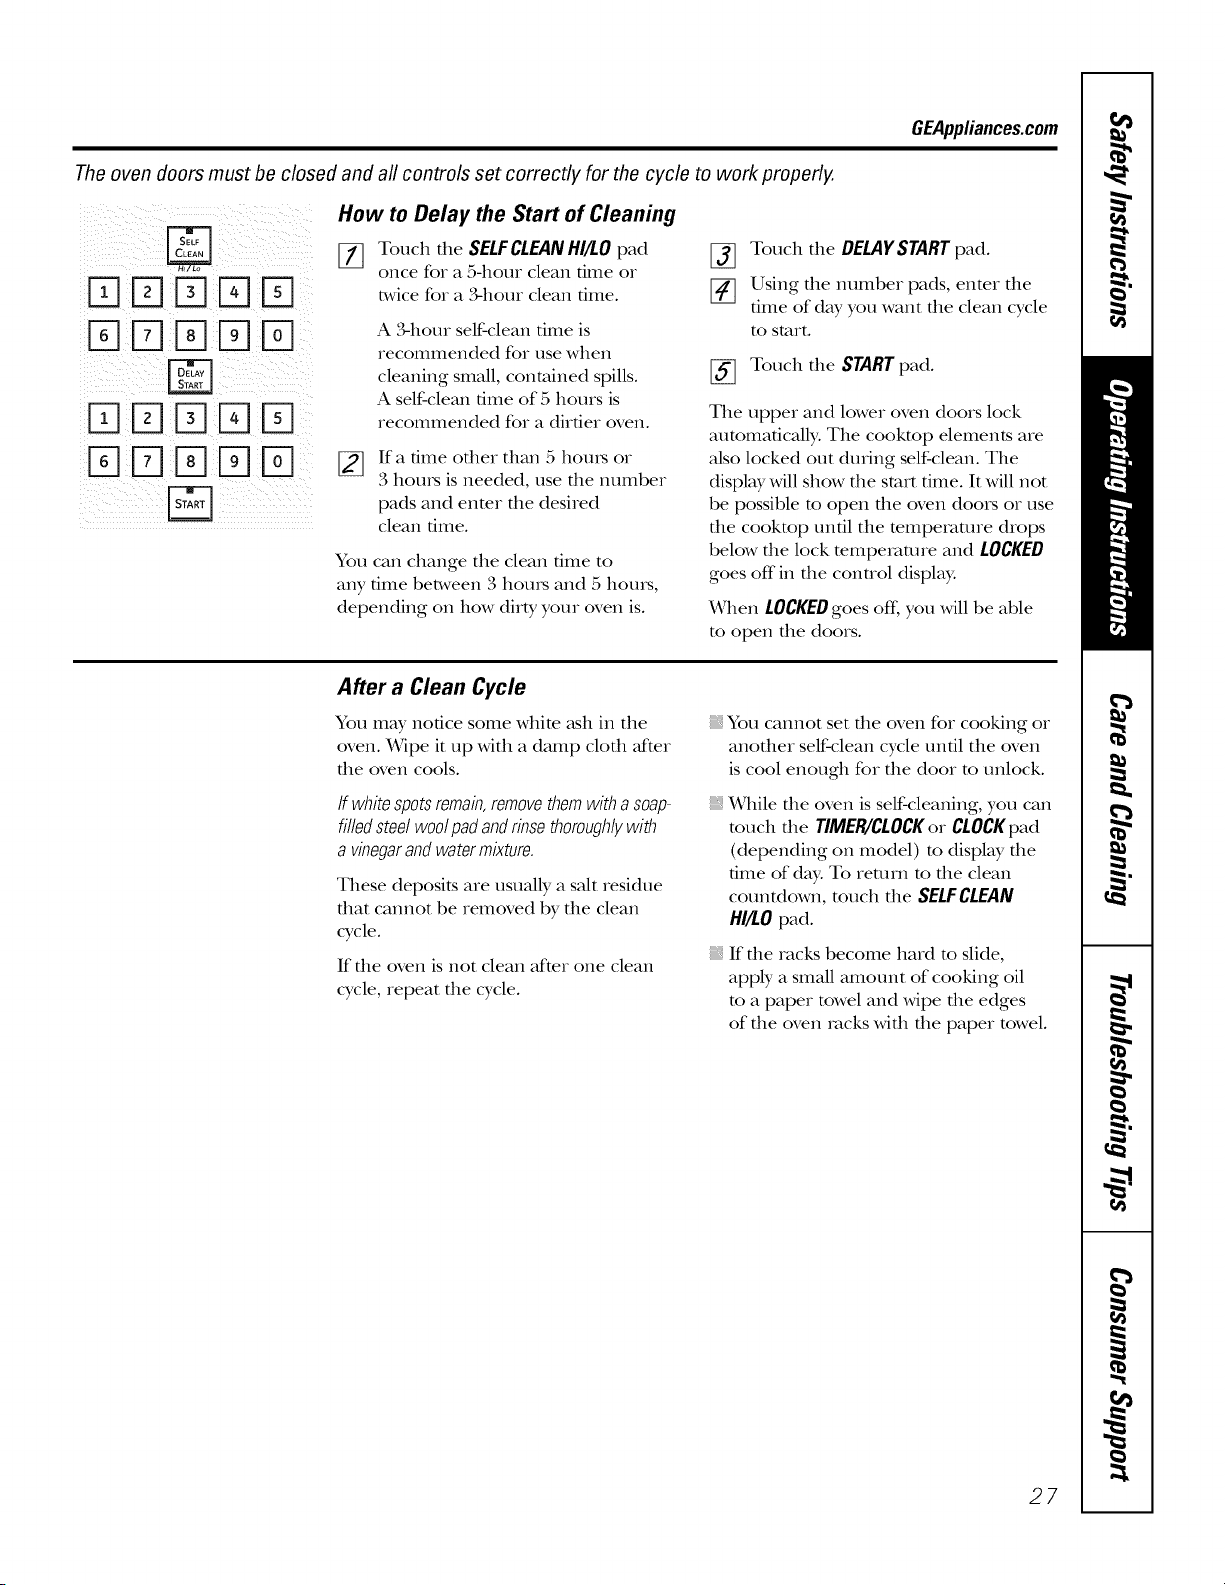
How to Delay the Start of Cleaning
[77 Touch the SELFCLEANHI/LOpad
once for a 5-hour clean time or
twice for a ,%hour clean time.
A ?,-hour self-clean dine is
recommended for use when
cleaning small, contained spills.
A self-clean time of 5 hours is
recommended for a dirtier oven.
[]
Ifa time other than 5 houls or
3 hours is needed, use the number
pads and enter the desired
clean time.
You can change the clean time to
any time between 3 hours and 5 houis,
depending on how dirty your oven is.
[_ Touch the DELAYSTARTpad.
[_] Using the number pads, enter the
dine of day you want the clean cycle
to start.
[_ Touch the STARTpad.
The upper and lower oven doors lock
automaficMly. The cooktop elements are
also locked out during self-clean. The
display will show the start time. It will not
be possible m open the oven doors or use
the cookmp until the mmperamre drops
below the lock tempe_vmlre and LOCKED
goes off'in the conuol display.
x_qlen LOCKEDgoes off, you will be able
to open the doors.
After a Clean Cycle
You may notice some white _ksh in the
oven. Wipe it up with a damp cloth meter
the oven cools.
If whitespotsremab,removethemwithasoap-
filledsteelwoolpadandrbse thorough/;/with
a vinegarandwatermixture.
These deposits are usually a salt residue
that cannot be removed by the clean
cycle.
If the oven is not clean after one clean
cycle, repeat the cycle.
You cannot set the oven for cooking or
another self-clean cycle until the oven
is cool enough for the door to unlock.
While file oven is self-cleaning, you can
much the TIMER/CLOCKor CLOCKpad
(depending on model) to display the
time of dW. To return m the clean
countdown, much the SELFCLEAN
HI/tO pad.
If die racks become hard m slide,
apply a small amount of cooking oil
m a paper towel and wipe the edges
of the oven _vmkswith the paper towel.
27
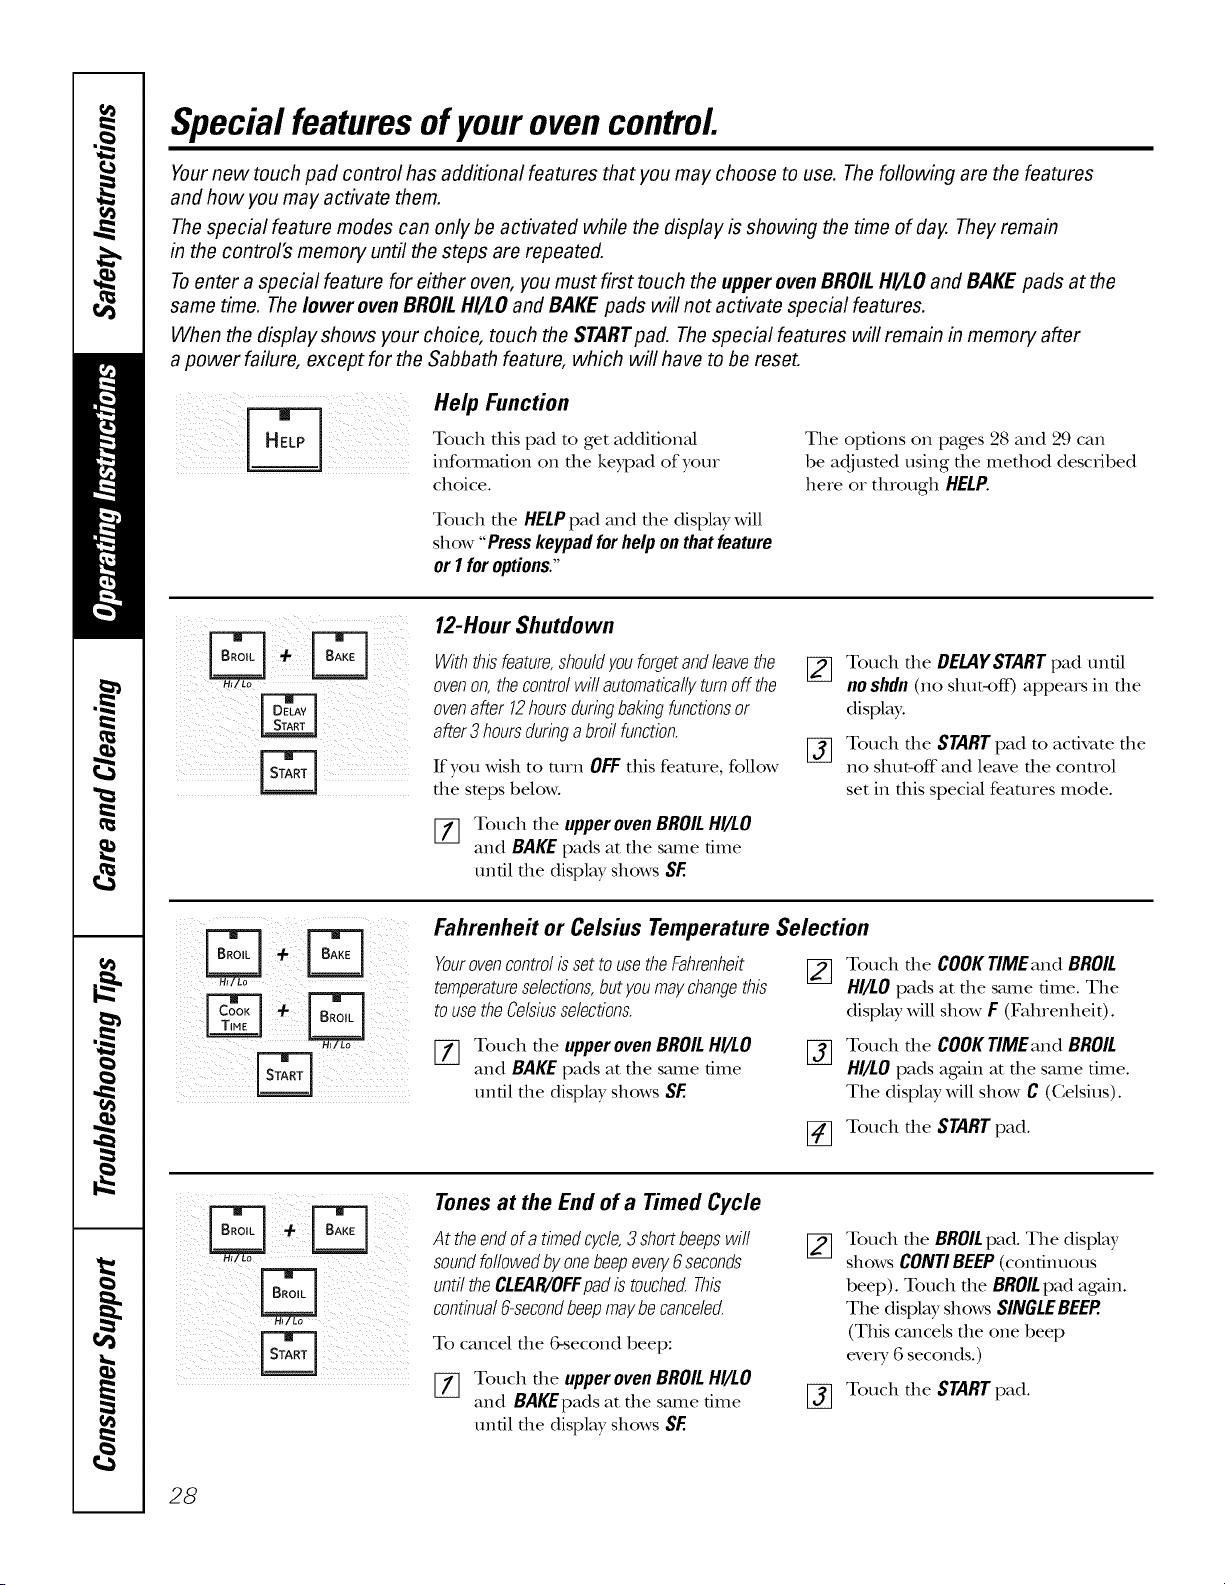
Special featuresofyourovencontrol
Yournew touch pad control has additional features that you may choose to use. The following are the features
and how you may activate them.
The special feature modes can only be activated while the display is showing the time of day. They remain
in the control's memory until the steps are repeated.
Toenter a special feature for either oven, you must first touch the upper oven BROILHI/LO and BAKE pads at the
same time. Thelower oven BROILHI/LO and BAKEpads will not activate special features.
When the display shows your choice, touch the $TARTpad. Thespecial features will remain in memory after
a power failure, except for the Sabbath feature, which will have to be reset.
Help Function
Touch this pad to get additional
infomnation on the keypad of your
choice.
Touch the HELPpad and the display will
show "Press keypad for help on that feature
or I for options."
The options on pages 28 and 29 can
be adjusted using the method described
here or through HELP.
}iii!iil)j if(!iiiiJl
12-Hour Shutdown
Withthisfeature,shouldyouforgetandleavethe
ovenon,thecontrolwillautomaticallyturnoff the
ovenafter 12hoursduringbakingfunctionsor
after3 hoursduringabroilfunction.
If you wish to turn OFFthis feature, follow
the steps below.
[_ Touch the upper oven BROIL HI/LO
and BAKE pads at the same time
until the display shows SE
%
Touch the DELAYSTART pad until
noshdn (no shut-off) appears in the
display.
Touch the START pad to acdvate the
no shut-off and leave the control
set in this special features mode.
Fahrenheit or Celsius Temperature Selection
YourovencontrolissettousetheFahrenheit
temperatureselections,butyoumaychangethis
tousetheCelsiusselections.
[_ Touch the upper oven BROIL HI/LO
and BAKE pads at the same time
until the display shows SE
[]
%
Touch the COOKTIME and BROIL
HI/LO pads at the same time. The
display will show F (Fahrenheit).
Touch the COOKTIME and BROIL
HI/LO pads again at the same time.
The display will show C (Celsius).
[_ Touch the STARTpad.
!i/ ii! iiiil ii iiiiiliiiii iilIIiiiiii!
Tones at the End of a Timed Cycle
At theendofatimedcycle,3shortbeepswill
soundfollowedbyonebeepevery6seconds
untiltheCLEAR/Offpadis touched.This
contbualgsecondbeepmaybecanceled.
To cancel the &second beep:
[_ Touch the upper oven BROIL HI/LO
and BAKEpads at the same time
until the display shows SE
Touch the BROILpad. The display
shows CONTIBEEP(continuous
beep). Touch the BROILpad again.
The display shows SINGLEBEEP.
(This cancels the one beep
eve_ y 6 seconds.)
[_ Touch the STARTpad.
28
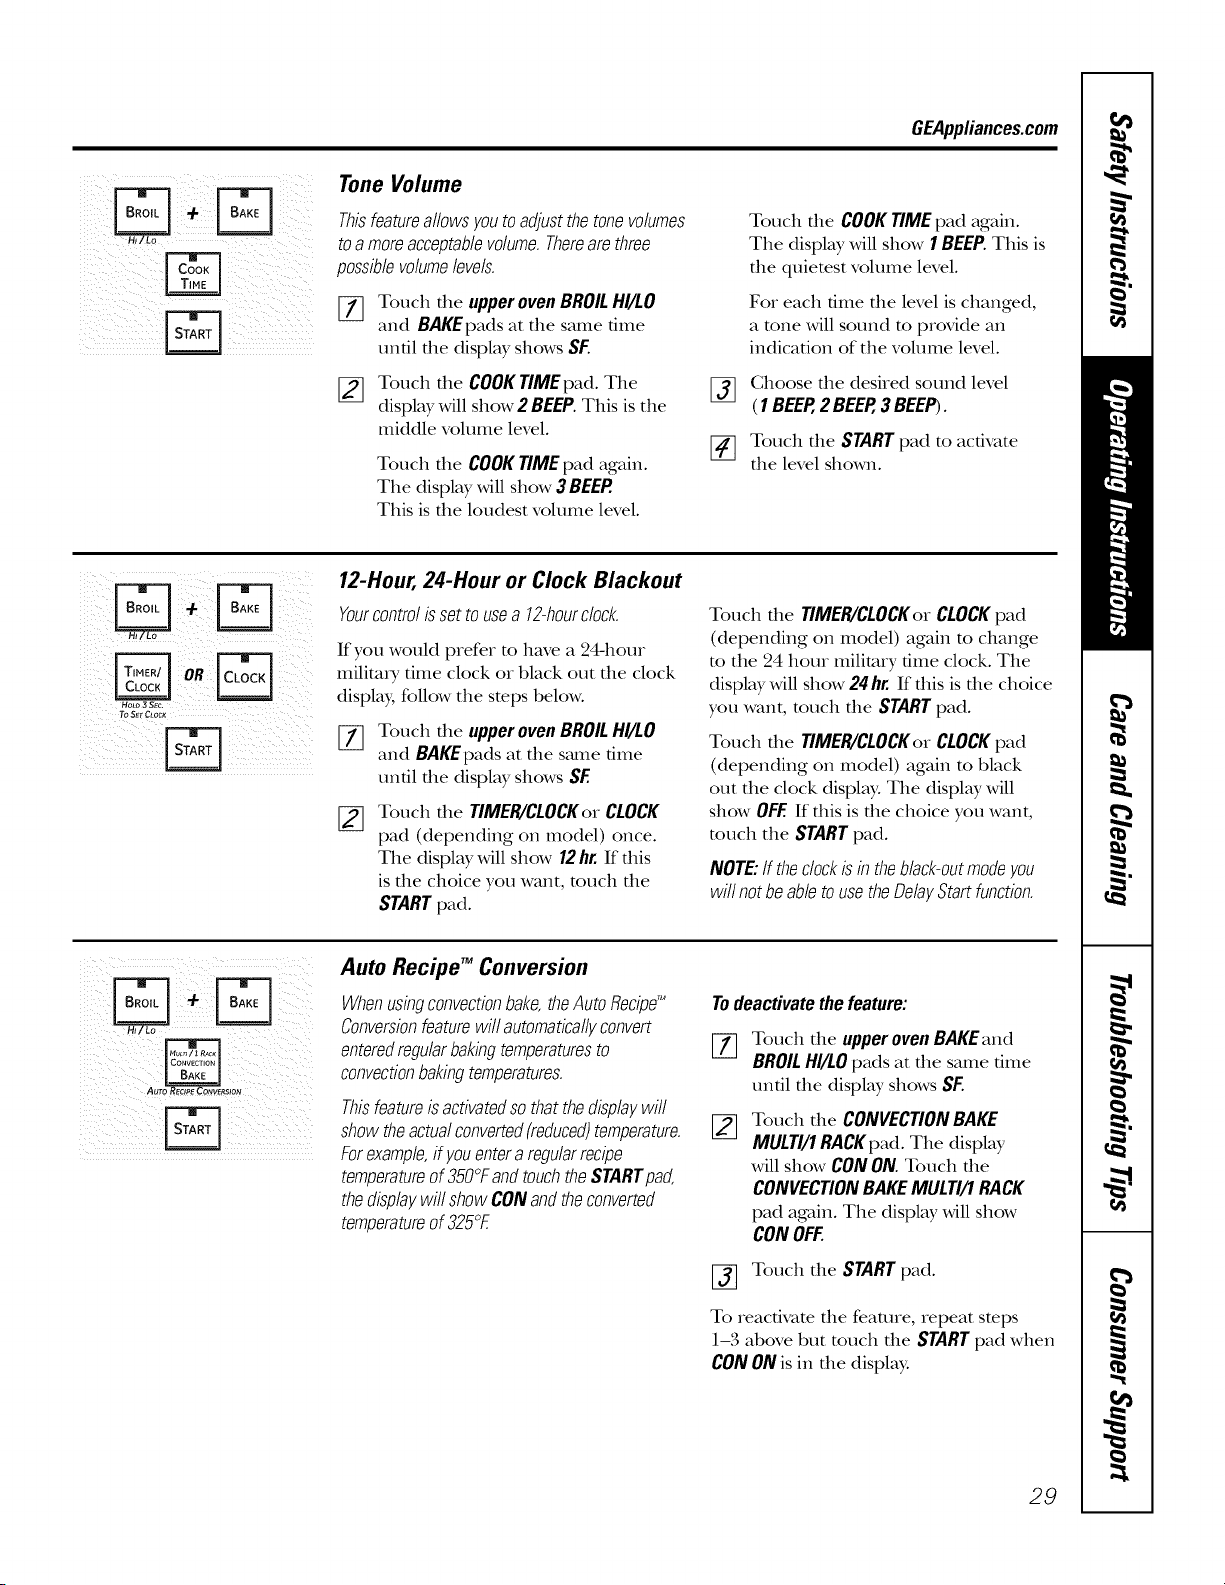
GEApplianees.com
i) i i iI
H
ii_ _i i i iii I ii
ii i ii iliI) iil I!II
i ii!ii! iiiv
Tone Volume
Thisfeatureallowsyoutoadjustthetonevolumes
toa moreacceptablevolume.Therearethree
possiblevolumelevels.
%
[]
Touch the upper oven BROIL HI/LO
and BAKEpads at the same time
until the display shows SF.
Touch the COOK TIME pad. The
display will show 2 BEEP. This is the
middle volume level.
Touch the COOK TIME pad again.
The display will show 3 BEEP.
This is the loudest volume level.
Touch the COOK TIME pad again.
Tile display will show 1 BEEP. This is
the quietest volume level.
For each time tile level is changed,
a tone will sound to provide an
indication of tile volume level.
ff_] Choose tile desired sound level
(1BEEP,2 BEEP,3 BEEP).
_] Touch tile STARTpad to activate
tile level shown.
To SEtCLOC_
12-Hour,24-Hour or Clock Blackout
Yourcontrolissettousea 12-hourclock.
If you would prefer to have a 24-hour
militm T time clock or black out the clock
display, follow tile steps below.
%
Touch tile upper oven BROIL HI/LO
and BAKEpads at tile s_une time
until tile display shows SF.
Touch tile TIMER/CLOCKor CLOCK
pad (depending on model) once.
Tile display will show 12hr. If this
is tile choice you want, touch tile
START pad.
Touch file TIMER/CLOCKorCLOCKpad
(depending on model) again m change
m tile 24 hour military time clock. Tile
display will show 24 hr. If this is the choice
you want, much the START pad.
Touch file TIMER/CLOCKorCLOCKpad
(depending on model) again m black
out tile clock display. Tile display will
show OFF.If this is tile choice you want,
much tile STARTpad.
NOTE:If theclockisb theblack-outmodeyou
willnotbeabletousetheDelayStartfunction.
Auto Recipe TM Conversion
Whenusbgconvectionbake,theAutoflecipg_
Conversionfeaturewillautomaticallyconvert
enteredregularbakingtemperaturesto
convectionbakingtemperatures.
Thisfeatureisactivatedsothatthedisplaywill
showtheactualconverted(reduced)temperature.
Forexample,ffyouenteraregularrecipe
temperatureof350°FandtouchtheSTARTpad,
thedisplaywillshowCONandtheconverted
temperatureof325°E
Todeactivatethefeature:
%
Touch tile upper oven BAKEand
BROILHI/LO pads at tile same time
until tile display shows SF.
Touch tile CONVECTIONBAKE
MULTI/1RACKpad.Tile display
will show CONON.Touch tile
CONVECTIONBAKEMULTI/1RACK
pad again. Tile display will show
CONOFF.
[_] Touch tile STARTpad.
To reactivate tile feature, repeat steps
1-3 above but touch tile STARTpad when
CONONis in tile display:
29
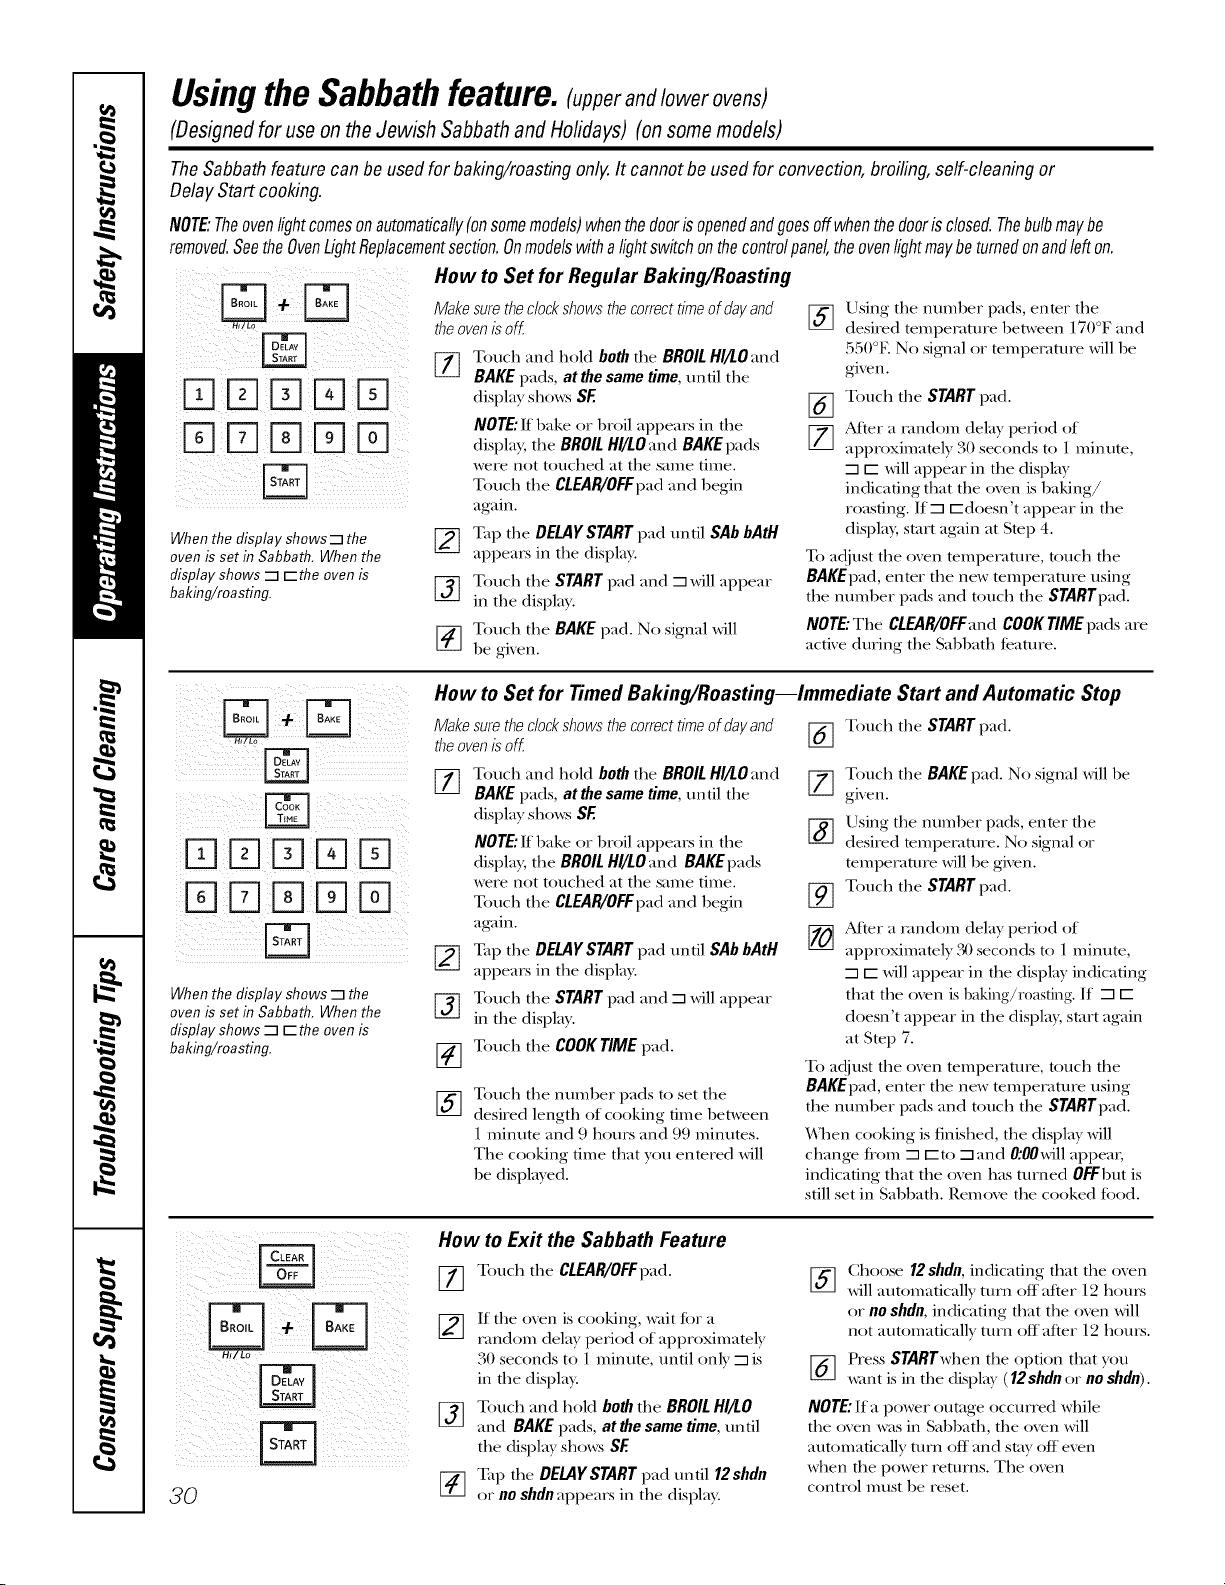
UsingtheSabbathfeature,lupperandlowerovens)
(DesignedforuseontheJewish SabbathandHolidays)(onsomemodels)
TheSabbathfeature canbe usedforbaking/roastingonly.It cannotbe usedfor convection,broiling,self-cleaningor
DelayStart cooking.
NOTE:Theovenlightcomesonautomatically(onsomemodels)whenthedoorisopenedandgoesoffwhenthedoorisclosed.Thebulbmaybe
removed.SeetheOvenLightReplacementsection.Onmodelswithalightswitchonthecontrolpanel,theovenlightmaybeturnedonandlefton.
How to Set for Regular Baking/Roasting
ill (!!iI i i iii! !!! iiiiiiii iiiiii i
When the display shows-q the
oven is set in Sabbath. When the
display shows -1 r-the oven is
baking/roa sting.
Make sure theclock shows the correct time of day and
theoven is off.
[-_ Toucla and hold both the BROIL Hl/LO:md
BAKE pads, at the same time, until the
display sho_v_SF
NOTE."If bake or broil appears in the
displa}; the BROIL Hl/LOand BAKE pads
were not touched at tlae same time.
Touch the CLEAR/OFFpad :and begin
again.
[-_ Tap the DELAYSTART pad until SAb bAtH
appears in the display.
Touch the START pad :and --1will appear
in the displa}.
[_ ouch the BAKE pad. No signal will
be gix en.
%
%
Using the number pads, enter the
desired tempelature between 170°F :and
550°E No signal or tempelature will be
given.
Touch the STARTpad.
After a 1,mdom delay period of
approximately 30 seconds to 1 minute,
--1r-- will appear in the display
indicating that the oven is baking/
roasting. If--1 f-doesn't appear in the
displa); st;art again at Step 4.
To adjust the oven tempeFature, touch the
BAKEpad, enter the new tempelature using
the number pads :and touch the STARTpad.
NOTE."The CLEAR/OFF:rod COOKTIME pads are
active during the SabbatlJ feature.
When the display shows -mthe
oven is set in Sabbath. When the
display shows-m r-the oven is
baking/roa sting.
How to Set for Timed Baking/Roasting--Immediate Start and Automatic Stop
Makesuretheclockshowsthecorrecttimeofdayand Touch the STARTpad.
theovenisof( [_
%
%
Touch :and hold both the BROILHI/fO:md
BAKE pads, at the same time, until the
display sho_v_ SE
NOTE."If bake or broil appears in the
displa}; the BROIL HI/LO :and BAKE pads
were not touched :at the same time.
Touch the CLEAR/OFFpad :and begin
again.
Tap the DELAY STARTpad until SAb bAtH
appears in the display.
Touch the START pad :and --1will appear
in the displa).
Touch the COOK TIME pad.
Toucla the number pads to set the
desired length of cooking time between
1 minute :and 9 hours :and 99 minutes.
The cooking time that }ou entered will
be displa} ed.
77 Touch the BAKE pad. No signal will be
gixen.
Using the numl)er pads, enter the
desired temperature. No signal or
temperature will be given.
[i_] Touch the START pad.
After a landom delay period of
approximately 30 seconds to 1 minute,
--1r-- will appear in the display indicating
that the oven is baking/r0asting. If --1 r--
doesn't appear in the displa); start again
:at Step 7.
To a(!just the oxen tempeFature, touch the
BAKEpad, enter the new tempelam]re using
the number pads :and touch tlae STARTpad.
When cooking is finished, the display will
change tiom --1 r-to --1:and O:OOwill appem;
indicating that tlae oxen has turned 0FFl)ut is
still set in SabbatlJ. Remove the cooked tood.
iiii iiiiil ii iil;iiii ilill! ii
iil i_ i
i i iiii!i
3O
How to Exit the Sabbath Feature
_-_ Touchthe CLEAR/OFFpad.
_-] ff tlae oxen is cooking, wait for a
landom dela} period of approximatel}
30 seconds to 1 minute, until onl} --1is
in the display.
[_ Touch :and hold both the BROIL HI/LO
and BAKE pads, at the same time, until
the (tispla} sho_v_ SE
Tap the DELAYSTART pad until 12shdn
or no shdn appears in the display.
Choose /2 sbdn, indicating that the oxen
will automaticall} turn off after 12 laours
or/10 shdn, indicating that tlae oven will
not automatically turn off after 12 hours.
Press STARTwhen the option that }ou
x_¢mtis in the displa} (12shdn or no shdn).
NOTE."If a power outage occurred while
the oven was in Sabbath, the oven will
automatically turn off :and stay off even
when the power returns. The oven
control must be reset.
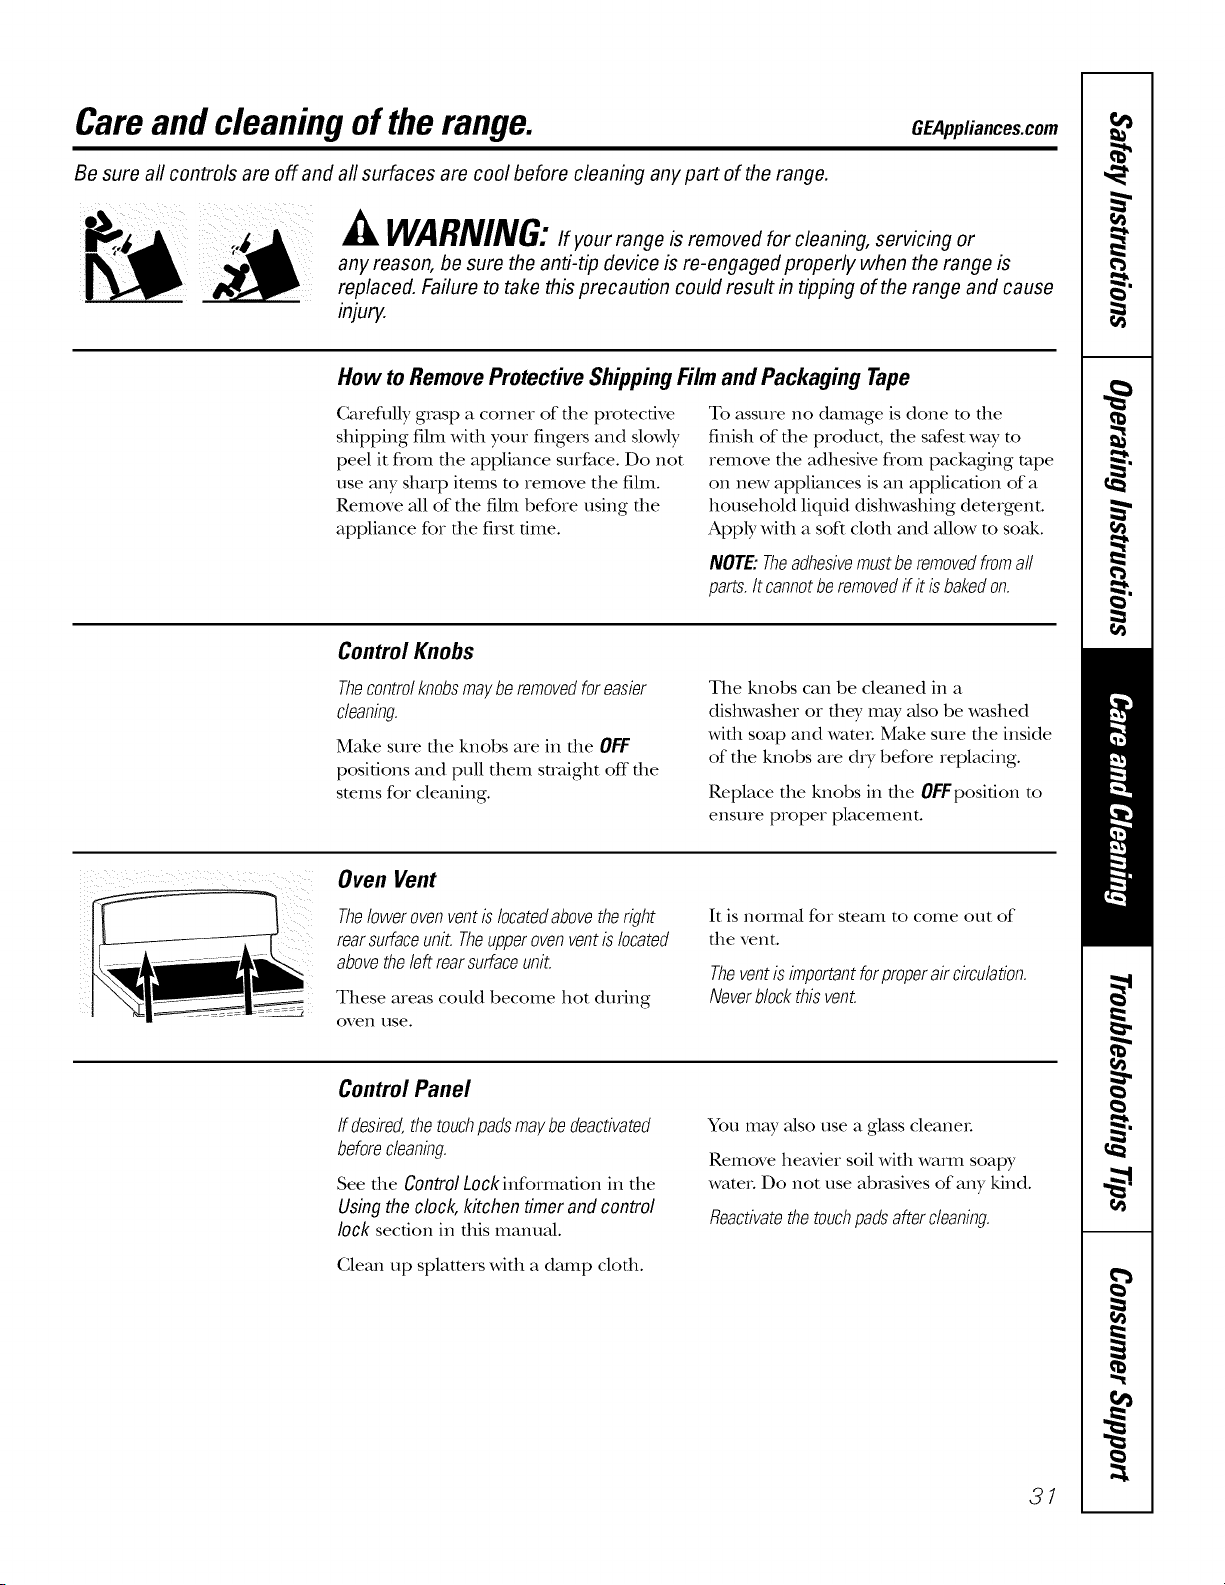
Careand cleaning oftherange. OEApplia.oesoom
Be sure all controls are off and
all surfaces are cool before cleaning any part of the range.
WARNING:if your range is removed for cleaning, servicing or
any reason, be sure the anti-tip device is re-engaged properly when the range is
replaced. Failure to take this precaution could result in tipping of the range and cause
injury.
How to Remove Protective Shipping Film and Packaging Tape
Carefldly grasp a corner of file protective
shipping fihn wifll your fingels and slowly
peel it from die appliance surface. Do not
use any sharp items to remove the film.
Remove all of the film before using die
appliance for die first time.
To assure no damage is done to file
finish of file product, file sJest way to
remove the adhesive flom packaging tape
on new appliances is an application of a
household liquid dishwashing detergent.
Apply wifli a soft cloth and allow to soak.
NOTE:Theadhesivemustberemovedfromaft
parts.Itcannotberemovedif it isbakedon.
Control Knobs
Thecontrolknobsmayberemovedforeasier
cleaning.
Make sure file knobs are in file OFF
positions and pull them suMght off die
smms for cleaning.
The knobs can be cleaned in a
dishwasher or fliey may also be washed
Mill soap and wateL Make sure die inside
of the knobs are dry before replacing.
Replace the knobs in the OFFposition to
ensure proper placement.
Oven Vent
ThelowerovenventisIocatedabovetheright
rearsurfaceunit.Theupperovenventislocated
abovetheleftrearsurfaceunit.
These areas could become hot during
oven use.
It is nomlM for smam to come out of
die vent.
Theventisimportantforproperaircirculation.
Neverblockthis vent.
Control Panel
If desired,thetouchpadsmaybedeactivated
beforecleanbg.
See die Control Lock information in the
Using the cloc£ kitchen timer and control
lock section in dds manual.
Glean up splatters with a damp clofli.
You may also use a glass cleaneL
Remove heavier soil Mill waml soapy
wateL Do not use abrasives of any kind.
Reactivatethe touchpads after cleaning.
31
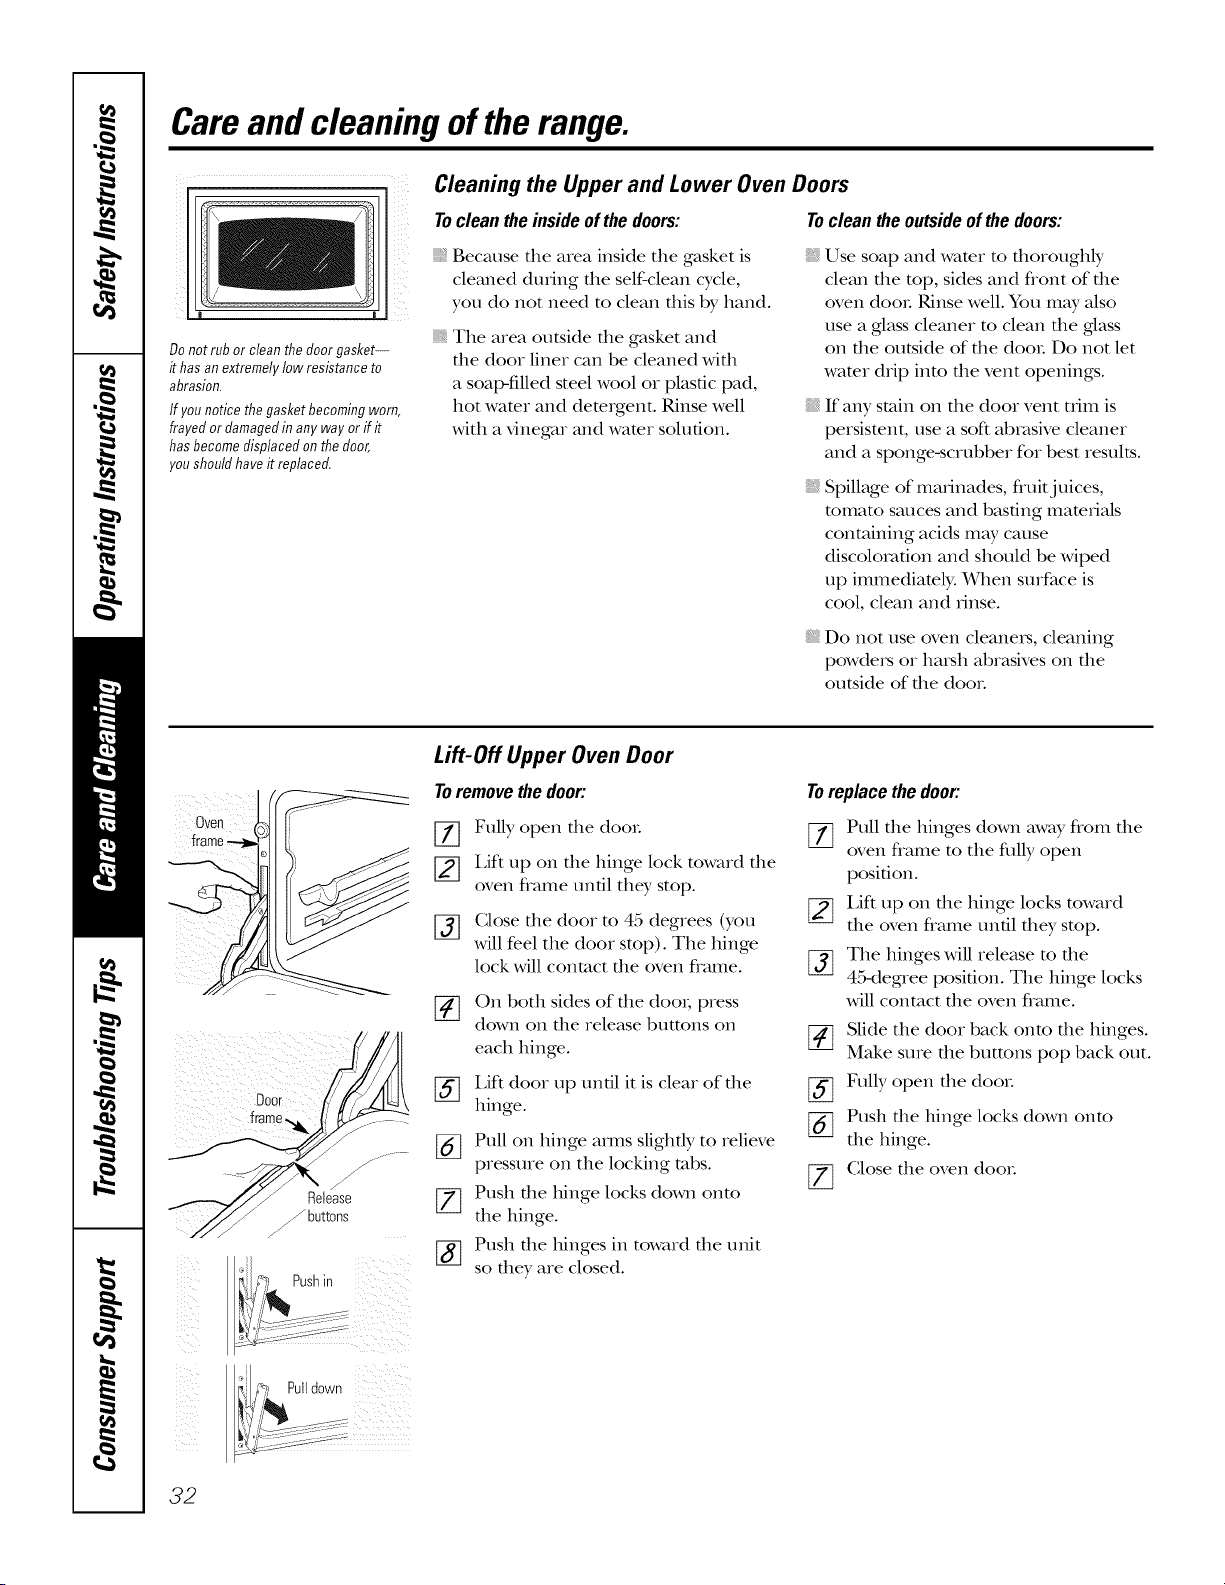
Careand cleaning oftherange.
Do not rub or clean the door gasket--
it has an extremely low resistance to
abrasion.
If younoticethegasketbecomingworn,
frayedor damagedin anyway orif it
hasbecomedisplacedonthedoor,
youshouldhaveit replaced,
Cleaning the Upper and Lower Oven Doors
Tocleantheinsideofthedoors: Tocleantheoutsideofthedoors:
{{_Because tile area inside the gasket is
cleaned during tile self-clean cycle,
you do not need to clean tills by hand.
The area outside file gasket and
file door liner can be cleaned Mill
a soal>filled steel wool or plastic pad,
hot wamr and dem_gent. Rinse well
with a vinegar and wamr solution.
Use soap and wamr m flloroughly
clean file top, sides and flont of die
oven dooL Rinse well. You may also
use a glass cleaner to clean the glass
on the outside of the dooL Do not let
wamr drip into the vent openings.
If any stain on tile door vent tlq_mis
persistent, use a soft abrasive cleaner
and a sponge-scrubber for best results.
Spillage of marinades, fluitjuices,
tomato sauces and basting mam_Jals
containing acids may cause
discolo_v_fion and should be wiped
up immediately. When surface is
cool, clean and _inse.
Do not use oven cleanexs, cleaning
powders or haiMl abrasives on tile
outside of tile dooL
Oven
frame
!rame_ ( ,.........
Lift-Off Upper OvenDoor
Toremovethedoor:
[_ Fully open tile dooL
[_] Lift up on tile hinge lock toward tile
oven flame until they stop.
[_] (;lose tile door to 45 degrees (you
will feel the door stop). The hinge
lock will contact tile oven flame.
[-_ On both sides of tlle dooi; press
down on tile release buttons on
each hinge.
[_ Lift door up until it is clear of tile
hinge.
[_] Pull on hinge amls slightly to relieve
pressure on the locking robs.
[_ Push tile hinge locks down onto
tile hinge.
[_] Push tlle hinges in toward tile unit
so dley are closed.
Toreplacethedoor:
[77 Pull tlle hinges down away flom tile
oven flame to the dilly open
position.
[_ Lift up on tlle hinge locks toward
tile oven flame until they stop.
[-_ The hinges will release to tile
45-degnee position. The hinge locks
will contact tile oven flvune.
Slide the door back onto tile hinges.
Make sure tile buttons pop back out.
[_ Fully open tile dooL
[_] Push tile hinge locks down onto
tile hinge.
[_ (;lose tile oven dooL
32
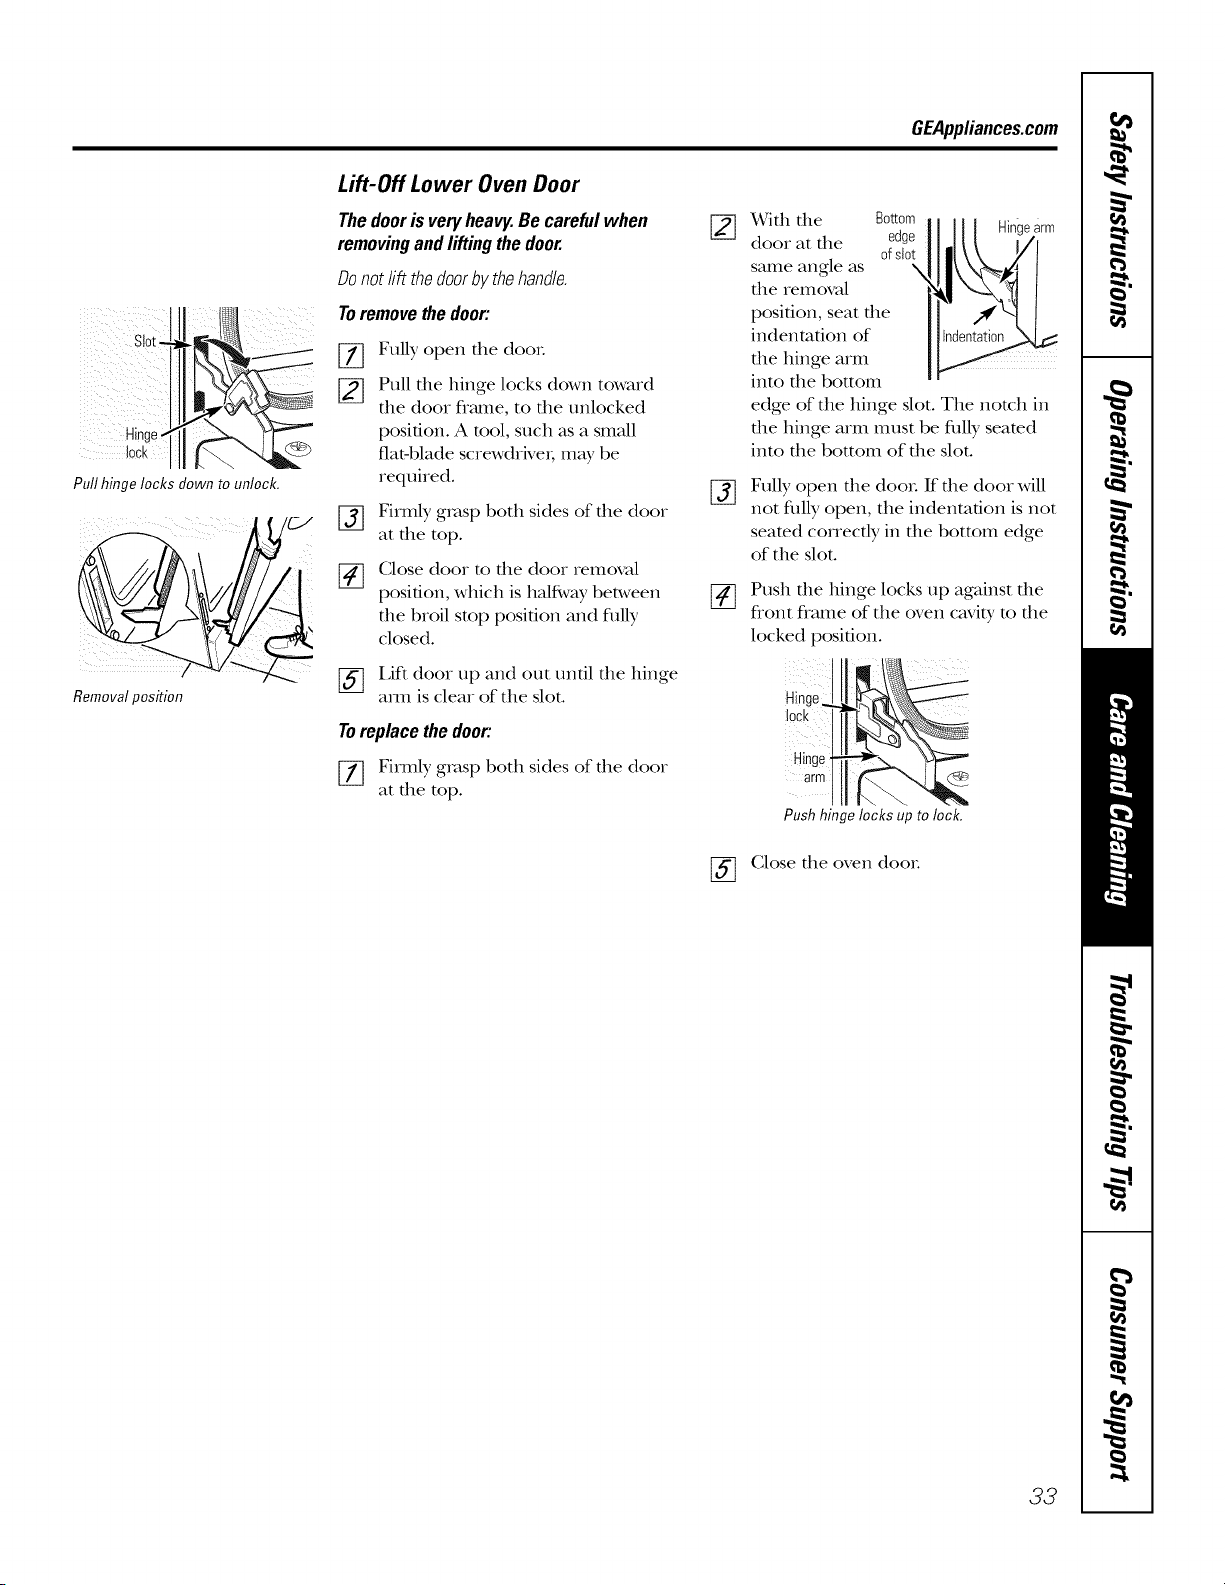
GEAppliances.com
i) ¸¸¸ _
Slot
Hinge
lock
Pullhingelocksdownto unlock.
Removalposition
Lift-Off Lower Oven Door
Thedooris veryheavy.Be carefulwhen
removingandliftingthedoor.
Donotlift thedoorbythehandle.
Toremovethedoor:
%
[]
%
[]
Fully open the doo_.
Pull the hinge locks down toward
the (loot frame, to the unlocked
position. A tool, such as a small
fiat-blade screwdriver; may be
required.
Firmly grasp both sides of the (loot
at the top.
(;lose door to file door removal
position, which is halfi,vay between
the broil stop position and fitlly
closed.
[_] Lift (loot up and out until the hinge
am1 is cleat of the slot.
Toreplacethedoor:
[_ Firmly grasp both sides of the door
at the top.
%
%
With the Bottom
(loot at the edge
ofslot
same angle as X
the removal
position, seat the
indentation of
the hinge arm
into the bottom
edge of the hinge slot. The nomh in
the hinge arm tllttst be flflly seared
into the bottom of the slot.
Fully open die door. If die door will
not fltlly open, the indentation is not
seared cotTectly in the bottom edge
of the slot.
Push the hinge locks up against the
flont flame of the oven cavi b, to the
locked position.
Hinge
lock
Hinge
arm
Push hinge locks up to lock.
(;lose the oven (loot.
33
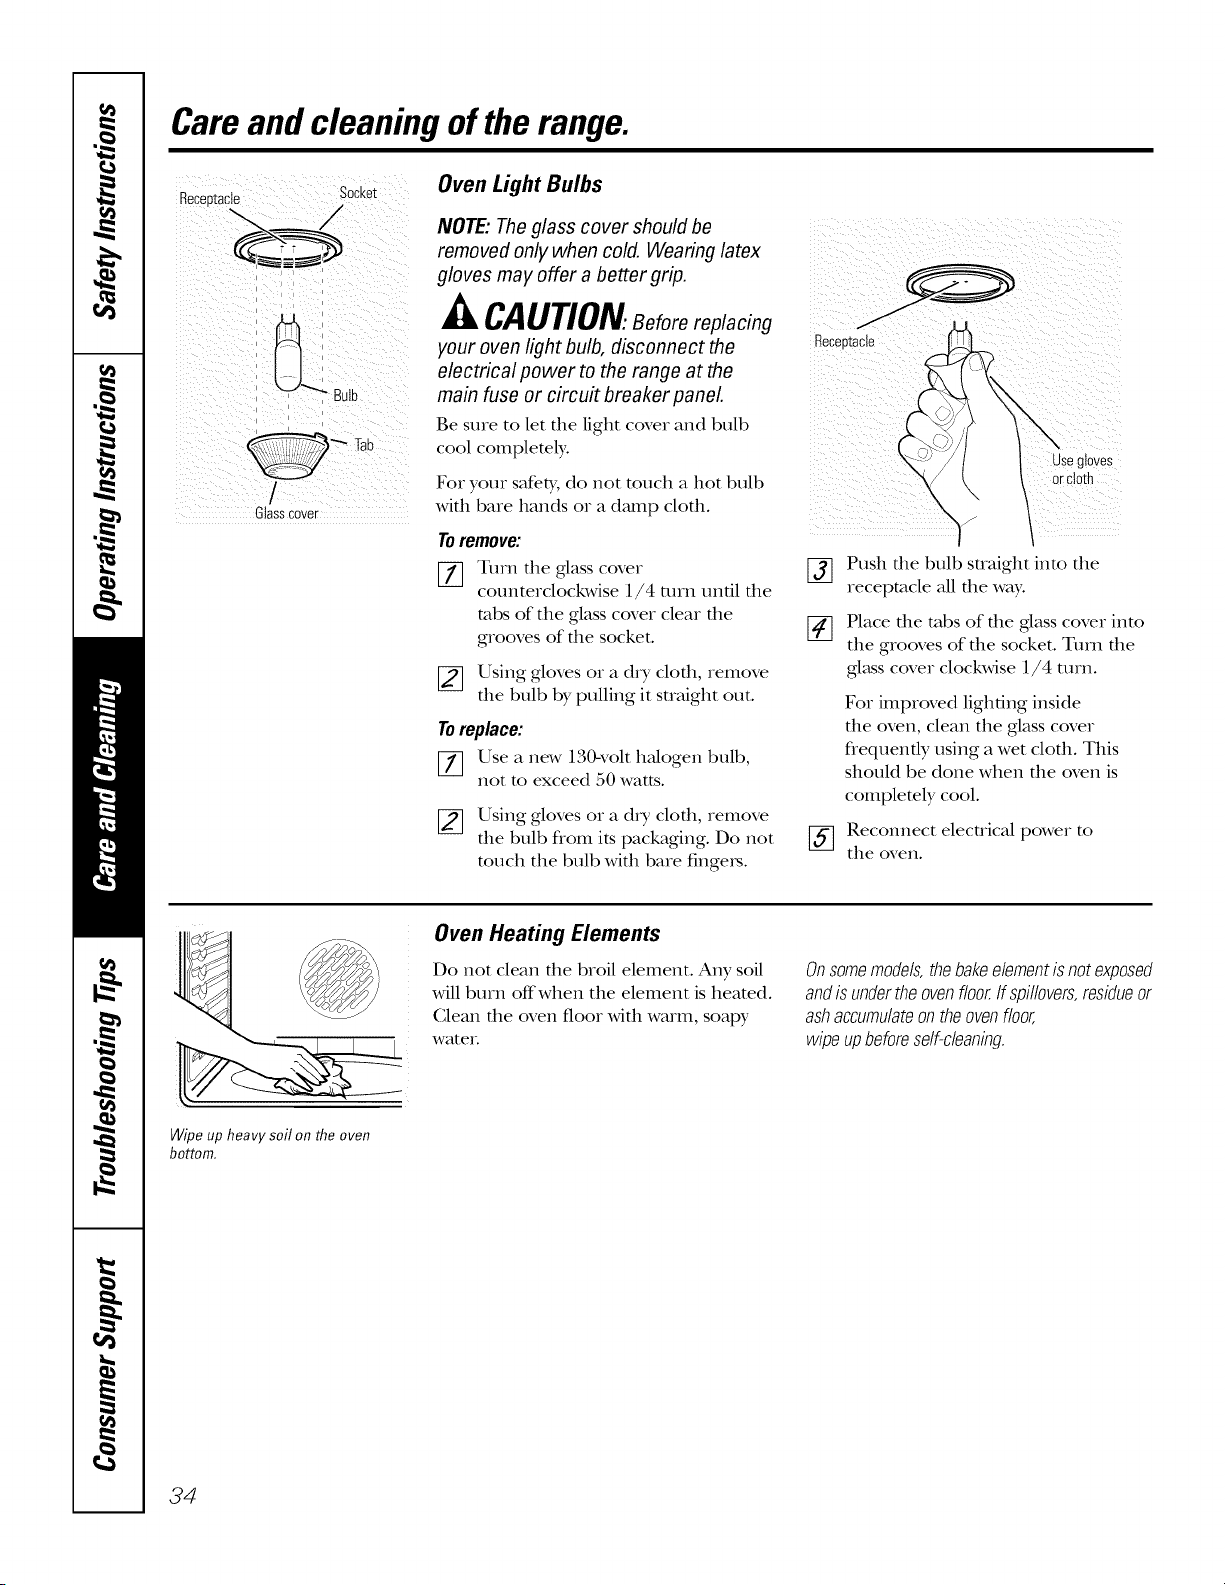
Careand cleaning oftherange.
n_i_iaci_p sockei Oven Light Bulbs
_=_/-- " NOTE: Theglass cover should be
removed only when cold. Wearing latex
gloves may offer a better gnp.
_lt CAUTiOn.. Before replacing
your oven light bulb, disconnect the
electrical power to the range at the
main fuse or circuit breaker panel.
Be sure to let file light cover and bulb
cool complemly.
Glasscover
Fox youx safety, do not touch a hot bull)
with t)are hands or a damp cloth.
Toremove:
[-_ Turn the glass cover
counterclockwise 1l/4 mrn until the
robs of the glass cover clear the
grooves of the socket.
[_ Using gloves or a dry cloth, remove
the bulb by pulling it straight out.
Toreplace:
[_ Use a new 130-volt h_dogen t)ult),
not to exceed 50 watts.
[_ Using gloves or a dry cloth, remove
the bull) from its packaging. Do not
touch the t)ult) with t)are fingex_.
%
[]
Receetac_e
Use gloves
orcloth
"'1 /
Push the bulb straight into the
receptacle all the way.
Place the robs of the ,glasscover into
the grooves of the socket. Turn the
glass cover clockwise 1l/4 turn.
Fox improved lighting inside
file oven, clean the glass cover
flequently using a wet clofll. This
should be done when die oven is
completely cool.
[_ Reconnect electrical power to
the oven.
Wipe up heavy soil on the oven
bottom.
Oven Heating Elements
Do not clean the t)roil element. Any soil
will t)urn off when the element is heated.
Glean the oven floor with warm, soap),
wateI.
Onsomemode/s,thebakeeiementisnotexposed
andisundertheovenfloor,ffspi//overs,residueor
ashaccumu/ateontheovenfloor,
wipeupbeforese/f-c/eaning.
34
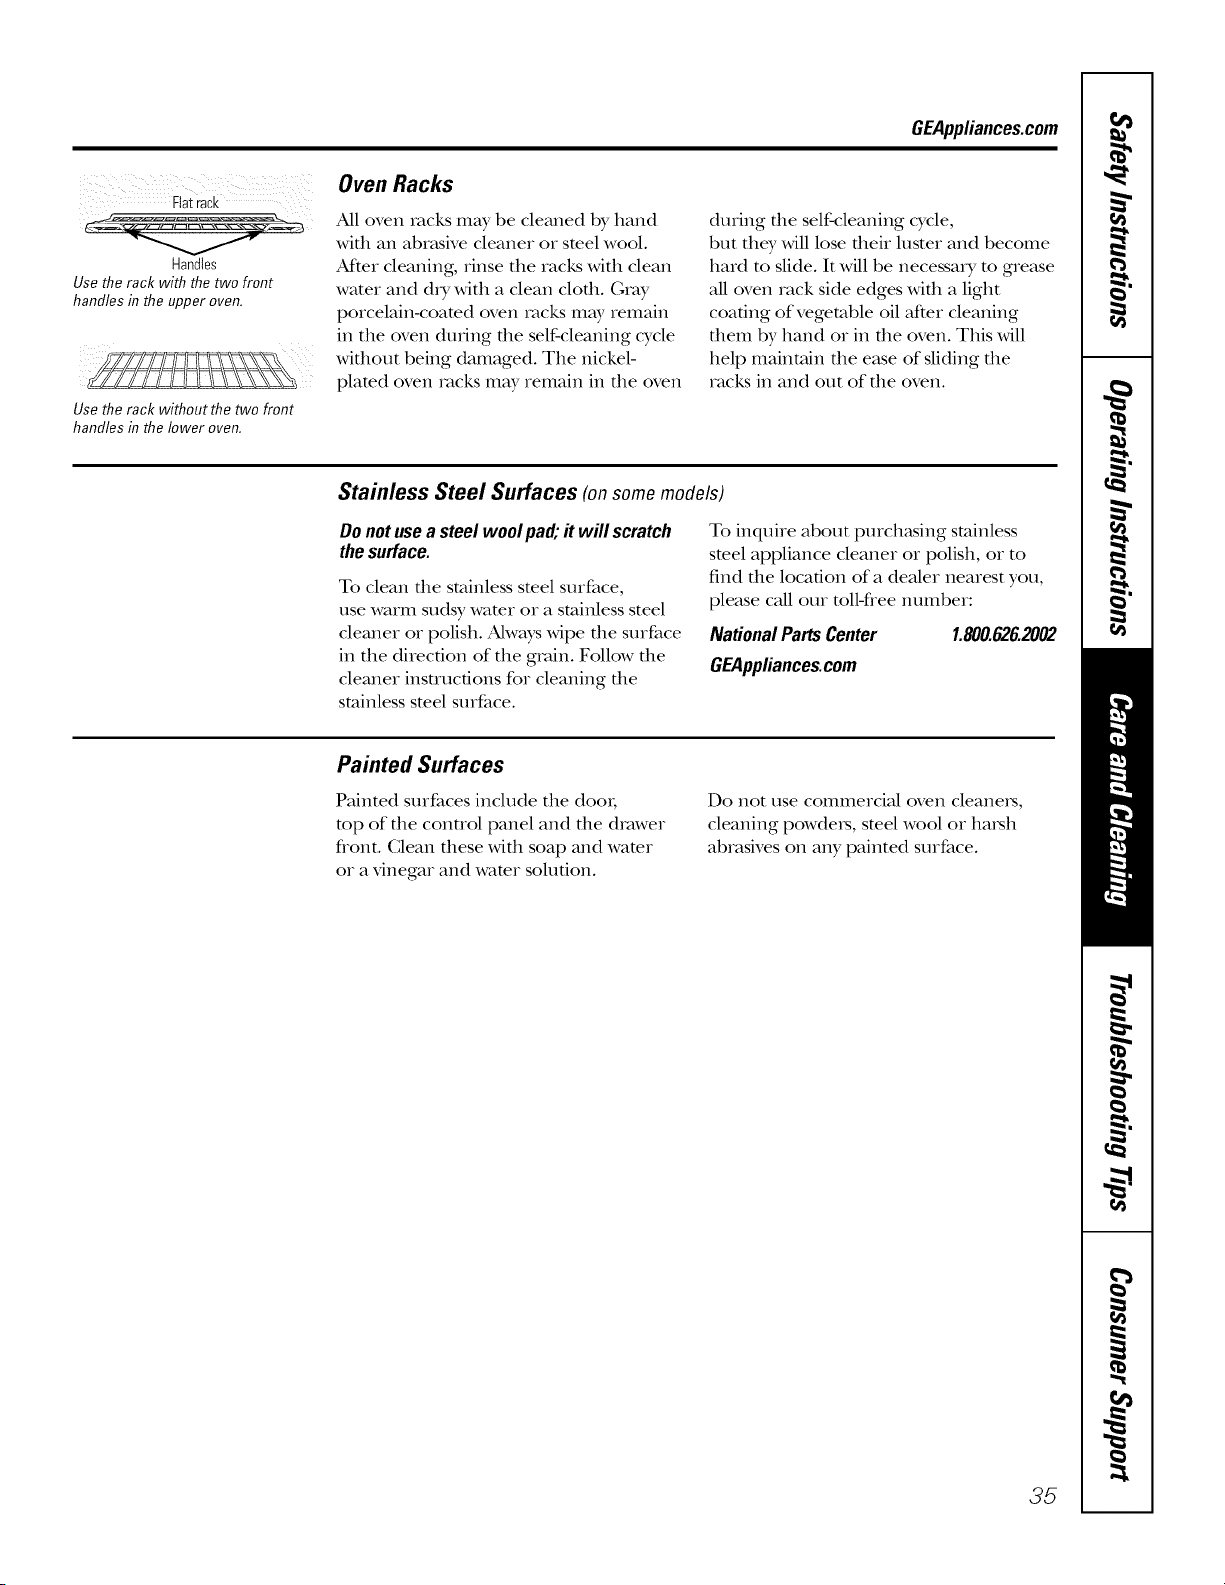
GEApplianees.com
iii i i i
Fiat rack
Handles
Use the rack with the two front
handles in the upper oven.
Use the rack without the two front
handles inthe lower oven.
Oven Racks
All oven racks may be cleaned by hand
wifll an abn_sive cleaner or steel wool.
At_er cleaning, rinse tile racks with clean
water and d_y with a clean cloth. Gray
porcelain-coamd oven racks mW remain
ill the oven during the self-cleaning cycle
without being damaged. Tile nickel-
plamd oven rocks mW ielilain ill the oven
during die self-cleaning cycle,
but tile}, will lose flmir luster and become
hard to slide. It will be necessary m grease
all oven rack side edges with a light
coating of vegetable oil after cleaning
them by hand or ill tile oven. This will
help maintain tile ease of sliding tile
racks ill and out of the oven.
Stainless Steel Surfaces (on some models)
Donotusea steel wool pa& # will serateh
thesurface.
To clean die stainless smel surface,
use warm sudsy wamr or a stainless steel
cleaner or polish. Ahvays wipe tile surface
ill the direction of tile groin. Follow the
cleaner insuucfions for cleaning tile
stainless steel surface.
To inquire about purch_tsing stainless
smel appliance cleaner or polish, or to
find the location of a dealer nearest you,
please call our mll-flee number:
NationalPartsCenter 1.800.626.2002
GEApplianees.com
Painted Surfaces
Painted surfaces include tile dooI;
mp of file conuol panel and file drawer
flont. Clean these with soap and wamr
or a vinegar and wamr solution.
Do not rise ColIllIleIcial oven cleanels_
cleaning powders, steel wool or harsh
abrasives on any painted surface.
35
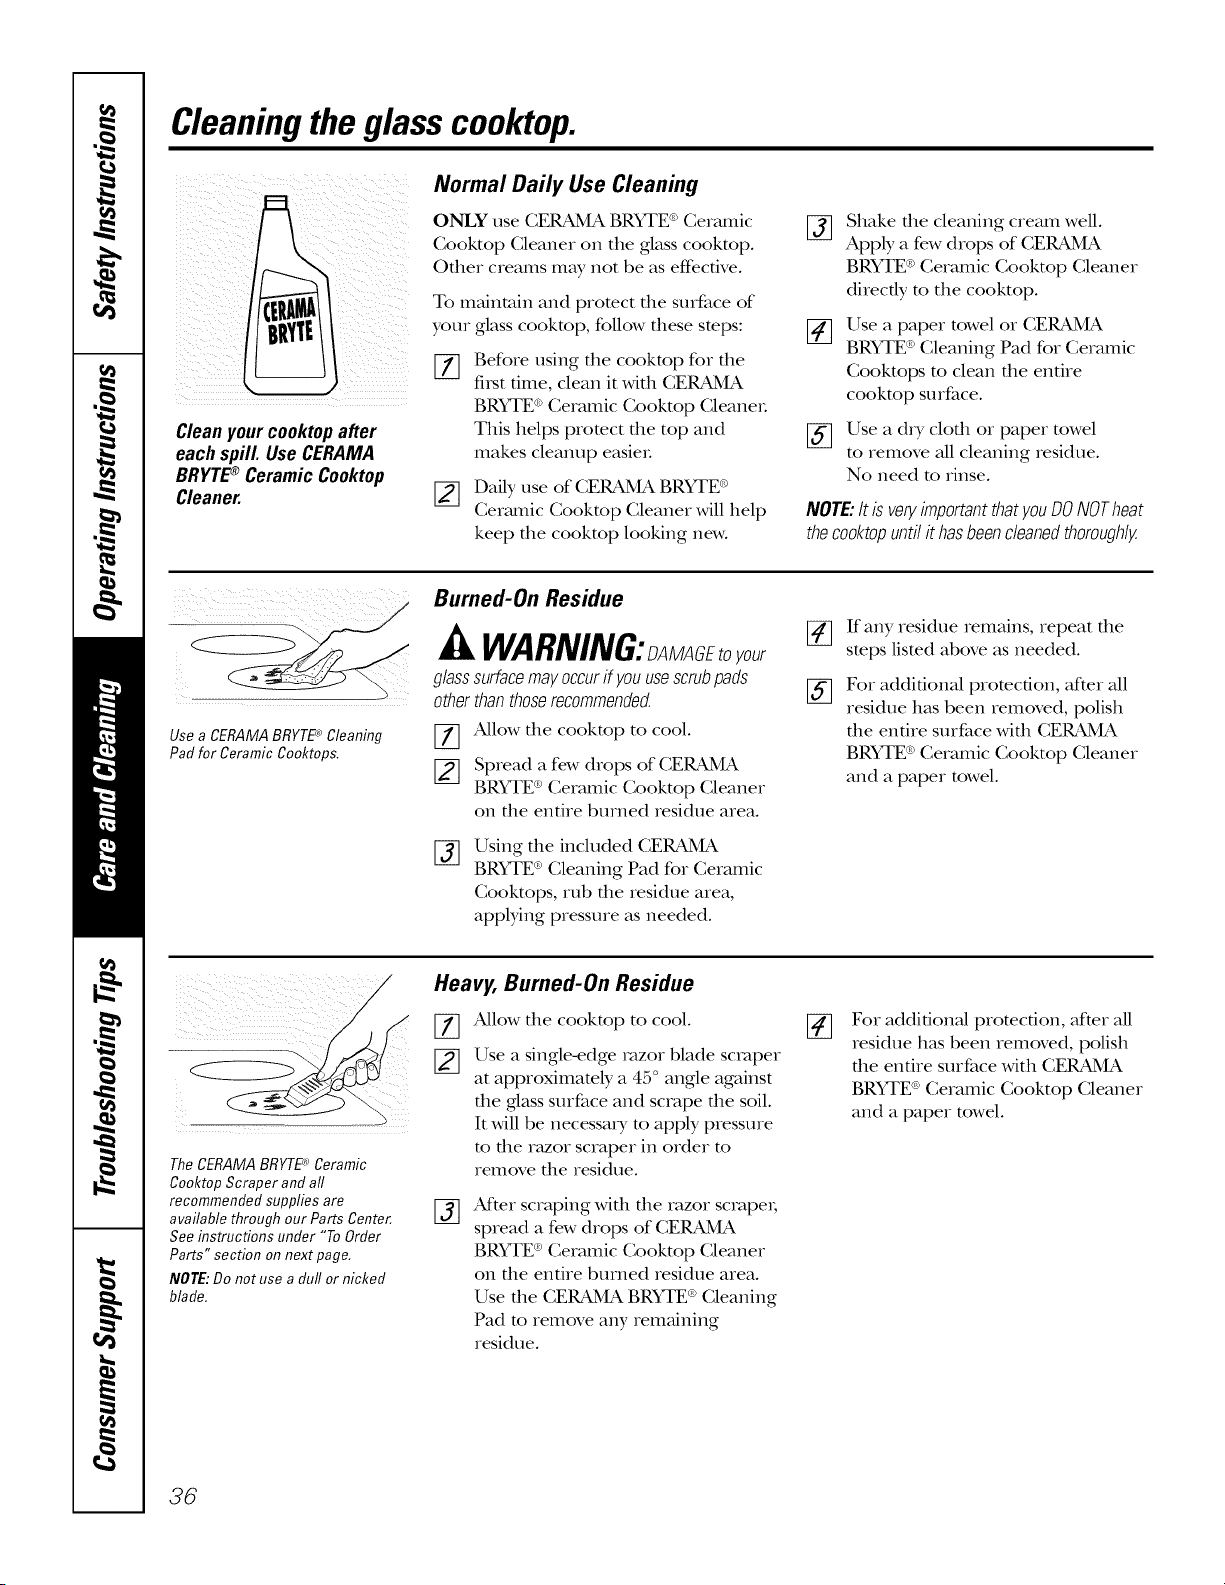
Cleaningtheglasscooktop.
Cleanyourcooktopafter
eachspill. UseCERAMA
BRYTE®CeramicCooktop
Cleaner.
Normal Daily Use Cleaning
ONLY use CERAMA BRYTE ®Cermnic
Cooktop Cleaner on the glass cooktop.
Other creams may not be as effective.
To maintain and protect the surface of
your glass cooktop, follow these steps:
%
Before using the cooktop for the
fi_st time, clean it with CERAMA
BRYTE®Ceramic Cooktop CleaneL
This helps protect the top and
makes cleanup easieL
[_ Daily use of CERAMA BRYFE®
Cermnic Cooktop Cleaner will help
keep the cooktop looking new.
%
[]
%
Shake the cleaning cream well.
Apply a few drops of CERAMA
BRYTE®Ceramic Cooktop Cleaner
directly to the cooktop.
Use a paper towel or CERAMA
BRYTE®Cleaning Pad for Ceramic
Cooktops to clean the entire
cooktop surface.
Use a dry cloth or paper towel
to remove all cleaning residue.
No need to rinse.
NOTE:Itis veryimportantthatyouDONOTheat
thecooktopuntilithasbeencleanedthoroughly.
Use a CERAMABRYTE_Cleaning
Pad for Ceramic Cooktops.
Burned-On Residue
WARNING:>MAGftoyour
glasssurfacemay.occurify.ouusescrubpads
otherthanthoserecommended.
77 Allow the cooktop to cool.
[_ Spread a few drops of CERAMA
BRYTE®Ceramic Cooktop Cleaner
on the entire burned residue area.
%
Using the included CERAMA
BRYTE ®Cleaning Pad for Ceramic
Cooktops, rub the residue area,
applying pressure as needed.
%
If any residue remains, repeat the
steps listed above as needed.
Fox additional protection, after all
residue has been removed, polish
the entire surface with CERAMA
BRYTE®Ceramic Cooktop Cleaner
and a paper towel.
TheCERAMABRYTE_ Ceramic
Cooktop Scraper and aft
recommended supplies are
available through our Parts Center.
See instructions under "To Order
Parts" section on next page.
NOTE:Do not use a duff or nicked
blade.
Heavy, Burned-On Residue
%
#]
Allow the cooktop to cool.
Use a single-edge razor blade scraper
at approximately a 45 ° angle against
the glass surface and scrape the soil.
It will be necessm y m apply pressure
m the ra_zor scraper in order m
remove the residue.
%
Aider scraping with the razor scrapex;
spread a few drops of CERAMA
BRYTE ®Ceramic Cooktop Cleaner
on the entire burned residue area.
Use the CERAMA BRYTE ®Cleaning
Pad m remove any remaining
residue.
Fox additional promcfion, after all
residue has been removed, polish
the entire surface with CERAMA
BRYTE®Ceramic Cooktop Cleaner
and a paper towel.
36
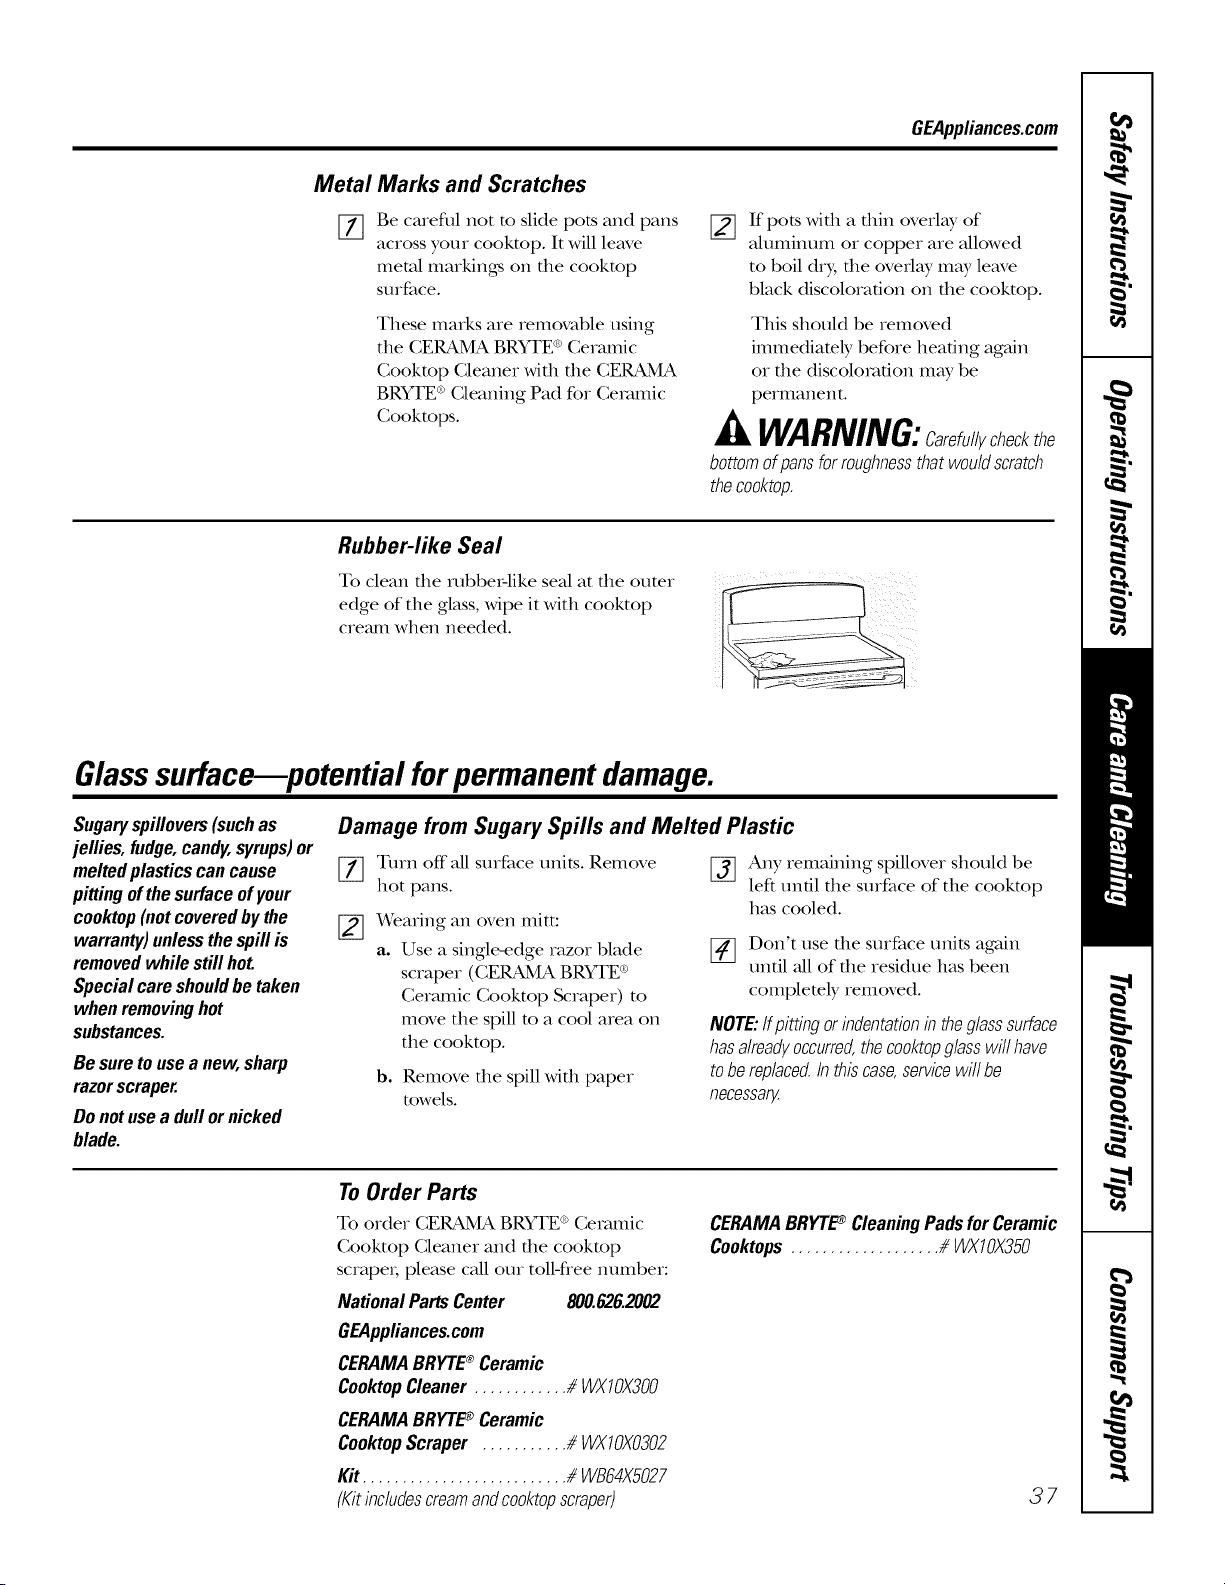
GEAppliances.com
Metal
[]
Marks and Scratches
Be careflll not m slide pots and pans
across your cookmp. It will leave
metal markings oi1 file cookmp
surface.
These marks are rem(_mble using
the CERAMA BRYTE®Ceramic
Cookmp Cleaner with the CERAMA
BRYTE®Cleaning Pad for Ceramic
Cookmps.
[]
If pots with a thin overlay of
aluminum or copper are allowed
to boil dry, the overlay may leave
black discoloration on the cooktop.
This should be removed
immediately before heating again
or file discoloration may be
permanent.
WARNING:Carefullycheckthe
bottomofpansforroughnessthatwouldscratch
thecooktop.
Rubber-like Seal
To clean the mbbe_:like seal at the outer
edge of the glass, wipe it with cooktop
cremn when needed.
Glasssurface--potential forpermanent damage.
Sugaryspillovers(suchas
jellies,fudge,candy,syrups)or
meltedplasticscancause
pittingofthesurfaceofyour
cooktop(notcoveredbythe
warranty)unlessthespillis
removedwhilestillhot.
Specialcareshouldbetaken
whenremovinghot
substances.
Besuretousea new,sharp
razorscraper.
Donotusea dull ornicked
blade.
Damage from Sugary Spills and Melted Plastic
[_ Turn offall surface units. Remove
hot pans.
Wearing an oven mitt:
a. Use a single-edge razor blade
scraper (CERAMA BRYTE®
Ceramic Cooktop Scraper) to
move the spill m a cool area on
the cooktop.
b. Remove the spill with paper
towels.
[_ Any remaining spillover should be
left un61 the surface of the cooktop
has cooled.
[_ Don't use the surface units again
until all of the residue has been
completely removed.
NOTE:ffpittingorindentationb theglasssurface
hasalreadyoccurred,thecooktopglasswillhave
tobereplaced,b thiscase,servicewillbe
necessary.
To Order Parts
To order CERAMA BRYTE®Ceramic
Cooktop Cleaner and the cookmp
scrape_; please call our tolM'ree number:
NationalPartsCenter 800.626.2002
GEAppliances.com
CERAMABRYTE_ Ceramic
CooktopCleaner............ _WX10)(300
CERAMABRYTE_ Ceramic
CooktopScraper ........... _ WX10)(0302
Kit.......................... _ WB64X5027
(Kitincludescreamandcooktopscraper)
CERAMABRYTE_ CleaningPadsforCeramic
Cooktops................... /_WX10)(350
37
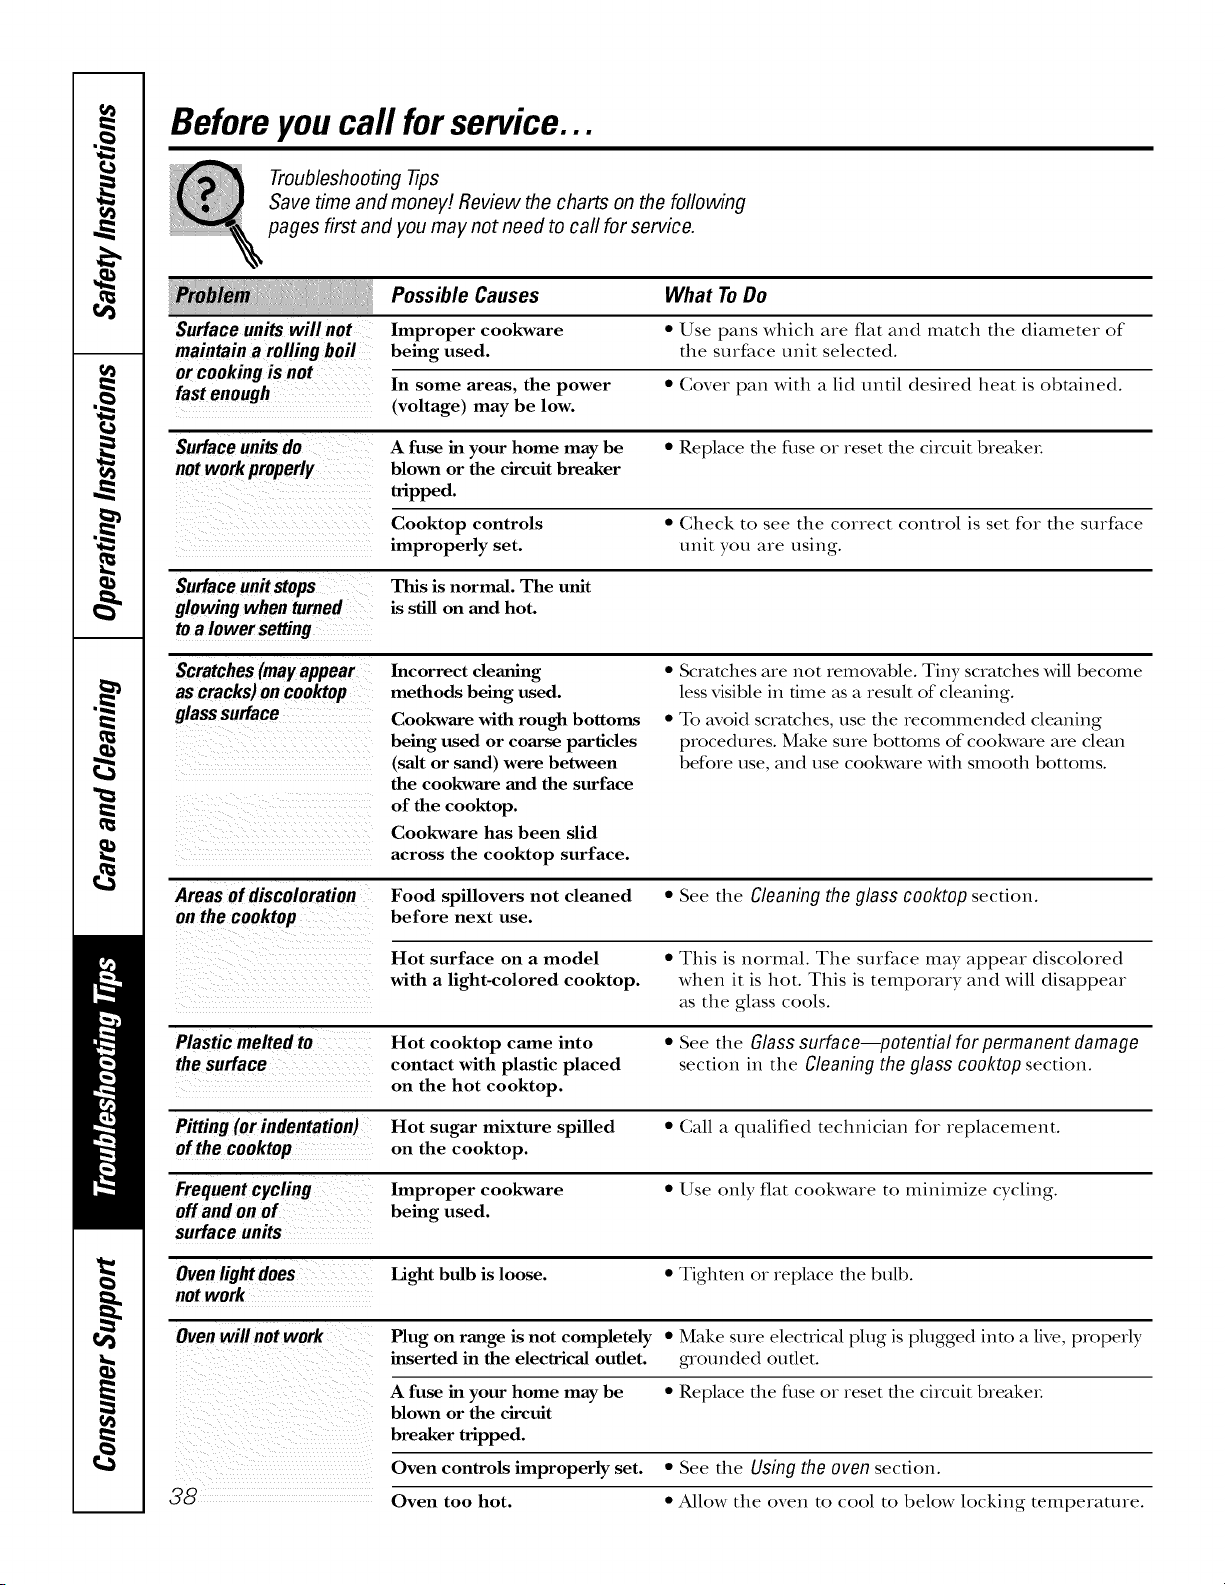
Beforeyoucall forservice...
Troubleshooting tips
Save time and money! Review the charts on the following
pages first and you may not need to call for service.
Possible Causes What ToDo
Surface units willnot Improper cookware • Use pans which are fiat and match the diameter of
maintain a rolling boil being used. the surface unit selected.
or cooking is not
fast enough In some areas, the power • Cover pan with a lid until desired heat is obtained.
(voltage) may be low.
Surface units do A fuse in your home may be • Replace the fi_se or reset the circuit breakeL
not work properly blown or the circuit breaker
tripped.
Cooktop controls • Check to see the correct control is set for the surface
improperly set. unit you are using.
Surface unit stops This is normal. The unit
glowing when turned is still on and hot.
toa lower setting
Scratches(mayappear
ascracks)oncooktop
glasssurface
Incorrect cleaning
methods being used.
Cookware with rough bottoms
being used or coarse particles
(salt or sand) were between
the cookware and the surface
of the cooktop.
Cookware has been slid
across the cooktop surface.
• Scratches are not removable. Tiny scratches Mll become
less visible in time as a result of cleaning.
• To avoid scratches, use the recommended cleaning
procedures. Make sure bottoms of cookware are clean
before use, and use cookware with smooth bottoms.
Areas of discoloration Food spillovers not cleaned • See the Cleaning the glass cooktop section.
on the ¢ooktop before next use.
Hot surface on a model • This is normal. The surface may appear discolored
with a light-colored cooktop, when it is hot. This is temporary and will disappear
as the glass cools.
Plastic melted to Hot cooktop came into • See the Glass surface--potential for permanent damage
the surface contact with plastic placed section in the Cleaning the glass cooktop section.
on the hot cooktop.
Pitting (or indentation) Hot sugar mixture spilled • Call a qualified technician for replacement.
of the cooktop on the cooktop.
Frequent cycling Improper cookware • Use only fiat cookware to minimize cycling.
off and on of being used.
surface units
Ovenlightdoes Light bulb is loose. • Tighten or replace the bulb.
not work
Oven willnot work Plug on range is not completely • Make sure electrical plug is plugged into a live, properly
inserted in the electrical outlet, gmounded outlet.
A fuse in your home may be • Replace the fi_se or reset the circuit breakeL
blown or the circuit
breaker tripped.
Oven controls improperly set. • See the Using the oven section.
_¢9 Oven too hot. • Allow the oven to cool to below locking temperature.
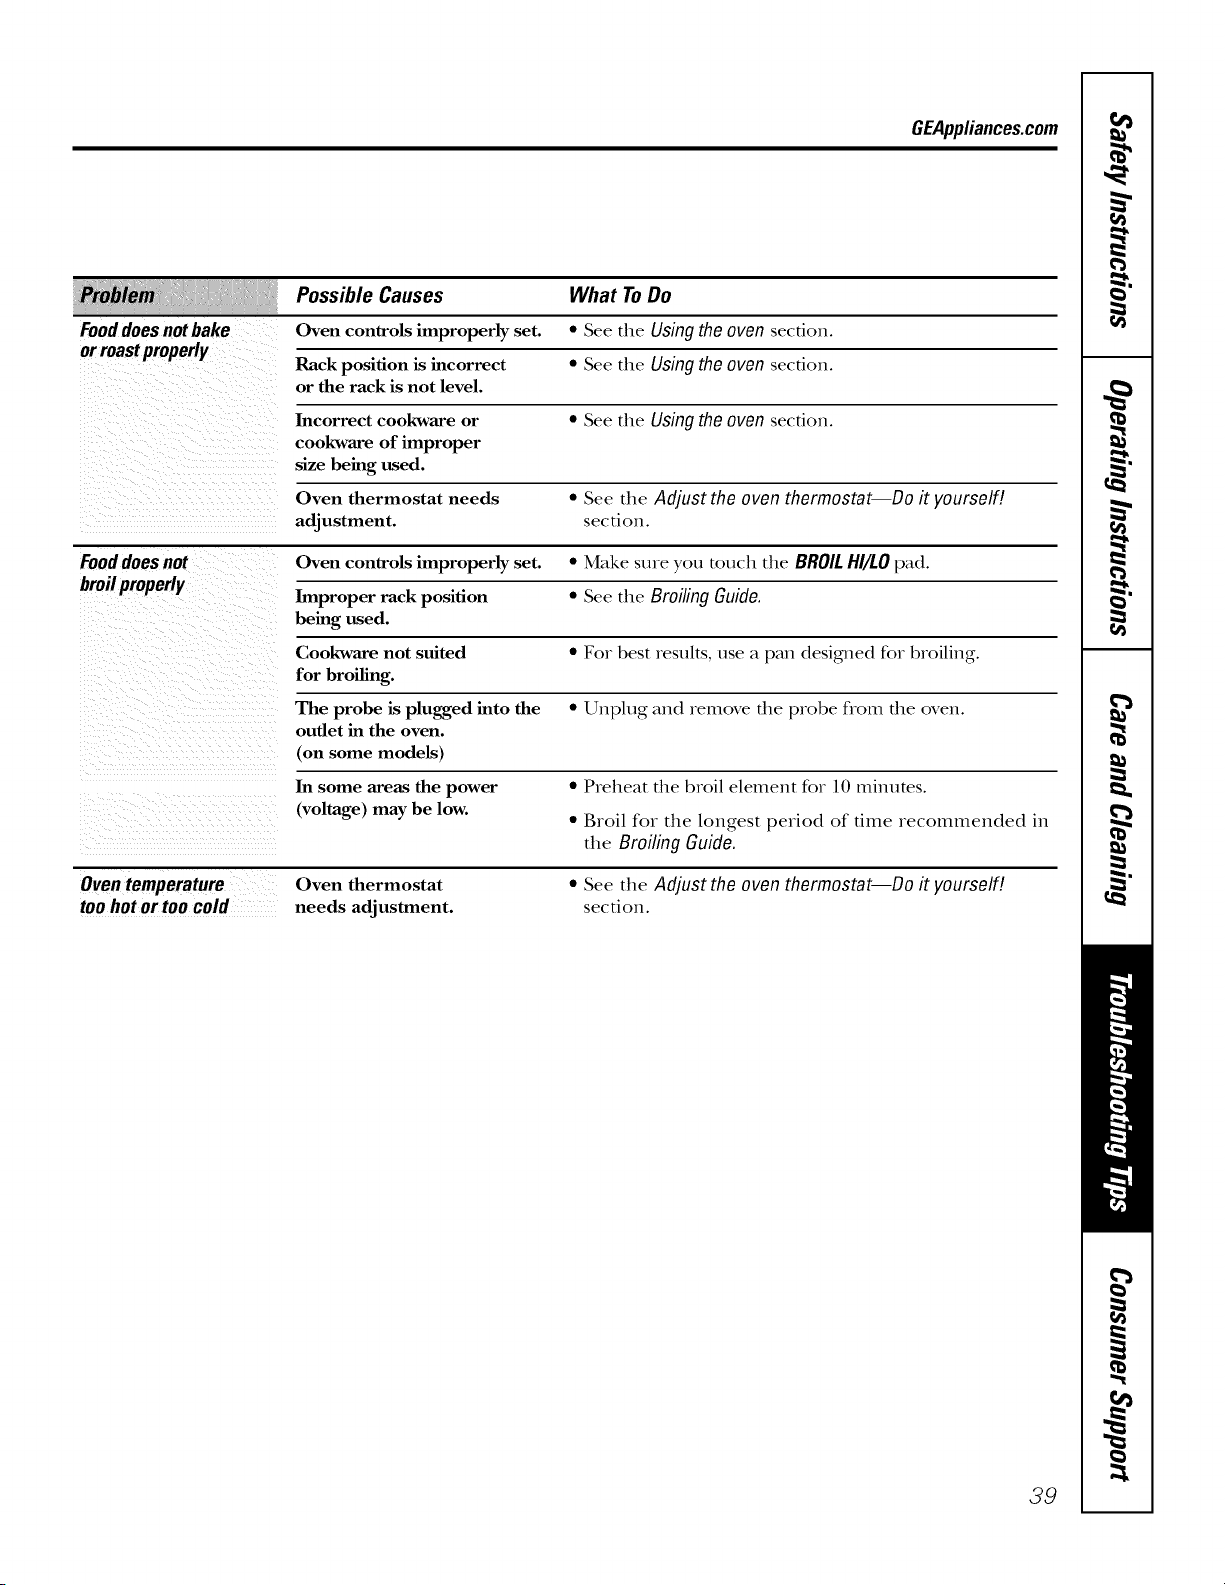
GEAppliances.com
Food does not bake Oven controls improperly set. • See the Using the oven section.
orroast properly
Rack position is incorrect • See the Using the oven secdon.
or the rack is not level.
Incorrect cookware or • See the Using the oven section.
cookware of improper
size being used.
Oven thermostat needs • See the Adjust the oven thermostat--Do it yourself!
adjustment, sec Lion.
Fooddoes not Oven controls improperly set. • Make sure you touch the BROILHI/tOpad.
broilproperly Improper rack position • See the Broiling Guide.
being used.
Cookware not suited • For best results, use a pan desigmed for broiling.
for broiling.
The probe is plugged into the • Unplug and remove the probe flom the oven.
outlet in the oven.
(on some models)
In some areas the power • Preheat the broil element for 10 minutes.
(voltage) may be low.
• Broil for the longest period of time recommended in
the Broiling Guide.
Oven temperature Oven thermostat • See the Adjust the oven thermostat--Do it yourself!
toohot or too cold needs adjustment, secdon.
Possible Causes What ToDo
39
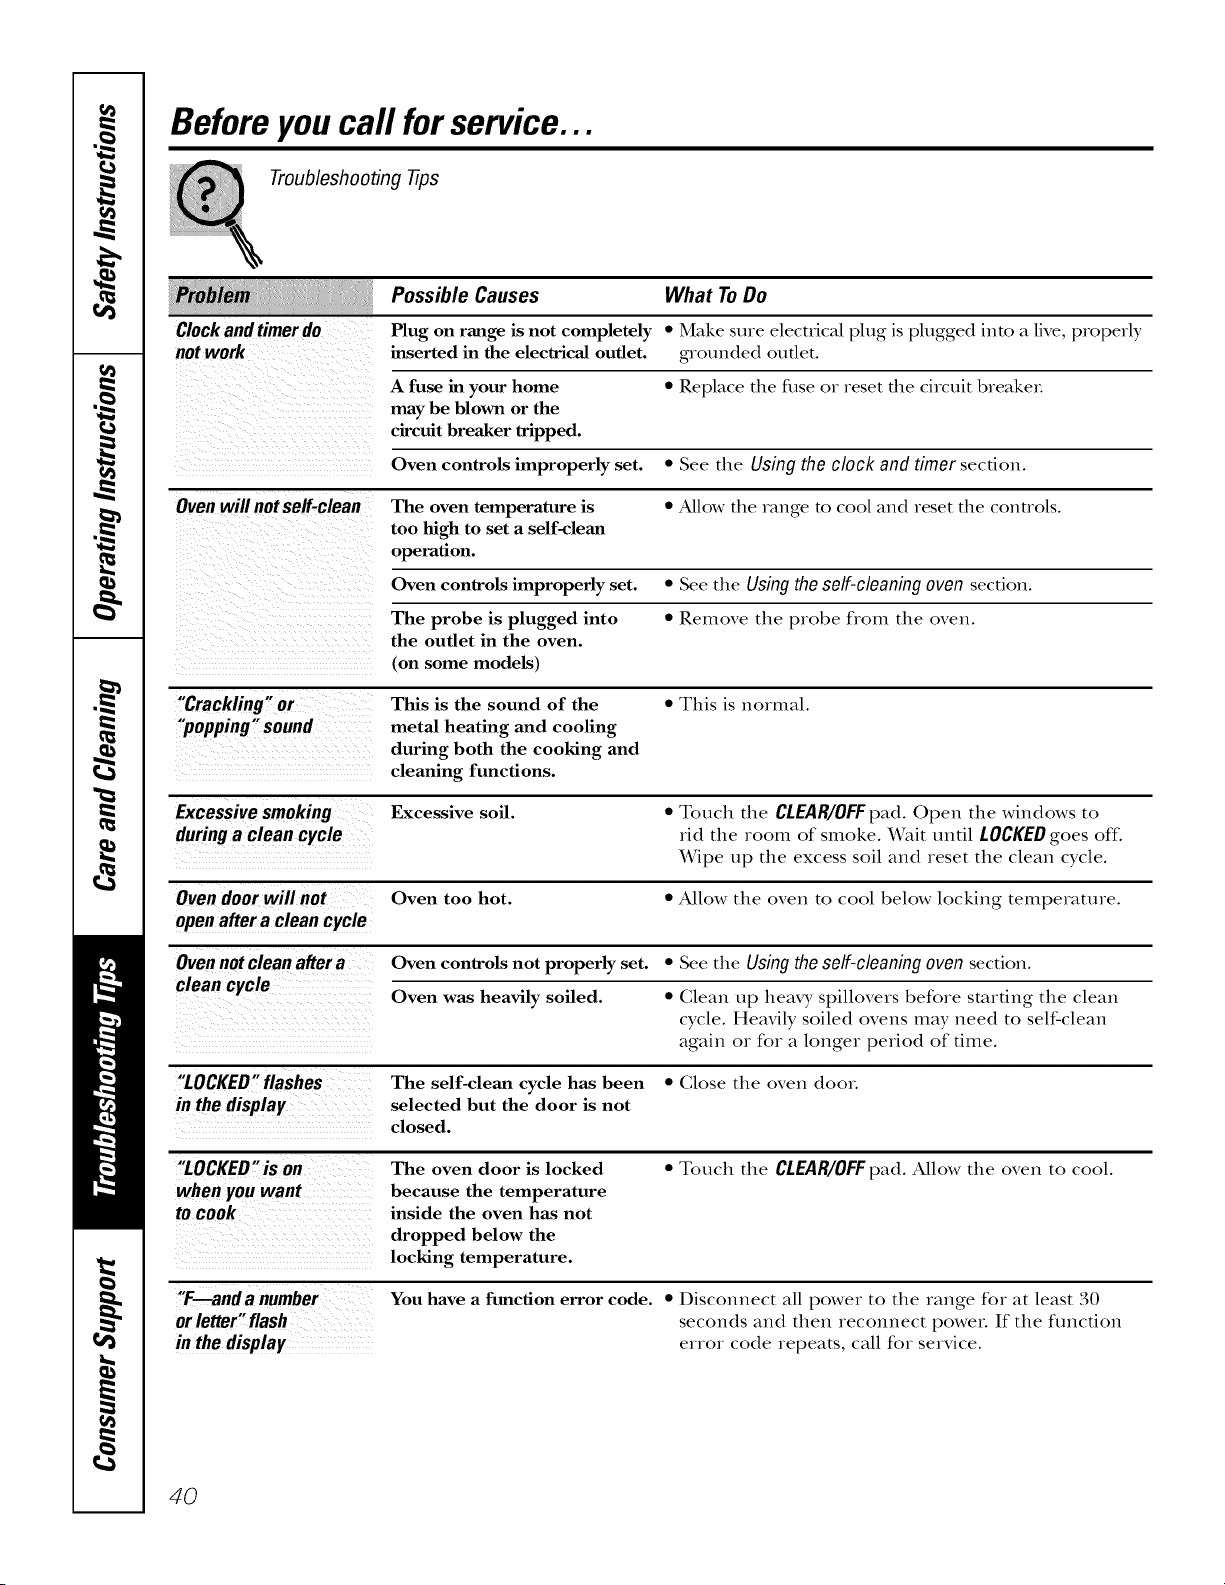
Beforeyoucall forservice...
Troubleshooting tips
Possible Causes What ToDo
Clock and timer do Plug on range is not completely • Make sure electrical plug is plugged into a live, properly
not work inserted in the electrical outlet, g_ounded outlet.
A fuse in your home • Replace file fi_se or reset file circuit breakeL
may be blown or the
circuit breaker tripped.
Oven controls improperly set. • See the Using the clock and timer section.
Oven will not self-clean The oven temperature is • Allow the range to cool and reset the controls.
too high to set a self-clean
operation.
Oven controls improperly set. • See the Using the self-cleaning oven section.
The probe is plugged into • Remove the probe flom the oven.
the outlet in the oven.
(on some models)
"Crackling" or This is the sound of the • This is normal.
"popping" sound metal heating and cooling
during both the cooking and
cleaning functions.
Excessive smoking Excessive soil. • Touch the CLEAR/OFFpad. Open the windows to
during a clean cycle rid the room of smoke. ¼rait until LOCKEDgoes off\
Wipe up the excess soil and reset the clean cycle.
Oven door will not Oven too hot. • Allow the oven to cool below locking temperature.
open after a clean cycle
Ovennot clean after a Oven controls not properly set. • See the Using the self-cleaning oven section.
clean cycle Oven was heavily soiled. • Clean up heax T spillovers before starting the clean
cycle. Heavily soiled ovens may need to self-clean
again or for a longer period of time.
"LOCKED"flashes The self-clean cycle has been • (;lose the oven dooL
in the display selected but the door is not
closed.
"LOCKED"is on The oven door is locked • Touch the CLEAR/OFFpad. Allow the oven to cool.
when you want because the temperature
tO COOk inside the oven has not
dropped below the
locking temperature.
"F--anda number You have a function error code. • Disconnect all power to the range for at least 30
orletter"flash seconds and then reconnect power. If the flmcfion
in the display error code repeats, call for service.
4O
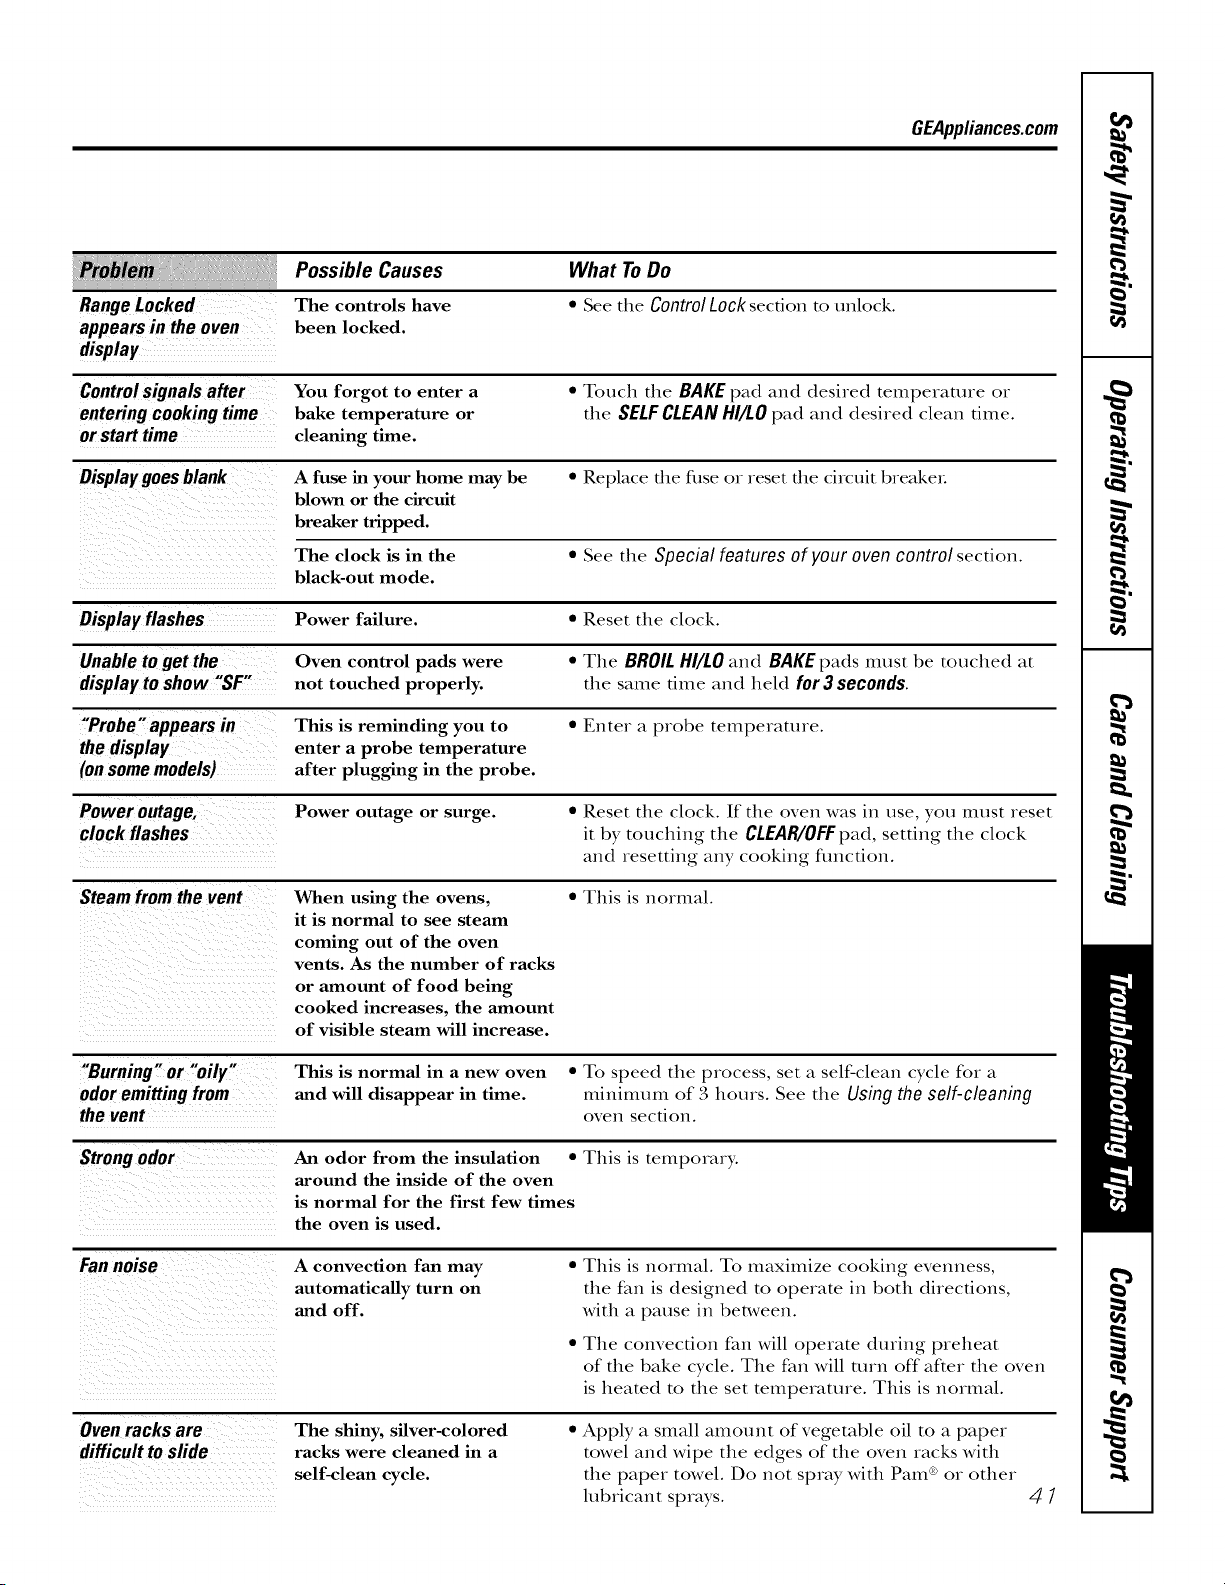
GEAppliances.com
Possible Causes What ToDo
Range Locked The controls have " See the Control Lock section to unlock.
appears in the oven been locked.
display
Control signals after You forgot to enter a " Touch the BAKE pad and desired temperature or
entering cooking time bake temperature or the SELF CLEAN HI/LO pad and desired clean time.
or start time cleaning time.
Display goes blank A fuse in your home may be * Replace the fi_se or reset the circuit breakeL
blown or the circuit
breaker tripped.
The clock is in the * See the Special features of your oven control section.
black-out mode.
Display flashes Power failure. * Reset the clock.
Unable to get the Oven control pads were * The BROIL HI/LO and BAKE pads must be touched at
display to show "SF" not touched properly, the same time and held for 3 seconds.
"Probe"appears in This is reminding you to " Enter a probe temperature.
the display enter a probe temperature
(on some models) after plugging in the probe.
Power outage, Power outage or surge. * Reset the clock. If the oven was in use, you must reset
clock flashes it by touching the CLEAR/OFFpad, setting the clock
and resetting any cooking fimcfion.
Steam from the vent When using the ovens, * This is normal.
it is normal to see steam
coming out of the oven
vents. As the number of racks
or amount of food being
cooked increases, the amount
of visible steam will increase.
"Burning" or "oily"
odoremittingfrom
thevent
This is normal in a new oven • To speed the process, set a self-clean cycle for a
and will disappear in time. milfilnUm of 3 hours. See the Using the self-cleaning
ovell section.
Strong odor An odor from the insulation • This is temporary.
around the inside of the oven
is normal for the first few times
the oven is used.
Fannoise
A convection fan may
automatically turn on
and off.
• This is normal. To maximize cooking evenness,
the fan is designed to operate in both directions,
with a pause in between.
• The convection fan will operate during preheat
of the bake cycle. The fan will mrn off"after the oven
is heated to the set temperature. This is normal.
Ovenracksare
difficulttoslide
The shiny, silver-colored
racks were cleaned in a
self-clean cycle.
• Apply a small amount of vegetable oil to a paper
towel and wipe the edges of the oven racks with
tim paper towel. Do not spray with Pam ®or other
lubricant sprays.
4/
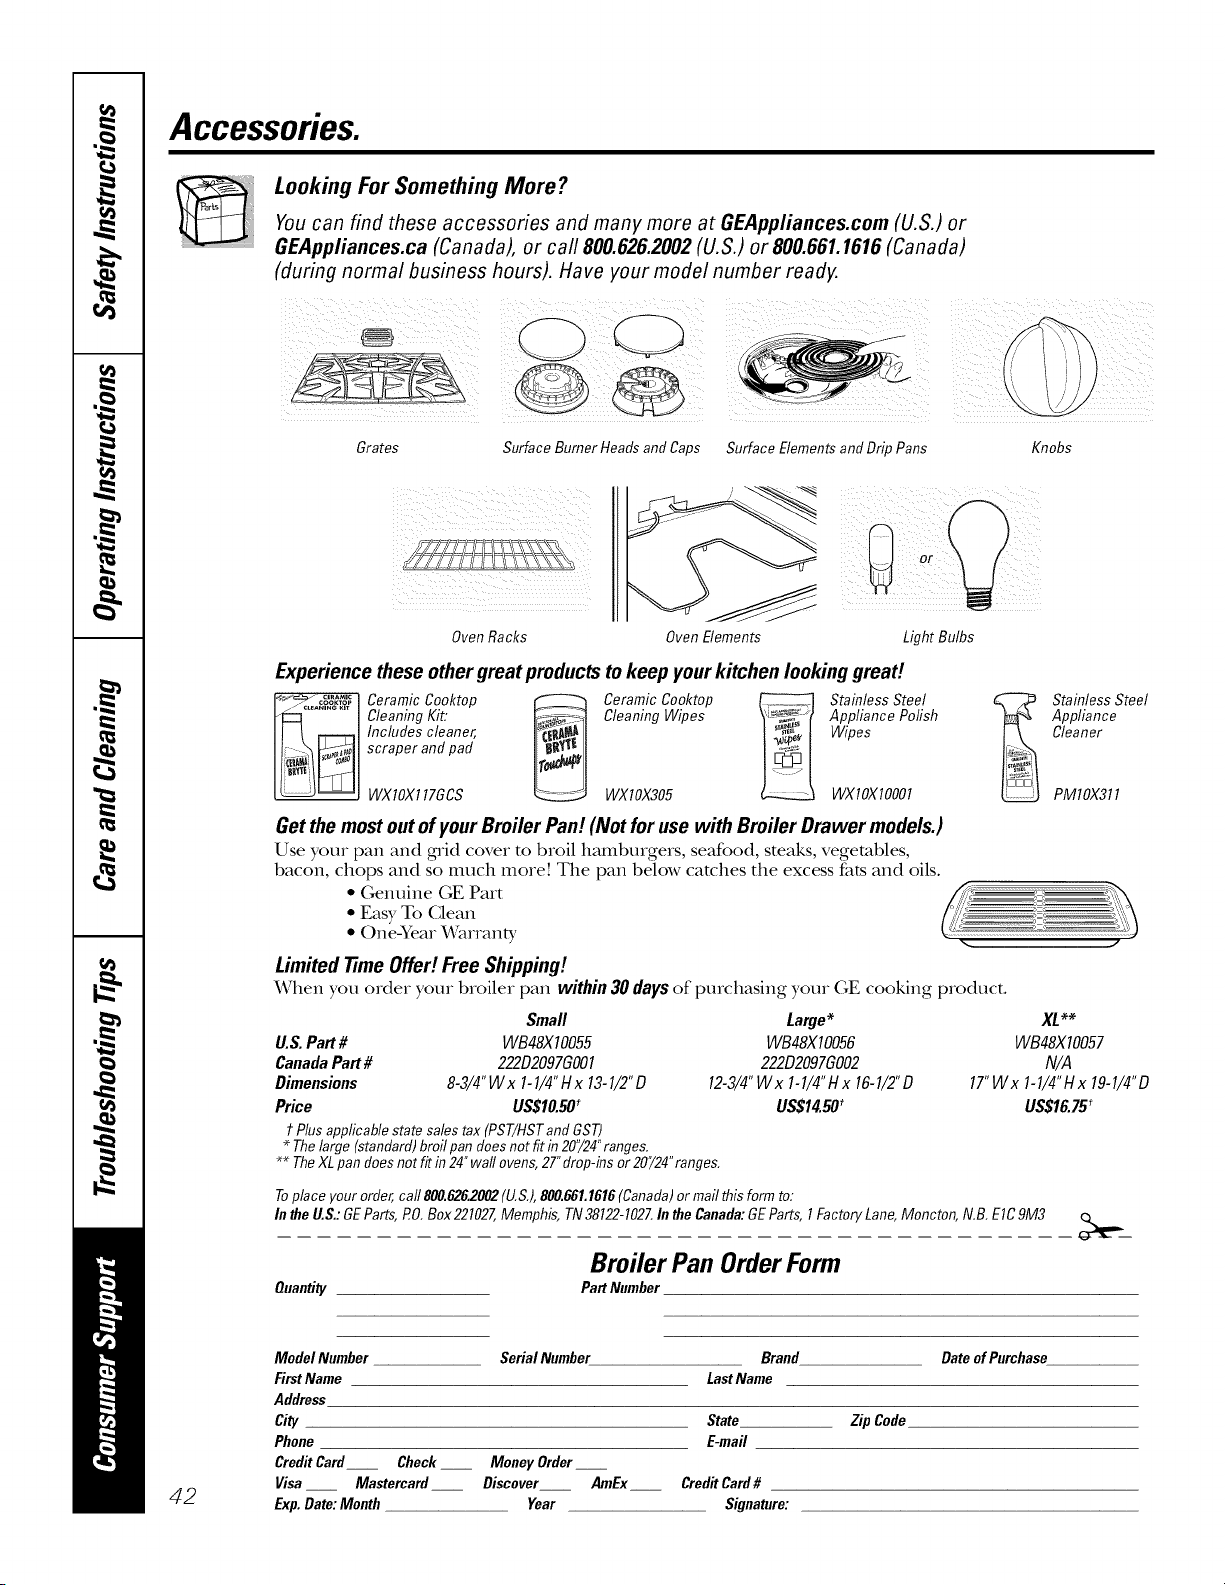
Accessories.
Looking For Something More ?
You can find these accessories and many more at GEAppliances.com (U.S.) or
GEAppliances.ca (Canada), or carl 800.626.2002 (U.S.) or 800.661.1616 (Canada)
(during normal business hours). Have your model number ready.
/iili ii!!iIIL Ii! iii i)i!ii(!ilili!ii ii
Grates
Surface Burner Heads and Caps Surface Elements and Drip Pans
Knobs
! L ¸ZLL L ZZ
Oven Racks Oven Elements
Experience these othergreat productstokeep yourkitchen looking great!
Ceramic Cooktop _ Ceramic Cooktop _ Stainless Steel
Cleaning Kit: Cleaning Wipes Appliance Polish
Includes cleaner, Wipes
scraper and pad
WXlOX117GCS WXlOX305 WXlOXlO001
Getthe mostout ofyourBroiler Pan! (Not for use with Broiler Drawer models.)
Use your pan and grid cover to broil hamburgers, seafood, steaks, vegetables,
bacon, chops and so much more! The pan below catches the excess fats and oils.
• Genuine GE Part
• Easy To Glean
• One:Year Wammty
Limited time Offe!! Free Shipping!
When you order your broiler pan within 30 days of purchasing your GE cooking product.
Small
U.S. Part # WB48X10055
Canada Part # 222D2097GO01
Dimensions 8-3/4"Wx 1-1/4" Hx 13-1/2"D
Price US$10.50'
t Plusapplicable state salestax (PST/HSTandGST)
* Thelarge (standard)broilpan doesnotfitin 20"/24"ranges.
Large*
WB48X10056
222D2097GO02
12-3/4"Wx 1-1/4"Hx 16-1/2"D
US$14.50_
** The XL pan does not fit in 24" wall ovens, 27" drop-ins or 20"/24" ranges.
Stainless Steel
Appliance
Cleaner
PMlOX311
WB48X IO057
N/A
17"Wx 1-1/4"Hx 19-1/4"D
US$16.75_
Toplace your order,carl800.626.2002(U.S.),800.881.1818(Canada)or mailthis form to:
Inthe U.S.:GEParts,PO.Box221027,Memphis, TN38122-1027.In theCanada:GEParts,1FactoryLane,Moncton,N,B. EIC9M3
Broiler Pan OrderForm
Quantity PartNumber
42
ModelNumber
FirstName
Address
City
Phone
CreditCard
Visa
Exp.Date:Month
Serial Number Brand DateofPurchase
LastName
State Zip Code
E-mail
Check __ Money Order__
Mastercard Discover AmEx Credit Card #
Year Signature:
GEElectric RangeWarranty.
Aft warranty service provided by our Factory Service Centers,
or an authorized Customer Care_ technician. Toschedule
service, visit us on-line at GEAppliances.com, or call
800.GE.CARES (800.432.2737).Please have serial number
and model number available when calling for service.
Staple yourreceipt here.
Proof of the original purchase
date is needed to obtain service
under the warranty.
!!!!_li!i_iiiii,@+_i_ii_iiii iii,'3ii';_iiiiiiii!iliiii_"!i_,,:i,_iiii'_iiiiiil!i!l'_"_'!iii,',i'i_ii_iiiiiii_i_'_'_!_'ii';__ii_i
One Year
From the date of the
original purchase
GEWill Provide:
Anypartof the range which fails due to a defect in materials or workmanship. During this
limited one-year warranty,C;E will also provide, free of charge, all labor and in-home sexs_ice
to replace the defective part.
Service trips to your home to teach you how to use
the product.
Improper installation, delivery or maintenance.
Failure of the product if it is abused, misused,
or used for other than the intended purpose or
used commercially.
Damage to the glass cooktop caused by use of cleaners
other than the recommended cleaning creams and
pads.
Damage to the glass cooktop caused by hardened
spills of sugary materials or melted plastic that
are not cleaned according to the directions in
the Owner's Manual.
Replacement of house fuses or resetting of circuit
breakers.
Damage to the product caused by accident, fire, floods
or acts of God.
Incidental or consequential damage caused by possible
defects with this appliance.
Damage caused after delivery.
Product not accessible to provide required service.
EXCLUSIONOFIMPLIED WARRANTIES--Your sole and exclusive remedy isproduct repair as providedin this Limited
Warranty.Any implied warranties, including the implied warranties of merchantability or fitnessfor aparticular purpose,
are limited toone year or the shortestperiod allowed by law.
This warranty is extended to the original purchaser and any succeeding owner for products purchased for
home use within the USA. If the product is located in an area where service by a GEAuthorized Servicer is not
available, you may be responsible for a trip charge or you may be required to bring the product to an Authorized GE
Service location for service. In Alaska, the warranty excludes the cost of shipping or service calls to your home.
Some states do not allow the exclusion or fimitation of incidental or consequential damages. This warranty
gives you specific legal rights, and you may also have other rights which vary from state to state. Toknow
what your legal rights are, consult your local or state consumer affairs office or your state's Attorney General
Warranton GeneralElectric Company.Louisville, KY40225
43
ConsumerSupport
GEAppliancesWebsite
GEAppliances.com
Have a ques0on ox need assistance with your appliance? TD_the GE Appliances Website 24 hours a day,
any day of the year! Fox greater convenience and lc,tster service, you can now download Owner's Manuals,
order parts or even schedule sex_qceon-line.
ScheduleService GEAppliances.com
Expert GE repair service is only one step away from youx dooL Get on-line and schedule yore sex_ice at
your convenience any day of the year! Or call 800.GE.GARES (800.432.2737) dining norm_d business hours.
RealLifeDesignStudio GEAppliances.com
GE suppoxts the Univers_d Desigm concept--products, services and environments that can be used
by people of all ages, sizes and capabili0es. _re recognize the need m desigm foxa wide x_mgeof physical
and mental abili0es and impaiIments. Fox details of GE's Univexsal Design applications, including kitchen
design ideas fox people with disabiliues, check out our Website today. Fox the hearing impaired, please call
800.TDD.GEAG (800.83,3.4322).
ExtendedWarranties
GEAppliances.com
Purchase a GE extended warranty and lemn about special discounts that are available while your warranty
is still in eff)ct. You can purchase it ondine anytime, or call 800.626.2224 duxing nomml business houxs.
GE Consumer Home Sex_qceswill still be there after your warranty expires.
PartsandAccessories
GEAppliances.com
IndMduals qualified to service their own appliances can have parts or accessoxies sent di_ecfly to their
homes (VISA, MasterGard and Discover cards are accepted). Order on-line today, 24 houxs every day
or by phone at 800.626.2002 during nomml business houxs.
Instructionscontainedinthismanualcoverprocedurestobeperformedbyanyuser.Otherservicinggenerally
shouldbereferredtoqualifiedservicepersonnelCautionmustbeexercised,sinceimproperservicingmaycause
unsafeoperation.
ContactUs
GEAppliances.com
If you are not satisfied wifll die service you receive flom GE, contact us on our Website wifll all die details
including youx phone numbex, ox wxim m: Genexal Managex; Gusmmex Relations
GE Appliances, Appliance Park
Louisville, KY40225
RegisterYourApplbnce
GEAppliances.com
Register your new appliance on-line--at your convenience! Timely product regismlfion will allow fox
enhanced communica0on and prompt service under the texans ofyoux waxTanty, should the need axise.
You may also mail in the preprinted regism_Oon card included in the packing material.
Printed in the United States

