Loading ...
Loading ...
Loading ...
SerialNumber:
Dateof Purchase:
GasolineCapacity/Type: 1.6 Quarts (Unleaded Regular)
Oil Type (API-SF-SJ): SAE 30 (above 32°F); SAE 5W-30 (below 32°F)
Oil Capacity: 20 Ounces
Spark Plug (Gap: .030") Champion RJ19LM or J19LM
Trimmer Line Length: 18.75 Inches (0.155 Inch Diameter)
• The model and serial numbers will be found on a decal on the rear of the trimmer.
Record both serial number and date of purchase in the space provided above.
Read these instructions and this manual in
its entirety before you attempt to assemble
or operate your new trimmer.
IMPORTANT: This trimmer isshipped WITH-
OUT OIL OR GASOLINE in the engine.
Your new trimmer has been assembled
at the factory with the exception of those
parts left unassembled for shipping
purposes. All parts such as nuts, wash-
ers, bolts, etc., necessary to complete the
assembly have been placed in the parts
bag. To ensure safe and proper operation
of your trimmer, all parts and hardware
you assemble must be tightened securely.
Use the correct tools as necessary to
ensure proper tightness.
When right hand (RH) or left hand (LH) is
mentioned in this manual, it means when
you are in the operating position (standing
behind the handle).
Loose Parts Packed Separately
Bottle of oil
Trimmer Lines (2) Sets
(0.155 diameter
x 18.75 inches long)
REMOVE TRIMMER FROM CARTON
1. Remove loose parts includedwith trimmer.
2. Cut down two end corners of carton
and lay end panel down flat.
3. Remove all packing materials.
4. Roll trimmer out of carton and check car-
ton thoroughly for additional loose parts.
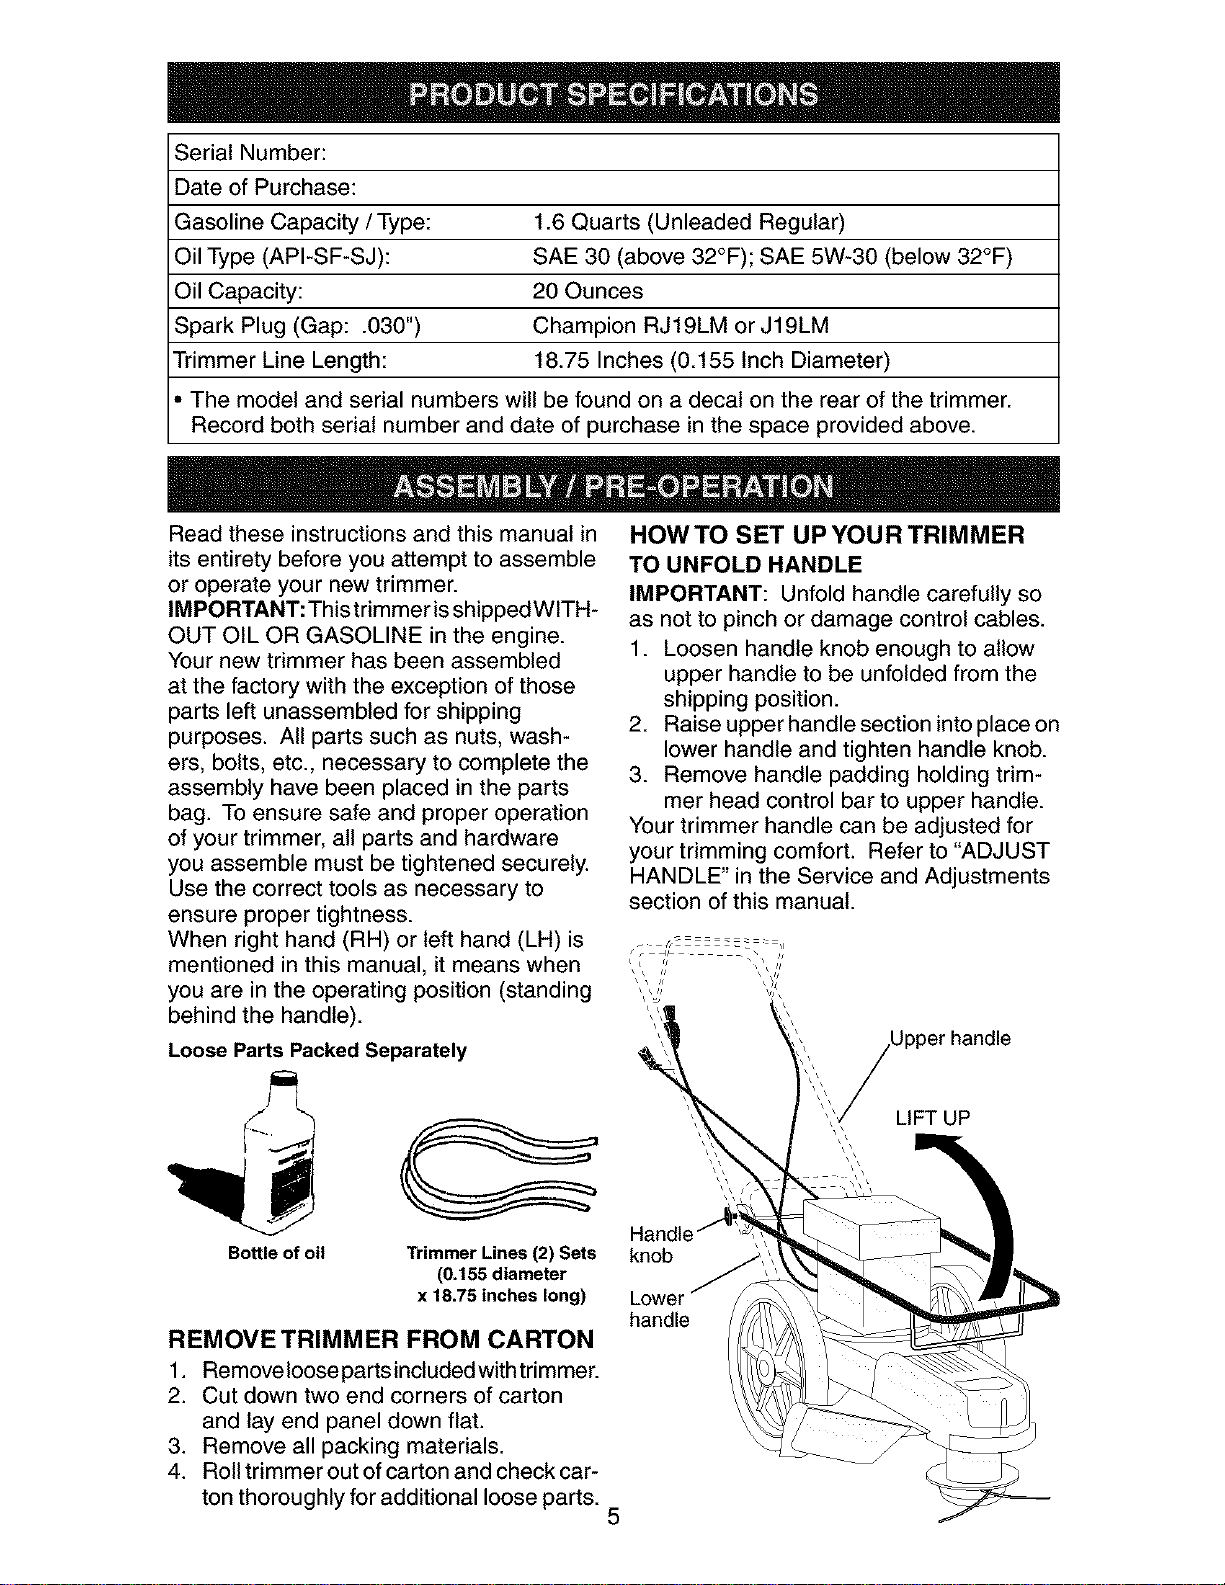
HOWTO SET UP YOUR TRIMMER
TO UNFOLD HANDLE
IMPORTANT: Unfold handle carefully so
as not to pinch or damage control cables.
1. Loosen handle knob enough to allow
upper handle to be unfolded from the
shipping position.
2. Raise upper handle section intoplace on
lower handle and tighten handle knob.
3. Remove handle padding holding trim-
mer head control bar to upper handle.
Your trimmer handle can be adjusted for
your trimming comfort. Refer to "ADJUST
HANDLE" in the Service and Adjustments
section of this manual.
handle
LIFT UP
Handle
knob
handle
5
Loading ...
Loading ...
Loading ...