Loading ...
Loading ...
Loading ...
10
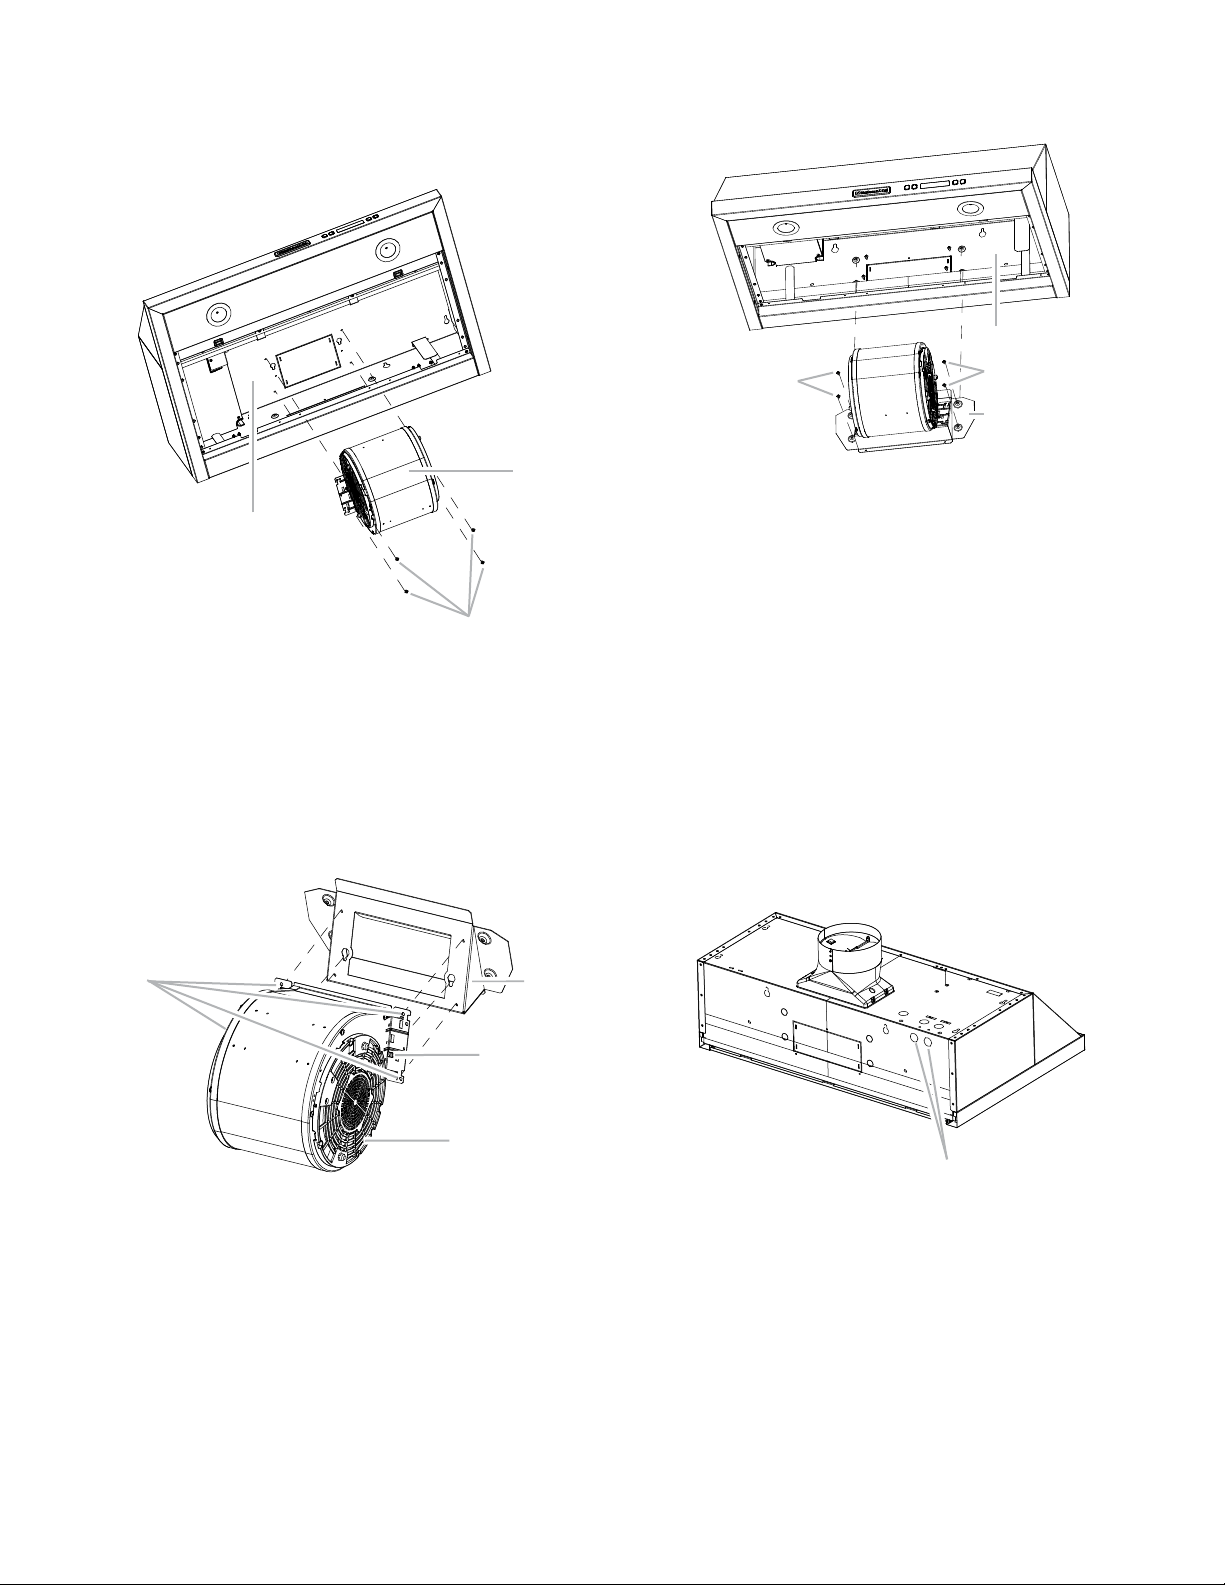
6. Remove the rear insulation panel and set it aside.
7. Using a T20
®
Torx
®
adapter, remove the 4 screws holding
the blower motor in place. Push up on the blower motor to
disengage the tabs from range hood cavity back. Remove
the blower motor and set it aside.
8. Install the blower motor onto the rear motor mounting bracket
(included with the 3¹⁄₄" x 10" (8.3 cm x 25.4 cm) Damper
Assembly/Motor Mounting Bracket Kit; see “Accessories or
Service” section to order). Engage the motor mounting tabs
into keyhole slots in rear mounting bracket and push down to
secure. Install the 4 screws removed in Step 7 and tighten to
secure motor bracket.
9. Install the blower motor assembly into the range hood and
secure with the 4 screws supplied with rear motor mounting
bracket assembly.
10. Reconnect blower motor electrical connector to the electrical
box connector.
11. Reinstall the rear insulating panel.
12. Reinstall the motor cover plate to range hood using the
4 screws removed in Step 3.
13. Reinstall bottom panels assembly to range hood using
the 8 screws removed in Step 2.
14. Attach the 3¹⁄₄" x 10" (8.3 cm x 25.4 cm) rectangular vent
damper (purchased separately) using 3 vent transition
mounting screws. Make sure the vent damper pivot is nearest
to the top back edge of the range hood. See vent connector
illustration in “Top Vent Connector Installation” in this section.
Install Range Hood to Cabinet
1.
Remove the round knockout from the top or back of the range
hood (depending on your wiring location) for the wiring strain
relief and install a
¹⁄₂
" UL listed or CSA approved strain relief.
2. Using 2 people, lift range hood into final location. Feed
enough electrical wire through the strain relief to make
connections in the terminal box. Tighten the strain relief
screws.
3. Position the range hood so that the large end of the keyhole
slots are over the mounting screws. Then push the hood
toward the wall so that the screws are in the neck of the slots.
The hood should be against the wall. Tighten the mounting
screws, making sure mounting screws are in the narrow neck
of the slots.
4. Check that damper, if used, rotates up and down freely.
5. Connect ventwork to hood. Seal joints with clamps to make
secure and airtight.
A. Range hood canopy (inside top)
B. Blower motor
C. Blower motor mounting screws
A. Rear motor mounting bracket
B. Motor mounting tabs (2)
C. Blower motor
D. Blower motor mounting screws (4)
C
A
B
C
B
A
D
A. Range hood canopy (inside top)
B. Blower motor mounting screws
C. Rear blower motor mounting bracket assembly
A. Round knockout
B
B
C
A
A
Loading ...
Loading ...
Loading ...