Loading ...
Loading ...
Loading ...

8
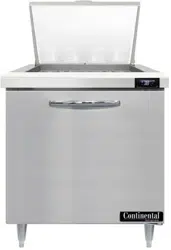
WORKTOPS/UNDERCOUNTERS & SANDWICH UNITS
OPERATIONS MANUAL
eliminate water as quickly as possible. The wick has a special
antimicrobial coating which minimizes any potential growth of
mold or bacteria. The wick pad should be replaced once a year,
or if it ever appears clogged or will not retain its shape.
In some adverse conditions such as extreme ambient tempera-
ture, high humidity, exceptionally heavy usage, frequent loading
for prolonged periods of time, or extra heavy pan loading, the
amount of condensate water generated could overflow the pan.
If this occurs, the plastic drain tube from the cabinet can be
diverted directly to a floor drain, bypassing the condensate pan.
Alternatively, an optional electric condensate heater may be
purchased as an accessory. To install the optional condensate
heater, follow the steps for: “Installing Electric Condensate
Heater” in the “Optional Accessories” section, located at the
back of this manual. (Note: An electric condensate heater is
supplied standard on all remote models.)
Periodically (at least once a month) the condenser coil should
be inspected, to make sure it is not dirty or blocked, and the
wick pad can be easily checked at the same time. To check
the condenser and wick, disconnect the cabinet power supply,
remove the screws securing the back cover to the cabinet and
set the parts aside. Inspect the condenser coil and wick pad
for any damage or debris. Make sure the wick is secured in the
drain pan as shown. Remove any mineral deposits or dirt build-
up on the condenser, as well as on the wick pad and drain pan.
Reattach the back cover and reconnect power to the cabinet.
Contact the factory if you need to order a new wick pad or any
replacement parts.
INSTALLING LEGS AND LEVELING
If your new unit is supplied with adjustable legs, they will be
packed in the accessory carton in the cabinet. Each model has
four leg mounting holes on the bottom of the cabinet (see
Figure 4). In order to install the legs, carefully tip the cabinet
back, adding four (4) 2” wood blocks underneath, and simply
screw the threaded leg studs into the case bottom front leg
holes. Repeat this procedure by tilting the cabinet in the oppo-
site direction and install the remaining legs. Make sure the
legs are tightened extremely well or the entire model will sway
or rock with each opening or closing of the doors, possibly
causing damage to the case bottom. This procedure should be
performed close to the final installation site and allow access
to the rear of the cabinet for condensate evaporator installation
(see “Installing Condensate Evaporator” under “Installation
and Location” section).
To assure your cabinet is level, all legs are equipped with bullet-
type leveling bolts. These bolts can be turned by hand or by
wrench, clockwise or counterclockwise to level the cabinet.
CONDENSATE REMOVAL
During the refrigeration process, warm, air is cooled and mois-
ture condenses into water which collects in a drain pan in your
cabinet. No floor drains or plumbing connections are required
for your cabinet, since all models use a self-contained, auto-
matic condensate water evaporating system (see Figure 5).
Some models include a wick pad in the drain pan, to maximize
evaporation. The pad is made of a composite wicking material
with a metallic facing, specifically designed to safely absorb and
FIGURE 4: Leg Installation
LEG
TURN END OF LEG
COUNTERCLOCKWISE
TO INCREASE HEIGHT,
OR CLOCKWISE
TO REDUCE HEIGHT.
UP
THREADED
END
FIGURE 5: Model Components
Loading ...
Loading ...
Loading ...