Loading ...
Loading ...
Loading ...
14
EN
5
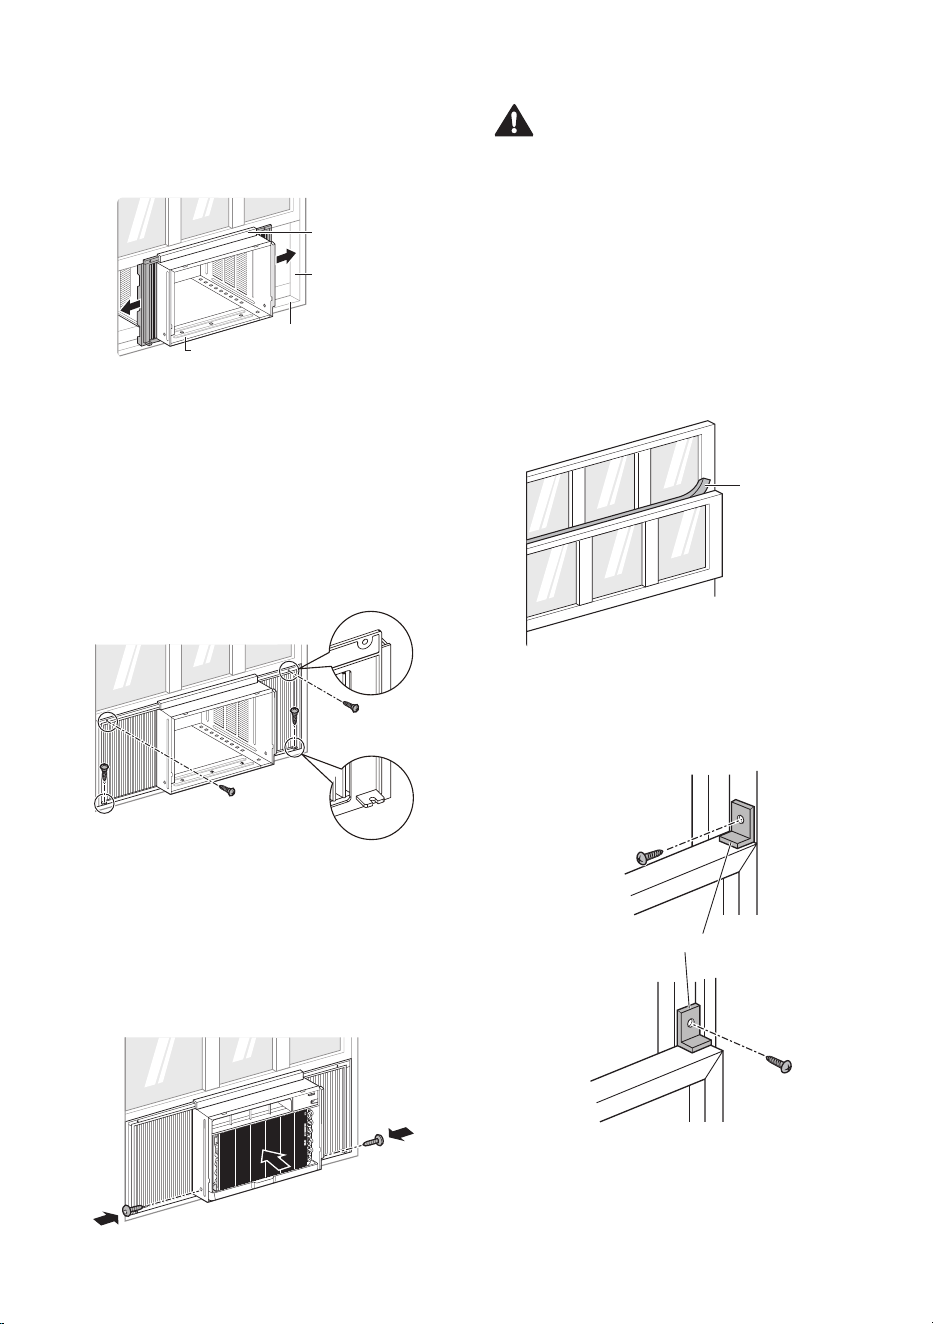
Pull each curtain panel out until it meets the
window sash track. Pull the bottom window
sash down behind the upper panel guide until
they meet.
Sash TrackSash Track
Front AngleFront Angle
Upper Panel Upper Panel
GuideGuide
Inside Window SillInside Window Sill
NOTE
• Do not pull the window sash down so tightly
that the movement of the curtain panels is
restricted.
6
Use a screwdriver or power drill to attach
the curtain panels to the window sashes
by inserting type C screws into the sashes
through the cabinet holes shown in the figure
below.
Screws Screws
(Type C)(Type C)
Unit Installation
1
With the aid of an assistant, slide the unit into
the cabinet. Do not push on the controls or
the finned coils. Reinstall the screws removed
from the cabinet sides in step 1 of preparation
of cabinet.
CAUTION
• The unit is heavy. Use an assistant to help
lift the unit and set it in place. Lifting and
maneuvering the unit by yourself could result
in injury.
• Hold the unit firmly in place until the window
frame is lowered to meet the top surface of the
unit directly behind the upper guide. If the unit
falls from the window, it could cause personal
injury or property damage.
2
Cut the non-adhesive foam strip to the proper
length and insert it between the upper window
sash and the lower window sash.
Foam Strip Foam Strip
(Non-adhesive)(Non-adhesive)
3
To prevent broken glass or damage
to windows, on vinyl or other similarly
constructed windows, attach the window
locking bracket with a type C screw.
Screw Screw
(Type C)(Type C)
Window Locking BracketWindow Locking Bracket
VinylVinyl
Screw Screw
(Type C)(Type C)
WoodWood
Loading ...
Loading ...
Loading ...