Loading ...
Loading ...
Loading ...
12
EN
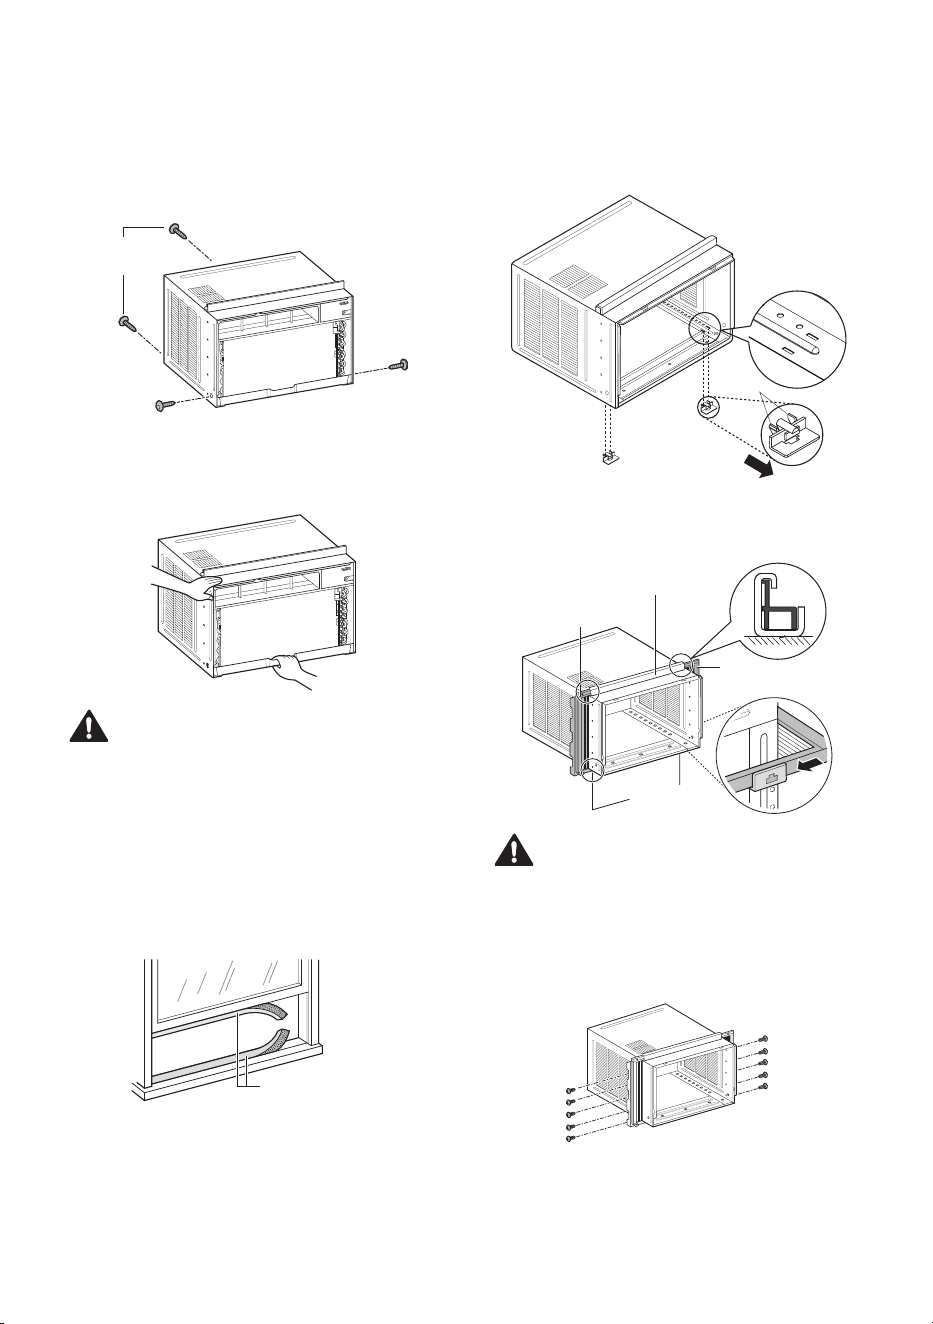
Preparation of the Cabinet
1
Remove 4 screws which fasten the cabinet at
both sides and at the back. (Keep the screws
for later use.)
Shipping Shipping
ScrewsScrews
2
Slide the unit from the cabinet by gripping the
base pan handle and pulling forward while
bracing the cabinet.
CAUTION
• The unit is heavy. To prevent injury, use proper
lifting techniques when pulling unit forward
from cabinet. Obtain assistance from another
person if possible.
3
Cut the window sash seals (Foam-PE) to the
proper length. Peel off the backing and attach
the adhesive-backed foam to the underside
of the window sash and the bottom of the
window frame.
Foam-PE Foam-PE
(Adhesive backed)(Adhesive backed)
4
Insert the hooks on the lower panel guides
into the slots on the bottom of the cabinet.
Make sure that the flanges on the lower panel
guides will face toward the inside of the room.
HookHook
IndoorIndoor
5
Insert the top and bottom rails of the curtain
panels into the upper and lower panel guides.
Upper Panel GuideUpper Panel Guide
Right Curtain PanelRight Curtain Panel
Lower Panel Lower Panel
GuideGuide
Left Curtain PanelLeft Curtain Panel
CAUTION
• The lower panel guides are easily broken. Be
careful with them when installing the cabinet.
6
Fasten the curtain panels to the unit with 10
type A screws.
Fasten the screws behind the curtain panel.
Screws Screws
(Type A)(Type A)
Screws Screws
(Type A)(Type A)
NOTE
• Use a long screwdriver to make installing the
screws easier.
Loading ...
Loading ...
Loading ...