Loading ...
Loading ...
Loading ...
BELT REPLACEMENT
Beforeperformingany type of maintenanceon the machine,waitfor
all partsto stopmovinganddisconnectthe sparkplugwire.Failure
to followthis instructioncouldresult inpersonalinjuryor property
damage.
Ifthe drivebelt needstobe replaced,makesureyou useonlya factory
authorizedbelt listedin the Partspagesof this operator'smanual,as an
"over-the-counter"beltmaynotperformsatisfactorily.Theprocedure
requiresaveragemechanicalabilityand commonlyavailabletools.
Toreplacethe Drivebelt,follow thesesteps:
1. RemovethebeltcoverfromtheIdt sideofthetillerby removingthe
twoselftappingscrewsandhexstopnutand washer.SeeFigure26.
\
Hex Stop
Nut
.
f
Washer
Figure26
Removetheidlerpulleybolt and movethe beltfrom underthe
idlerpulleykeeper.See Figure27.
J
3. Removethe belt keeperassemblylocatedbehindthe engine
pulleyby removingthe two hex boltsand lockwashers.See
Figure27.
4. Removethe oldbelt fromaroundthe transmissionpulleyand
installthe newbelt. SeeFigure27.
5. Followthe instructionsinreverseorderto re-installthe belt keeper
and idlerpulley.
NOTE:Uponreassembly,makecertainthattheidler pulleykeeperisas
shownin Figure27.Takenoteof the notchon thebottomof thekeeper
andthealignmentwhenreassemblingwith the replacementbelt.
NOTE;Afterre-installingthebelt,double-checkthe cableadjustment.
Referto theAssemblysectionfor instructionsonadjustingthe cable.
TINES
The tines willwearwith use andshouldbe inspectedat the beginning
of each tillingseasonand after every30 operatinghours.The tines
can be replaced.Referto the Parts List sectionof this manualfor part
numbers.
Tine Inspection
Withuse,the tineswill becomeshorter,narrowerandpointed.Badly
worntines will resultina lossof tillingdepth,and reducedeffective-
nesswhenchoppingup andturningunderorganicmatter.
Removing/Installing a Tine Assembly
1. A fine assemblyconsistsof a left handtine anda righthand fine.
NOTE:The sharpedgesof thetinesare positionedto enterthe soil
first whenrotating.Notethispositionof thetinesfor reinstallationof the
newfineassemblies.
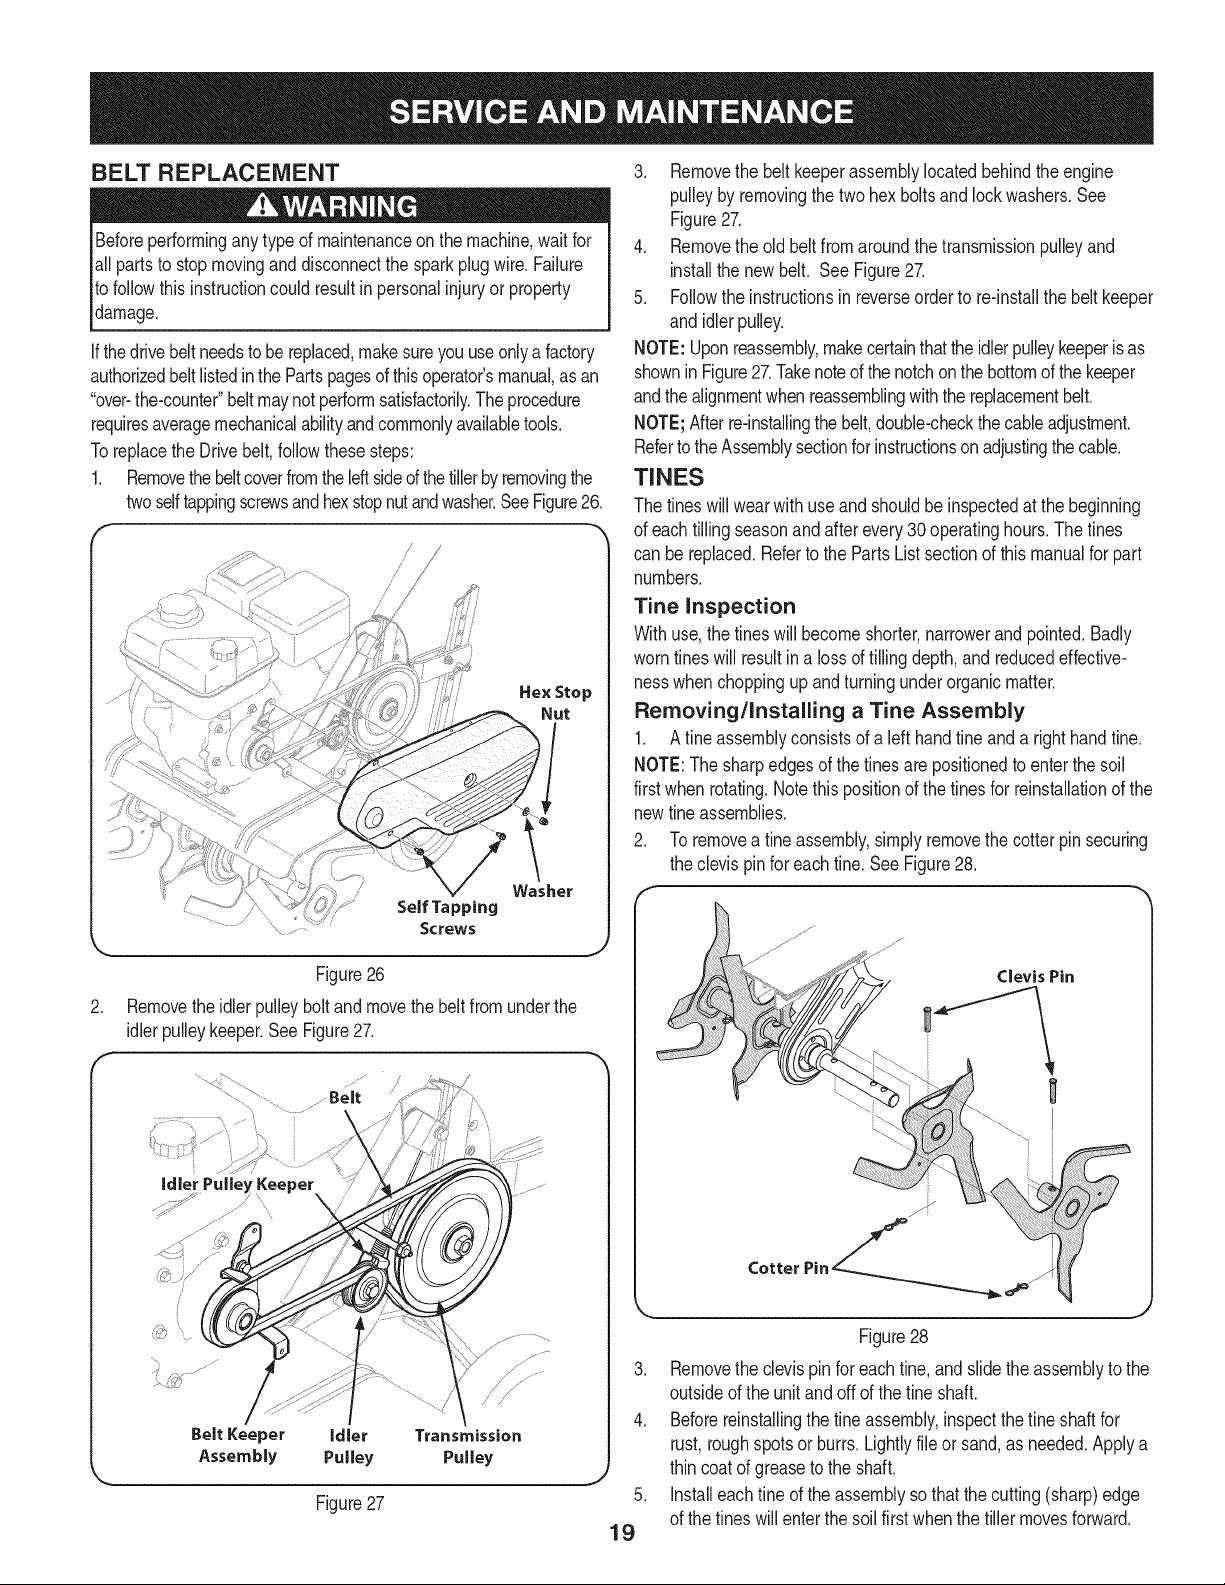
2. To removea fineassembly,simplyremovethe cotterpin securing
the clevispinfor eachtine.SeeFigure28.
.
4.
Belt Keeper IdJer Transmission
Assembly Pulley Pulley
Figure27 5.
19
Figure28
Removethe clevispin for eachfine, and slidethe assemblyto the
outsideof the unit and off of the fine shaft.
Beforereinstallingthe tine assembly,inspectthefine shaftfor
rust,roughspotsor burrs.Lightlyfile or sand,as needed.Applya
thin coat of greaseto the shaft.
Installeachfine of the assemblyso thatthe cutting(sharp)edge
of the tineswill enterthe soilfirst whenthe tillermovesforward.
Loading ...
Loading ...
Loading ...