Loading ...
Loading ...
Loading ...
15
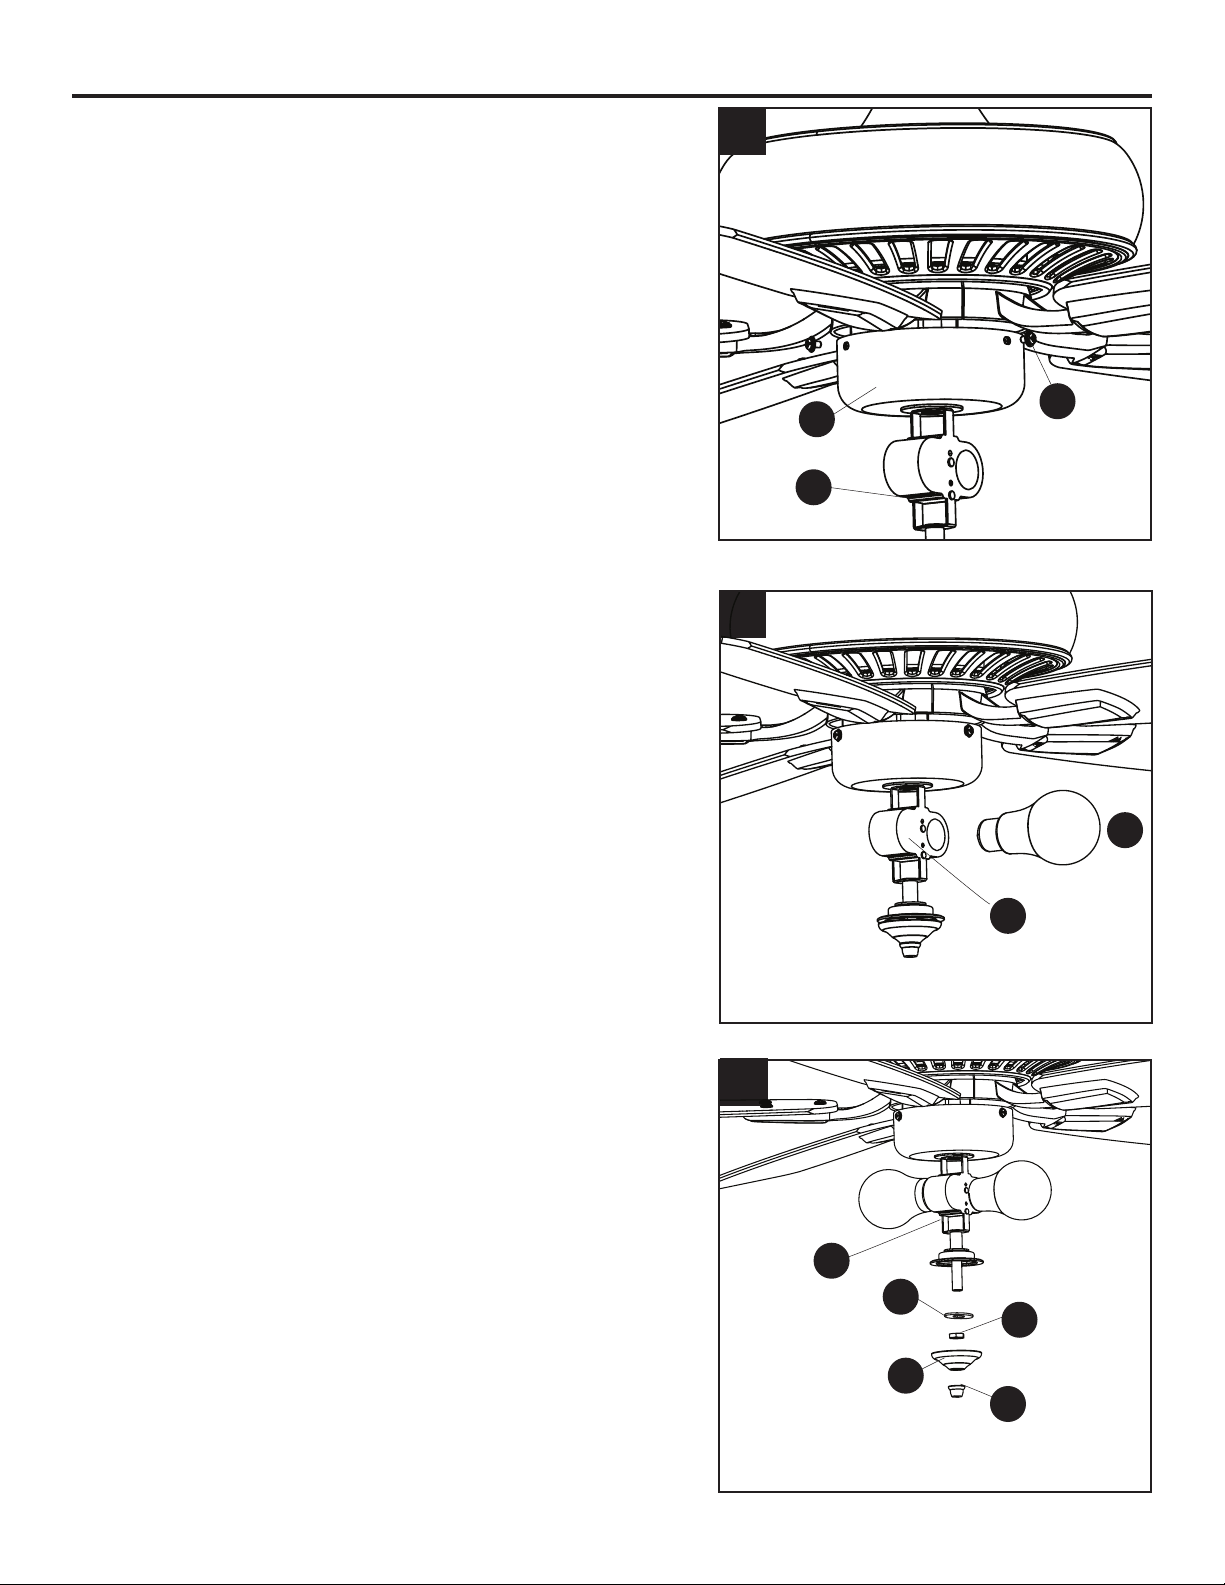
FINAL INSTALLATION
6. Secure the switch housing (O) along with light kit (P)
to the tter plate (L) using the previously removed
tter plate screws (M).
7. Install bulbs (Y) into the sockets of the light kit (P).
Important: Make sure to allow the bulbs (Y) and light
kit (P) to cool before you replace the bulbs.
8. Remove the preassembled nial (T), nial cap (S),
hex nut (Q) and rubber washer (R) from the light kit
(P). Lift the glass bowl (X) onto the threaded rod at
the bottom of the light kit (P).
6
7
M
P
P
Y
O
8
T
S
Q
R
P
Loading ...
Loading ...
Loading ...