Loading ...
Loading ...
Loading ...
TOOLS REQUIRED FOR ASSEMBLY
(1) Hammer
(2) 1/2" Wrenches
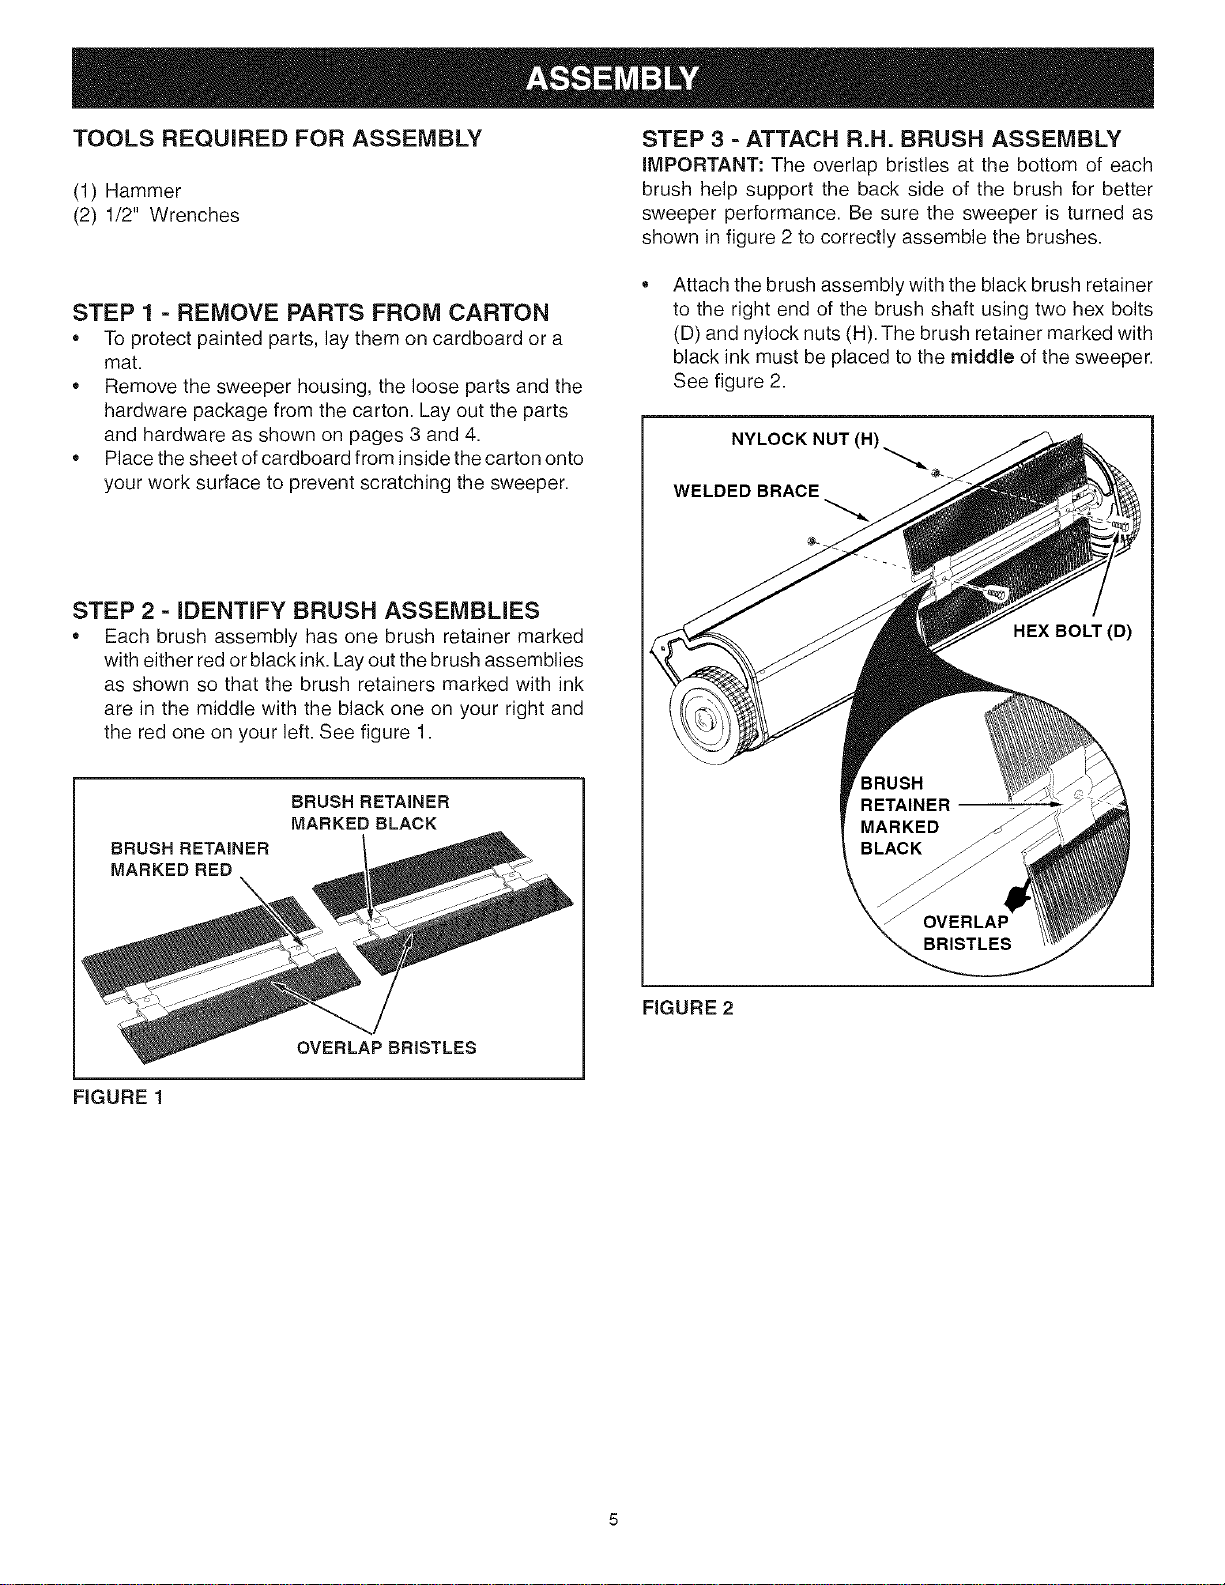
STEP 3 - ATTACH R.H. BRUSH ASSEMBLY
IMPORTANT: The overlap bristles at the bottom of each
brush help support the back side of the brush for better
sweeper performance. Be sure the sweeper is turned as
shown in figure 2 to correctly assemble the brushes.
STEP 1 - REMOVE PARTS FROM CARTON
• To protect painted parts, lay them on cardboard or a
mat.
Remove the sweeper housing, the loose parts and the
hardware package from the carton. Lay out the parts
and hardware as shown on pages 3 and 4.
Place the sheet of cardboard from inside the carton onto
your work surface to prevent scratching the sweeper.
STEP 2 = IDENTIFY BRUSH ASSEMBLIES
• Each brush assembly has one brush retainer marked
with either red or black ink. Lay out the brush assemblies
as shown so that the brush retainers marked with ink
are in the middle with the black one on your right and
the red one on your left. See figure 1.
BRUSH RETAINER
MARKED RED
BRUSH RETAINER
MARKED BLACK
OVERLAP BRISTLES
Attach the brush assembly with the black brush retainer
to the right end of the brush shaft using two hex bolts
(D) and nylock nuts (H). The brush retainer marked with
black ink must be placed to the middle of the sweeper.
See figure 2.
NYLOCK NUT (H)_
WELDED BRACE
HEX BOLT (D)
FIGURE 2
FIGURE 1
Loading ...
Loading ...
Loading ...