Loading ...
Loading ...
Loading ...
9
Fireplace Installation
The replace is packaged with
a three prong plug installed for
plug-in convenience. Hard wiring
the replace is also an option
by removing the plug from the
factory tted cord and completing
the wiring according to National
and Local Elecrical Codes.
WARNING: Do not attempt to
wire your own new outlets or
circuits. To reduce the risk of
re, electric shock or injury to
persons, always use a licensed
electrician.
WARNING: Ensure that the
3-Position Switch is set to the
Off position ("O") and that the
circuit on which the replace is
to be installed has the power
cut off at the service panel until
installation is complete.
Surface Installation
CAUTION: Two people will be
required for various steps of
this procedure.
1. Determine the mounting
location of the unit so that the
wall-mounting bracket can be
installed into 3 wall studs.
!
NOTE: It is recommended that
the mounting bracket be installed
56 in. (142 cm) off of the ground
to maintain an optimized viewing
angle of the ame.
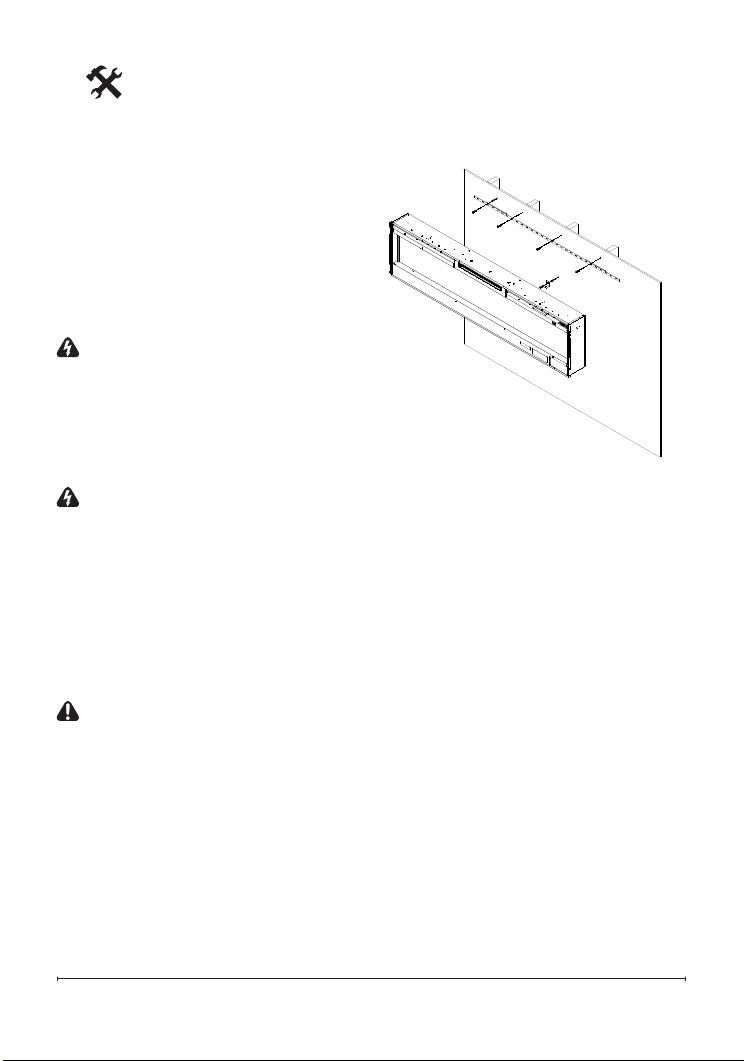
2. Hold the wall mounting brack-
et, with the bubble level on
the top, on the wall so that the
bubble on the level is centered
between the two black lines.
3. Mark the 4 mounting screw
locations, on the wall, ensur-
ing that the wall bracket stays
level. (Figure 2)
4. In locations where the screws
are being installed only into
drywall, install the supplied
wall anchors before installing
the screw (predrill if required).
5. Secure the wall bracket to the
wall using the supplied 1½ in.
(3.8 cm) mounting screws and
washers into the wall and/or
Figure 2
Loading ...
Loading ...
Loading ...