Loading ...
Loading ...
Loading ...
Page 14
Window Installation Kit
Installation
Instructions
window
slider
window
dimension (mm)
window
dimension (inch)
a+b 484
~
592 19.1
~
23.3
b+c 592
~
696 23.3
~
27.4
a+b+c 696
~
802 27.4
~
31.6
b+e 802
~
896 31.6
~
35.3
a+b+e 896
~
998 35.3
~
39.3
a+b+c+d 998
~
1210 39.3
~
47.6
a+b+c+d+e 1210
~
1620 47.6
~
63.8
1: For Hung Window types only
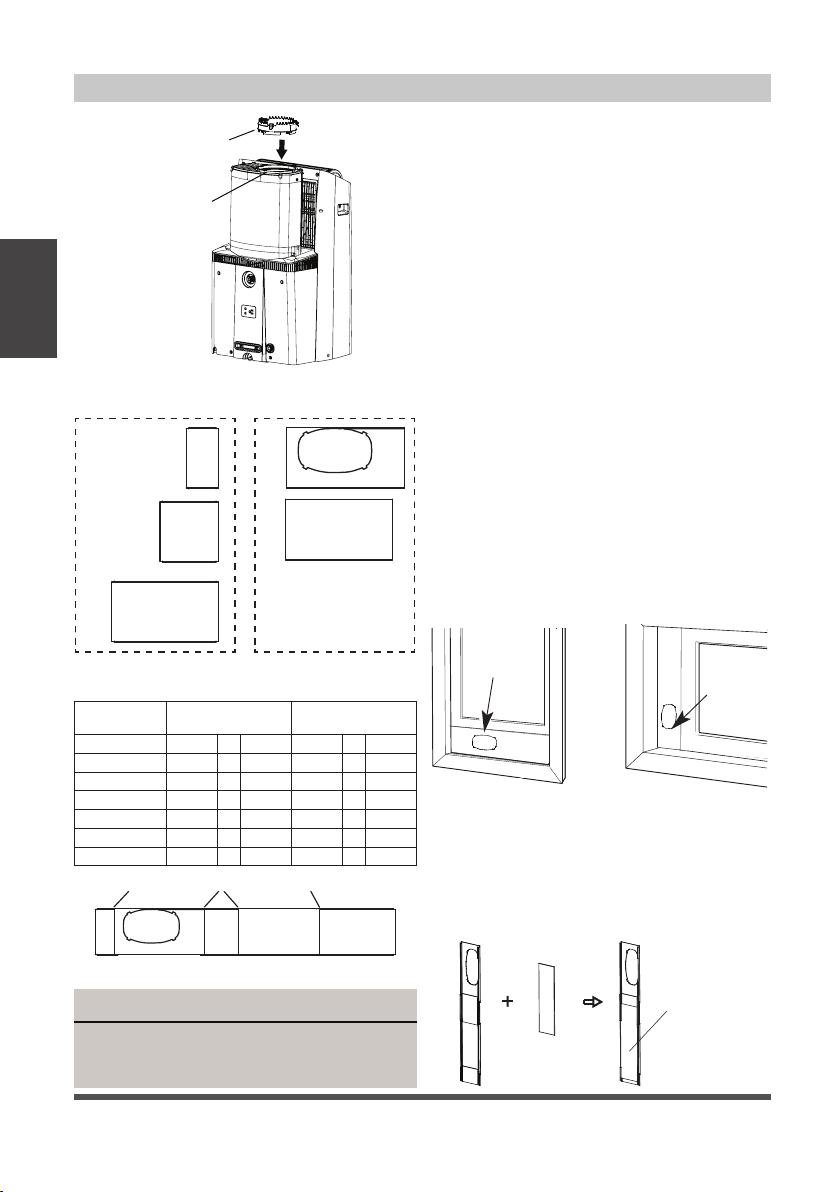
Insert the Air Exhaust Adapter into the
exhaust of the hose (the circular opening)
for optimal performance. Rotate the
adapter clockwise until the locking tabs
click and it no longer rotates.
Skip this step if installing into a
horizontal sliding window.
The Air Exhaust adapter may interfere
with some window screens, and can be
removed if desired (Please note this may
slightly decrease performance).
2: Preparing the adjustable window slider
1. Depending on the size of your window,
adjust the size of the window slider.
Use the combination of panels that
best fits your window opening.
2. If the length of the window requires
two or more window sliders, use the
bolt to fasten the window sliders once
they are adjusted to the proper length.
3. If installing in a sliding window, bolts
should be installed on both sides of the
window sliders.
Hung Window Sliding Window
Windows Type
Window
slider
Window
slider
Air Exhaust
Adapter
Exhaust
Hose
NOTICE
Once the Exhaust Hose assembly and Adjustable
Window Slider are prepared, choose from one of
the following two installation methods.
3: Applying insulation to the window slider
After assembling the window slider to your
proper dimension, cut and apply the foam
insulation sheets to the exterior side of the
window slider.
Window
Slider Foam
Window
Slider Foam
Three Window Sliders
with side holes
Two Window Sliders
without side hole
Use the table below to determine what combination
of Window Sliders is correct for your window
a b
c d
e
a b c d e
boltbolt bolt
Loading ...
Loading ...
Loading ...