Thank you for choosing our product! We invite you to spend a few minutes
to read the user instruction before first use.
Feel free to contact us at: [email protected] if you need any help.
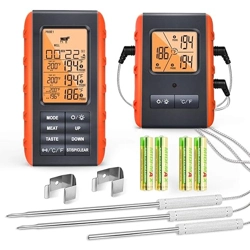
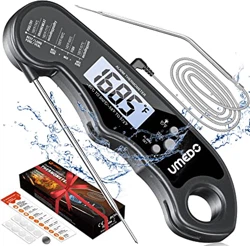
Large bright LCD with backlight, which can be turned off automatically.
Can be re-calibrated at temperature near 0°C (32°F).
Strong internal magnet allows the thermometer to be stuck on metal surface.
Hold temperature function to stop the display from changing the readout.
Switchable Fahrenheit and Celsius.
User-defined high alarm temperature.
Resolution:0.1°.
Measurement range: -50°C-300°C (-58°F -572°F).
Measurement accuracy: ±1°C(±2°F) at -20°C-150°C (-4°F-302°F).
Auto-off: Auto Shut-off after 10 Minutes of inactivity if the measured
temperature is stably below 50°C (122°F).
The front panel has a protective film that needs to be peeled off.
Short press to light up the LCD display
Long press to switch from Fahrenheit to Celsius.
Insert the probe into the thickest part of the food to get its temperature.
Short press to hold the current temperature
Long press to enter calibration mode.
Internal Magnet The thermometer has a internal magnet that allows
the thermometer to be stuck on metal surfaces.
To change the battery, use a coin to open the battery compartment
on the back. The type of battery used must be a 3V CR2032. You
will see a C shaped metal on the left side of the battery compartment.
Insert the battery at an angle against the C shaped metal and press
the battery down. You will know your battery is properly installed if
the battery does not fall out when you turn the thermometer over
without the battery door. If it does fall out, it means you need to reinsert
it until it is lodged enough for it not to fall out. Once the battery is
secure, use a coin to press down and twist the battery door back on.
1. Wearing a heat-resistant glove to touch the stainless steel probe sensor or
wire during or just after cooking. Do not touch with bare hands.
2. Keep the stainless steel probe tip and wire away from children.
3. Clean the stainless steel probe and dry thoroughly after each and every use.
Wash the metal probe tips with hot soapy water and dry thoroughly. Wipe the
unit with a damp cloth. Do not immerse either in the water while cleaning.
4. Do not use the unit in the rain. Do not immerse in water while cooking or
cleaning the unit.
5. Do not expose the plug of the stainless steel probe or the jack hole of the unit
to water or any liquid. This will result in a bad connection and/or faulty reading.
6. Do not expose the unit to direct heat or heat surface. Do not use stainless
steel probes in microwave ovens.
7. Do not use the stainless probe sensor above 300°C(572°F ) or will deteriorate
the probe.
8. Do not use the wire above 380°C(716°F ), or will deteriorate the wire.
9. Do not drop the unit or subject it to sudden shock or impact. Do not
disassemble the unit.
Tip #1: Make sure your meat is fully
thawed out and rested at room
temperature for at least 30 minutes
to promote evenly cooked meat.
Tip #2: The probe for fillet meat
should be inserted at the thickest
portion of the meat for the most
accurate reading. If cooking on a grill,
make sure all sides of meat get equal
time over the heat
Tip #3: For meats that are lean on
some parts and fatty on others, those
separate meat types may show
different temperature readings(such
as. breast and thighs). That is normal,
please make sure that all portions
reach your desired temperature before
pulling from heat.
Tip #4: Most chefs will recommend
taking a temperature reading of whole
birds right in the thickest part of the
thigh, in between the leg and the body,
and make sure to avoid the bone and
gristle or else you will get an
inaccurate reading.
+
To ensure your calibration leads to
accurate temperatures, you must first
create proper ice water.
Step 1: Making a proper ice bath is
all about proper ice to water ratio.
First fill a clear glass full of ice all the
way to the top. Crushed ice is
preferred, but cubed will work also.
Step 2: Slowly fill the glass with cold
water,but stop about an inch below
the top of the ice. Stir the water and
let it sit for 3 minutes to reach its
lowest temperature.Watch your
glass bottom. If there is no ice on the
bottom, but just water, pour out some
water and add more ice. Water below
ice level will not be 32℉
Step 3: After 3 minutes is up, stir it one
more time and insert the thermometer
being careful not to let the probe touch
the sides or bottom of the glass.
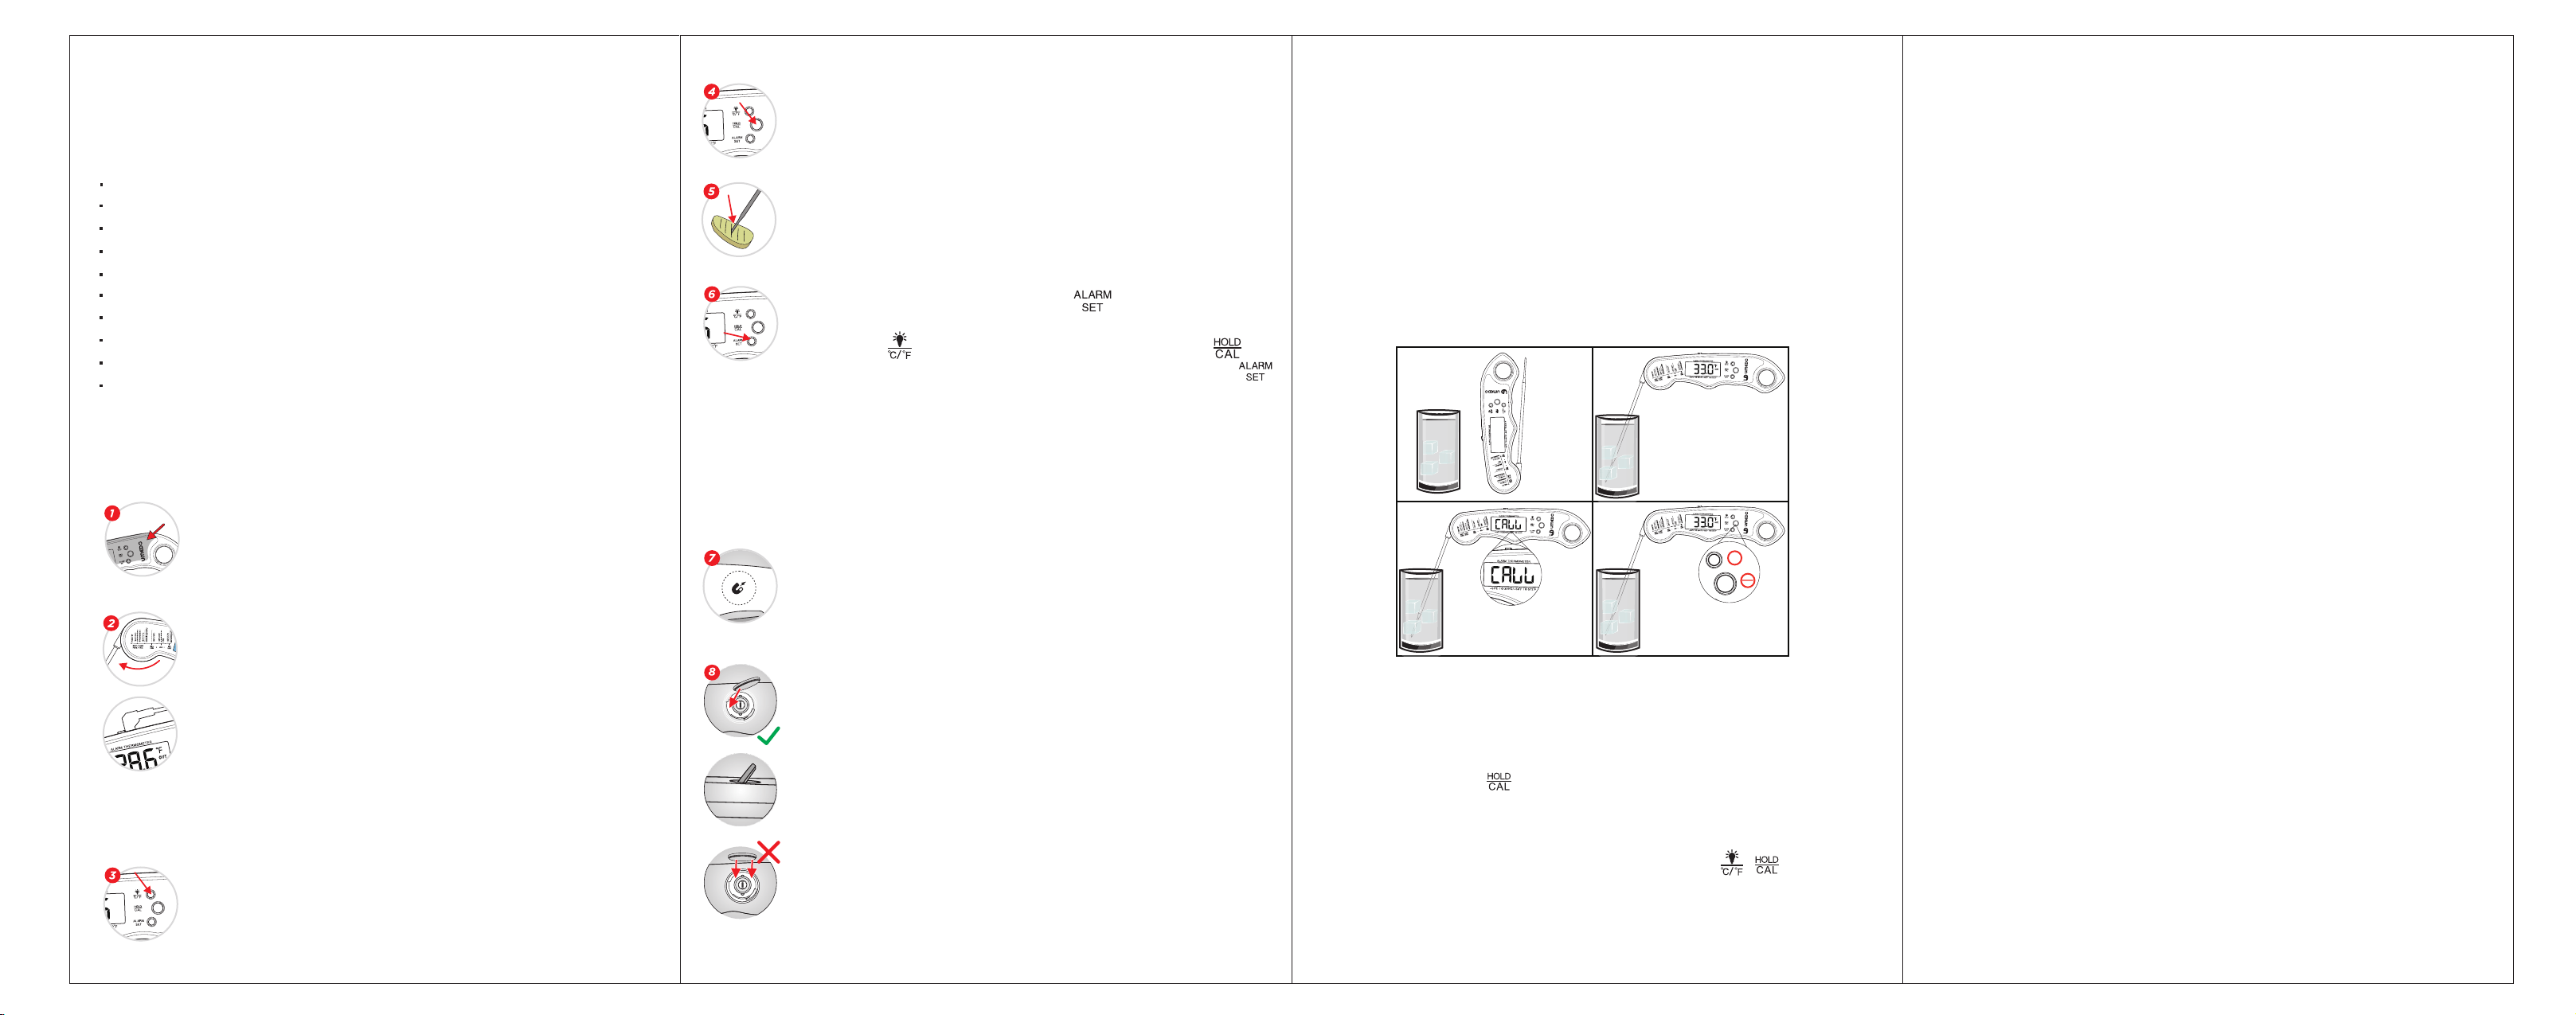
How to Calibrate? (All Umedo thermometer comes pre-calibrated and
ready to use. You can re-calibrate it when the accuracy is exceed ±3 °C. )
Step 1: Prepare a cup of ice water .(use the ice water method)
Kindly note : Remove the external probe when calibration.
Step 2: Insert the probe into ice-water to touch the ice.It will show the final reading.
Step 3: Long-press the button for 3 seconds until the display shows "CALL"
indicating it is in calibration mode.(If you get an "ERR"message, that means the
water is still too warm for the thermometer to be calibrated.Wait until the ice melt
to near 32℉/0℃.)
Step 4: Adjust the reading to 0 ℃(32℉) by pressing the / button to
increase/decrease the value.The calibration is completed when the digit 0℃ stop
flashing. Kindly note : Do not take the probe out of the ice water before the calibration
is completed.
To set high alarm temperature,press the button once, it will enter
high alarm temperature setting mode and the digit will keep flashing,
then press the button to increase the number or press the
button to decrease the number. When finish the setting, press the
button again to confirm and back to normal. If the temperature
measurement rises above the setting temperature,the thermometer
will beep and the digit of“alarm set" will flash. The beep will be stopped
automatically after one minute but the“alarm set" will keep flashing until
the temperature falls below its setting temperature or the thermometer
turns off. User can also stop the beep by pressing any button.
1 2 3 4
The unit comes with two probes, one is built-in rotation probe, the
other is external probe.
① To use the built-in rotation probe :
pull the rotation probe away from its body to turn on and fold in the
probe back to its body to turn off.
② To use the external probe :
when the built-in probe folds, open the rubber stopple to make the jack
hole leak out ,plug the external probe into the jack hole to turn on then
the LCD will display“OUT”,pull the external probe away to turn off.
( Note: when plugging the external probe, the thermometer only reads
the temperature of external probe even the built-in probe unfolds . )
Step 1 Step 2
Step 3 Step 4