Loading ...
Loading ...
Loading ...
35
1.
Make sure that the power cord is rmly
and correctly connected to the projector
and the outlet.
Turning on the power
2.
Make sure that the POWER indicator is
lighted in steady orange (117). Then
remove the lens cover.
3.
Press STANDBY/ON button on the projector
or the ON button on the remote control.
The projection lamp will light up and POWER indicator will begin blinking in
green. When the power is completely on, the indicator will stop blinking and
light in steady green (117).
Power on/off
To display the picture, select an input signal according to the section Selecting an
input signal (
38).
1.
Press the STANDBY/ON button on the projector or the STANDBY button on
the remote control.
The message “Power off?” will appear on the screen for about 5 seconds.
Turning off the power
2.
Press the STANDBY/ON or STANDBY button again while the message
appears.
The projector lamp will go off, and the POWER indicator will begin blinking
in orange. Then the POWER indicator will stop blinking and light in steady
orange when the lamp cooling is complete (117).
3.
Attach the lens cover, after the POWER indicator turns to steady orange.
Do not turn the projector on for about 10 minutes or more after turning it off.
Also, do not turn the projector off shortly after turning it on. Such operations might
cause the lamp to malfunction or shorten the lifetime of some parts including the lamp.
Power on/off
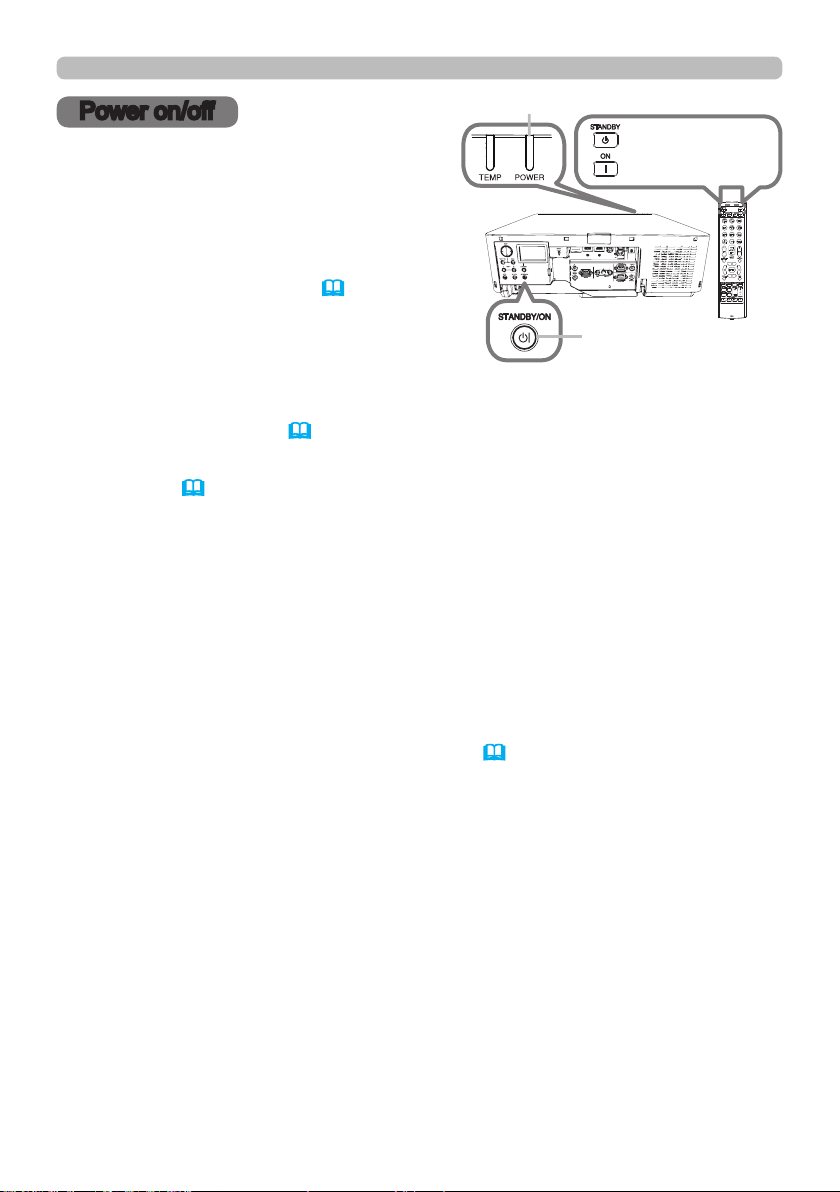
POWER indicator
ON button
STANDBY button
STANDBY/ON button
SHADE
(continued on next page)
Loading ...
Loading ...
Loading ...