Loading ...
Loading ...
Loading ...
Installing Sewing Machine into Your
It may be helpful to read the directions for operating
the mechanism before proceeding with the following
steps. See page 15, and FIG. 19 on next page.
let.
FIG. 16
Step 1.
Swing out the Leaf Support Wing and open leaves.
To prevent damage to Cabinet surface, place
cushioning material just to the left of cut-out. Lay the
machine on its back, on top of cushioning material.
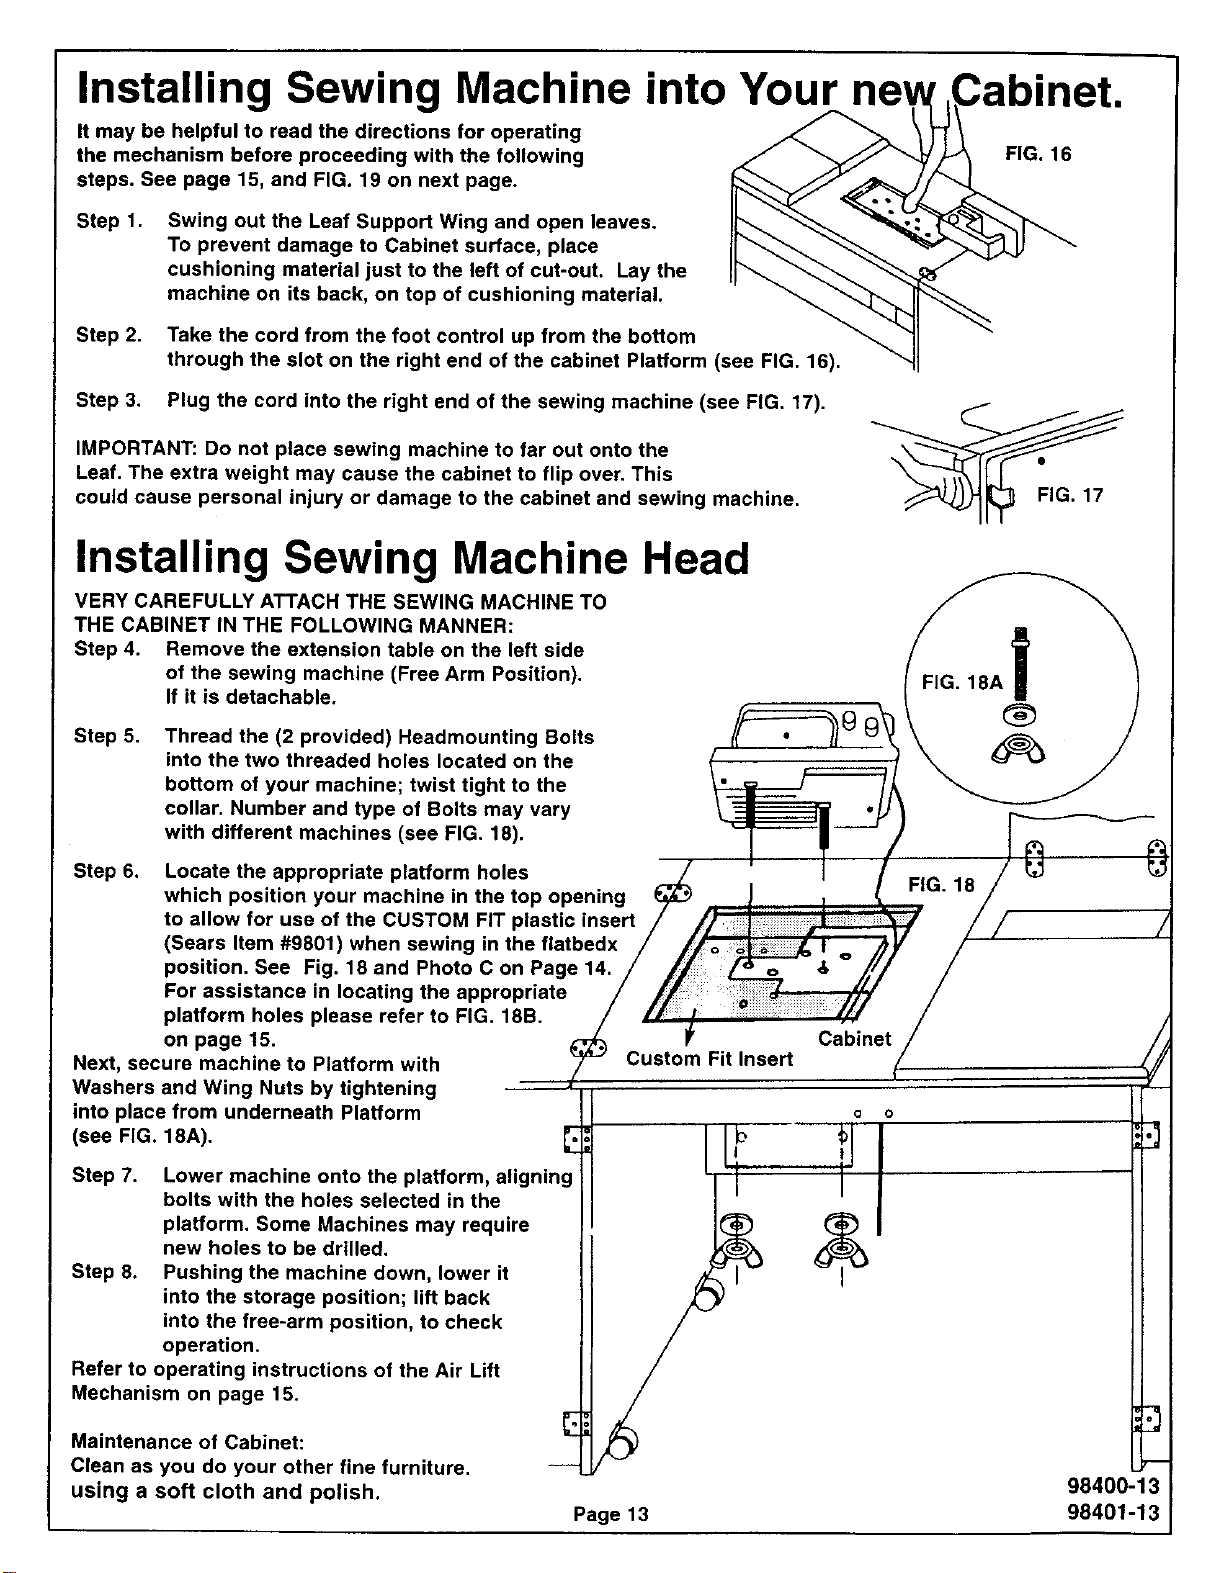
Step 2. Take the cord from the foot control up from the bottom
through the slot on the right end of the cabinet Platform (see FIG. 16).
Step 3. Plug the cord into the right end of the sewing machine (see FIG. 17).
IMPORTANT: Do not place sewing machine to far out onto the
Leaf. The extra weight may cause the cabinet to flip over. This
could cause personal injury or damage to the cabinet and sewing machine.
Installing Sewing Machine Head
VERY CAREFULLY ATTACH THE SEWING MACHINE TO
THE CABINET IN THE FOLLOWING MANNER:
Step 4. Remove the extension table on the left side
of the sewing machine (Free Arm Position).
If it is detachable.
Step 5. Thread the (2 provided) Headmounting Bolts
into the two threaded holes located on the
bottom of your machine; twist tight to the
collar. Number and type of Bolts may vary
with different machines (see FIG. 18).
FIG. 18A l
®
Step 6.
Locate the appropriate platform holes
which position your machine in the top opening
to allow for use of the CUSTOM FIT plastic insert
(Sears Item #9801) when sewing in the flatbedx
position. See Fig. 18 and Photo C on Page 14.
For assistance in locating the appropriate
platform holes please refer to FIG. 18B.
on page 15.
Next, secure machine to Platform with
Washers and Wing Nuts by tightening
into place from underneath Platform
(see FIG. 18A).
Step 7. Lower machine onto the platform, alignin!
bolts with the holes selected in the
platform. Some Machines may require
new holes to be drilled.
Step 8. Pushing the machine down, lower it
into the storage position; lift back
into the free-arm position, to check
operation.
Refer to operating instructions of the Air Lift
Mechanism on page 15.
Maintenance of Cabinet:
Clean as you do your other fine furniture.
using a soft cloth and polish.
Cabinet
Custom Fit Insert
FIG. 18
/
Page 13
o O
ilI
98400-13
98401-13
Loading ...
Loading ...
Loading ...