Loading ...
Loading ...
Loading ...
en-us Before using for the first time
16
3. Bring the rack to a horizontal position and push it in the
rest of the way .
The rack should be straight and flat, not crooked.
5.4 Inserting the telescopic rack
Requirement:You have read the recommendation on
→
"Safe use of oven racks", Page15
.
1. Slide the rack in evenly until the rear of the rack is about
2'' (5cm) from the back of the oven.
2. Tilt the front of the rack up about 3/4'' (2cm)
and fin-
ish pushing the rack all the way back .
Note:Avoid striking the oven light cover glass when
pushing the rack into position.
a The back of the telescopic rack drops in to place.
3. Pull the rack forward to engage the bottom of the rack
onto the rear of the rack position guide.
4. Lower the front of the rack to finish seating it on the rack
guide. The rack should feel stable when properly
seated.
5. Slide the movable part of the telescopic rack in and out
a few times to make sure it is able to move freely and
that the non-moving part of the telescopic rack is se-
curely anchored.
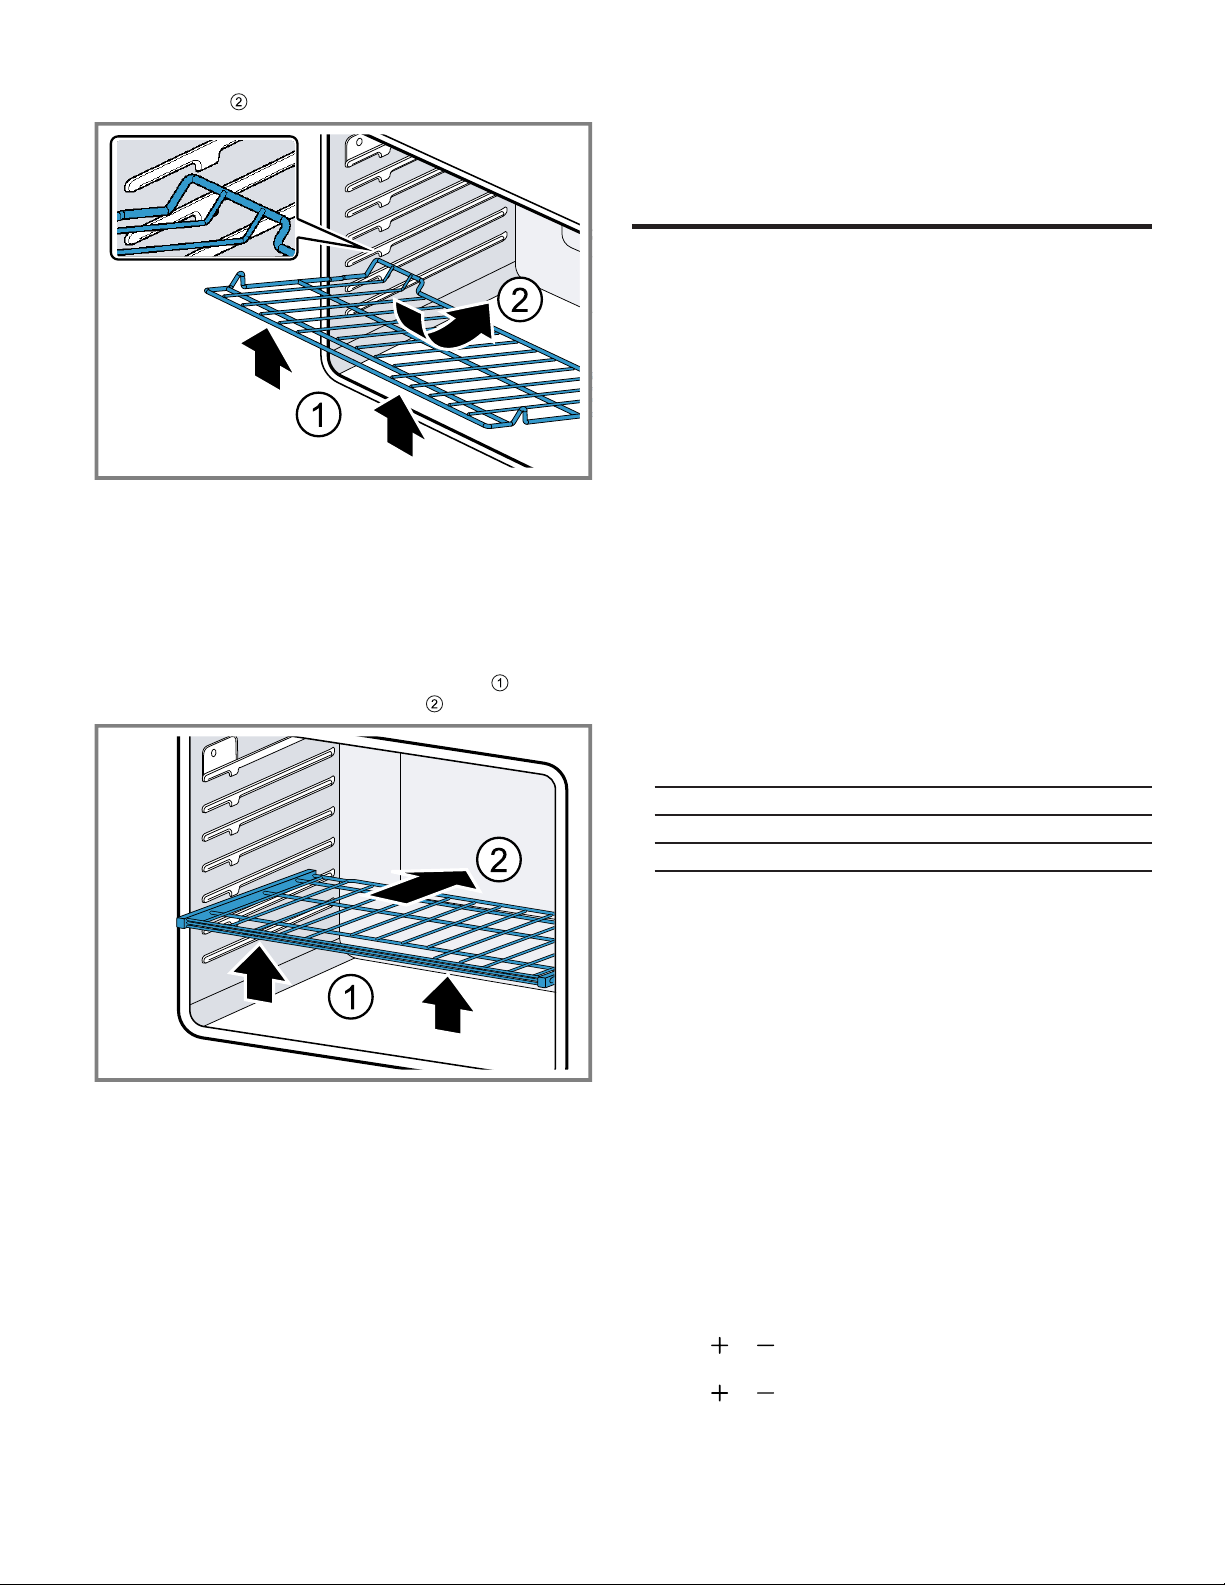
Removing a telescopic rack
1. Lift the front of the telescopic rack assembly about 1/
2'' (1cm) and push the rack to the rear about
3/4'' (2cm).
a The rack can disengage from the rack position guide.
2. Lift the rear of the telescopic rack assembly so it clears
the rack position guide and gently pull the rack from the
oven.
Note:Do not pull the rack unevenly, this will cause it to
bind during removal, catching on the oven walls.
Before using for the first time
6 Before using for the first time
Before using for the first time
Carry out these steps before using your appliance.
¡ The appliance must be properly installed by a qualified
service provider before use.
¡ Read and understand all safety precautions →
Page3
and information in the Use and Care Manual prior to op-
erating.
¡ Download the HomeConnect™ app to remotely control
your appliance, get cooking inspiration, and access ser-
vice tips and support.
¡ This Use and Care Manual covers several models. Not
all features are available on all models.
6.1 Cleaning the appliance before using it for
the first time
Clean the oven cavity and accessories before using the
appliance to prepare food for the first time.
1. Remove all packaging materials from the oven cavity.
For double ovens, check both oven cavities.
2. Before heating the appliance, wipe the smooth surfaces
in the oven cavity with a soft, damp cloth.
3. Keep the room ventilated while the appliance is heating.
4. Set the heating mode and temperature.
Heating mode Conv Bake
Temperature maximum
Duration 1hour
5. Switch off the appliance after the specified cooking
time.
6. Wait until the oven cavity has cooled down.
7. Clean the smooth surfaces with soapy water and a dish
cloth.
8. Clean the accessories using soapy water and a dish
cloth or soft brush.
a There may be a slight odor during first uses. This is nor-
mal and will disappear.
6.2 Setting the clock
The oven includes time functions that require the current
time to be set.
Tip:Activate HomeConnect™ to set and maintain the
clock automatically.
Setting the clock - 500 Series
Requirement:The oven is in standby mode.
1. Press Clock.
2. Press
or to set the hour.
3. Press Clock.
4. Press
or to set the minutes.
Setting the clock - 800 Series
Requirement:The oven is in standby mode.
Loading ...
Loading ...
Loading ...