H H
H
i
//
t"
/
/
J
/-
/
/*"
/-
//
.1/
//
/-
/>/.I
ti
/

PLEASE NOTE: To obtain maximum efficiency,the As anEN Rmachine has the ability to
learn and adapt to the local environment_This may take several wash cycles, therefore
maximum energy efficiency may not be achieved until a number of wash cycles have been
completed.This usually takes about 5 cycles.
As an ENERGY STAR® Partner
Fisher & Paykel Limited has determined that
this product meets the ENERGY STAR®
guidelines for energy efficiency
A WARNING _ I
READ ALL SAFETY INFORMATION BEFORE USING
!
To reduce _e r sk of fire,electricshock,or injuryto personsreadthe IMPORTANT SAFETY
INSTRUCTIONS before operatingthis appliance,pages23 to 30
I A ATTENTION ,_ I
LIRETOUTES LES INFORMATIONS RELATIVES II
A LA SECUTITI_ AVANT UTILISATION
Afln de r(..duiretout risque de feu,de choc_lectrique ou de blessure,veuillezlirea_centivement|
cesIMPORTANTESCONSIGNES DE SI_CURITI_avantdutiliser cet appareil,pages23 _ 30.
I. Operating Instructions
• How to Get Started
2. AboutYour ecosmart
How your ecosmartWorks
2
4
3. Wash Cycles and Options
• The Wash ProgressLights 5
The Wash Cycles 6
Wash Options 6
Softener Rinse 7
Soak 7
Time Saver 7
Water Levels 8
Spin Hold 9
Delay Start 9
Clothes Care Safeguards 9
Customizing the Wash Cycle I 0
Favorite Cycle I0
Washing Bulky Items I I
Washing Woolens II
Cold Water Washing I I
4. Before You Wash
• Sorting and Loading
• DetergendBleach
• Fabric Softener
• Scrud
5. Changing Pre-set Options
Option Adjustment Mode 14
Out of Balance Recovery Routine 16
Auto Water Fill Level 16
End of Cycle Beeps 17
Softener Rinse Options 17
Volume of Water used in the
Shower Rinse 17
6. Machine Information
• Care and Cleaning 18
• ProductsThat Might DamageYour
ecosmart 19
• ecosmart Soundsand Beeps 19
• Automatic Lint System 19
7. Problem Solving
• Wash Problems 20
• Operating Problems 21
If your ecosmart Beeps for Help 22
8. Important Safety Instructions
• Safety Information 23
12
13
13 9. Warranty
13 • Warranty 32
NOTE: Proof ofpurchaseis required for anywarrantyclaim.
Foryour recordswe suggestyou attachyour proofof purchasehere,
2
HOWTO GET STARTED
POWER
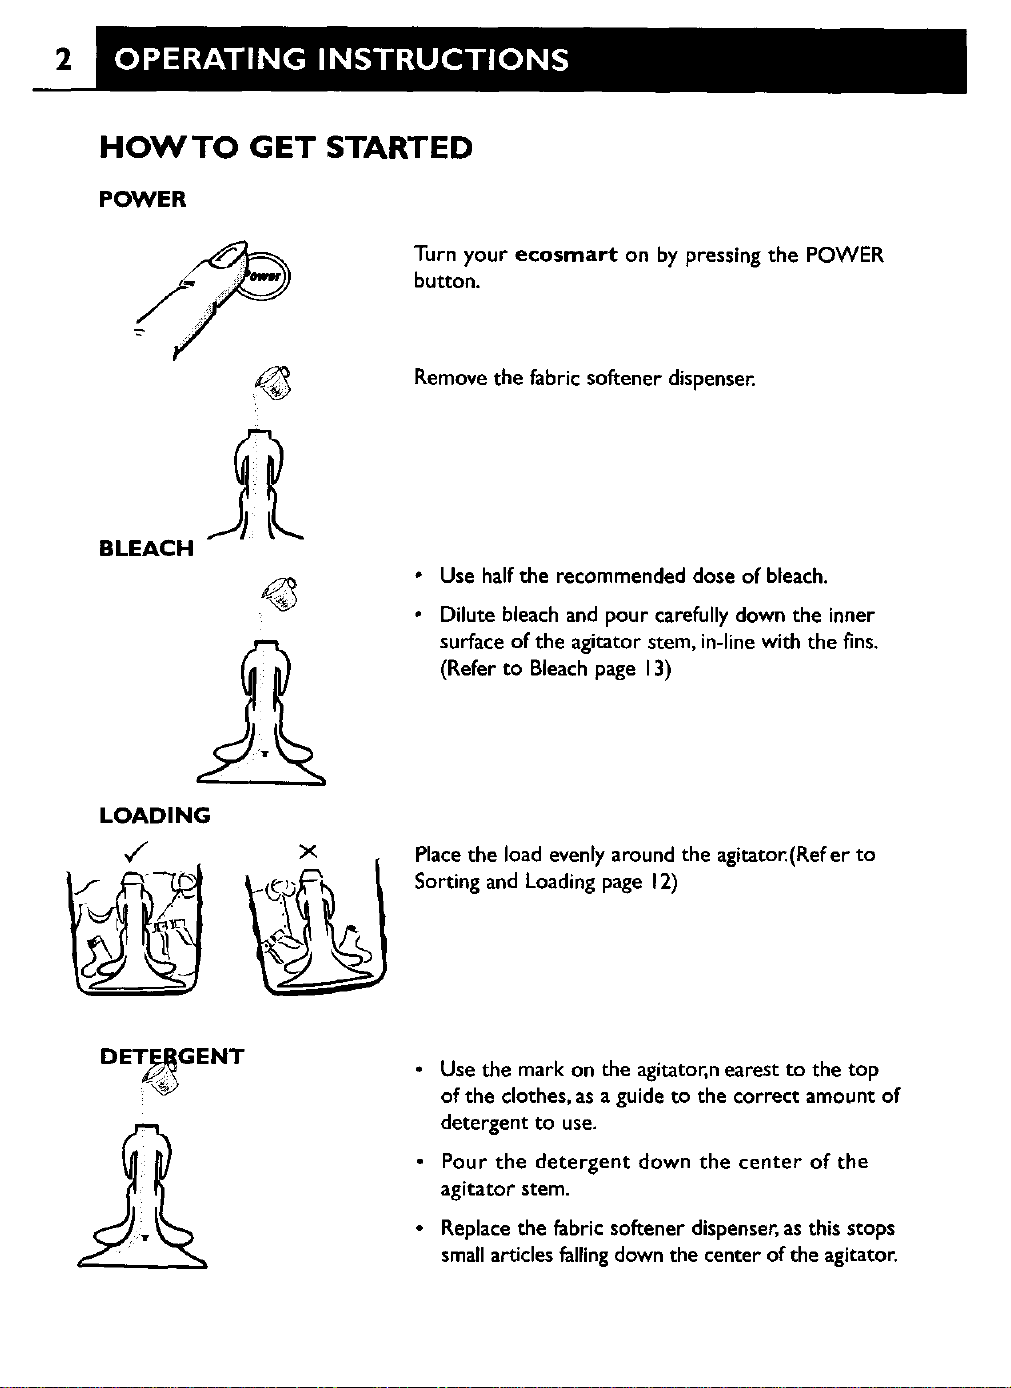
Turn your ecosmart on by pressing the POWER
button.
BLEACH
LOADING
×
Remove the fabric softener dispenser.
• Use halfthe recommendeddose of bleach.
• Dilute bleachand pour carefully down the inner
surface of the agitator stem, in-line with the fins.
(Refer to Bleach page 13)
Place the load evenly around the agitator.(Refer to
SortingandLoading page 12)
DETEJ_GENT
• Use the mark on the agitator,nearest to the top
of the clothes,as a guide to the correct amount of
detergent to use.
• Pour the detergent down the center of the
agitator stem.
• Replacethe fabric softener dispenser,as this stops
smallarticles fallingdown the center of the agitator.
3
FABRIC SOFTENER
_ ._rsoftener
_rinse
WASH CYCLE
perme_n_ woo/ _eaw
ta_ press _ de_c_t# regular duty
0 000
WASH OPTIONS
START
e
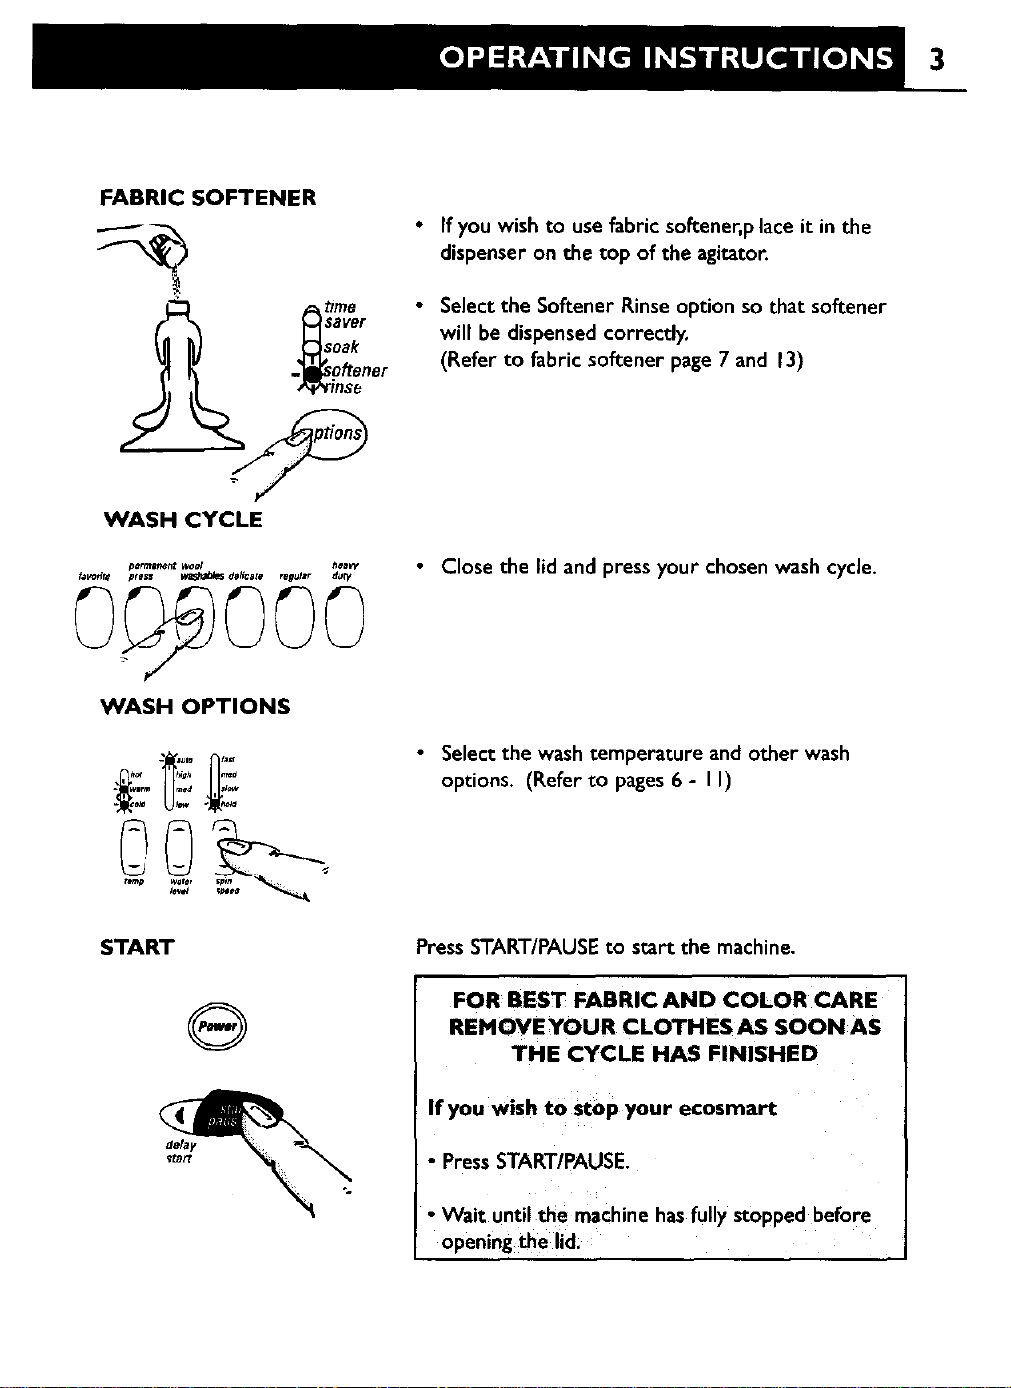
• If you wish to use fabric softener, place it in the
dispenser on the top of the agitator.
• Select the Softener Rinse option so that softener
will be dispensed correctly.
(Refer to fabric softener page 7 and 13)
• Close the lid andpress your chosen wash cycle.
• Selectthe washtemperature and other wash
options. (Refer to pages6- II)
PressSTART/PAUSEto start the machine.
FOR BEST FABRIC AND COLOR CARE
REMOVEYOUR CLOTHESAS SOON AS
THE CYCLE HAS FINISHED
If you wish to stop your ecosmart
• Press START/PAUSE.
• Wait untilthe machinehasfullystoppedbefore
openingthe lid,

4
HOWTHE ECOSMART WORKS
The Fisher & Paykel ecosmart's _2 in I' wash system gives you the best
of both worlds. Using a combination of front !oader and top loader wash
systems,the e¢osmart gives exceptional wash results While using up to
50% less hot water*, and, at the same time, taking better care of your
clothes than a conventional top loading washer.
Phase I - FRONT LOADERTYPEWASH
The ecosmart fills the bowl, at the selected
temperature,with just enoughwater so that the
clothes are 100%saturated•
This smallamountof sudsywater is circulated through
the clothes, up the specially designed portal and back
onto the clothes with a waterfall effect.
The chemicalactionprovided by a small amount of
water,combined with detergent, rapidly targets soil
and stains at fiber level, boosting soil removal and
accelerating the wash process.
m
*CEE, e_ember 1999
Phase 2 -TOP LOADERTYPEWASH
After 3 minutes,your ecosmart will fill with just
enough cooler water to suspendthe soil in solution.
Agitation will then begin, moving soil awayfrom the
clothes. Becauseof its head-start, the wash requires
lessagitation than a conventional top loader wash.
Unique Fisher & Paykel Shower Rinse
S
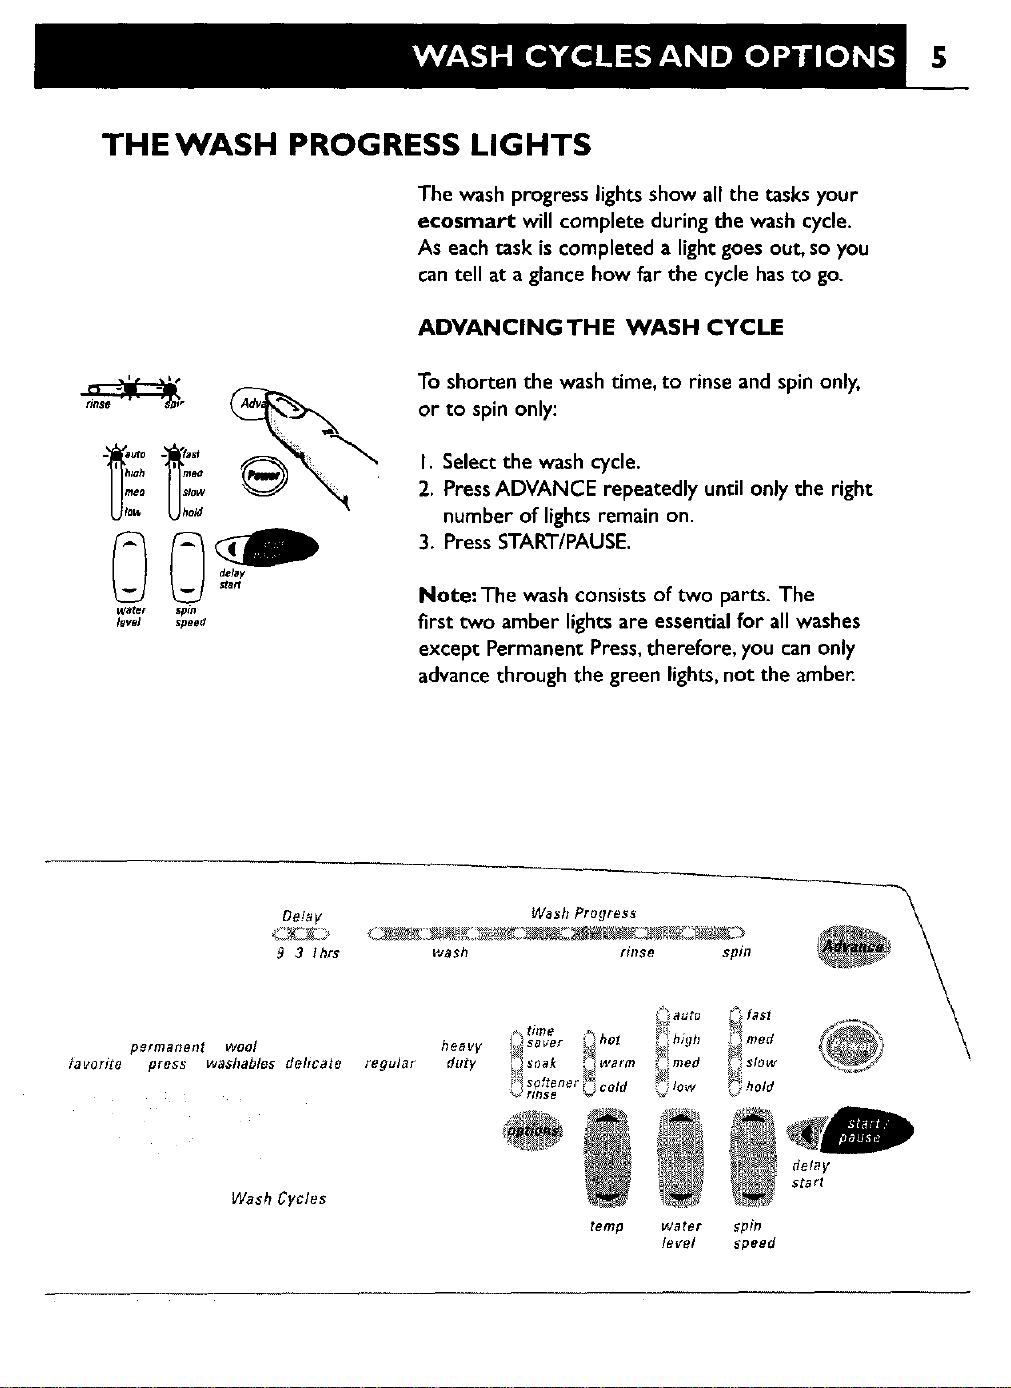
THEWASH PROGRESS LIGHTS
The wash progress lightsshow all the tasks your
ecosmart will complete duringthe wash cycle.
As each task is completed a light goes out, so you
can tell at a glance how far the cycle has to go.
ADVANCING THE WASH CYCLE
_r
. auto
htah m_
meo slaw
o_ otct
water spin
level speed
To shorten the wash time, to rinse and spin only,
or to spin only:
I. Select the wash cycle.
2. PressADVANCE repeatedly until only the right
number of lights remain on.
3. PressSTART/PAUSE.
Note: The wash consistsof two parts. The
first two amber lightsare essential for allwashes
except Permanent Press,therefore, you can only
advance through the green lights, not the amber
Delay
9 3 Ihrs
,o_rITlaner#t wDol
/avorite press washables delicate
Wash Progt es_
wash rinse spin
time _
heavy !#_sa_er _het _high
regular duty _t soak _ warm mad
" spftener '_
rinse _ cold _ low
delay
start
Wash Cycles
tamp water gpin
level ;peed
6
Initial Wash
Agitate Tirne
' Wash Action
Wash Temp
Rinse
Heavy Duty
3 min
J2 min
Heavy Duty
w_rrn
cold
shower
rinse
Regular
3 rain
8 rain
Regular
warm
cord
shower
rinse
Spin Speed Fast Fast
Spin Time 6 min 6 min
Delicate
3 rain
4 rain
Delicate
warm/cold
spray rinse
+
cold
deep rinse
Slow
4 rain
Wool
3 min
4 rain
Delicate
warm/cold
spray rinse
+
warm/cold
deep rinse
Medium
6 rnin
Permanent
Press
8 rain
Regular
warm/cold
spray rinse
+
cold
deep rinse
Slow
6 rnin
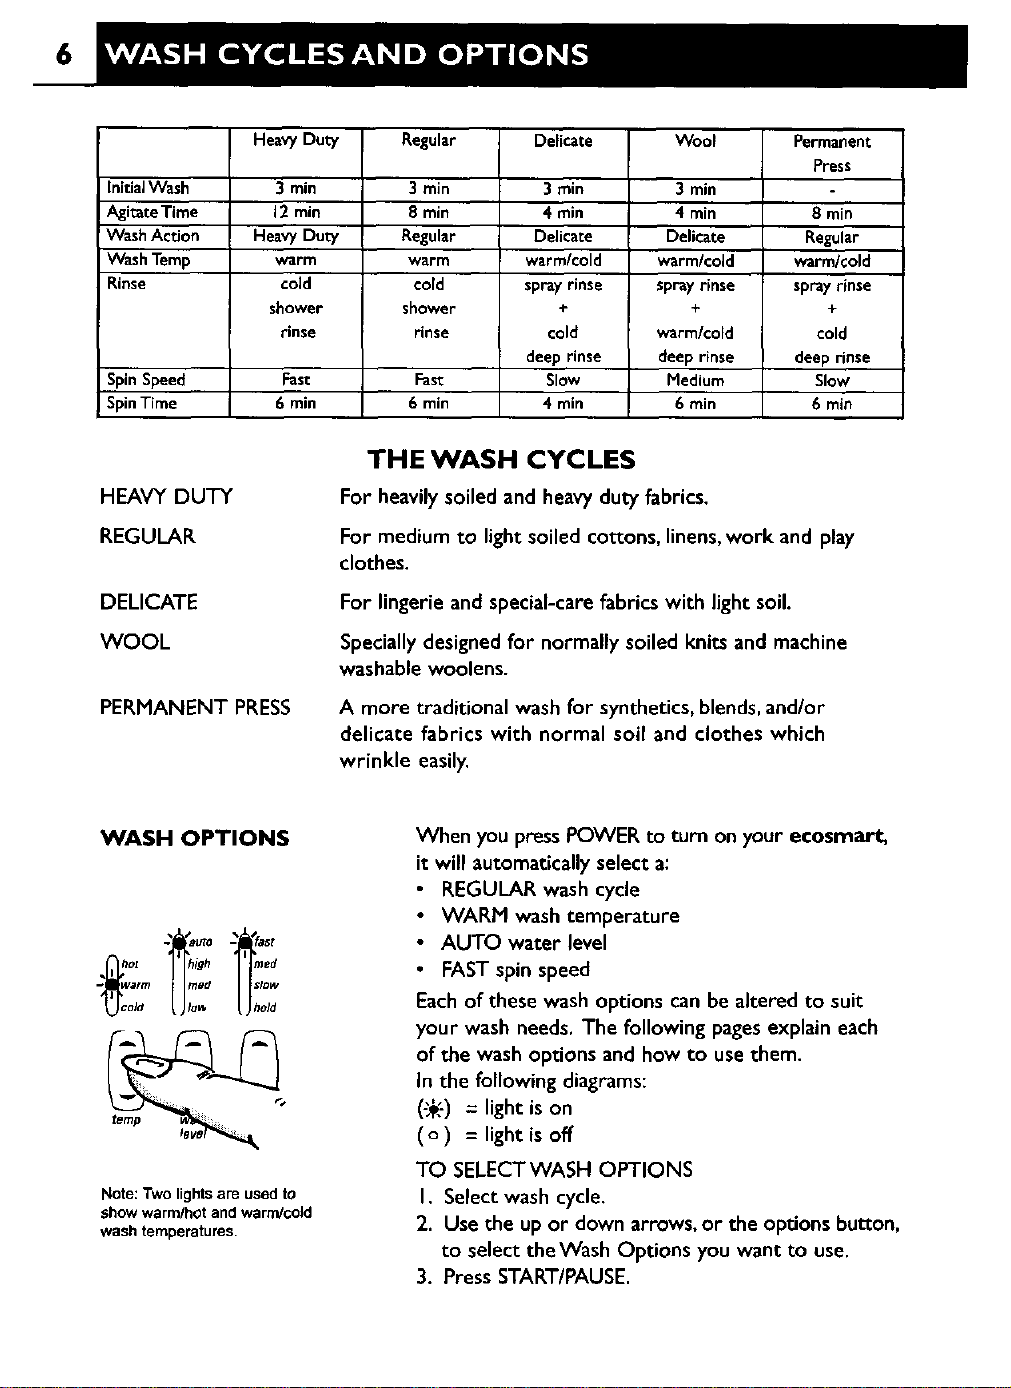
HEAVY DUTY
REGULAR
DELICATE
WOOL
PERMANENT PRESS
THE WASH CYCLES
For heavilysoiledandheavydutyfabrics.
For mediumto lightsoiledcottons,linens,work and play
clothes.
For lingerieandspecial-carefabrics with light soil.
Speciallydesignedfor normallysoiledknitsand machine
washablewoolens.
A more traditional washfor synthetics,blends,and/or
delicate fabrics with normal soil and clothes which
wrinkle easily,
WASH OPTIONS
- _ ffast
oz high reed
. wm-m rood SlOW
ok1 o_, old
Note: Two lights are used to
show warm/hot and warm/cold
wash temperatures.
When youpressPOWER to turn on your ecosmart_
it will automaticallyselecta:
• REGULAR wash cycle
• WARM wash temperature
• AUTO water level
• FASTspin speed
Eachof these wash options can be altered to suit
your wash needs, The following pagesexplain each
of the wash options and how to use them.
In the followingdiagrams:
(-_) = light is on
(o) = light is off
TO SELECTWASH OPTIONS
I. Select wash cycle.
2. Use the up or down arrows, or the options button,
to select theWash Options you want to use.
3. PressSTART/PAUSE.

7
SOFTENER RINSE
t_eavy i_s aver I_ot
duty I soak warm
- soTrener Id
inse o
'emp
We recommendthe useof softenerdryer sheets
becauseliquidfabricsoftener hasbeen known to
causean unpleasantbuild-upinsidewashing
machines.(Refer to Scrudpage13)
If you do wish to useliquidfabricsofteneryou
must select the SOFTENER RINSE option.
This changesthe rinse option to includea sprayand
deep rinse, so that the fabric softener will be
dispensed correctly.
Note: Some wash loads are better washed using a
cycle with a deep rinse. For instance,garments that
have a lot of sand or sawdust in them, or garments
where the color still runs. Forthese loads select the
SOFTENER RINSEoption, as this will changethe
rinse to include a deep rinse.
SOAK
_SaV] / I saver Of
duty - soak - warm
se old$°_ner-
_mp
When you select SOAK your ecosmart will stop at
the end of wash and soak for 2 hours before
completing the rinse and spin. During soak your
washer will agitate for a few seconds every minute.
TIME SAVER
• _me .,_tol
heavy - saver
duty soak - warm
temp
TIME SAVERallowsyou to shorten the wash cycle
for lightly soiled clothes. Selectingthis option reduces
the wash and spin times.
Time Savercan be turned on or off at any time during
the cycle.
8
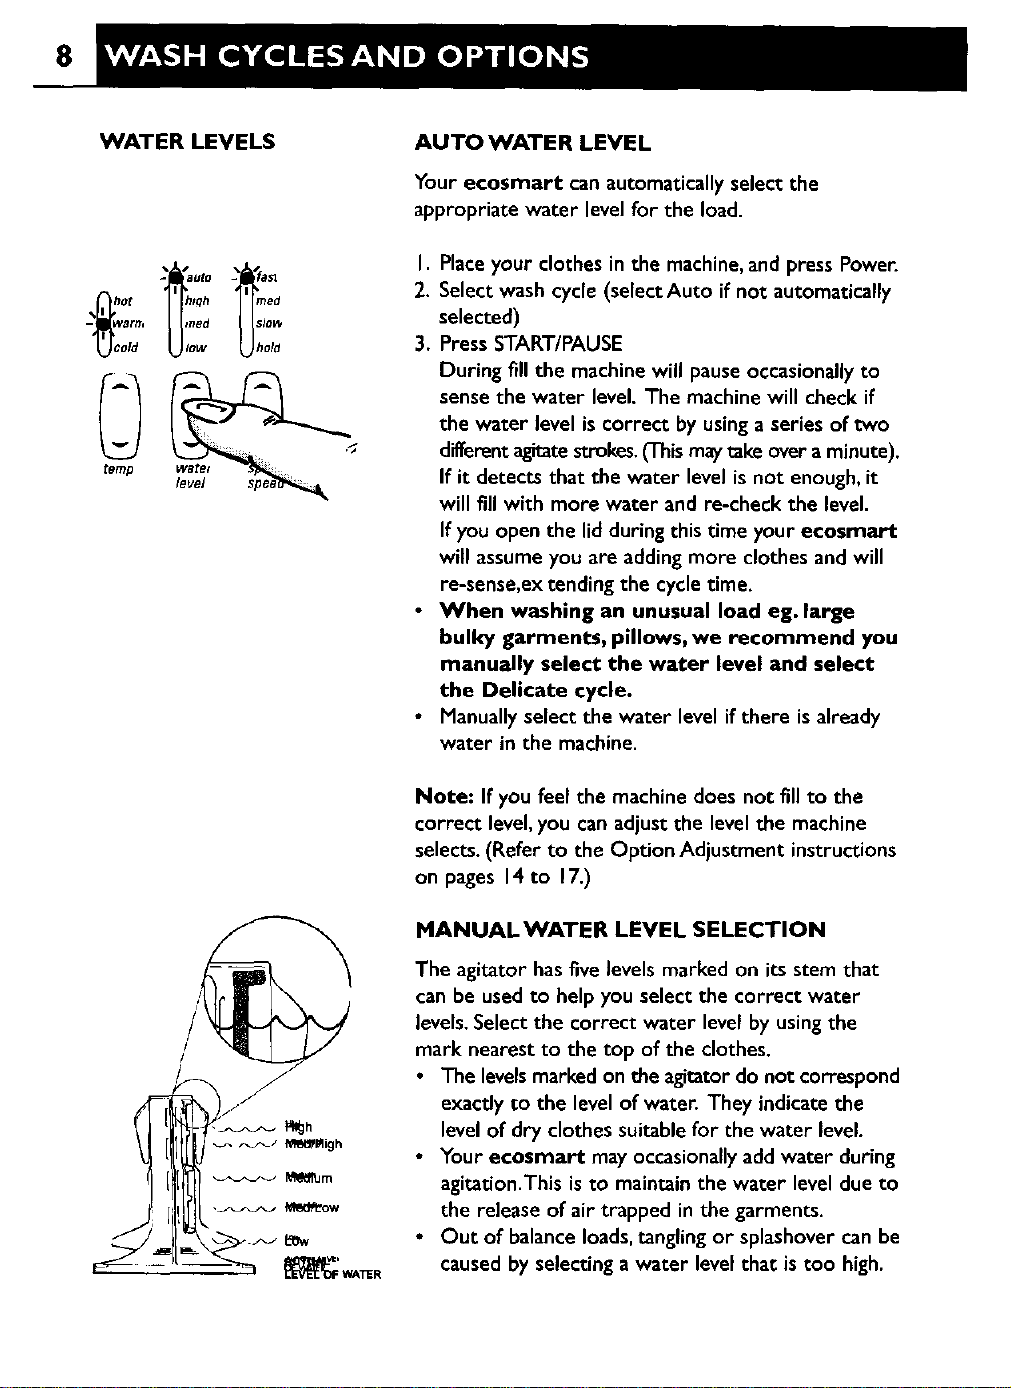
WATER LEVELS
_,_! ot hl#h rned
- wart[, med SJO_
old ow o/O
torlTp wafol
AUTO WATER LEVEL
Your ecosmart can automaticallyselectthe
appropriate water levelfor the load.
I. Placeyour clothes in the machine,andpress Power.
2. Select wash cycle (select Auto if not automatically
selected)
3. PressSTART/PAUSE
During fill the machine will pauseoccasionally to
sensethe water level. The machine will check if
the water level is correct byusing a series of two
differentagitatestrokes.(Thismaytake over a minute).
If it detects that the water level is not enough, it
will fill with more water and re-check the level.
If you open the lid during this time your ecosmart
will assumeyou are adding more clothes and will
re-sense,ex tending the cycle time.
• When washing an unusual load eg. large
bulky garments, pillows, we recommend you
manually select the water level and select
the Delicate cycle.
• Manually select the water levelif there is already
water in the machine.
Note: If you feel the machinedoes not fillto the
correct level,you can adjustthe levelthe machine
selects.(Refer to the Option Adjustment instructions
on pages 14 to 17.)
MANUAL WATER LEVEL SELECTION
The agitatorhasfivelevels marked on its stemthat
can be used to helpyou select the correct water
levels.Select the correct water level by using the
mark nearest to the top ofthe clothes.
• The levelsmarkedon the agitator do not correspond
exacdy to the level of water. They indicatethe
level of dry clothes suitable for the water level.
• Your ecosmart may occasionallyadd water during
agitation.This is to maintain the water level due to
the release of air trapped in the garments.
• Out of balance loads,tangling or splashover can be
caused by selecting a water level that is too high.
9
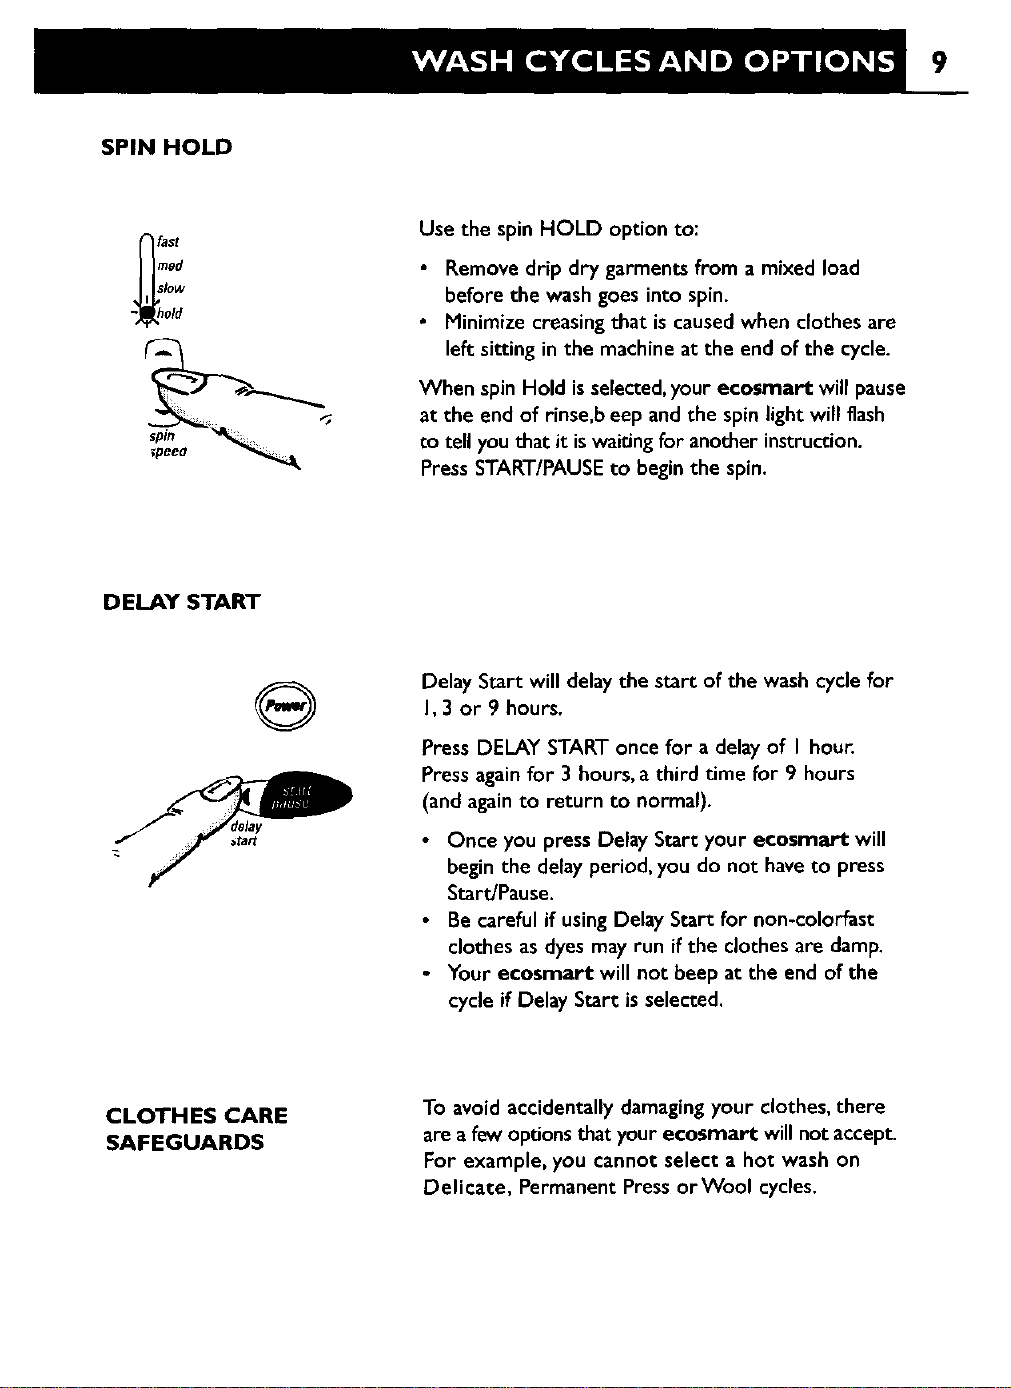
SPIN HOLD
._i st
reed
slow
old
Use the spin HOLD option to:
• Remove drip dry garments from a mixed load
before the wash goes into spin.
• Minimize creasing that is caused when clothes are
left sitting in the machine at the end of the cycle.
When spin Hold is selected, your ecosrnart will pause
at the end of rinse,b eep and the spin light will flash
to tell you that it is waiting for another instruction.
Press START/PAUSE to begin the spin.
DELAY START
Delay Start will delay the start of the washcycle for
I, 3 or 9 hours.
Press DELAY STARToncefor a delay of I hour.
Pressagainfor 3 hours,a third time for 9 hours
(and againto return to normal).
• Once you press Delay Start your ecosmart will
begin the delay period, you do not haveto press
Start/Pause.
• Be careful if using Delay Start for non-colorfast
clothes as dyes may run if the clothes are damp.
• Your ecosmart will not beep at the end of the
cycle if Delay Start is selected.
CLOTHES CARE
SAFEGUARDS
To avoid accidentallydamagingyour clothes,there
areafew optionsthat your ecosmart willnotaccept.
For example, you cannot select a hot wash on
Delicate, Permanent PressorWool cycles.
10
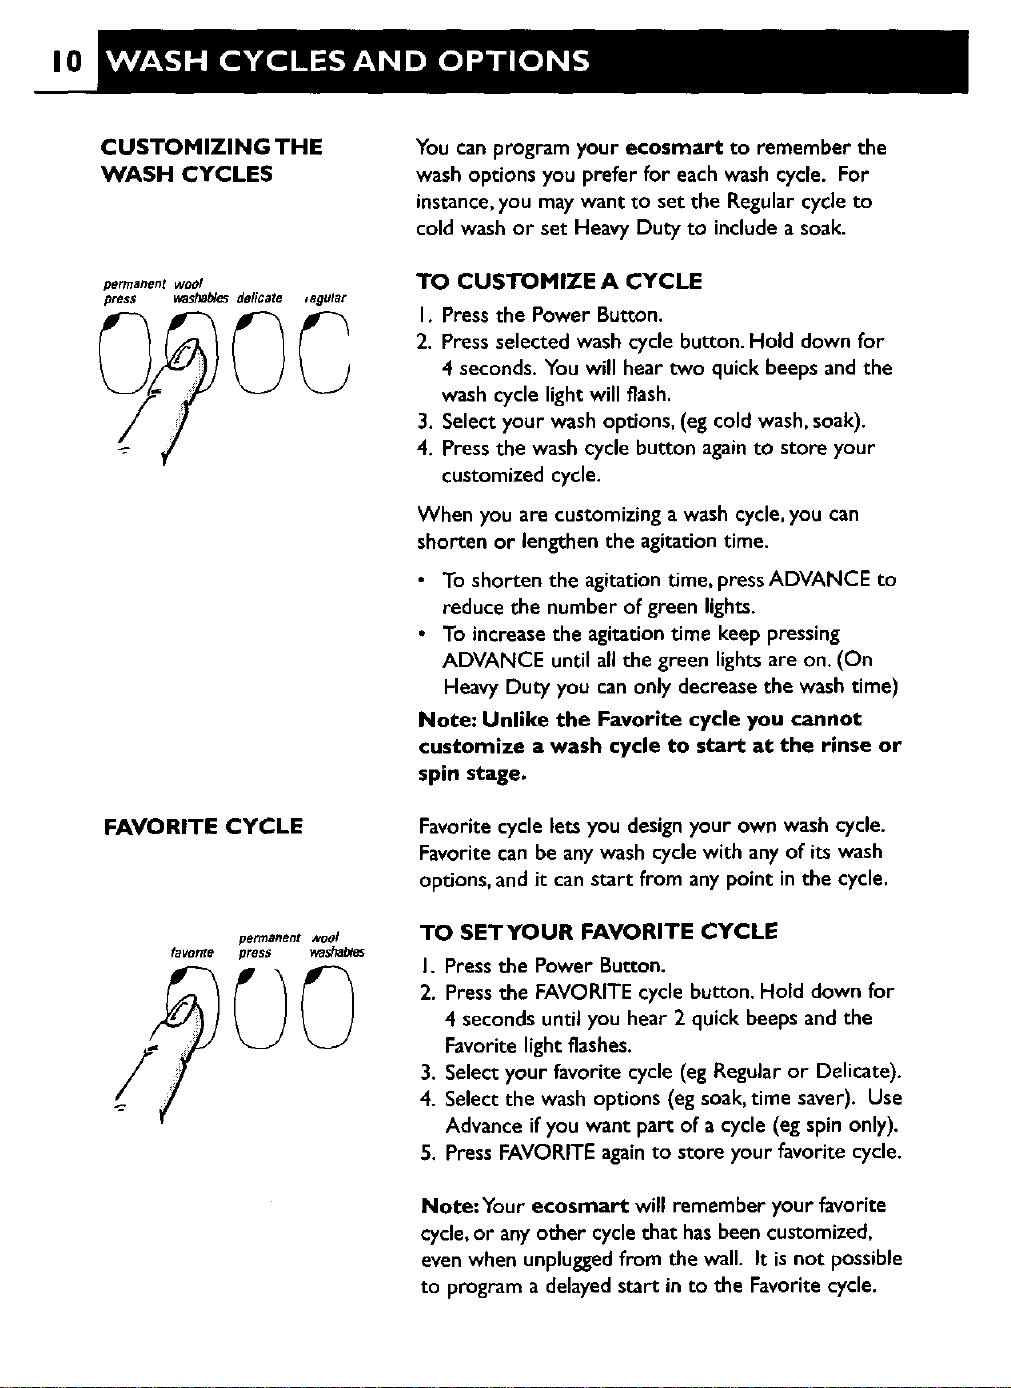
CUSTOMIZING THE
WASH CYCLES
FAVORITE CYCLE
You can program your ecosmart to remember the
wash options you prefer for each wash cycle. For
instance,you may want to set the Regular cycle to
cold wash or set Heavy Duty to include a soak.
TO CUSTOMIZE A CYCLE
I. Press the Power Button.
2. Pressselectedwashcycle button. Hold down for
4 seconds.Youwill heartwo quick beepsand the
washcycle light will flash.
3. Selectyour washoptions,(eg cold wash,soak).
4. Pressthe wash cycle buttonagainto store your
customized cycle.
When you are customizing a washcycle,you can
shortenor lengthenthe agitationtime.
• To shorten the agitationtime, pressADVANCE to
reduce the number of green lights.
• To increase the agitation time keep pressing
ADVANCE until all the green lights are on. (On
Heavy Duty you can only decreasethe wash time)
Note: Unlike the Favorite cycle you cannot
customize a wash cycle to start at the rinse or
spin stage.
Favorite cycle lets you design your own wash cycle.
Favorite can be any wash cycle with any of its wash
options, and it can start from any point in the cycle.
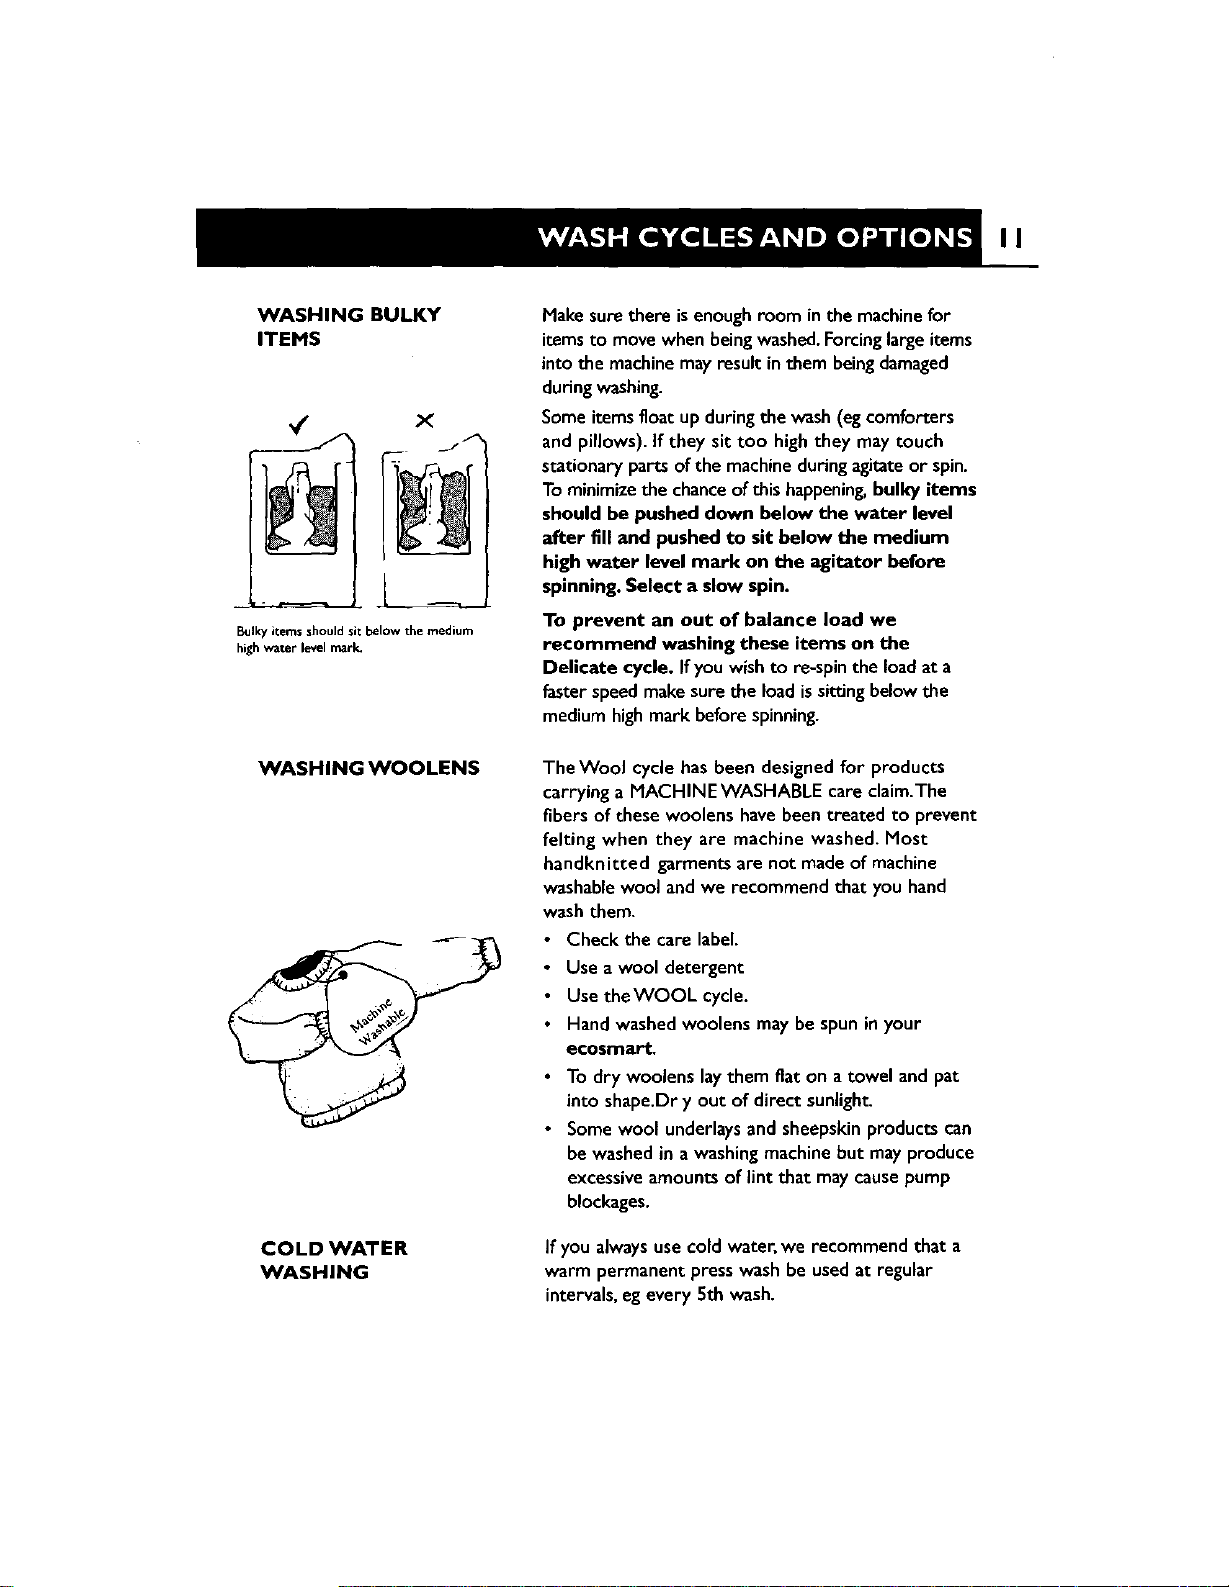
TO SETYOUR FAVORITE CYCLE
I. Pressthe Power Button.
2. Pressthe FAVORITEcyclebutton.Hold down for
4 seconds until you hear 2 quick beeps and the
Favorite light flashes.
3. Select your favorite cycle (eg Regular or Delicate).
4. Select the wash options (eg soak,time saver). Use
Advance if you want part of a cycle (eg spin only).
5. PressFAVORITEagainto store your favorite cycle.
Note:Your ecosmart will remember your favorite
cycle,or any other cycle that has beencustomized.
evenwhen unpluggedfrom the wall. It isnot possible
to programa delayedstart in to the Favoritecycle.
II
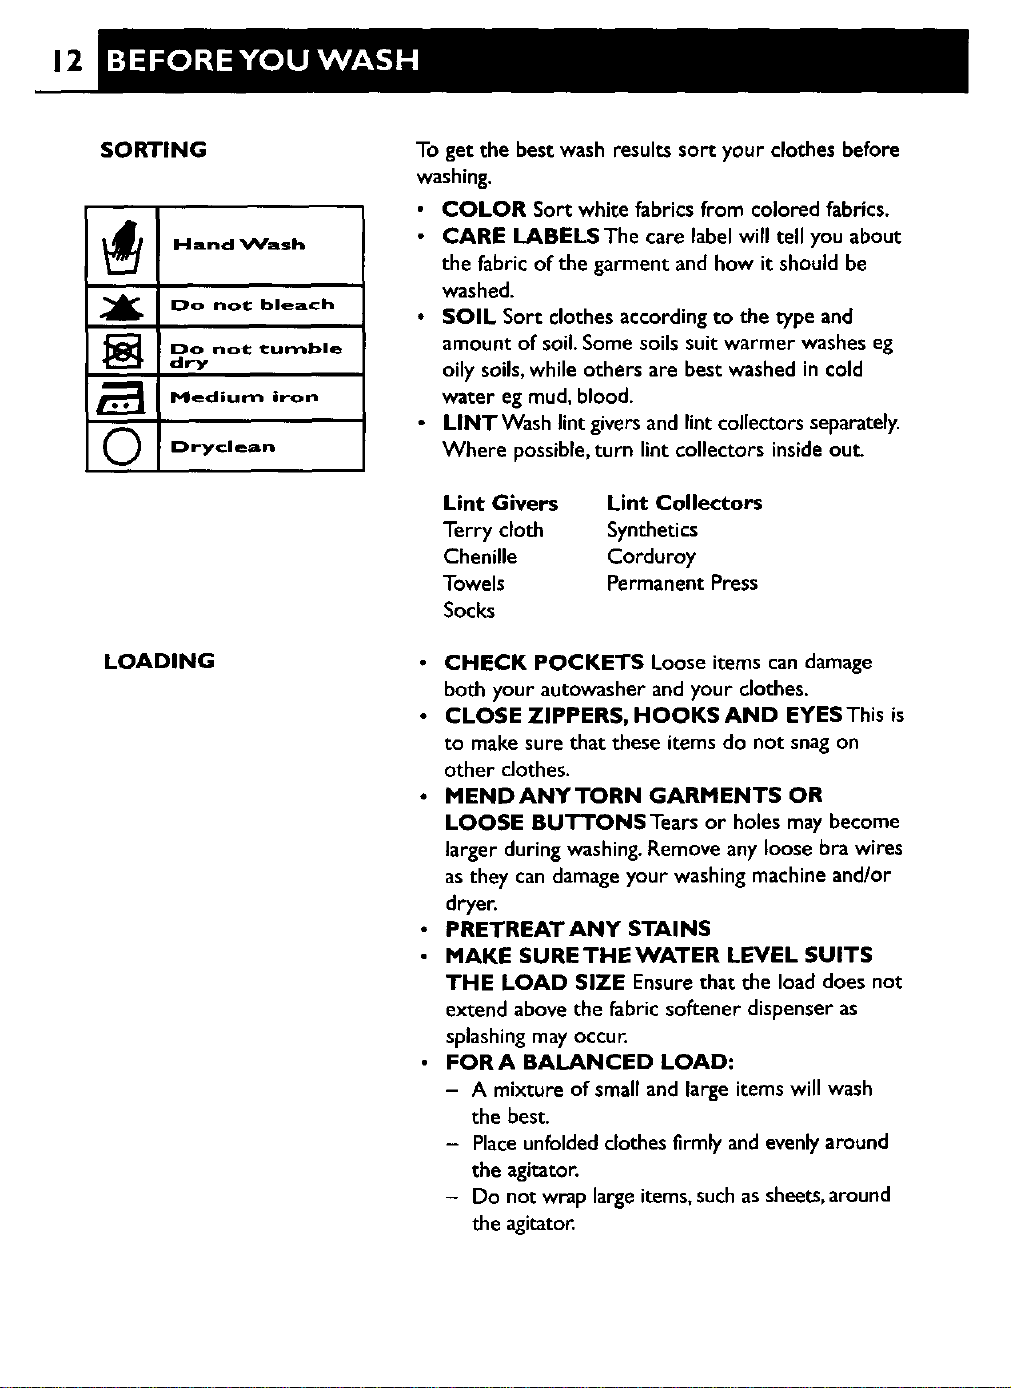
WASHING BULKY
ITEMS
Bulkyitems shouldsit below the medium
highwater level mark.
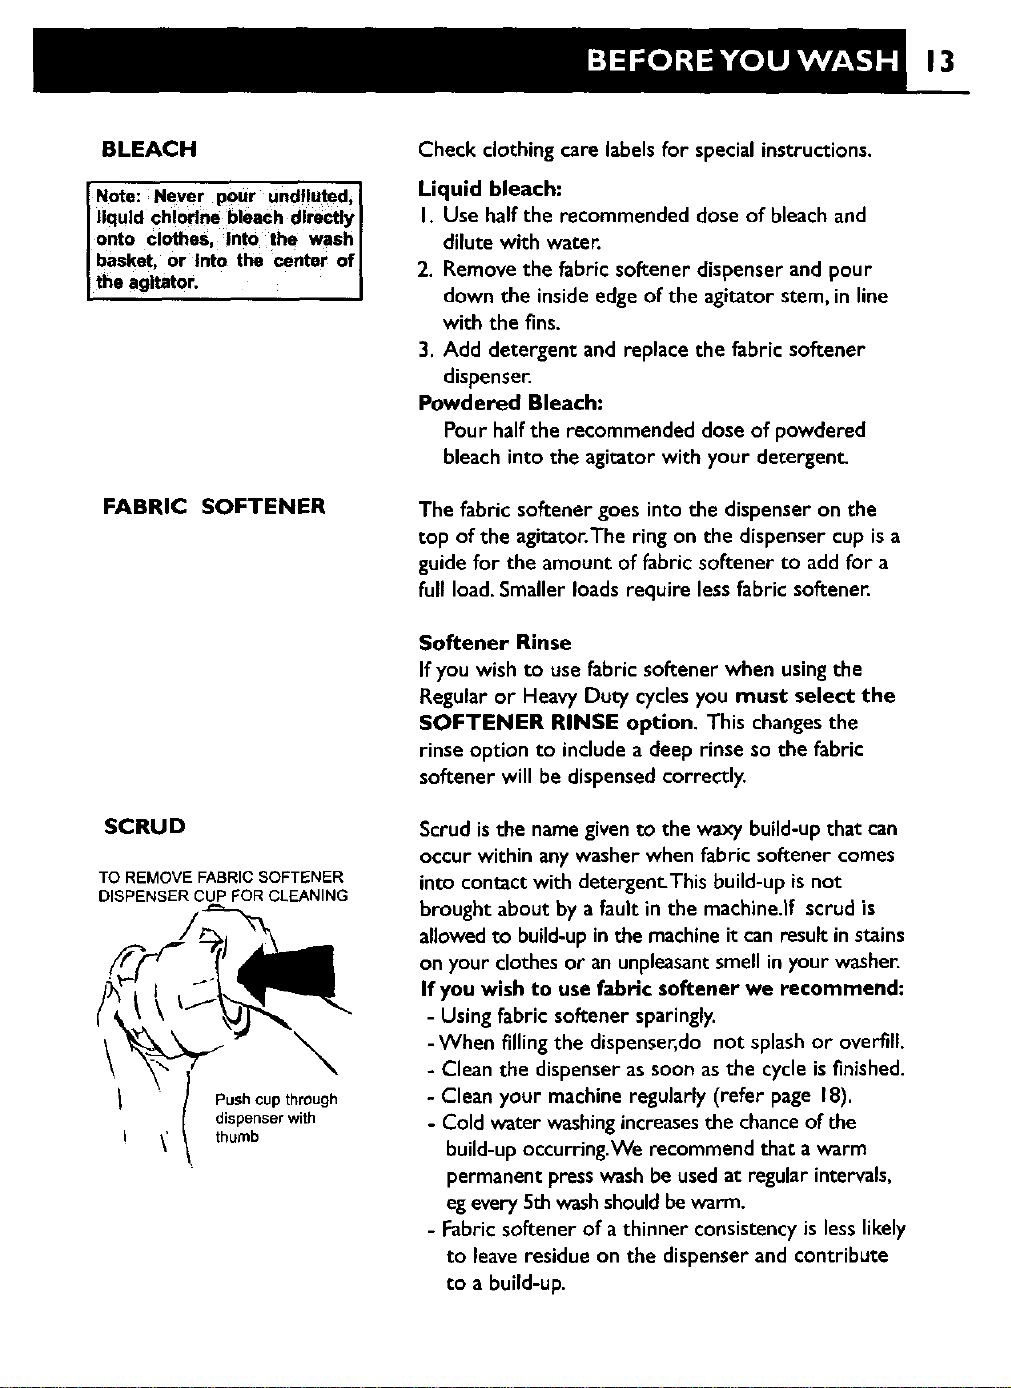
WASHING WOOLENS
COLD WATER
WASHING
Makesurethere isenough room inthe machinefor
itemsto movewhenbeingwashed.Forcinglargeitems
intothe machinemay result in them beingdamaged
during washing.
Some items floatup during the wash (egcomforters
and pillows). If they sit too high they may touch
stationary parts of the machineduring agitate or spin.
To minimize the chanceof this happening,bulky items
should be pushed down below the water level
after fill and pushed to sit below the medium
high water level mark on the agitator before
spinning.Select a slow spin.
To prevent an out of balance load we
recommend washing these items on the
Delicate cycle. If youwishto re-spin the loadat a
faster speed make sure the load is sitting below the
medium highmark before spinning.
The Wool cycle has been designed for products
carrying a MACHINEWASHABLE care claim.The
fibers of these woolens havebeen treated to prevent
felting when they are machine washed. Most
handknitted garments are not made of machine
washablewool and we recommend that you hand
washthem.
• Check the care label.
• Use a wool detergent
• Use theWOOL cycle.
• Hand washed woolens may be spun inyour
ecosmart.
• To dry woolens lay them flat on a towel and pat
into shape,Dr y out of direct sunlight.
• Some wool underlays and sheepskin products can
be washed in a washing machine but may produce
excessive amounts of lint that maycause pump
blockages.
If you alwaysuse cold water, we recommend that a
warm permanent press wash be used at regular
intervals, egevery 5th wash.
12
SORTING
H and Wash
,_ Do not bleach
] Do not tumble
dry
r_ Medium iro_
O Dl'yclean
LOADING
To get the bestwashresults sort your clothesbefore
washing.
• COLOR Sort white fabrics from coloredfabrics.
• CARE LABELSThe carelabel will tell you about
the fabricof the garment and how it shouldbe
washed.
• SOIL Sort clothesaccordingto the type and
amountof soil.Some soilssuitwarmer washeseg
oily soils,while othersare best washedin cold
water eg mud,blood.
LINT Washlint giversandlint collectorsseparately.
Where possible,turn lint collectors insideout.
Lint Givers Lint Collectors
Terry cloth Synthetics
Chenille Corduroy
Towels Permanent Press
Socks
• CHECK POCKETS Loose items can damage
both your autowasherandyour clothes.
• CLOSE ZIPPERS, HOOKS AND EYESThis is
to make sure that these items do not snag on
other clothes.
• MENDANYTORN GARMENTS OR
LOOSE BUTTONS Tearsor holes may become
larger duringwashing.Remove any loose bra wires
asthey can damageyourwashing machineand/or
dryer.
• PRETREATANY STAINS
• MAKE SURE THE WATER LEVEL SUITS
THE LOAD SIZE Ensure that the load does not
extendabovethe fabric softener dispenseras
splashingmayoccur.
• FORA BALANCED LOAD:
- A mixture of small and large itemswill wash
the best.
- Placeunfoldedclothes firmlyand evenlyaround
the agitator.
- Do not wrap large items,suchas sheets,around
the agitator.
13
BLEACH
Note:Never pour und uted
liquid Chiorlne bleach directly I
onto clothes, !nto the waehI
basket, or into the center of
the ag tator.
FABRIC SOFTENER
SCRUD
TO REMOVE FABRIC SOFTENER
DISPENSER CUP FOR CLEANING
\ \
! Push cup through
dispenser with
I _ thumb
Check clothing care labelsfor specialinstructions.
Liquid bleach:
I. Use halfthe recommended doseof bleachand
dilute with water.
2. Remove the fabric softener dispenser and pour
down the inside edge of the agitator stem, in line
with the fins.
3. Add detergent and replace the fabric softener
dispense_
Powdered Bleach:
Pour half the recommended dose of powdered
bleach into the agitator with your detergent.
The fabric softener goes into the dispenser on the
top of the agitator.The ring on the dispensercup isa
guide for the amount of fabric softener to add for a
full load. Smaller loads require lessfabric softener.
Softener Rinse
If you wish to use fabric softener when using the
Regular or Heavy Duty cycles you must select the
SOFTENER RINSE option. This changes the
rinse option to include a deep rinse so the fabric
softener will be dispensed correctly.
Scrud is the name given to the wax7 build-up that can
occur within any washer when fabric softener comes
into contact with detergent.This build-up is not
brought about by a fault in the machine.If scrud is
allowed to build-up in the machine it can result in stains
on your clothes or an unpleasantsmell in your washer.
If you wish to use fabric softener we recommend:
- Using fabric softener sparingly.
-When filling the dispenser,do not splash or overfill.
- Clean the dispenser as soon as the cycle isfinished.
- Clean your machine regularly (refer page 18).
- Cold water washing increasesthe chance of the
build-up occurring.We recommend that a warm
permanent press wash be used at regular intervals,
eg every 5th washshould be warm.
- Fabric softener of a thinner consistency is less likely
to leave residue on the dispenser and contribute
to a build-up.
14
OPTION
ADJUSTMENT MODE
delay
start
After usingyour ecosmart you maywant to fine
tune some of the optionsto suityour wash needs.
Youcanchangethe following pre-set options:
the defaultrinse option
the amount of water usedin the Shower Rinse
the number of beeps at the end of the cycle
the Out of Balancerecovery routine
the fill level selected by auto water level
the controlled cold
To make these changesit is necessaryto enter the
"Option Adjustment Mode".
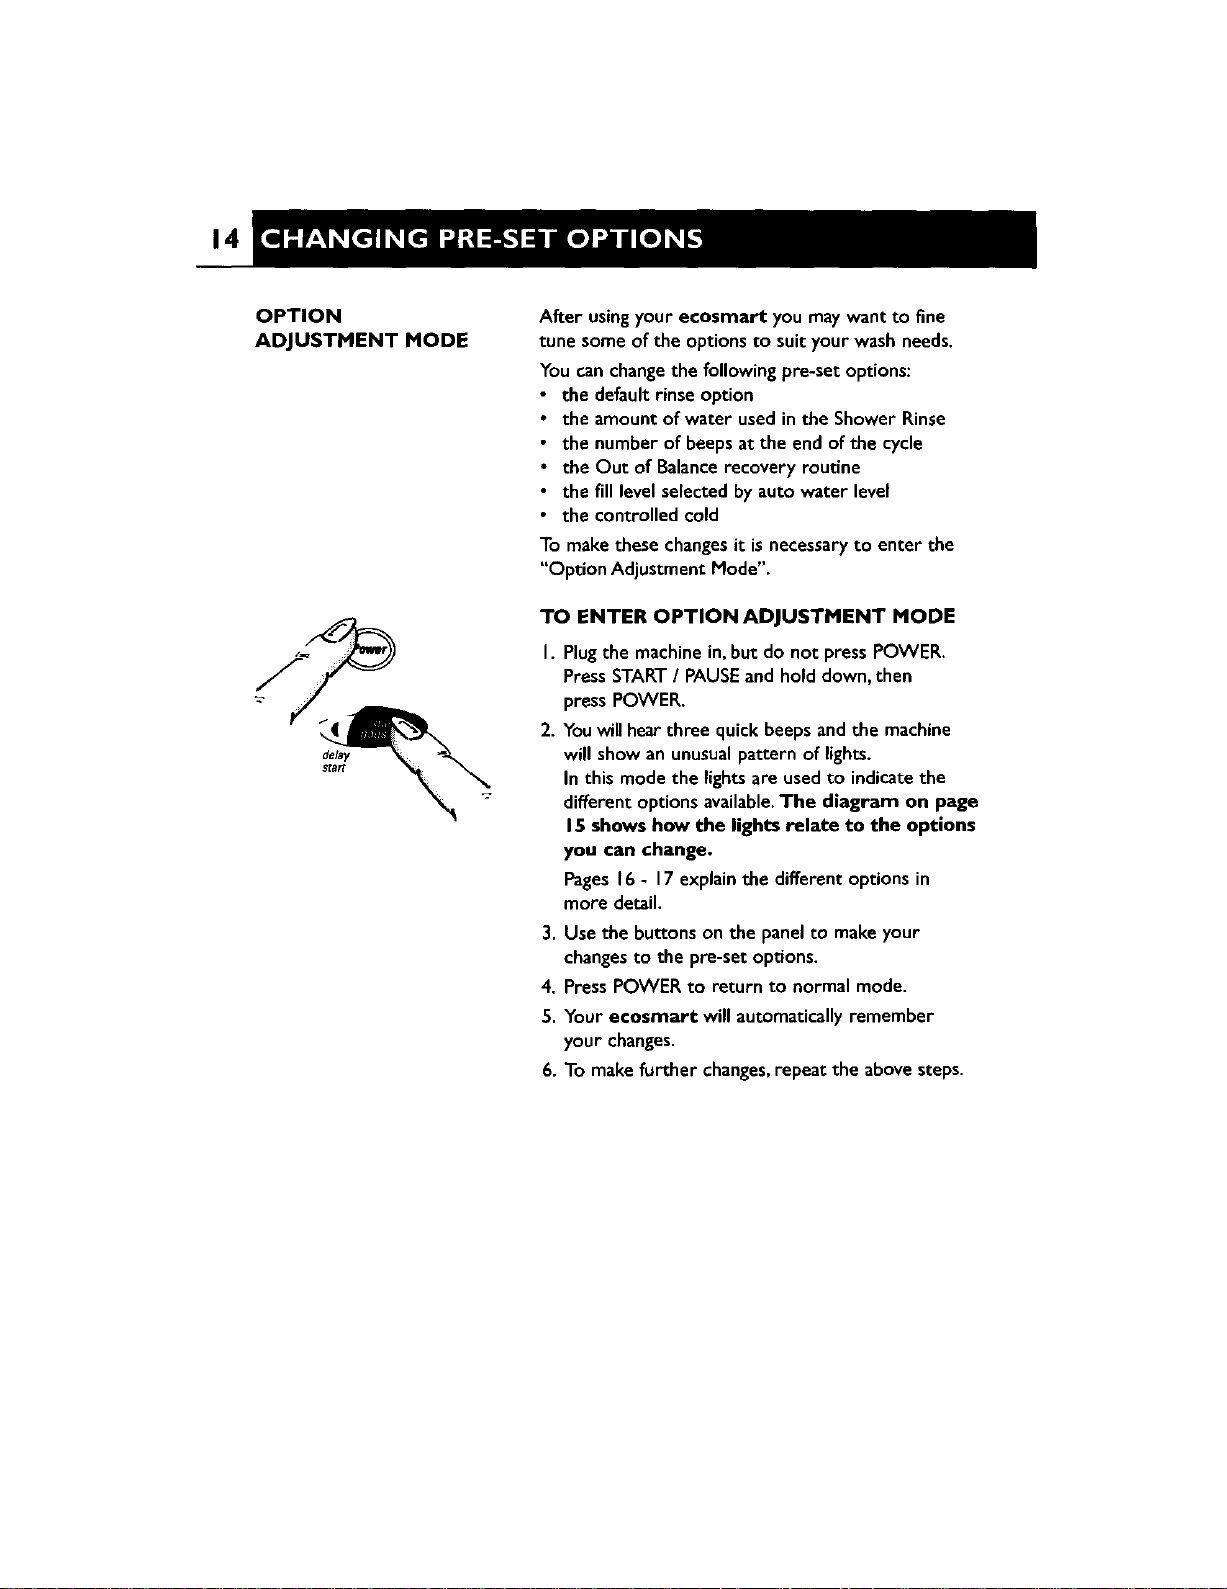
TO ENTER OPTION ADJUSTMENT MODE
I. Plugthe machine in, but do not press POWER.
Press START/ PAUSEand hold down, then
press POWER.
2. Youwill hear three quick beeps and the machine
will show an unusual pattern of lights.
In this mode the lights are used to indicate the
different options available.The diagram on page
15 shows how the lights relate to the options
you can change.
Pages 16- 17 explainthe differentoptions in
more detail.
3. Use the buttonson the panelto make your
changesto the pre-setoptions.
4. PressPOWER to return to normal mode.
5. Your eeosrnart will automaticallyremember
your changes.
6. To make further changes,repeat the abovesteps.

15
I. Press START/ PAUSEand
hold down. PressPOWER.
2. This diagram below shows how the lights
relate to the options you can change. It also
shows what lights will be on when you first enter
the Option Adjustment Mode.
¢ont_ C_d
.J.
delay
opuo_
vowaw
\
\
\
\
\
\
\
\
\
\
3
3. Use the buttons on the panel
to change the pre-set options.
V_ur_
16
OUT OF BALANCE
RECOVERY ROUTINE
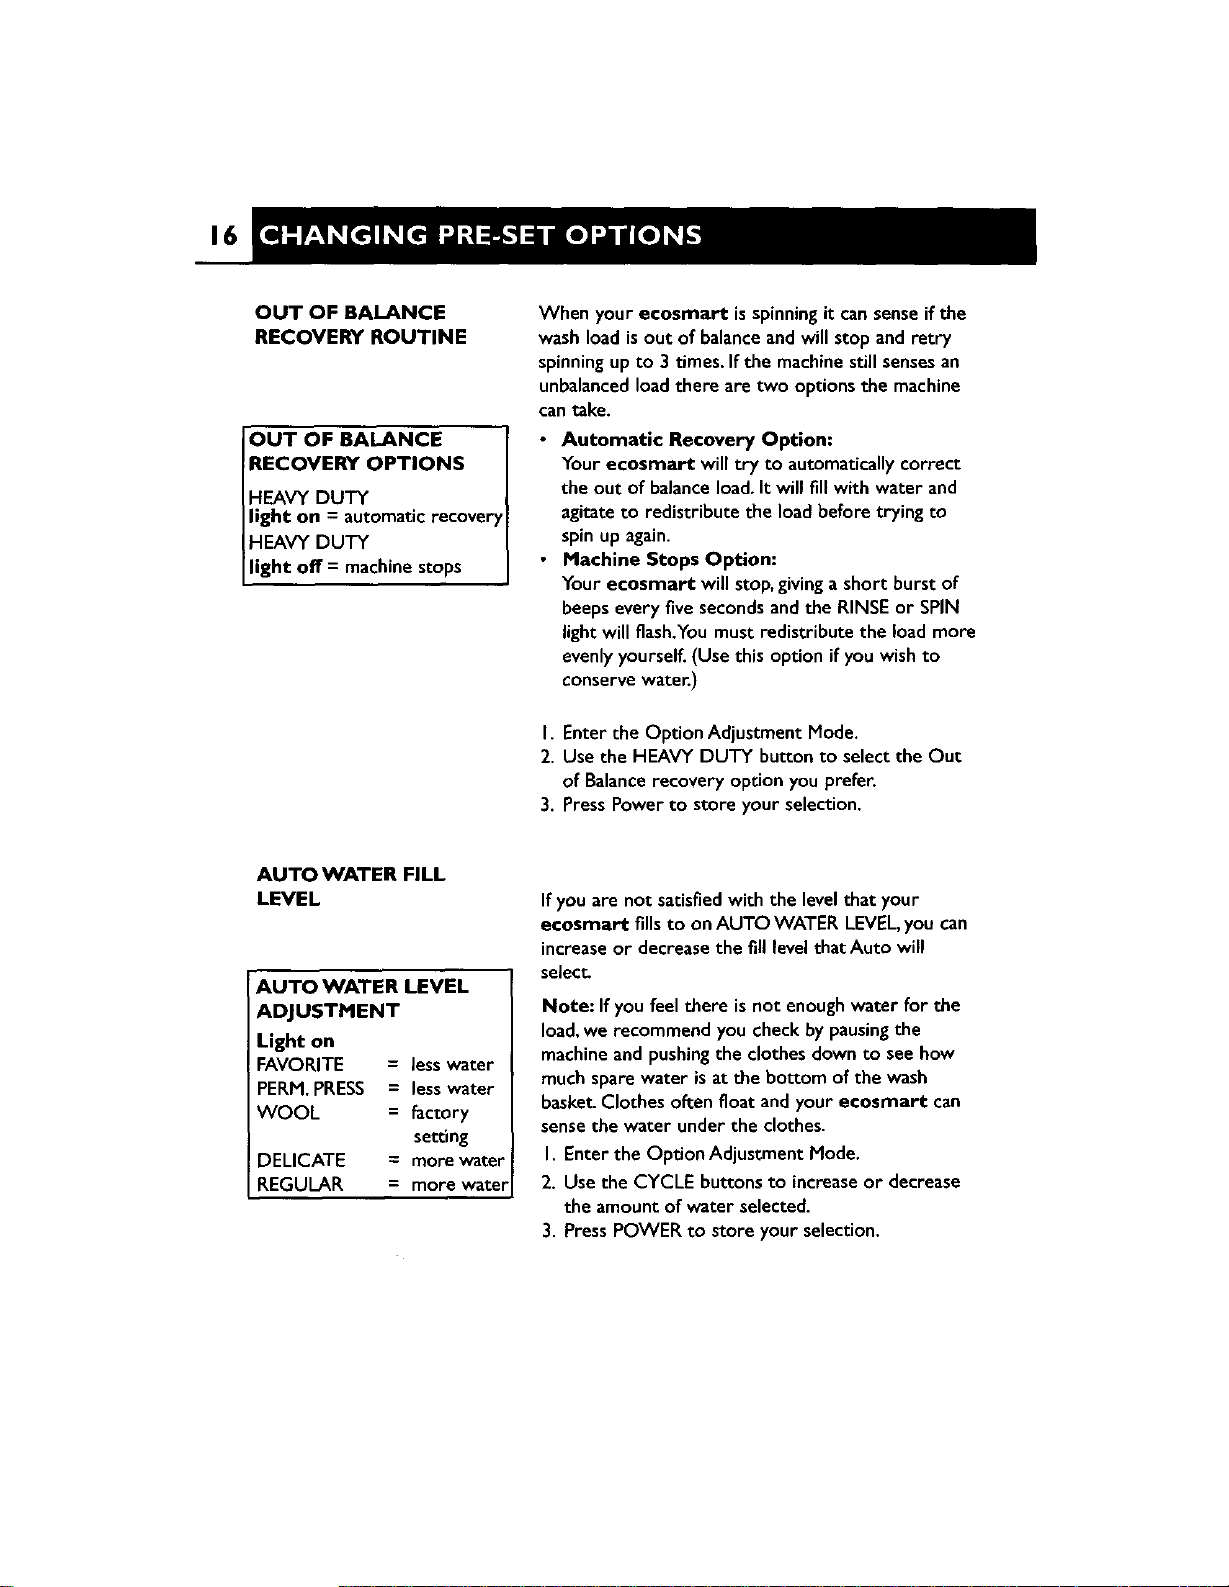
OUT OF BALANCE
RECOVERY OPTIONS
HEAVY DUTY
light on = automaticrecover
HEAVY DUTY
light off = machine stops
When your ecosmart isspinningit cansenseifthe
wash load is out of balanceandwill stop and retry
spinningup to 3 times. If the machine still sensesan
unbalancedload there are two optionsthe machine
can take.
• Automatic Recovery Option:
Yourecosmart will try to automaticallycorrect
the out of balanceload.It will fill with water and
agitateto redistribute the load before trying to
spin up again.
• Machine Stops Option:
Your ecosmart will stop,givinga short burstof
beeps every five secondsand the RINSE or SPIN
light will flash.You must redistribute the load more
evenlyyourself. (Use this option if you wish to
conserve water.)
I. Enter the Option Adjustment Mode.
2. Use the HEAVY DUTY button to select the Out
of Balance recovery option you prefer.
3. Press Power to store your selection.
AUTO WATER FILL
LEVEL
AUTO WATER LEVEL
ADJUSTMENT
Light on
FAVORITE = less water
PERM. PRESS = less water
WOOL = factory
setting
DELICATE = more water
REGULAR = more water
If you are not satisfied with the level that your
ecosmart fills to on AUTO WATER LEVEL, you can
increase or decrease the fill level that Auto will
select.
Note: If you feel there is not enough water for the
load, we recommend you check by pausing the
machine and pushing the clothes down to see how
much spare water is at the bottom of the wash
basket. Clothes often float and your ecosmart can
sense the water under the clothes.
I. Enterthe OptionAdjustment Mode.
2. Use the CYCLE buttons to increaseor decrease
the amount of water selected.
3. PressPOWER to store your selection.
17
END OF CYCLE
BEEPS
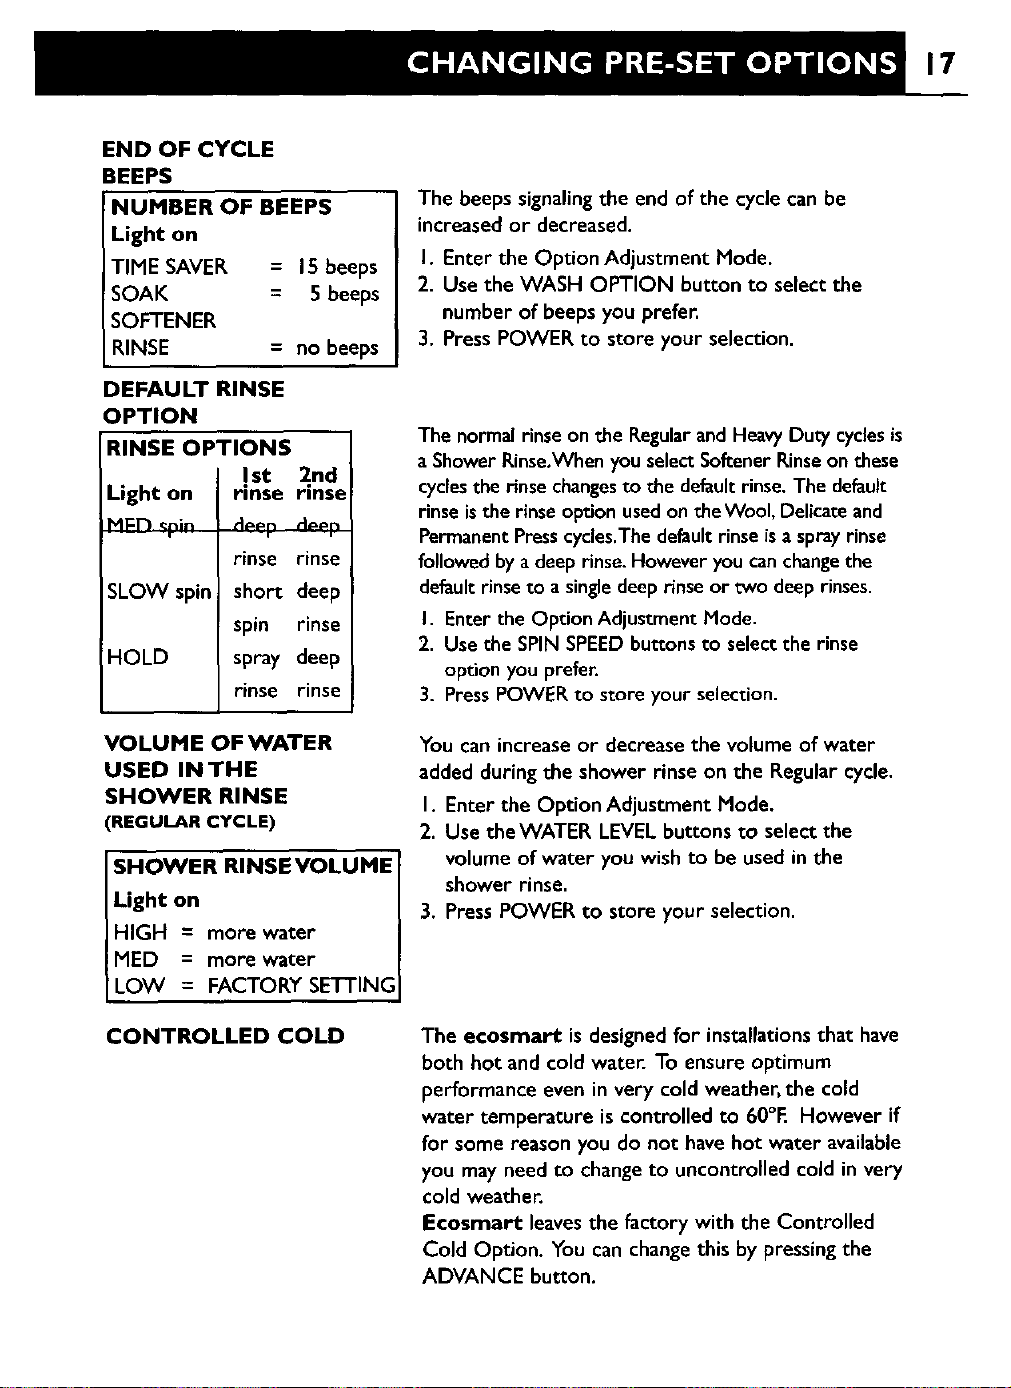
NUMBER OF BEEPS
Light on
TIME SAVER = 15beeps
SOAK = 5 beeps
SOFTENER
RINSE = no beeps
DEFAULT RINSE
OPTION
RINSE OPTIONS
I Ist 2nd
Light on rinse rinse
MEr_ _ri. a_p a_n
rinse rinse
SLOW spin short deep
spin rinse
HOLD spray deep
rinse rinse
VOLUME OF WATER
USED IN THE
SHOWER RINSE
(REGULAR CYCLE)
SHOWER RINSE VOLUME
Light on
HIGH = more water
I MED = more water
[LOW = FACTORY SETTING
CONTROLLED COLD
The beeps signaling the end of the cycle can be
increased or decreased.
I. Enter the Option Adjustment Mode.
2. Use the WASH OPTION button to select the
number of beeps you prefer.
3. PressPOWER to store your selection.
The normal rinse on the Regular and Heavy Duty cycles is
a Shower Rinse,When you selectSoftener Rinse on these
cycles the rinse changesto the default rinse, The default
rinse is the rinse option used on the Wool, Delicate and
Permanent Press cycles.The default rinse is a spray rinse
followed by a deep rinse. However you can change the
default rinse to a single deep nnse or two deep rinses.
I. Enter the Option Adjustment Mode.
2. Use the SPIN SPEED buttons to select the rinse
option you prefer.
3. Press POWER to store your selection.
You can increaseor decreasethe volume of water
addedduring the shower rinse on the Regular cycle.
I. Enter the Option Adjustment Mode.
2. Use theWATER LEVELbuttons to select the
volume of water you wish to be used in the
shower rinse.
3. PressPOWER to store your selection.
The ecosmart is designed for installationsthat have
both hot and cold water. To ensure optimum
performance even in very cold weather, the cold
water temperature is controlled to 60°E However if
for some reason you do not have hot water available
you may need to change to uncontrolled cold in very
cold weather.
Ecosmart leavesthe factory with the Controlled
Cold Option. You can change this by pressingthe
ADVANCE button.
18
CARE AND CLEANING
\ /
TO REMOVE FABRIC SOFTENER
DISPENSER CUP
\ \
1 I Push Cup through
I _ dispenser with
thumb
WHENYOU HAVE FINISHED
• Turn off the faucets to preventanychanceof
floodingshoulda hose burst.
• Unplugthe machine from the wall socket.
CLEANING YOUR ECOSMART
• Clean with a soft damp cloth and wipe dry. Do
not use chemical or scouring cleaners as they
can damage the paint and plastic surfaces.
• You can remove the lid for cleaning. Open the lid
fully,h old one side with one hand and gently tap
the other side with an upward motion.
To replace the lid, hold the lid vertically and align
both hingesbefore pushingdown firmly.
• To remove the agitator for cleaning,unscrew the nut
down the center of the agitator by turning
anti-clockwise.
CAUTION:The agitator must be fully pushed
on to the shaft when refittlng.Tighten the nut
firmly by hand. Ensure the agitator is not
loose.
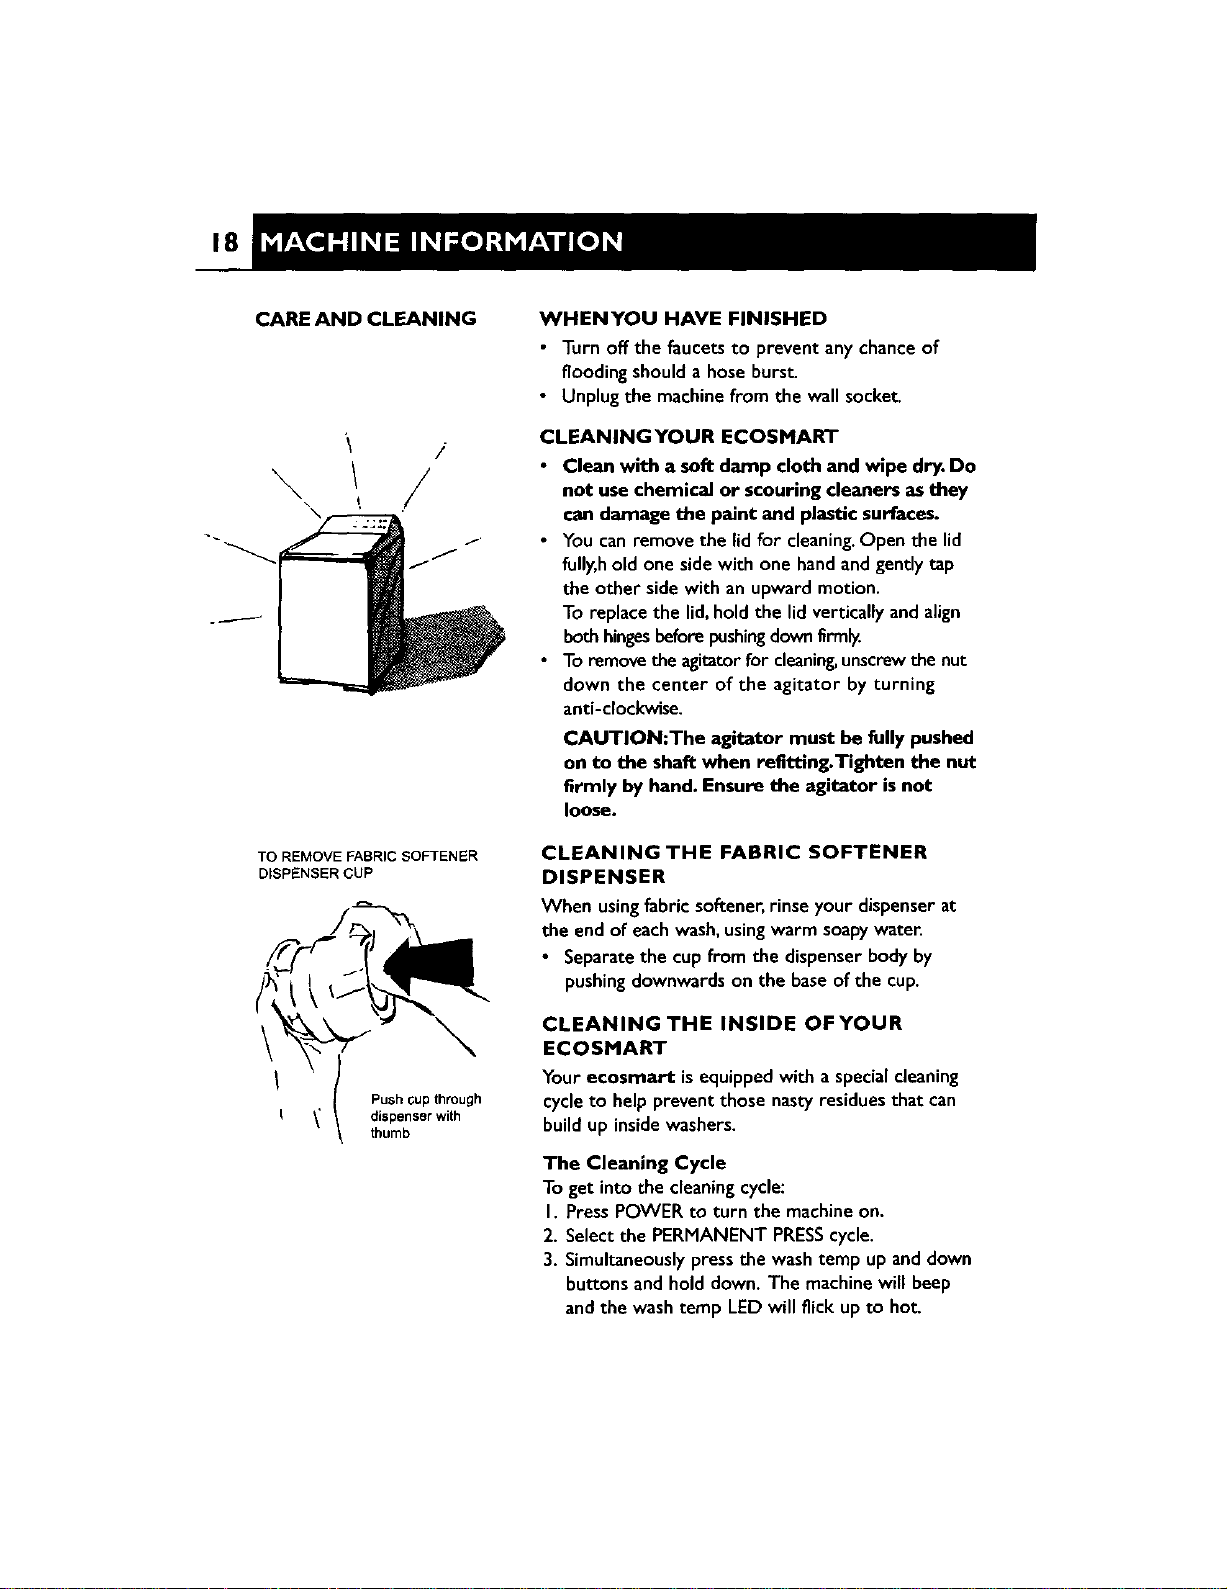
CLEANING THE FABRIC SOFTENER
DISPENSER
When usingfabricsoftener,rinse your dispenserat
the end of eachwash,usingwarm soapywater.
• Separatethe cupfrom the dispenserbodyby
pushingdownwardson the baseof the cup.
CLEANING THE INSIDE OF YOUR
ECOSMART
Yourecosmart is equippedwith a specialcleaning
cycleto help prevent those nasty residuesthat can
buildup insidewashers.
The Cleaning Cycle
To get into the cleaningcycle:
I. PressPOWER to turn the machineon.
2. Select the PERMANENT PRESScycle.
3. Simultaneously press the wash temp up and down
buttons and hold down. The machine will beep
and the wash temp LED will flickup to hot.

19
PRODUCTS THAT
MIGHT DAMAGE
YOUR ECOSMART
The ecosmart will then fill with hot water and do a
hot wash. It'sagood ideato clean the machine using
this cyclewithout clothesanda coupleof cups of
powered detergent,every few weeks.
• Concentrated bleaches,nappysanitizersand
hydrocarbon solvents(eg petrol andpaint thinners)
can cause damage to the paintwork and
components of your autowasher.( Do not wash
or dry garments stained with these solvents as
they are flammable.)
Do not use pre-treatment sprays or liquids on or
near your autowasher as they can damageyour
machine's control panel.
Useof dyes inyour autowashermay causestaining
of the plastic components.The dye will not damage
the machine but we suggestyou thoroughly clean
your autowasher afterwards.We do not recommend
the use of dye strippers in your autowashe_
ECOSMART SOUNDS
AND BEEPS
Your ecosmart will make sounds that you will not
have heard from other autowashers.
• During drain you will hear the pump on your
machine turn on and off quicklyabout every 10
seconds.Thisis part of your ecosmart's automatic
lint removal system.
• While draining your machine maygive several low
thuds.Your machine is checking that the water has
drained before spinning.
• Your ecosmart will beep at the end of the cycle
or if you have used Spin Hold or Soak.
• If your machine is beeping continuously or giving a
musical series of beeps(refer to page22).
AUTOMATIC LINT
SYSTEM
Yourecosmart has a selfcleaninglint system.It
automaticallyseparates the lint from the wash water,
trapping the lint between the inner and outer bowls
and flushing it out at the end of the wash.

2O
WASH PROBLEMS
PROBLEM POSSIBLE CAUSES AND SOLUTIONS
Creasing • Overloading the washeror dryer.
• Choose a PermanentPressor Delicate cycle asthese cycleshave
beendesignedto minimizecreasing.
• Try selectinga slower spin speed.
• Do not leavewet clothes to sit in the washer or laundry basket
Poor soil • Not enoughdetergent for load sizeor amount of soil.
removal • White clothes are better washedseparately.Separatelight and
heavilysoiled items,as clothescanpick up soilfrom dirty washwater.
Selectthe washtemperature accordingto soil type. For example,
blood and mud are better washedin cold water,while oily soils
washbetter in warmer water.
Overloading the washer.
Loadsmade up of articles of varyingsizeswill wash better (egfull
loadsof sheets maynot washas well).
Hard water requires moredetergent thansoft water.
Linting
Residue
detergent
Wash lintgivers egtowels,flannelettesheets,separatelyfrom lint
collectors egsynthetic fabrics.
Overloading the washer.
Not enoughdetergentto hold the lint in suspension.
Overdrying in a dryer cancausea build-upon static electricity in
syntheticfabricsandcausethem to attractlint.
• Overloading the washer.
• Try usinglessdetergent.
• Some detergentsneed to be pre-dissolved,check the detergent
instructions.
• Cold ambienttemperatures,coldwashesor shortagitationtimes
maynot In the detergentdissolveproperly.Try pre-dissolvingthe
detergent.
Blackmarkson • A build-up caused by the interactionof fabric softenerand
clothes detergent canflakeoffandmarkdothes. (Referto Scrudpage13)
• Insufficientdetergent,for the amount of soil on the clothes,can
result in blackmarks on clothes.
Dye transfer • Wash anddry non-colorfastclothes separately.
• Non-colonCastclothes left sittingina washeror laundry basketcan
transfer dye to other clothes.
Tangling • Washingwith too muchwater (ieunderloading)cancausethe
clothes to tangle around one another.
• Do not loadthe washer by wrapping clothes around the agitator.
21
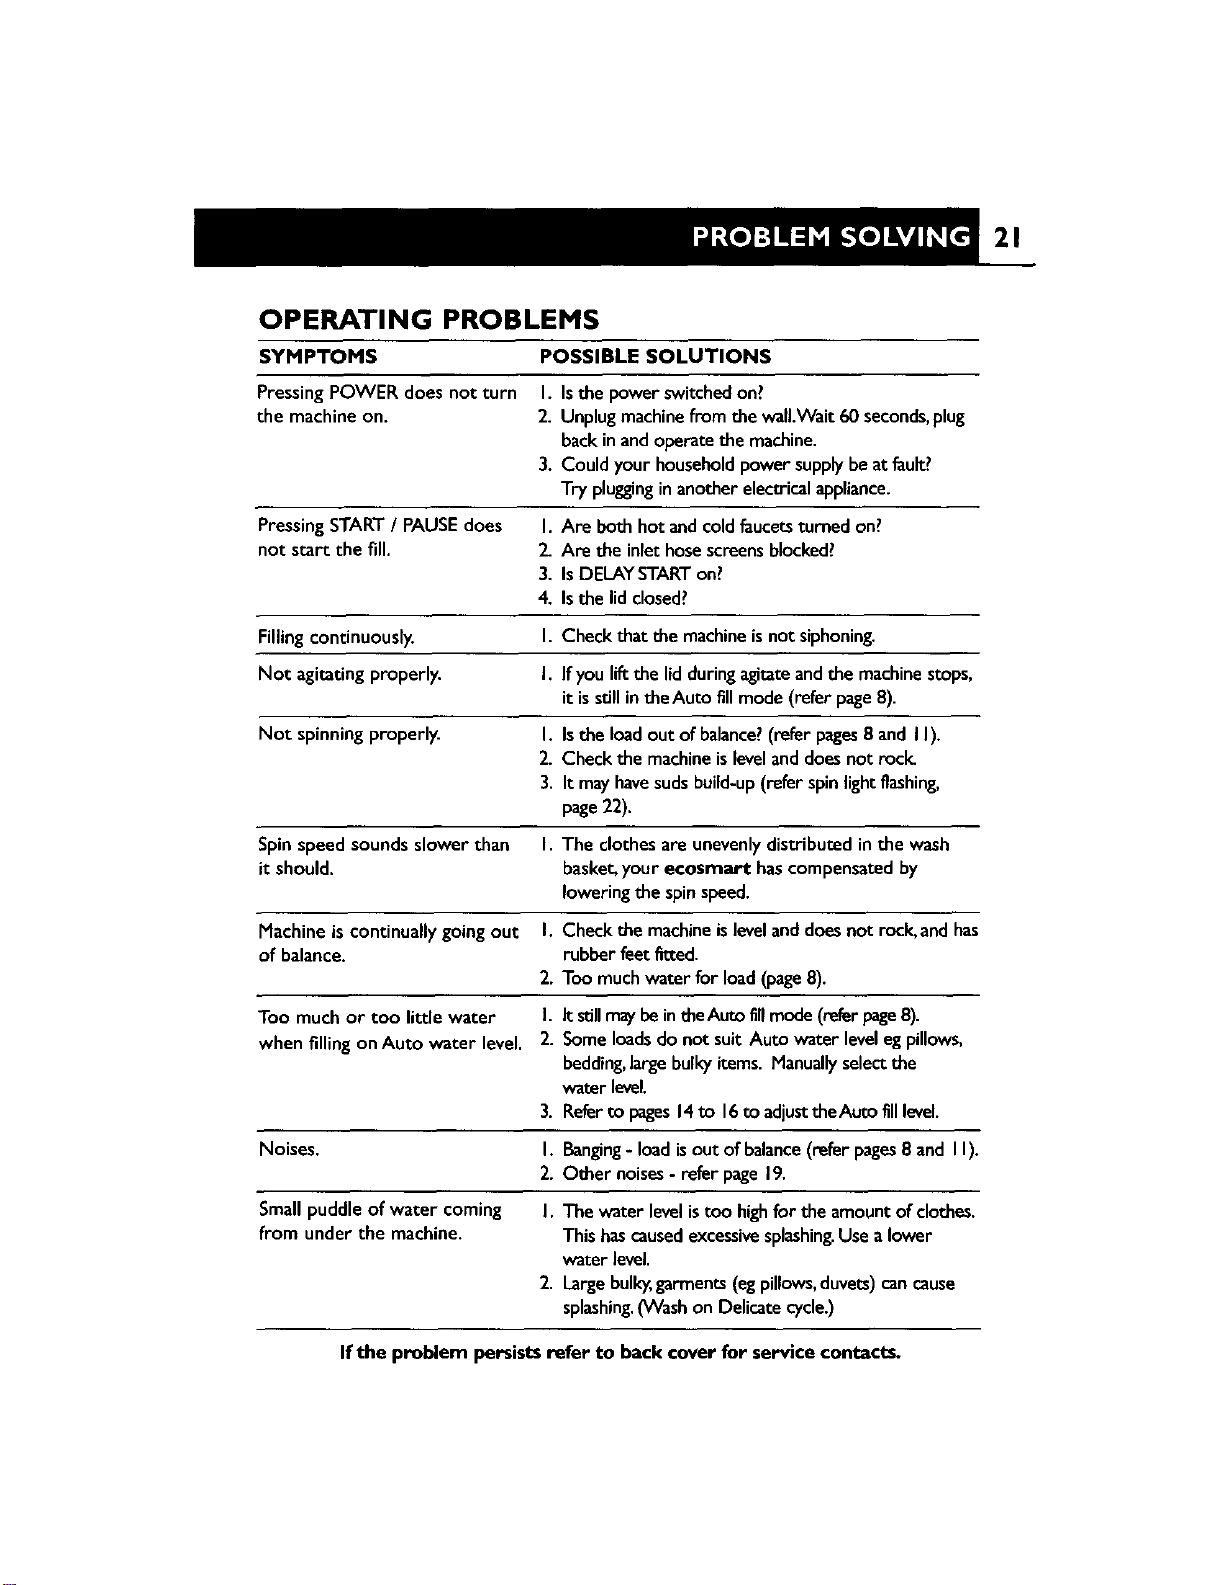
OPERATING PROBLEMS
SYMPTOMS POSSIBLE SOLUTIONS
PressingPOWER does not turn I. Isthe power switchedon?
the machine on. 2. Unplug machinefrom the wall.Wait60 seconds,plug
backin and operate the machine.
3. Could your householdpower supplybe at fault?
Try pluggingin another electricalappliance.
PressingSTART/ PAUSEdoes I. Are both hot andcold faucetsturned on?
not start the fill. 2_Are the inlet hosescreensblocked?
3. IsDELAYSTARTon?
4. Isthe lid closed?
Filling continuously. I. Check that the machineis not siphoning.
Not agitating properly. I. If you lift the lid duringagitateand the machinestops,
it is still in theAuto flUmode (refer page8).
Not spinning properly. I. Isthe load outof balance?(refer pages8 and I I).
2. Check the machineis leveland doesnot rock.
3. It mayhavesudsbuild-up(refer spin light flashing,
page22).
Spin speed sounds slower than I. The clothes are unevenlydistributed in the wash
it should, basket,your ecosmart has compensated by
lowering the spinspeed.
Machine is continually going out I. Check the machineis leveland does not rock, and has
of balance, rubber feet fitted.
2. Too muchwater for load(page8).
Too much or too little water I. It _11maybein theAuto fillmode(refer page8).
when fillingon Auto water level. 2. Some loadsdo not suit Auto water level egpillows,
bedding,largebulkyitems. Manuallyselect the
waterlevel.
3. Referto pages14to 16to adjusttheAuto filllevel.
Noises. I. Banging- load is out of balance(refer pages8 and I I).
2. Other noises- refer page19.
Small puddle of water coming I. The water levelis too highfor the amount of clothes.
from under the machine. This hascausedexcessivesplashing.Use a lower
waterlevel.
2. Largebulky,garments (egpillows,duvets) cancause
splashing.(Wash on Delicate cycle.)
If the problem persists refer to back cover for service contacts.
22
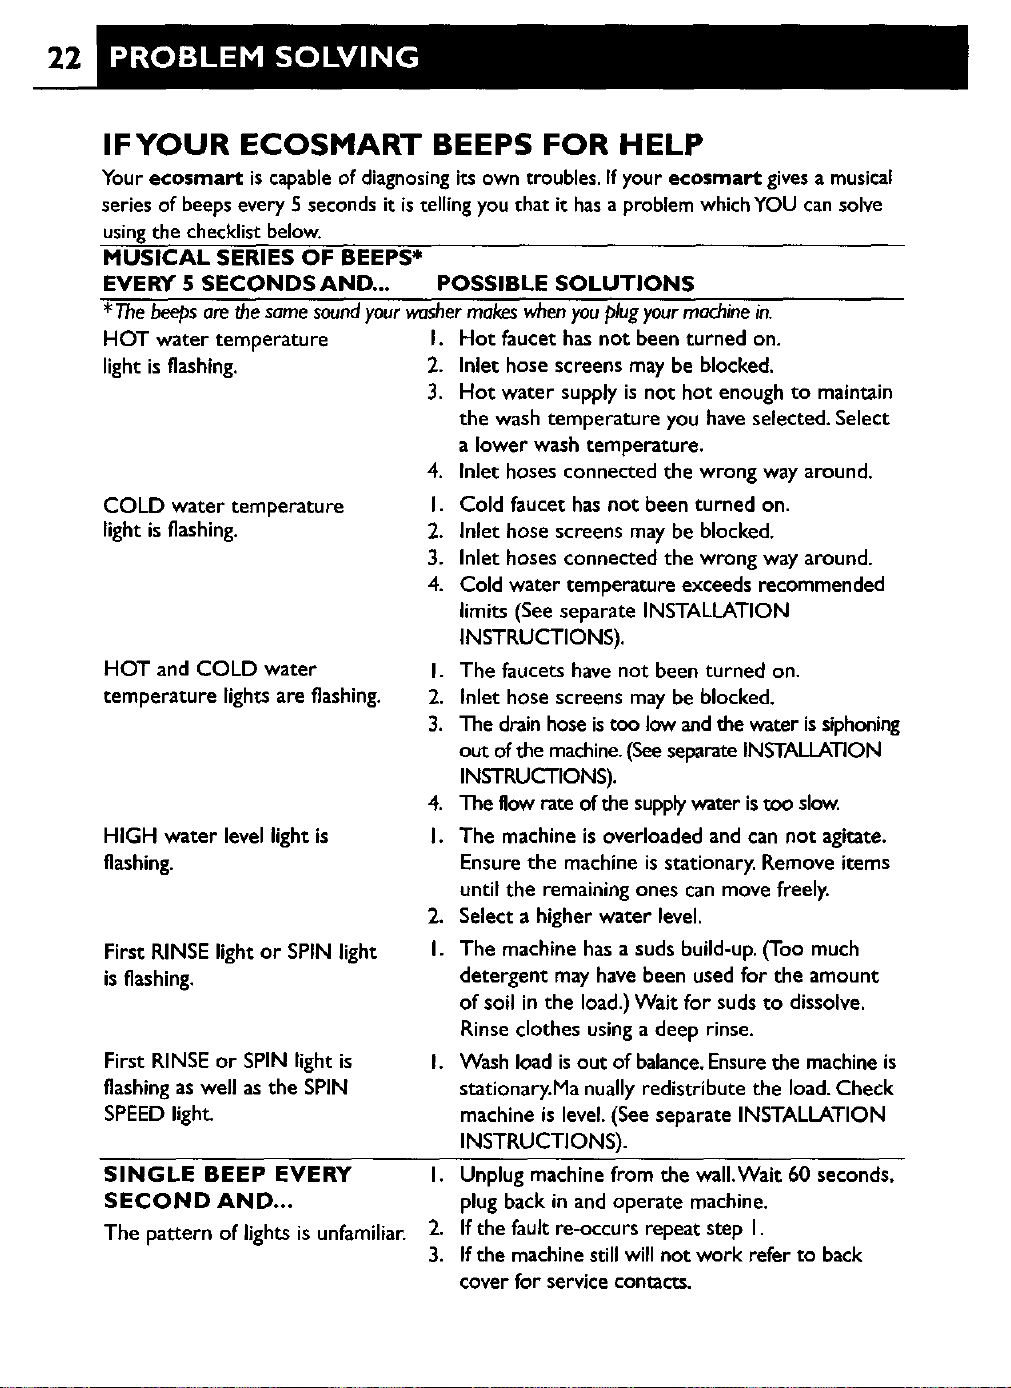
IFYOUR ECOSMART BEEPS FOR HELP
Your ecosmart iscapableof diagnosingitsown troubles. If yourecosmart givesa musical
seriesof beepsevery5 secondsit istelling youthat it has aproblem which¥OU cansolve
usingthe checklist below.
MUSICAL SERIES OF BEEPS*
EVERY 5 SECONDS AND... POSSIBLE SOLUTIONS
*The beepsarethe samesoundyourwashermakeswhenyoup/ugyourmachinein.
HOT water temperature I. Hot faucet has not beenturned on.
light is flashing. 2. Inlet hose screens may be blocked.
3. Hot water supply is not hot enough to maintain
COLD water temperature
light is flashing.
HOT and COLD water
temperature lights are flashing.
HIGH water level light is
flashing.
First RINSE lightor SPIN light
is flashing.
First RINSE or SPIN light is
flashing as well as the SPIN
SPEED ligh_
SINGLE BEEP EVERY
SECOND AND...
The pattern of lights is unfamiliar.
the wash temperature you have selected.Select
a lower wash temperature.
4. Inlet hoses connected the wrong way around.
I. Cold faucet has not been turned on.
2. Inlet hose screens may be blocked.
3. Inlet hoses connected the wrong way around.
4. Cold water temperature exceeds recommended
limits (Seeseparate INSTALLATION
INSTRUCTIONS).
I. The faucets have not been turned on.
2. Inlet hose screens may be blocked.
3. The drainhose istoo low andthe water issiphoning
out of the machine.(SeeseparateINSTALLATION
INSTRUCTIONS).
4. The flowrate of the supplywater istoo slow.
I. The machine is overloaded and can not agitate.
Ensure the machine is stationary. Remove items
until the remaining ones can move freely.
2. Select a higher water level.
I. The machine has a suds build-up. (Too much
detergent may havebeen used for the amount
of soil in the load.)Wait for sudsto dissolve.
Rinse clothes using a deep rinse.
I. Wash load is out of balance.Ensurethe machineis
stationary.Ma nually redistribute the load. Check
machine is level.(Seeseparate INSTALLATION
INSTRUCTIONS).
I. Unplug machine from the wall,Wait 60 seconds,
plug back in and operate machine.
2. If the fault re-occurs repeat step I.
3. If the machinestill will not work refer to back
coverfor servicecon_cts.
23
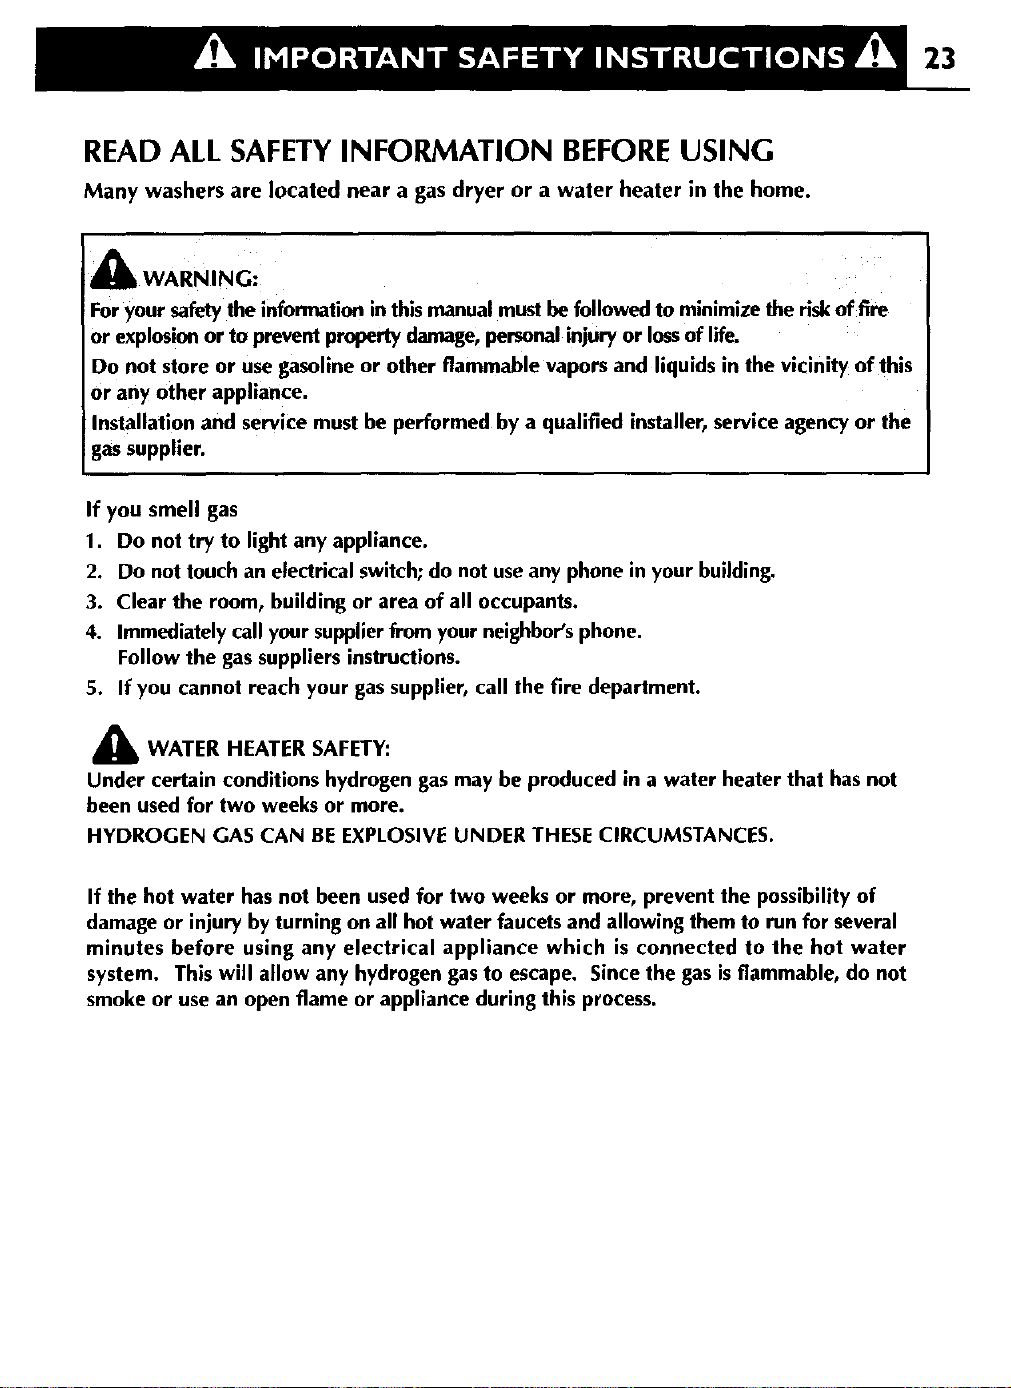
READ ALL SAFETY INFORMATION BEFORE USING
Many washers are located near a gas dryer or a water heater in the home.
[,_k WARNING:
Foryour safetythe informationinthismanualmustbefollowedto minimizethe riskof fire
or explosionor to preventpropertydamage,personalinjuryor lossof llfe.
Do not store or usegasolineor other flammable vapors and liquidsin the vicinity of this
or any other appliance.
Installationand servicemust he performed by a qualified installer,serviceagencyor the
_assupplier.
If you smell gas
1. Do not try to light any appliance.
2. Do not touch an electrical switch; do not use any phone in your building.
3. Clear the room, building or area of all occupants.
4. Immediately call your supplier from your neighbor's phone.
Follow the gas suppliers instructions.
5. If you cannot reach your gas supplier, call the fire department.
_k WATER HEATER SAFETY:
Under certain conditions hydrogen gas may be produced in a water heater that has not
been used for two weeks or more.
HYDROGEN GAS CAN BE EXPLOSIVE UNDER THESE CIRCUMSTANCES.
If the hot water has not been used for two weeks or more, prevent the possibility of
damage or injury by turning on all hot water faucets and allowing them to run for several
minutes before using any electrical appliance which is connected to the hot water
system. This will allow any hydrogen gas to escape. Since the gas is flammable, do not
smoke or use an open flame or appliance during this process.
24
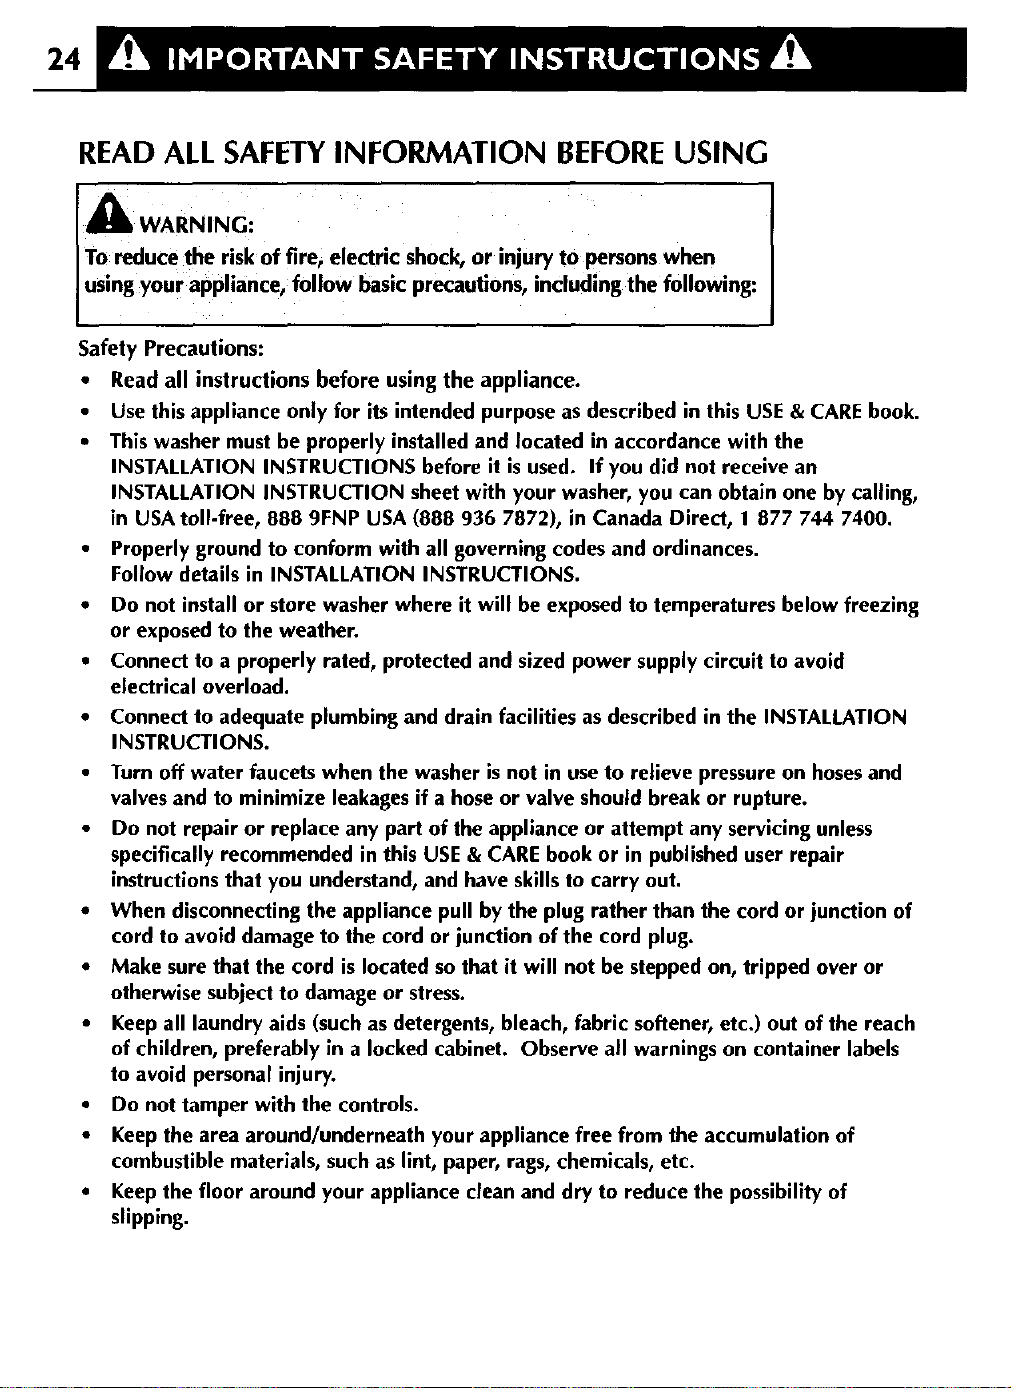
READ ALL SAFETY INFORMATION BEFORE USING
To reduce the risk of firei electric shock, or injury to .persons when
using your app lance, fo low basic precautions, including the fo owing:
Safety Precautions:
• Read all instructions before using the appliance.
• Use this appliance only for its intended purpose as described in this USE & CARE book.
• This washer must be properly installed and located in accordance with the
INSTALLATION INSTRUCTIONS before it is used. If you dld not receive an
INSTALLATION INSTRUCTION sheet with your washer, you can obtain one by calling,
in USA toll-free, 888 9FNP USA (888 936 7872), in Canada Direct, 1 877 744 7400.
• Properly ground to conform with all governing codes and ordinances.
Follow details in INSTALLATION INSTRUCTIONS.
• Do not install or store washer where it will be exposed to temperatures below freezing
or exposed to the weather.
• Connect to a properly rated, protected and sized power supply circuit to avoid
electrical overload.
• Connect to adequate plumbing and drain facilities as described in the INSTALLATION
INSTRUCTIONS.
• Turn off water faucets when the washer is not in use to relieve pressure on hoses and
valves and to minimize leakages if a hose or valve should break or rupture.
• Do not repair or replace any part of the appliance or attempt any servicing unless
specifically recommended in this USE & CARE book or in published user repair
instructions that you understand, and have skills to carry out.
• When disconnecting the appliance pull by the plug rather than the cord or junction of
cord to avoid damage to the cord or junction of the cord plug.
• Make sure that the cord is located so that it will not be stepped on, tripped over or
otherwise subject to damage or stress.
• Keep all laundry aids (such as detergents, bleach, fabric softener, etc.) out of the reach
of children, preferably in a locked cabinet. Observe all warnings on container labels
to avoid personal injury.
• Do not tamper with the controls.
• Keep the area around/underneath your appliance free from the accumulation of
combustible materials, such as lint, paper, rags, chemicals, etc.
• Keep the floor around your appliance clean and dry to reduce the possibility of
slipping.
25
• Never reach into the washer if the basket or agitator is moving.
• Before opening the lld, unloading or adding clothes, press START/PAUSE and wait
until the machine has completely stopped before openlng the lld.
• Close supervision is necessary if this appliance is used by or near children. Do not
allow children to play inside, or with this appliance or any discarded appliance.
• Dispose of discarded appllances and shlpping/packing materials properly. Before
discarding a washer, or removing from service, remove the washer lid.
• Do not leave washer lld up during the cycle. This will stop the fill and spin action
and prevent completion of the cycle. To restart, close lid and press START/PAUSE.
• Do not wash or dry articles that have been cleaned in, washed in, soaked in, or spotted
with combustible or explosive substances (such as wax, oil, paint, gasoline, degreasers,
dry-cleanlng solvents, kerosene, etc.) which may ignite or explode. Do not add these
substances to the wash water. Do not use these substances around your washer and/or
dryer during operation, asthey give off vapors that could ignite or explode.
• The laundry process can reduce the flame retardancy of fabrics. To avoid such a
result, the garment manufacturer's care instruction should be followed very carefully.
• Do not mix chlorine bleach with ammonia or acid such as vinegar and/or rust remover.
Mixing can produce a toxic gas which may cause death.
• Never climb on or stand on the washer top or lid.
• Do not wash fibreglass articles in your washer. Skin irritation could result from the
remaining particles that may be picked up by clothing during subsequent washer use.
• To minimize the possibility of electric shock, unplug this appliance from the power
supply or disconnect the washer at the household distribution panel by removing the
fuse or switching off the circuit breaker before attempting any maintenance or
cleaning.
• NOTE: Pressing POWER button does NOT disconnect the appliance from the power
supply, even though the lights are out.
• Do not operate this appliance if it is damaged, malfunctioning, partially disassembled
or has missing or broken parts, including a damaged cord or plug.
• Do not operate this appliance if the lid has been incorrectly fitted.
• If you are using an extension cord or a portable electrical outlet device (eg multi-
socket outlet box), ensure that it is positioned so that it does not come into contact
with water or moisture.
SAVE THESE INSTRUCTIONS
26
LEER TODA LA INFORMACION DE SEGURIDAD ANTES
DE USAR
Muchas lavadoras est;_n cerca a una secadora de gas o la calefacci6n del agua en casa.
_kb ADVERTENCIA
Para su seguridad personal hay que seguir la informaci6n en este manual para
minimizar el riesgo de incendlo o explosi6n o para prevenir dafio a la propiedad, dafic
personal o muerte.
No guardar o usar naffa u otros vapores o Ifquidos inflamables en la proximidad de
_e u otros aparatos electrodom_'ticos.
La instalaci6n y revisi6n deben ser realizadas por una persona capacitada, una agencia
de servicio o el proveedor de gas.
AI sentir gas:
1. No prender ningdn aparato.
2. No tocar ningdn interruptor el_ctri¢o, ni usar el telefono del edificio.
3. Desocupar la habitaci6n, el edificlo o la ._rea.
4. Llamar inmedlatamente al proveedor de gas desde el tel_fono de su vecino.
Seguir las instrucciones del proveedor de gas.
5. Si no es poslble ponerse en contacto con el proveedor de gas, Ilamar al cuerpo de
bomberos.
SEGURIDAD DE CALEFACCI6N DEL AGUA
Fn ciertas condiciones, hidrogeno est_ producido dentro de la calefacci6n que no se
haya usado por dos semanas o m_s.
EN ESTAS CONDICIONES HIDROGENO PUEDE SER EXP/OSWO.
Si no se usa el agua caliente hace dos semanas o m;_s,abrir todos los Ilaves de
agua caliente para unos minutos antes de usar cualquier aparato electrodom_stico
conectado al sistema del agua. Eso permite quese escape el hidrogeno yes para
prevenir la posibilidad de dafio a la propiedad o dafio personal. Porque el hidrogeno es
inflamable, no fumar o usar fuego o aparato durante este proceso.
27
LEER TODA LA INFORMACION DE SEGURIDAD ANTES
DE USAR
[_ ADVERTENCIA
Para reducir e! riesgode incendio, choqueelectrico, odafio persona!en el usodel
aparato, hay que seguirlas precaucionesbasicas,Io que incluye Io siguiente:
Precauciones de Segurldad:
• Leer todas las instrucciones antes de usar el aparato.
• Usar este aparato s61o por la utilidad descrilo el este MANUAL de USO y
MANTENIMIENTO.
• Esnecesaria que se instale y se coloque esta maquina y que conforme alas
INSTRUCCIONES PARA INSTALAR antes de usarla. Si le falta esta hoja de
INSTRUCCIONES PARA INSTALAR, Ilamar sin pagar a 888 9FNP USA (888
936 7872) (en EEUU) o directamente a 1 877 744 7400 (en Canada).
• Conectar bien con tierra para conformar a todos los c6digos rectores y
regulaciones. Seguir las detalles en las INSTRUCCIONES PARA INSTALAR.
• No instalar o guardar la lavadora en un lugar con las temperaturas bajo cero o un
lugar con exposici6n al tiempo.
• Conectar a un fuente de electricidad adecuado, protegido y de bien fuerza para
evitar la sobrecarga de electricidad.
• Conectar con el suminlstro adecuado de agua seg_n las INSTRUCCIONES PARA
INSTALAR.
• Apagar las canillas de agua cuando no est_ usando la lavadora para aliviar la
presi6n en las mangueras y las v_lvulas y para mlnlmizar fugas si se rompe una
manguera o v,_lvula.
• No arreglar o reemplazar ninguna parte del aparato ni intentar mantenimiento a
menos que sea recomendado en este MANUAL de USO y MANTENIMIENTO o
en instrucciones publicadas de arreglos que usted entienda y que tenga las
habilidades para Ilevar al cabo.
• AI desconectar el aparato, sacar el enchufe por el enchufe y no el cable.
• Asegurar que el cable est;_bien situado para que nadie Io pise, se caiga o Io ponga
bajo estr_s o dafio.
• Guardar todos los detergentes (cloro, suavizador etc.) fuera del alcance de nifios,
preferiblemente bajo Ilave. Observar todas las advertencias de los envases para
evitar dafio personal.
28
• No manosear los controles.
• Mantener llbre de artfculos inflamables, como hilas, papel, trapos, quimicas etc., la
._rea cerca y debajo el aparato.
• Mantener limpio y seco el suelo cerca del aparato para reducir la poslbilidad de
resbalarse.
• No poner las manos adentro de la maquina sl el agitador o canasta mueve.
• Antes de cargar, descargar o agregar ropa, apretar START/PAUSE y esperar hasta
que la maquina pare totalmente antes de abrir la tapa.
• Esnecesar]o supervlsar bien ni_os si se usa este aparato cerca de ellos. No permitlr
jugar los ni_os adentro o con este aparalo o cualquier aparato botado.
• Botar culdadosamente aparatos no queridos y articulos de empaque. Antes de botar
una lavadora o sacar la de servicio quitar la tapa.
• No dejar abierla la tapa durante el ciclo. Eso inhibe la acci6n de Ilenar y
centrlfugar y implda que termine el ciclo. Para empezar otra vez, cerrar la tapa y
apretar START/PAUSE.
• No lavar ni secar ropa lavada, remojada o manchada con una sustancla inflamable o
explosiva (ej. Cera, acelte, plntura, gasolina, solventes de limpleza en seco,
keroseno etc.) que puedan encenderse o explolar. No agregar estas sustancias al
agua para lavar. No usar estas sustancias cerca la lavadora y/o secadora mientras
funcionan porque tienen vapores que puedan encenderse o explotar.
• El proceso de lavar puede reducir la retardada de fuego de prendas. Para evitar tal
resultado, seguir a la pie de la letra las instrucclones de cuidado de la fabricante.
• No mezclar cloro con amonio o _cidos como vinagre y/o quitaherrumbre. Mezclar
puede producir un vapor t6xico que resulte en muerte.
• No subir o parar en la parte superior o la tapa de la lavadora.
• No lavar art_culos de fibra de vidrlo en la lavadora. Las fibras restantes pueden
adherir a ropa durante los slguientes usos de la lavadora y pueden resultar en
picaz6n de piel.
• Desenchufar este aparato o desconcectar el panal de dlstribuci6n domestica (sacar el
plomo fusible o apagar el rompecircuitos) antes de hacer cualquler mantenimlento
o limpieza para minimizar la poslbilldad de un choque el_ctrlco.
• IMPORTANTE: A pretar el bot6n POWER, NO desconecta el aparato del fuente
de electricidad aunque todas las luces est_n apagadas.
• No hacer funclonar este aparto si tiene averia, no funciona bien, no est_ completo
o le faltan piezas o que las piezas est_n rotas, incluso el enchufe y el cable.
• No hacer funcionar este aparato si no la han inslalado ¢orrectamente la tapa.
• Si se usa un cable de extensi6n o una salida el_ctrlca y prol_til (ej. Caja de m_ltiple
salldas), asegurar que se pone en un lugar donde no va a tener contacto con agua
nl humedad.
GUARDAR BIEN ESTAS INSTRUCCIONES
29
LURE ATTENTIVEMENT TOUTES LES DIRECTIVES DE
SECURITE AVANT L' UTILISATION DU LAVE LINGE
Dans la plupart des foyers le lave linge est situ_ prosd'un chauffe-eau (gaz ou
_lectrlque) ou d'un s_chelinge.
ATrENTION
Pour votre s_curit_ et afin d'_vlter une explosion, des dommages immobiliers et un
risque de blessures ou de mort suivez altentivement les instructions de ce manuel.
Ne conservezpasde produitsinflammablestelsque gaz, essence,etc. _ proxlmit_ de
votre lave lingeou d'un appareil de m_me sorte.
L'installatiun ou la rdparatlon de votre lave linge doivent _tre effectudes par une
personne qualifi(_e(plombier, r_parateur en _lectrom_nager, etc).
Si vous sentez une odeur de gaz :
1. N'allumez pas votre lave linge.
2. Ne touchez pas I'interrupteur _leclrique, n'utilisez pas le t_l_phone de votre domicile.
3. Evacuez le domicile de tous ses occupants.
4. Appelez imm_dlatement votre compagnie de gaz depuis le domicile de votre voisin
ou d'une cabine t_l_phonlque et suivez ces instructions.
5. Si vous ne pouvez pas jolndre votre compagnle de gaz. appelez les pompiers.
SECURITE POUR CHAUFFE-EAU
Un chauffe-eau n'ayant pas fonctlonnd pendant deux semalnes ou plus, peut, dans
certaines circonstances, produire de I'hydrog_ne.
L'HYDROGENE EST UN GAZ EXPLOSIF
Avant d'utillser tout apparell connect_ au chauffe-eau et si votre chauffe-eau n'a pas
fonctlonn_ pendant deux semaines ou plus, afin d'_viter tous risques de blessures,
ouvrez le robinet d'eau chaude et laissez couler I'eau pendant plusieurs minutes pour
laisser I'hydrog_ne s'_chapper. Pendant cette op_ration, n'utilisez aucun apparell
_lectrique, ne fumez pas, ne provoquez aucune flamme.
30
LIRE ATTENTIVEMENT TOUTES LES DIRECTIVES DE
SECURITE
AVANT L'UTILISATION DU LAVE LINGE
Pour eviter tout risque d'incendie, d'61ectrocutnon ou de blessure lots de I'utilisatio.
de Votre lave nge, su vez atlent vement es recommandat ons su vantes :
RECOMMANDATIONS DE SECURITE
• Lisez attentivement toutes les instructions avant I'utillsation du lave linge.
• Le lave linge dolt _tre install_ suivant les instructions de recommandations et dans
un endroit appropri_ avant utilisation. Si vous n'avez par re_u le manuel
d'instructJons avec votre lave llnge, vous pourrez vous en procurer un en appelant
un num_ro vert aux USA : 888 9FNP USA (888 936 7872) ou directement au
Canada, 1 8777 744 7400.
• Assurez vous que la prise de terre est conforme aux normes de s_curit_.
• Ne pas installer le lave linge dans un endroit ofJ la temperature peut descendre en
dessous de z_ro degr_ Celsius (0 ° C) ou _tre expos_ au cllmat ext_rleur.
• Branchez le lave linge sur une prise aux normes de s_curit_ et pouvant supporter la
tension g_n_r_e par la machine afin d'_viter une surcharge _lectrique.
• Assurez vous que la plomberle et le drainage sont ad_quates et respectez la notice
d'installation.
• Arr_tez ie robinet d'arriv_e d'eau afin d'all_ger la presslon sur les tuyaux pour
minimlser les risques de fuites et de ruptures de la tuyauterie ou de valves.
• Ne pas remplacer ou r_parer de pi_ces sl vous n'_tes pas qualifi_.
• Lorsque vous d_branchez votre lave iinge, d_branchez le en tirant sur la prise en
non pas sur le cordon de fa_on _ _viter _ ]a prise d'etre endommag_e.
• Assurez vous que le cordon est plac_ de manikre _ ce que I'on ne puisse pas
marcher dessus ou tr_bucher avec0 ce qui pourrait I'endommager.
• Conservez tout produit de lavage (lesslve, assouplissant, javel) hors de ]a port_e des
enfants et si possible dans un endrolt ferm_ _ clef. Soyez attentlf aux instructions
sur I'emballage pour _viter les risques de blessures.
31
• Ne pas jouer avec les boutons de contrSle.
• Evitez I'accumu]ation de papiers, de chiffons, de produits chimiques, de poussi_res
de v_tements, etc.. autour et sous votre lave linge.
• Pour rdduire les posslbilitds de ddraper, garder la surface du sol autour de votre lave
linge, propre et s_che.
• Ne pas toucher au tambour ou _ I'agitateur Iorsque le lave linge est en marche.
• Avant de mettre, sortlr ou rajouter du linge dans votre lave linge, appuyer sur le
START/PAUSE • et attendez I'arr_t de votre machine avant d'ouvrir le couvercle.
• Soyez tr_s vigilant si votre lave llnge est utilisd par des enfants ou _ c6td d'enfants.
Ne laisser pas d'enfants jouer dans ou avec votre lave linge ou tout autre lave llnge
m_me s'il est d_montd.
• Si vous _tes amend _ jeter votre ancienne machine, des pi_ces ddmontdes ou
I'emballage, dlsposez les proprement. Par mesure de s_curltd enlevez le couvercle
de toute machine n'dtant pas en dtat de fonctionner.
• Lorsque votre lave linge est en cycle de lavage, ne laisser pas le couvercle ouvert. Le
remplissage de I'eau et I'actlon de lavage seront alors arr_tdes. Pour reddmarrer
votre machine appuyer sur le bouton • START/PAUSE _.
• Ne pas laver de v_tements ayant _td prdcddemment laves, lachds, trempds dans des
produits chimiques ou combustibles (cire, peinture, essence, kdrosdne, dissolvant.
produits de lavage _ sec, etc.). La machine pourralt s'enflammer ou exploser.
N'ajouter aucun des produits visds cl-dessus _ I'eau de lavage.
N'utiliser aucun de ces prodults autour du lave linge Iorsque celui-ci est en marche
car les _manations pourraient provoquer I'inflammatlon ou I'explosion du lave linge.
• L'effet de lavage peut r_duire la rdsistance au feu de certains v_tements. De mani_re
rdduire cet effet suivez attentlvement les recommandations du fabricant.
• Ne pas mdlanger d'eau de javel avec de I'amoniaque ou de produit acide tel que le
vinaigre ou ddcapant pour la rouille. Le mdlange de ces produits provoque des gaz
toxiques qui pourraient causer la mort.
• Ne pas monter sur le couvercle du lave linge.
• Ne pas laver d'articles contenant de la fibre de verre car certaines particu]es
pourraient rester dans la machine et se mdlanger _ vos v_tements Iors des prochalns
lavages ce qui pourrait provoquer des irritations de la peau.
• Si vous d_sirez nettoyer votre lave linge ou remplacer une piece, ddbrancher le ou
fermer le courant au compteur dlectrique afin d'dviter une dlectrocution.
• Notez bien : Eteindre la machine en appuyant sur le bouton • POWER • ne coupe
pas I'arriw_e de courant dlectrique dans la machine m_me si les lumi_res s'_teignent,
• Ne pas utillser votre lave linge si celui-ci est endommagd, partiellement ddmontd,
ayant des pi_ces ddfectueuses ou manquantes ou en dtat de dysfonctionnement,
m_me en cas de probl_me de prise dlectrique ou de cordon.
• Ne pas mettre en marche votre lave ]inge si le couvercle n'a pas dtd correctement
placd.
• Si vous utilisez une rallonge dlectrlque ou une double prise, assurez vous que ces
derni_res ne sont pas en contact avec de I'eau ou de I'humidit_.
GARDER CES INSTRUCTIONS
32
FULL TWO-YEAR WARRANTY
For two years from the date of original purchase, we will provide, free of charge, parts and
service labor in your home to repair or replace any part of the washer that fails because of
a manufacturing defect.
el• o iIe iI o o • o t el o e o ii e o iiiI o eoo o • • o o e go o • B • o e o o • m • • o o e, • oo o o o e, • • • o o oo •
This warranty is extended to the original purchaser and any succeeding owner for products
purchased for ordinary home use in the 48 mainland states, Hawaii and Washington. D.C.
In Alaska the warranty is the same except that it is LIMITED because you must pay to ship the
product to the service shop or for the service technician's travel costs to your home.
All warranty will be provided by a Fisher & Paykel Authorized Service Agent during normal
working hours.
Should your appliance need service, during the warranty period or beyond, call
in USA TOLL FREE 888 9FNP USA (888 936 7872)
in CANADA DIRECT 1877 744 7400
• Service trips to your home to teach you how to use the product or change the set-up of
the product.
Read your USE & CARE book. If you then have any questions about operating the
product, please contact your dealer or call:
in USA TOLL FREE800 863 5394 in CANADA DIRECT 1877 744. 7400
• Improper installation.
If you have an installation problem, contact your dealer or installer. You are responsible
for providing adequate electrical, exhausting and other connection facilities.
• Replacement of house fuses or resetting of circuit breakers.
• Failure of the product if it is misused, or used for other than the intended purpose or
used commercially.
• Damage to product caused by accident, fire, floods or Acts of God.
• Correction of unauthorized repairs.
• Normal recommended maintenance as set out in the products USE & CARE book.
I WARRANTOR IS NOT RESPONSIBLE FOR CONSEQUENTIAL DAMAGES I
@
Some states do not allow the exclusion or limitation of incidental or consequential
damages, so the above limitation or exclusion may not apply to you. This warranty gives
you specific legal rights, and you may also have other rights which vary from state to state.
To know what your legal rights are in your state, consult your local or state consumer
affairs office or your state's Attorney General.
Warrantor: Fisher & Paykel Appliances Inc.
If further help is needed concerning this warranty write:
Fisher & Paykel Appliances Inc., 27 Hubble, Irvlne, CA 92618.

GYST®PYr
t Nre FN_s Eirt h_gAN/rkEel Aid_F R& NhAdrGAl_l_Ad_oAuRfurc GL
giAEaAmEiin_O: :r tS YYrbbbrxt ,k rcG L rvbbbrx,wSbS(3_2
_uPEu EdErgiAEaAmEii_SYPf Ib55r544r5488
Nrs u REsRFarR&NFo&rF Nt" AZrahRA
III 2h_.ANgEI Ai2s n
GYST_YrLkS YGii-Y, fY
k FNs uuE RNAEoAuI_rEFR hie rtl_&ANy nkEel AiriArgiFargNardArs&Amp Fa EF
2c 2s n g a,_dAmFn N aEuarNEParaFIpEuRbbbrxt, krc O. rvbbbrx,wSbS(3_2F
PEuE dE s n gaA mdhl'_sRAnAuRdArlb55r544r5488
T Farg FpAnToEi_ AuPrs n n Fuh FANEp_ru FargEhI_RN_AR- riEd_FPpEuRA
II I _a&Al_lEel Ai2s n
GYST®F_)
kENEraF__oAuRAd.FR I_l_Ed rdArGA_lsh n sEirdArt I_&AN7 rkEel Ai
Auri arYYccriiEnArG_rkL LSrErbbbrxt, krcGLrvbbbrx, v,r5b5C_
YurP EuEd riiEn A_Ih_IAREn_RArEirb55r544r5488
rs uREs_l_ arEl_Ep ardAruFAal_lrah_,hrAurAirlA Z
II I _ha&Al_lEel Ai2s n
Copyright © Fisher & Paykel2001 Part No. 420182
Printed In New Zealand