Loading ...
Loading ...
Loading ...
20 RS5500 / RS7000E PowerDial Series Portable Generators
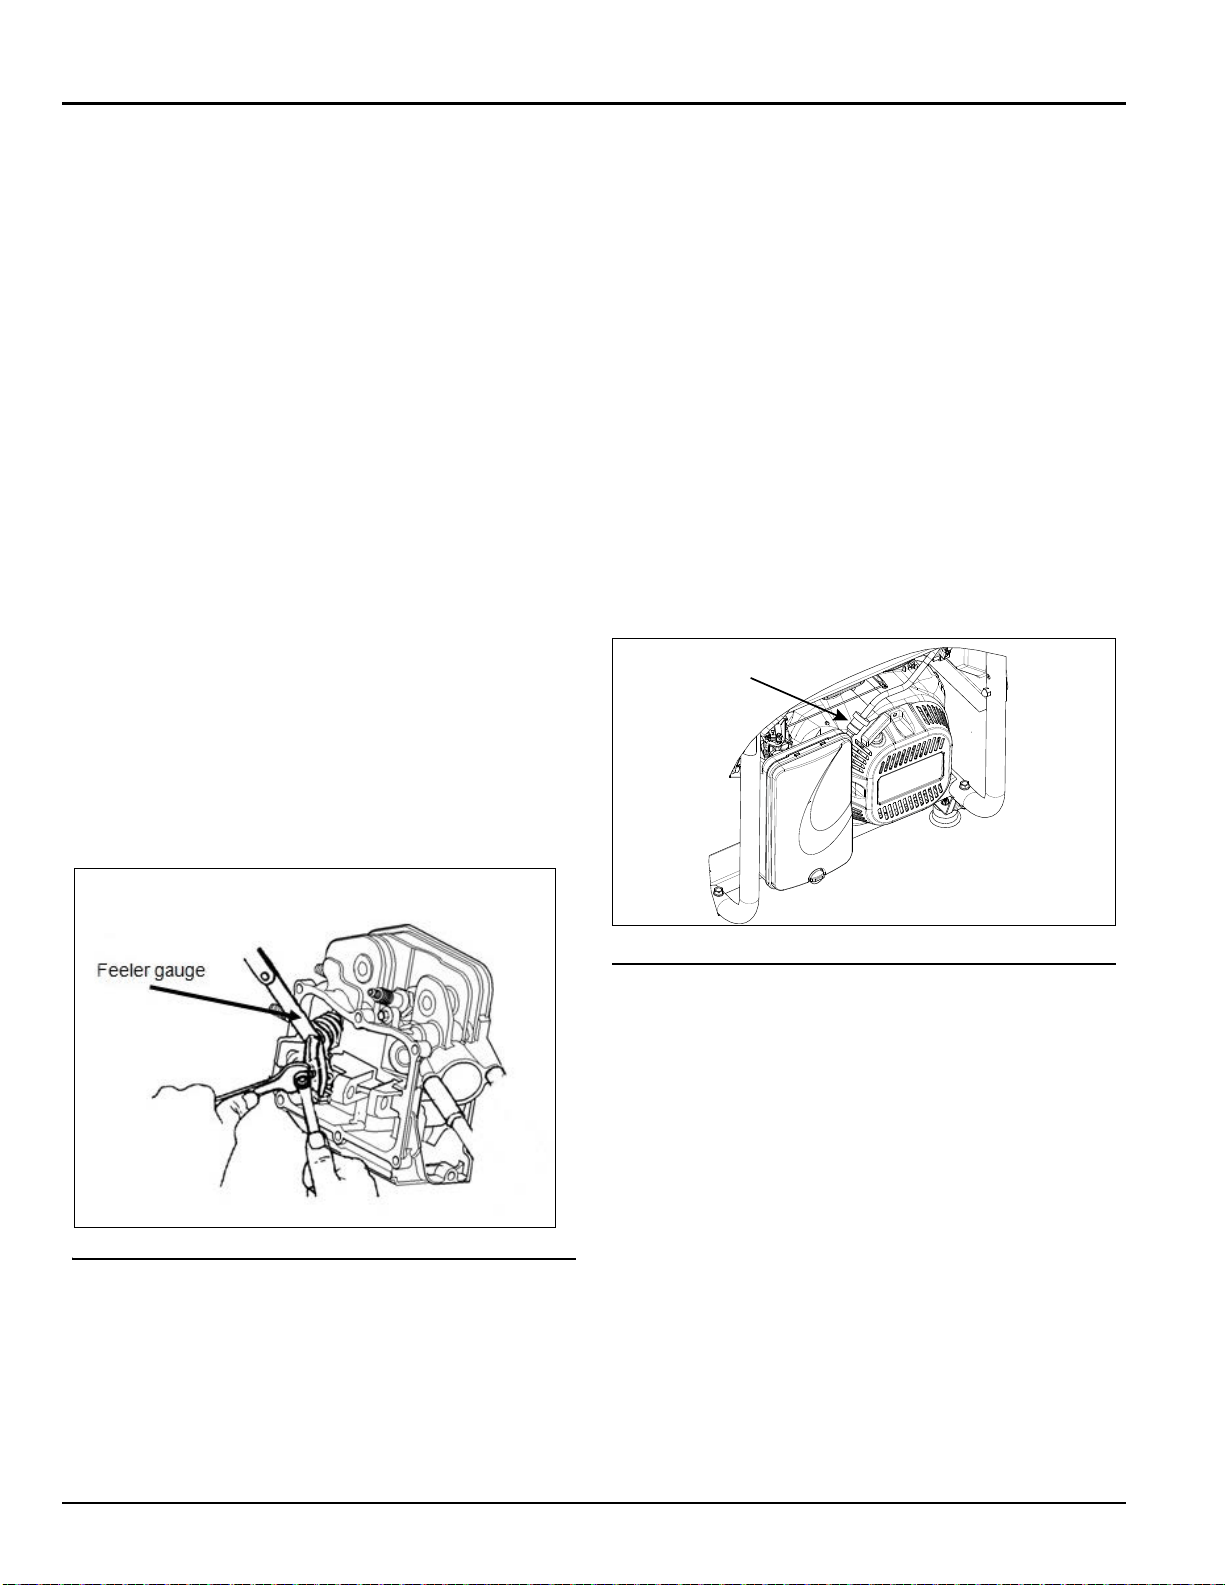
5. Insert a 0.006 in (0.15 mm) feeler gauge, for intake
clearance, between the intake rocker arm and valve
stem. Insert a 0.008 in (0.20 mm) feeler gauge, for
exhaust clearance, between the exhaust rocker arm
and valve stem. Correct clearance is when a slight
drag is felt when sliding the gauge back and forth. If
the clearance is either excessively loose or tight the
rocker arms will need adjusting.
To adjust valve clearance:
1. Hold the rocker arm pivot with a wrench and loosen
the pivot lock nut (Figure 4-6).
NOTE:
The rocker arm jam nut must be held in place as the
pivot ball stud is turned.
2. Loosen the rocker arm pivot and turn the rocker arm
pivot to obtain the specified valve clearance. The
desired clearance for intake and exhaust valves is
the same.
3. Hold the rocker pivot with a wrench and tighten the
lock nut to 2.25 - 3.15 ft/lbs (10 - 14 Nm).
4. Install new valve cover gasket.
NOTE:
Start all six screws before tightening or it will not be
possible to get all the screws in place.
5. Re-attach the valve cover. Torque fasteners to 20-48
in/lbs / 2.3-5.4 Nm. Torque fasteners in a cross pat-
tern.
Figure 4-6. Valve Clearance Adjustment
6. Re-attach the spark plug boot to the spark plug.
4.3.7 — Fuel Filter Replacement
The fuel filter replacement should take place every 500
hours of operation and/or annually (Figure 4-7).
1. Turn the PowerDial to the STOP position. Allow the
engine to cool..
2. Using a pliers, squeeze the clamp and slide the
clamp away from the fuel filter fittings and remove
the hose from fuel valve fitting. Clamps can be
reused.
3. Remove the short hose from the fuel filter. Then
remove the filter from the longer hose.
4. Place the new filter on the longer hose. The larger
end of the filter (with the red dot) must face towards
the fuel valve. Position the clamp on the filter fitting.
5. Place the short length of hose on the filter. Then the
other end on the fuel valve.
6. Place both clamps back onto the fittings of the filter
and fuel valve.
Figure 4-7. Fuel Filter Location
4.3.8 — Battery Charging (7.0 kW only)
The charging port is protected by a 1.50 Amp replaceable
in-line fuse. If the charger is not recharging the battery,
check the fuse. Replacement fuses can be obtained at
your dealer.
1. The battery charger fuse is located behind the control
panel as shown in Figure 4-8.
FUEL FILTER
FUEL FILTER
Loading ...
Loading ...
Loading ...