Loading ...
Loading ...
Loading ...
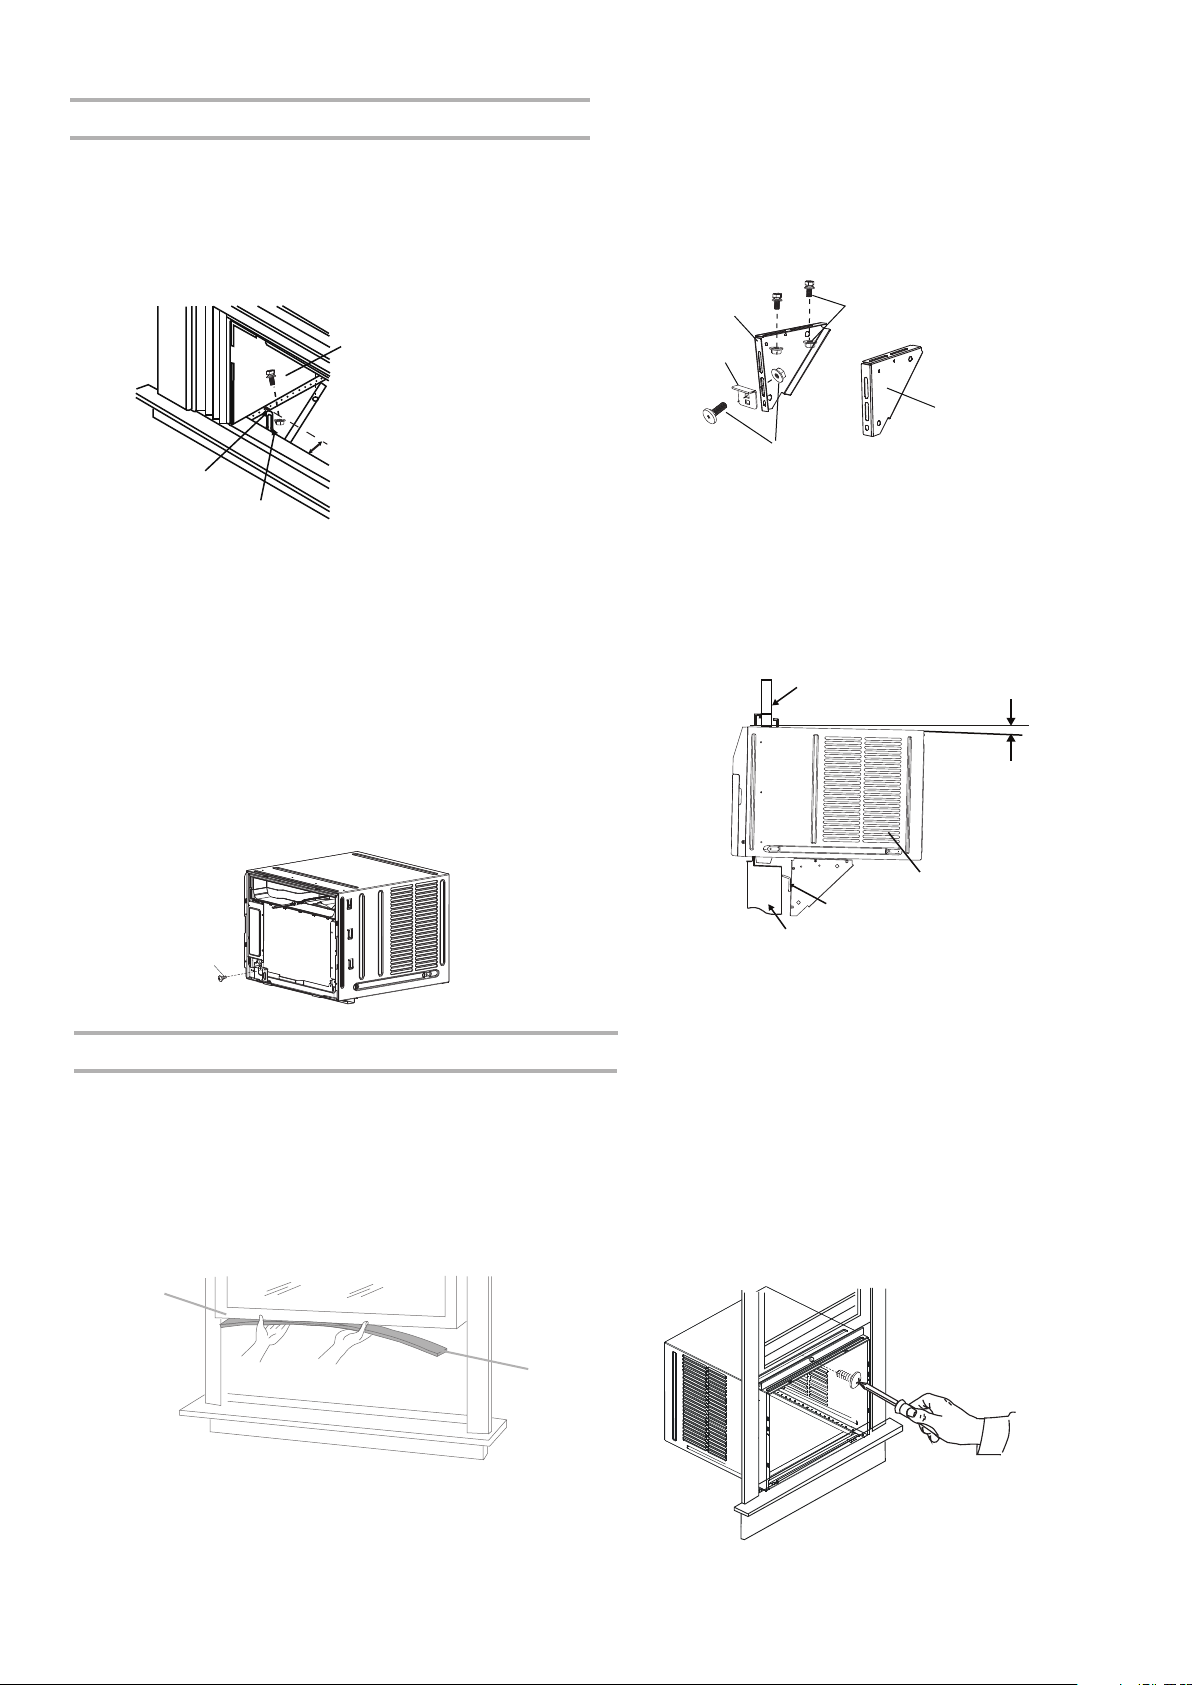
Install Support Bracket
3.
Insert 1/2" long bolts through appropriate holes in
cabinet bottom given the sill width distance. Thread
the bolts into the slots of the support brackets. Tighten
lock washer nuts onto bolts.
1. Hold each support bracket flush against outside
of sill and tight to bottom of cabinet. Mark brackets
at top level of sill. Mark cabinet bottom at distance
of sill width. Remove support brackets.
MARK
MARK
" Long Bolt
and Locknut (4)
1⁄2
2. Attach sill angle brackets to support brackets at
marked positions with flat head bolts and nuts.
Hand tighten only at this point.
RIGHT
LEFT
Angle Brackets
" Long Flat Head
Bolt and Locknut
3⁄4
" Long Bolt
and Locknut
1⁄2
4.
Adjust height of sill angle bracket so that bracket
rests securely on edge of sill, and so that cabinet
has the correct downward tilt for proper water
drainage. Tighten nuts securely.
3°
This lock frame is only provide for 12K
NOTE:
Extend Window Filler Panels and attach to top angle rail
1. Carefully raise window to expose filler panel locking screws on top angle rail. Loosen screws so filler
panels slide easily.
2. Close window behind top angle rail.
3. Attach the top angle rail to window frame: Use a drill bit to drill one hole through the hole in the
middle of top angle rail into the window frame, and drive one 3/4" locking screw through
the hole in the middle of top angle rail into the window frame as shown.
Si
d
e
L
ou
ve
r
s
Wi
ndo
w
Sa
s
h
Si
l
l A
n
g
le B
racket
W
ind
o
w
S
il
l
about 3°
8
1/4"screws
A. Lower window sash
B Adhesive seal.
A
B
5 Place the frame lock between the base and the
sill with 1/4" (6,5mm) screw as shown
. cabinet
Loading ...
Loading ...
Loading ...