Loading ...
Loading ...
Loading ...
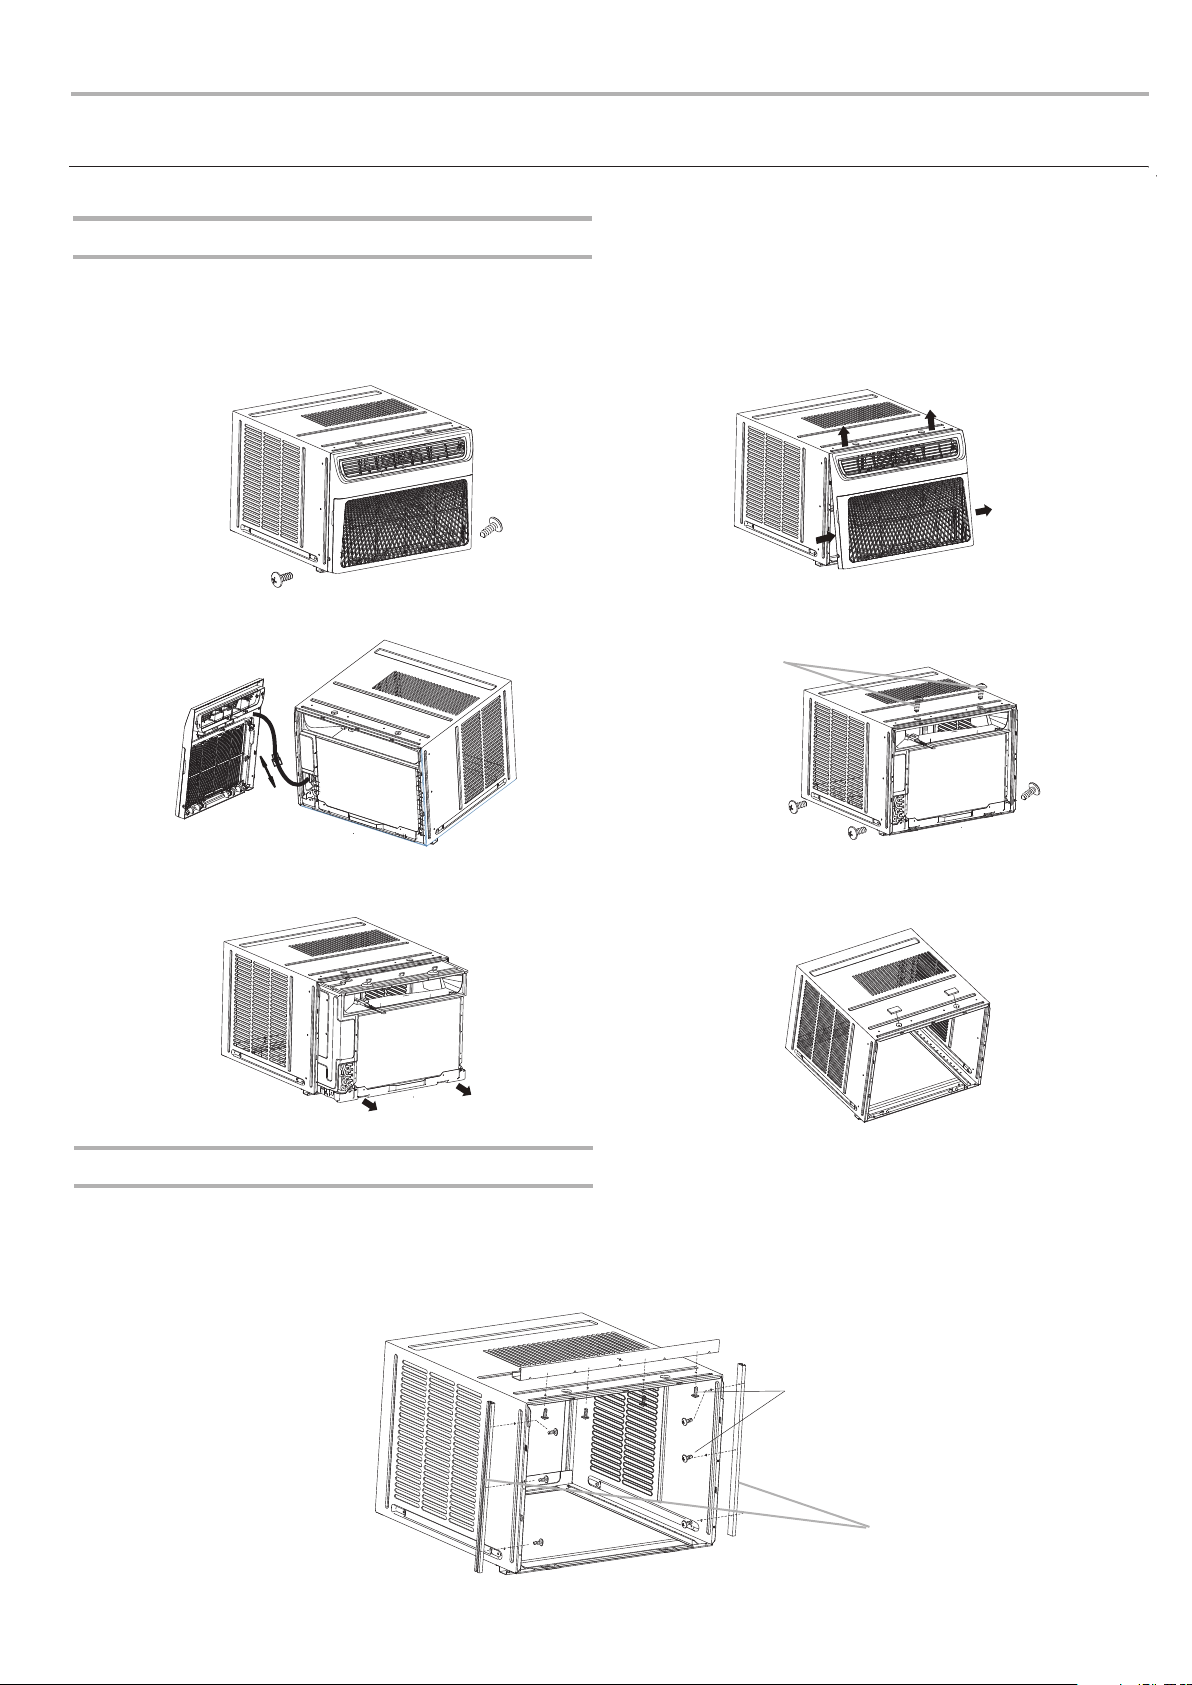
1、Locate the two Front Panel screws and remove.
These screws will be needed to re-install the Front
Panel later.
2、Push metal cabinet side inward to release plastic tabs
on each side of Front Panel.
3、Remove Front Panel from unit.
4、Remove shipping screws from top of unit and also on
both sides by the base if installed.
5、carefully remove the air conditioner from cabinet.
Install Top Angle Rail and Side Retainers
6、Add two foam inserts to holes in top of cabinet where
shipping screws were removed from.
1. Remove adhesive strip coating from foam gasket.Attach adhesive side of gasket to bottom of top angle rail.
Insert 4 screws from inside of cabinet and secure to top angle rail.
2. From inside of cabinet insert 3 screws to attach each side baffle as shown. Attach side baffles
with flat side against cabinet and angled edge toward rear of cabinet.
Remove Air Conditioner from Cabinet
NOTE: Remove any packaging material from cabinet exterior.
6
INSTALLATION INSTRUCTIONS
Prepare Air Conditioner for Installation
12K model do not need
to attach the two screws
1/4" screws
12K model do not need
to attach the two sbaffle
Loading ...
Loading ...
Loading ...