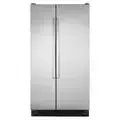
User Manual Kenmore 10641563801 refrigerator
TABLE OF CONTENTS
- KENMORE APPLIANCE WARRANTY
- REFRIGERATOR SAFETY
- Proper Disposal of Your Old Refrigerator
- INSTALLATION INSTRUCTIONS
- Unpack the Refrigerator
- Location Requirements
- Electrical Requirements
- Base Grille
- Refrigerator Doors
- Adjust the Doors
- Connect Water Supply
- Normal Sounds
- REFRIGERATOR USE
- Ensuring Proper Air Circulation
- Using the Controls
- Convertible Drawer Temperature Control
- Crisper Humidity Control
- Chilled Door Bin
- Ice Maker and Storage Bin/Bucket
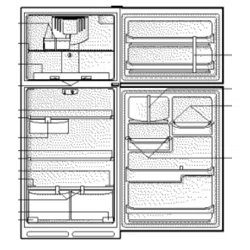
- REFRIGERATOR FEATURES
- Refrigerator Shelves
- Dell Bin
- Convertible Vegetable/Meat Drawer, Crisper and Covers
- Wine Rack
- Utility Bin
- FREEZER FEATURES
- Freezer Shelf
- Freezer Basket or Bin
- DOOR FEATURES
- Door Rails or Bins
- Door Bins
- REFRIGERATOR CARE
- Cleaning
- Changing the Light Bulbs
- Power Interruptions
- Vacation and Moving Care
- TROUBLESHOOTING
- Refrigerator Operation
- Temperature and Moisture
- PROTECTION AGREEMENTS
- ACCESSORI ES
- SERVICE NUMBERS
KENMORE APPLIANCE WARRANTY
ONE YEAR LIMITED WARRANTY
When installed, operated and maintained according to all instructions supplied with the product, if this appliance fails due to a defect in material or workmanship within one year from the date of purchase, call 1-800-4-MY-HOME ®to arrange for free repair.
If this appliance is used for other than private family purposes, this warranty applies for only 90 days from the date of purchase.
THIS WARRANTY COVERS ONLY DEFECTS IN MATERIAL AND WORKMANSHIP. SEARS WILL NOT PAY FOR:
- Expendable items that can wear out from normal use, including but not limited to filters, belts, light bulbs, and bags.
- A service technician to instruct the user in correct product installation, operation or maintenance.
- A service technician to clean or maintain this product.
- Damage to or failure of this product if it is not installed, operated or maintained according to all instructions supplied with the product.
- Damage to or failure of this product resulting from accident, abuse, misuse or use for other than its intended purpose.
- Damage to or failure of this product caused by the use of detergents, cleaners, chemicals or utensils other than those recommended in all instructions supplied with the product.
- Damage to or failure of parts or systems resulting from unauthorized modifications made to this product.
DISCLAIMER OF IMPLIED WARRANTIES; LIMITATION OF REMEDIES
Customer's sole and exclusive remedy under this limited warranty shall be product repair as provided herein. Implied warranties, including warranties of merchantability or fitness for a particular purpose, are limited to one year or the shortest period allowed by law. Sears shall not be liable for incidental or consequential damages. Some states and provinces do not allow the exclusion or limitation of incidental or consequential damages, or limitations on the duration of implied warranties of merchantability or fitness, so these exclusions or limitations may not apply to you.
This warranty applies only while this appliance is used in the United States and Canada.
This warranty gives you specific legal rights, and you may also have other rights which vary from state to state.
PRODUCT RECORD
In the space below, record your complete model number, serial number, and purchase date. You can find this information on the model and serial number label located on the product.
Have this information available to help you obtain assistance or service more quickly whenever you contact Sears concerning your appliance.
REFRIGERATOR SAFETY
Proper Disposal of Your Old Refrigerator
MPORTANT: Child entrapment and suffocation are not problems of the past. Junked or abandoned refrigerators are still dangerous - even if they will sit for "just a few days." If you are getting rid of your old refrigerator, please follow these instructions to help prevent accidents.
Before You Throw Away Your Old Refrigerator or Freezer
- Take off the doors.
- Leave the shelves in place so that children may not easily climb inside.
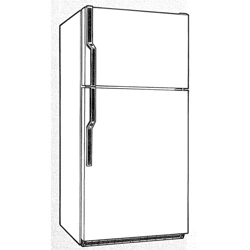
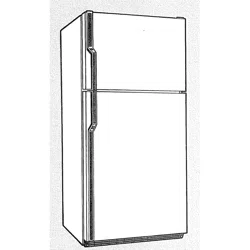
INSTALLATION INSTRUCTIONS
Remove the Packaging
- If the ice storaage bin is located on the door, remove the temporary shield from underneath the ice storage bin. See Ice Maker and Storage Bin."
- Remove tape and glue residue from surfaces before turning on the refrigerator. Rub a small amount of liquid dish soap over the adhesive with your fingers. Wipe with warm water and dry.
- Do not use sharp instruments, rubbing alcohol, flammable fluids, or abrasive cleaners to remove tape or glue. These products can damage the surface of your refrigerator. For more information see "Refrigerator Safety."
Clean Before Using
After you remove all of the packaging materials, clean the inside of your refrigerator before using it. See the cleaning instructions in "Refrigerator Care."
To ensure proper ventilation for your refrigerator, allow for 1/2" (1.25 cm) space on each side and at the top. When installing your refrigerator next to a fixed wall, leave 2" (5.08 cm) minimum on each side (depending on your model) to allow for the door to swing open. If your refrigerator has an ice maker, allow extra space at the back for the water line connections.
NOTE: It is recommended that you do not install the refrigerator near an oven, radiator, or other heat source. Do not install in a location where the temperature will fall below 55°F (13°C).
Recommended Grounding Method
A 115 Volt, 60 Hz., AC only 15- or 20-amp fused, grounded electrical supply is required. It is recommended that a separate circuit serving only your refrigerator be provided. Use an outlet that cannot be turned off by a switch. Do not use an extension cord.
NOTE: Before performing any type of installation, cleaning, or removing a light bulb, turn the control (Thermostat, Refrigerator or Freezer Control depending on the model) OFF and then disconnect the refrigerator from the electrical source. When you are finished, reconnect the refrigerator to the electrical source and reset the control (Thermostat, Refrigerator or Freezer Control depending on the model) to the desired setting
Remove the Base Grille:
1. Open both doors.
2. Place hands along the ends of the grille. Push in on the top of the base grille and pull up on the bottom.
NOTE: Be sure to refasten the Tech Sheet behind the base grille after cleaning.
Replace the Base Grille:
1. Open both doors.
2. Line up the grille support tabs with the metal clips. 3. Push the grille firmly to snap it into place.
Handle Removal (optional)
- Apply firm pressure with your hand on the face of trim, Slide top trim up and bottom trim down away from handle. Lift trim pieces off shoulder screws. See Graphic 1.
- Remove handle screws and handles.
- Move refrigerator into place, Replace handles as shown. See Graphic 1.
Door Removal
- Unplug refrigerator or disconnect power.
- Open both refrigerator doors. Remove the base grille by pulling up on the bottom outside corners. See Graphic 2.
- Close both doors and keep them closed until you are ready to lift them free from the cabinet,
- Remove top left hinge cover and screws as shown, See Graphic 3. Do not remove screw A.
- Carefully lift freezer door straight up off bottom hinge, See Graphic 4.
- Remove top right hinge cover and screws as shown. See Graphic 5, Do not remove screw A.
- Carefully lift refrigerator door straight up off bottom hinge. See Graphic 4.
- It may not be necessary to remove the bottom hinge to move the refrigerator through a doorway. Both bottom hinges have similar construction. Disassemble the hinges as shown, See Graphic 6. Do not remove screw A.
Door and Hinge Replacement
- Replace both bottom hinges, if removed, Tighten screws.
- Replace the freezer door by carefully lifting the door onto the bottom left hinge.
- Align and replace the top left hinge as shown. See Graphic 3. Tighten screws.
- Replace left hinge cover.
- Replace the refrigerator door by carefully lifting the door onto the bottom right hinge.
- Align and replace the top right hinge as shown. See Graphic 5. Tighten screws.
- Replace hinge cover.
- Plug into a grounded 3 prong outlet
Adiust The Doors
Door Closing
Your refrigerator has two front adjustable rollers -- one on the right and one on the left. If your refrigerator seems unsteady or if you want the doors to close more easily, adjust the refrigerator's tilt using the instructions below:
- Move the refrigerator into its final location.
- The two leveling screws are part of the front roller assemblies which are at the base of the refrigerator on either side. See Graphic 7.
- Use a hex-head wrench to adjust the leveling screws. Turn the leveling screw to the right to raise that side of the refrigerator or turn the leveling screw to the left to lower that side. It may take several turns of the leveling screws to adjust the tilt of the refrigerator. See Graphic 7. NOTE: Having someone push against the top of the refrigerator takes some weight off the leveling screws and rollers. This makes it easier to adjust the screws.
- Open both doors again and check to make sure that they close as easily as you like. If not, tilt the refrigerator slightly more to the rear by turning both leveling screws to the right. It may take several more turns, and you should turn both leveling screws the same amount.
- Replace the base grille. NOTE: Be sure to refasten the Tech Sheet behind the base grille.
Connect to Water Line
- Unplug refrigerator or disconnect power.
- Turn OFF main water supply. Turn ON nearest faucet long enough to clear line of water.
- Locate a 1/2"to 11/4'' (1.25 cm to 3.18 cm) vertical cold water pipe near the refrigerator.
- Determine the length of copper tubing you need. Measure from the connection on the lower left rear of refrigerator to the water pipe. Add 7 ft (2.1 m) to allow for cleaning. Use 1/4" (6.35 mm) O.D. (outside diameter) copper tubing. Be sure both ends of copper tubing are cut square.
- Using a cordless drill, drill a 1/4"hole in the cold water pipe you have selected.
- Fasten the shutoff valve to the cold water pipe with the pipe clamp. Be sure the outlet end is solidly in the 1/4"drilled hole in the water pipe and that the washer is under the pipe clamp. Tighten the packing nut. Tighten the pipe clamp screws carefully and evenly so washer makes a watertight seal. Do not overtighten or you may crush the copper tubing.
- Slip the compression sleeve and compression nut on the copper tubing as shown. Insert the end of the tubing into the outlet end squarely as far as it will go. Screw compression nut onto outlet end with adjustable wrench. Do not overtighten.
- Place the free end of the tubing in a container or sink, and turn ON the main water supply. Flush the tubing until water is clear. Turn OFF the shutoff valve on the water pipe. Coil the copper tubing.
Connect to Refrigerator
- Attach the copper tube to the valve inlet using a compression nut and sleeve as shown. Tighten the compression nut. Do not overtighten. Use the tube clamp on the back of the refrigerator to secure the tubing to the refrigerator as shown. This will help avoid damage to the tubing when the refrigerator is pushed back against the wall.
- Turn shutoff valve ON.
- Check for leaks. Tighten any connections (including connections at the valve) or nuts that leak.
- The ice maker is equipped with a built-in water strainer. If your water conditions require a second water strainer, install it in the 1/4"(6.35 mm) water line at either tube connection. Obtain a water strainer from your nearest appliance dealer.
- Plug in refrigerator or reconnect power.
REFRIGERATOR USE
In order to ensure proper temperatures, you need to permit air to flow between the two sections. Cold air enters the bottom of the freezer section and moves up. It then enters the refrigerator section through the top vent. Air then returns to the freezer as shown.
Do not block any airflow vents. If the vents are blocked, airflow will be obstructed and temperature and moisture problems may occur.
Adjusting Controls
Give the refrigerator time to cool down completely before adding food. It is best to wait 24 hours before you put food into the refrigerator. The settings indicated in the previous section should be correct for normal household refrigerator usage. The controls are set correctly when milk or juice is as cold as you like and when ice cream is firm.
Rotary Controls: Turn the control right (clockwise) to make the compartment colder. Turn the control left (counterclockwise) to make it less cold. To turn the cooling system off, turn the Refrigerator Control counterclockwise until it reaches the OFF position.
Rotary Controls: Turn the control right (clockwise) to make the compartment colder. Turn the control left (counterclockwise) to make it less cold. To turn the cooling system off, turn the Refrigerator Control counterclockwise until it reaches the OFF position.
If you need to adjust temperatures in the refrigerator or freezer, use the settings listed in the chart below as a guide. Wait at least 24 hours between adjustments.
REFRIGERATOR CARE
Both the refrigerator and freezer sections defrost automatically. However, clean both compartments about once a month to avoid build-up of odors. Wipe up spills immediately.
To Clean Your Refrigerator:
- Unplug refrigerator or disconnect power.
- Remove all removable parts from inside, such as shelves, crispers, etc.
- Hand wash, rinse, and dry removable parts and interior surfaces thoroughly. Use a clean sponge or soft cloth and a mild detergent in warm water.
- Determine whether your refrigerator exterior is painted metal, brushed aluminum or stainless steel and choose the appropriate cleaning method.
- There is no need for routine condenser cleaning in normal home operating environments. If the environment is particularly greasy or dusty, or there is significant pet traffic in the home, the condenser should be cleaned every 2 to 3 months to ensure maximum efficiency.
- Plug in refrigerator or reconnect power.
Dispenser Light (on some models)
Reach through the dispenser area to remove and replace light bulb.
Refrigerator Control Panel Light
Reach behind the refrigerator control panel to remove and replace light bulb.
Crisper Lights
- If necessary, remove the top crisper drawer to access the crisper light shield. Remove the light shield by lifting the ends out of the brackets as shown.
- Replace the light shield by inserting the ends into the brackets. If necessary, replace the top crisper drawer.
Upper Freezer Light (on some models)
Style 1
- Remove light shield by grasping the top center of the shield and pulling forward while turning it slightly to one side. If necessary, remove top crisper drawer to gain access to the crisper light shield.
- Replace the light shield by inserting the tabs on one end into the slotted holes in the refrigerator or freezer liner. Then, bend the shield at the center to insert the tabs on the other end.
Style 2
- Remove the light shield by squeezing the sides of the light shield in toward the center while pulling the shield forward as shown.
- Replace the light shield by fitting the tabs into the slotted holes in the freezer liner. Push in the shield until it snaps into place.
Lower Freezer Light (on some models)
Style I - Beneath Ice Bin
- Remove the light shield by grasping the sides and squeezing in toward the center. Once the side hooks of shield are free from the freezer lining, pull down the shield.
- Replace the light shield by squeezing the sides toward the center and inserting the side hooks into the slotted holes. Once the side hooks are in place, snap the front tab into the slotted hole.
Style 2 - Behind Freezer Basket
- Depending on your model, remove the top freezer basket or top freezer basket shelf. Remove light shield by removing the Phillips screw on the top of the shield. Gently rotate the shield until the left tab can be pulled from the freezer wall.
- Replace the light shield by inserting the left tab into the freezer wall. Align top tab with screw hole and replace screw.
If the power will be out for 24 hours or less, keep the door or doors closed (depending on your model) to help food stay cold and frozen.
If the power will be out for more than 24 hours, do one of the following:
- Remove all frozen food and store it in a frozen food locker.
- Place 2 Ibs (907 g) of dry ice in the freezer for every cubic foot (28L) of freezer space. This will keep the food frozen for 2 to days.
- If neither a food locker nor dry ice is available, consume or can perishable food at once.
Vacations
If You Choose to Leave the Refrigerator On While You're Away:.
1. Use up any perishables and freeze other items.
2. If your refrigerator has an automatic ice maker:
• Raise wire shutoff arm to OFF (up) position or move the switch to the OFF (right) setting.
• Shut off water supply to the ice maker.
3. Empty the ice bin.
If You Choose to Turn the Refrigerator Off Before You Leave:
1. Remove all food from the refrigerator.
2. If your refrigerator has an automatic ice maker:
• Turn off the water supply to the ice maker at least one day ahead of time.
• When the last load of ice drops, raise the wire shutoff arm to the OFF (up) position or move the switch to the OFF (right) setting.
3. Depending on the model, turn the Temperature Control or Refrigerator Control to OFR See "Using the Controls."
4. Clean refrigerator, wipe it, and dry well.
5. Tape rubber or wood blocks to the tops of both doors to prop them open far enough for air to get in. This stops odor and mold from building up.
Moving
When you are moving your refrigerator to a new home, follow these steps to prepare it for the move.
1. If your refrigerator has an automatic ice maker:
- Turn off the water supply to the ice maker at least one day ahead of time.
- Disconnect the water line from the back of the refrigerator.
- When the last load of ice drops, raise the wire shutoff arm to the OFF (up) position or move the switch to the OFF (right) setting.
2. Remove all food from the refrigerator and pack all frozen food in dry ice.
3. Empty the ice bin.
4. Depending on the model, turn the Temperature Control or Refrigerator Control to OFR See "Using the Controls."
5. Unplug refrigerator.
6. Empty water from the defrost pan.
7. Clean, wipe, and dry thoroughly.
8. Take out all removable parts, wrap them well, and tape them together so they don't shift and rattle during the move.
9. Depending on the model, raise the front of the refrigerator so it rolls more easily OR screw in the leveling legs so they don't scrape the floor. See "Adjust the Doors."
10. Tape the doors closed and tape the power cord to the back of the refrigerator.