Loading ...
Loading ...
Loading ...
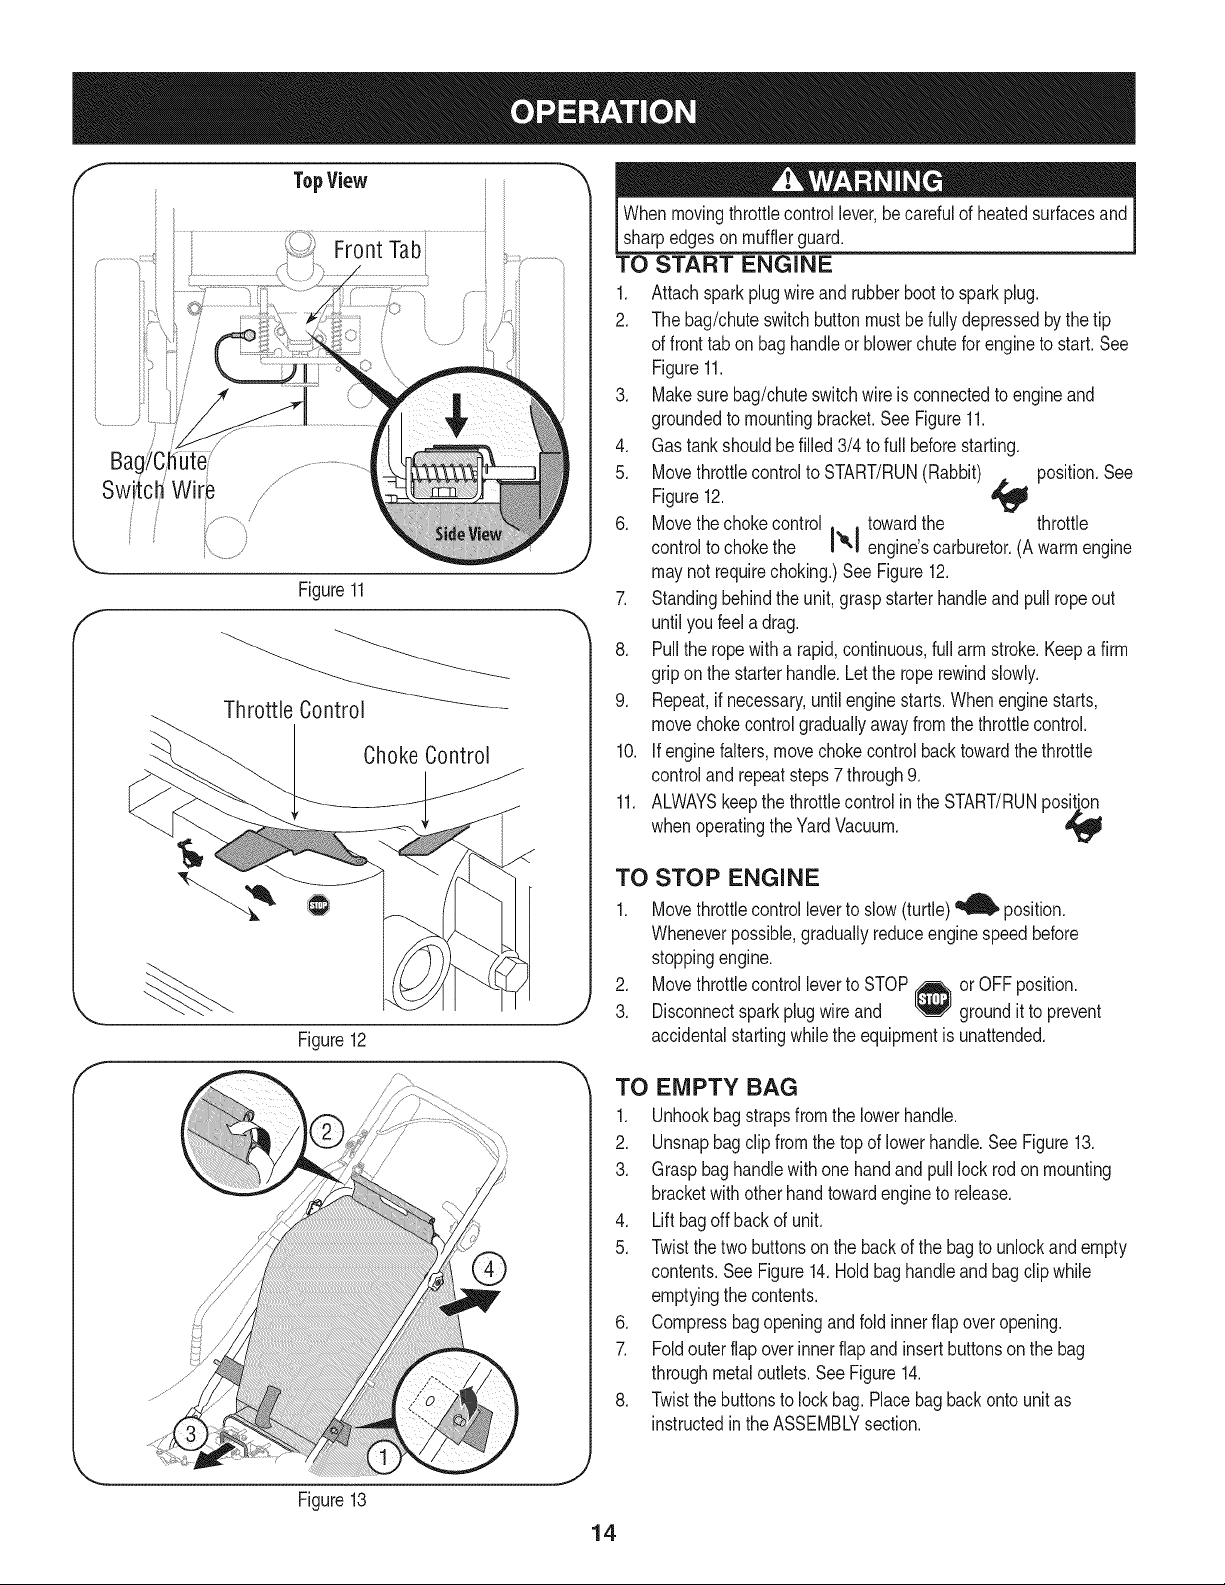
TopView
iiii_ FrontTab i i
BagYC_hutei/
Switch Wire /
/
/
Figure11
Choke Control
Figure12
f
;/
Whenmovingthrottlecontrollever,becarefulof heatedsurfacesand
sharpedgeson mufflerguard.
TO START ENGINE
1. Attachspark plugwire and rubberbootto sparkplug.
2. The bag/chuteswitch buttonmustbefullydepressedbythe tip
of fronttab on baghandleor blowerchutefor engineto start.See
Figure11.
3. Makesurebag/chuteswitchwire is connectedto engineand
groundedto mountingbracket.SeeFigure11.
4. Gas tank shouldbe filled3/4 to full beforestarting.
5. Movethrottlecontrolto START/RUN(Rabbit) position.See
Figure12. _lf
6. Movethechokecontrol towardthe throttle
controltochokethe I",1eng ne'scarburetor(Awarmengine
maynot requirechoking.)See Figure12.
7. Standingbehindthe unit, graspstarterhandleandpull ropeout
until youfeel adrag.
8. Pullthe ropewitha rapid,continuous,full arm stroke.Keepa firm
gripon the starterhandle.Letthe roperewindslowly.
9. Repeat,if necessary,untilenginestarts.Whenenginestarts,
movechokecontrolgraduallyawayfromthe throttlecontrol.
10. If enginefalters,movechoke controlbacktowardthe throttle
controland repeatsteps7 through9.
11. ALWAYSkeepthe throttlecontrolin the START/RUNposition
whenoperatingthe YardVacuum.
TO STOP ENGINE
1. Movethrottlecontrolleverto slow(turtle) _ position.
Wheneverpossible,graduallyreduceenginespeedbefore
stoppingengine.
2. Movethrottlecontrolleverto STOP or OFFposition.
3. Disconnectsparkplugwireand groundit to prevent
accidentalstartingwhilethe equipmentis unattended.
TO EMPTY BAG
1. Unhookbagstrapsfromthe lowerhandle.
2. Unsnapbagclip fromthetop of lowerhandle.See Figure13.
3. Graspbag handlewith one handandpulllock rodonmounting
bracketwith otherhandtowardengineto release.
4. Liftbagoffbackof unit.
5. Twistthe two buttonson the back of the bagto unlockandempty
contents.SeeFigure14.Holdbaghandleandbagclip while
emptyingthe contents.
6. Compressbagopeningand fold innerflap overopening.
7. Foldouter flapoverinnerflapand insertbuttonsonthe bag
throughmetaloutlets.SeeFigure14.
8. Twistthe buttonsto lock bag.Placebagbackonto unitas
instructedinthe ASSEMBLYsection.
Figure13
Loading ...
Loading ...
Loading ...