Loading ...
Loading ...
Loading ...
f
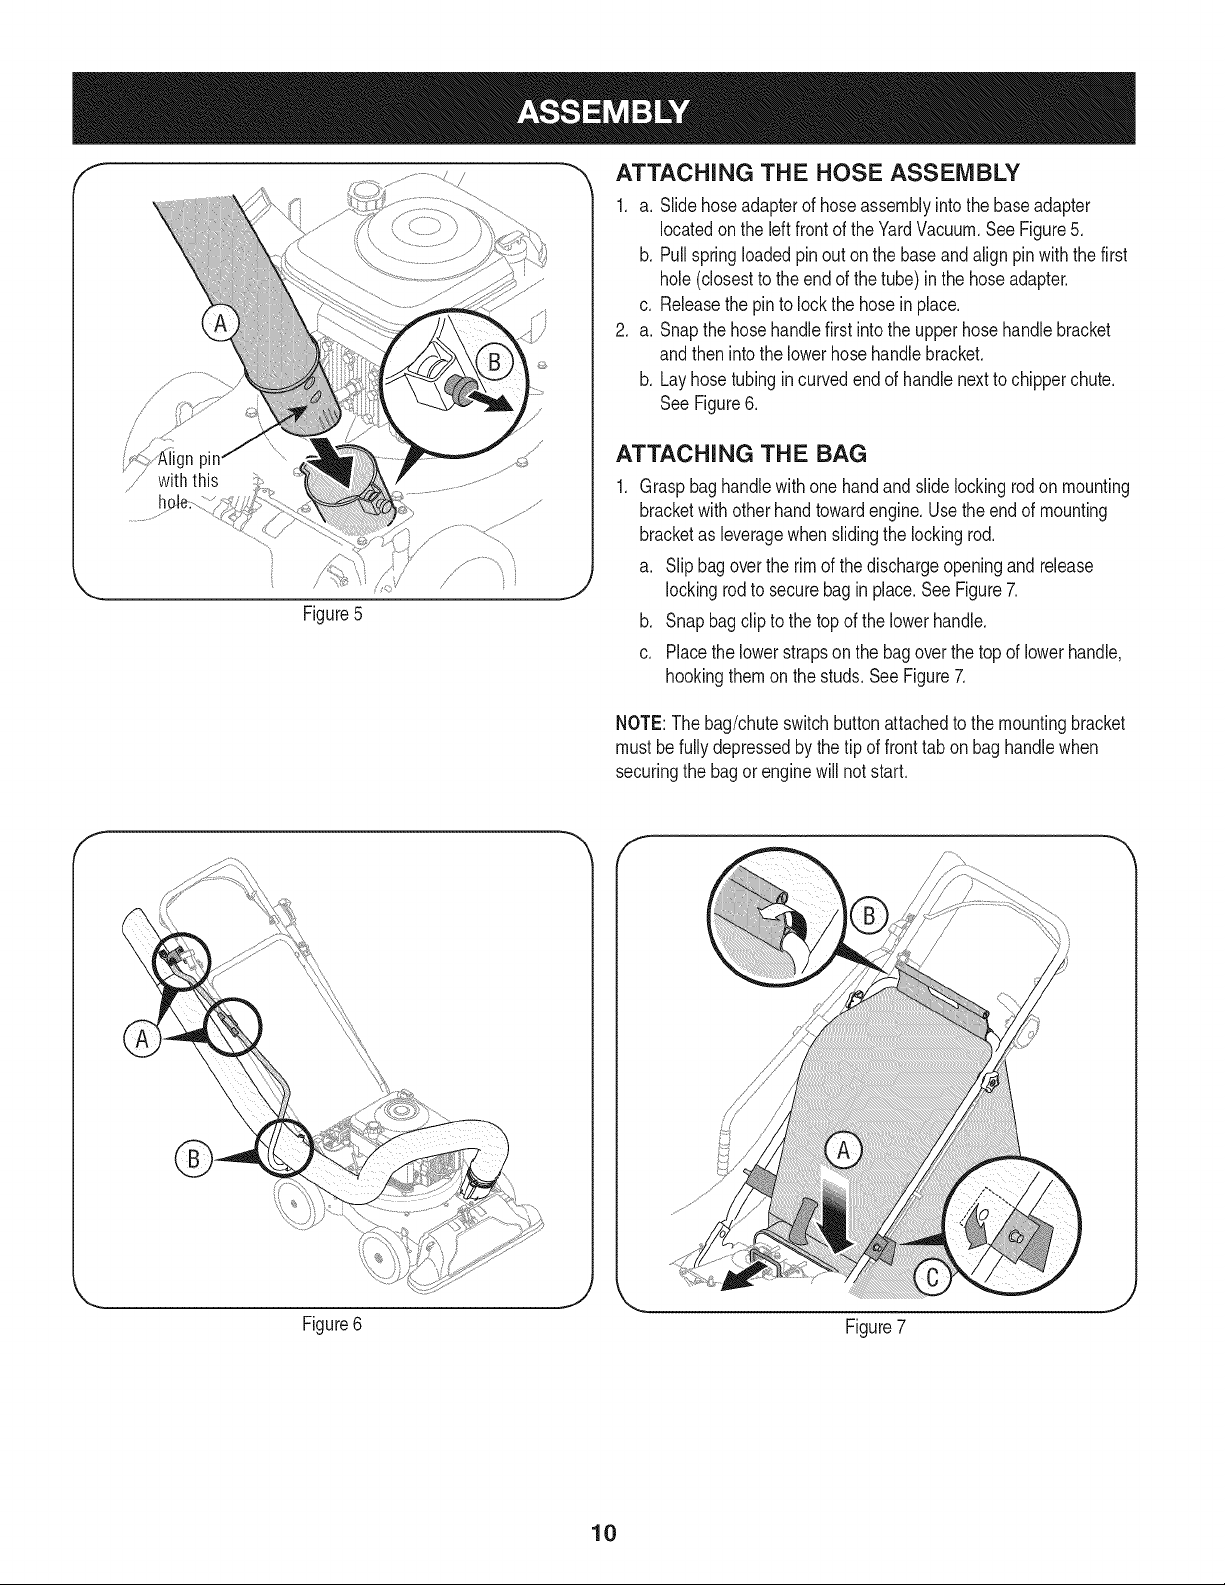
Figure5
_, ATTACHING THE HOSE ASSEMBLY
1. a. Slidehoseadapterof hoseassemblyintothe baseadapter
locatedon the left front of theYardVacuum.SeeFigure5.
b. Pullspringloadedpinout on the baseandalignpinwiththe first
hole(closestto the end of the tube) in the hoseadapter.
c. Releasethe pinto lockthe hosein place.
2. a. Snapthe hosehandlefirst intothe upperhose handlebracket
andthen intothe lowerhosehandlebracket.
b. Layhosetubingincurvedendof handlenextto chipperchute.
SeeFigure6.
ATTACHING THE BAG
Graspbaghandlewithonehandandslide lockingrodonmounting
bracketwith otherhandtowardengine.Usethe endof mounting
bracketas leveragewhenslidingthe lockingrod.
a. Slip bag overthe rim of the dischargeopeningandrelease
lockingrodto securebagin place.SeeFigure7.
b. Snap bag clipto the topof the lowerhandle.
c. Placethe lowerstrapson the bagoverthe topof lowerhandle,
hookingthemon the studs.SeeFigure7.
NOTE:The bag/chuteswitchbuttonattachedto the mountingbracket
must befullydepressedby thetip of fronttab on baghandlewhen
securingthe bagorenginewill not start.
Figure6
Figure7
10
Loading ...
Loading ...
Loading ...