Loading ...
Loading ...
Loading ...
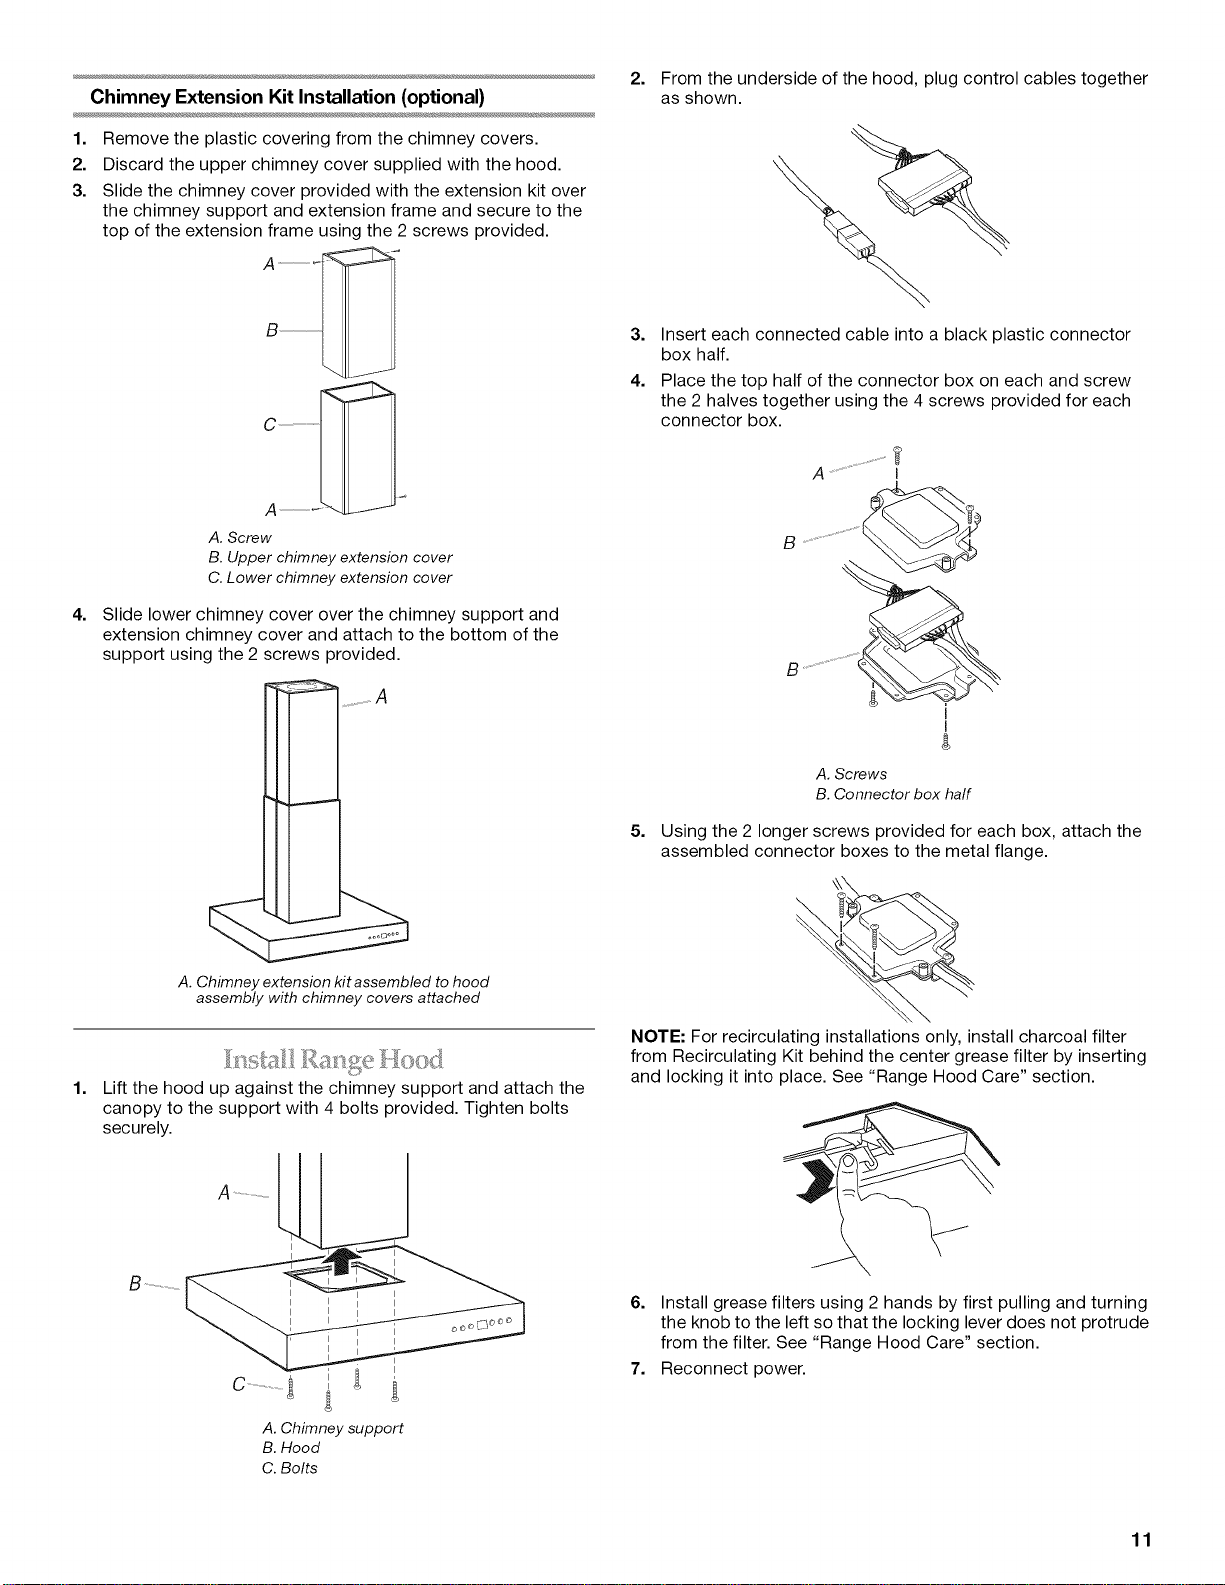
Chimney Extension Kit Installation (optional)
1. Remove the plastic covering from the chimney covers.
2. Discard the upper chimney cover supplied with the hood.
3. Slide the chimney cover provided with the extension kit over
the chimney support and extension frame and secure to the
top of the extension frame using the 2 screws provided.
A. Screw
B. Upper chimney extension cover
C. Lower chimney extension cover
4. Slide lower chimney cover over the chimney support and
extension chimney cover and attach to the bottom of the
support using the 2 screws provided.
A. Chimney extension kit assembled to hood
assembly with chimney coversattached
1=
Lift the hood up against the chimney support and attach the
canopy to the support with 4 bolts provided. Tighten bolts
securely.
2=
From the underside of the hood, plug control cables together
as shown.
3. Insert each connected cable into a black plastic connector
box half.
4. Place the top half of the connector box on each and screw
the 2 halves together using the 4 screws provided for each
connector box.
B
A. Screws
B. Connector box half
5. Using the 2 longer screws provided for each box, attach the
assembled connector boxes to the metal flange.
NOTE: For recirculating installations only, install charcoal filter
from Recirculating Kit behind the center grease filter by inserting
and locking it into place. See "Range Hood Care" section.
S ..............................
A.Chimneysupport
B.Hood
C.Bolts
6. Install grease filters using 2 hands by first pulling and turning
the knob to the left so that the locking lever does not protrude
from the filter. See "Range Hood Care" section.
7. Reconnect power.
11
Loading ...
Loading ...
Loading ...