Loading ...
Loading ...
Loading ...
- , _-# _,,_# _ _ • S m
_,;_,S_ _._,(_,h_,_i _,_,eV__,,_ove_
j •
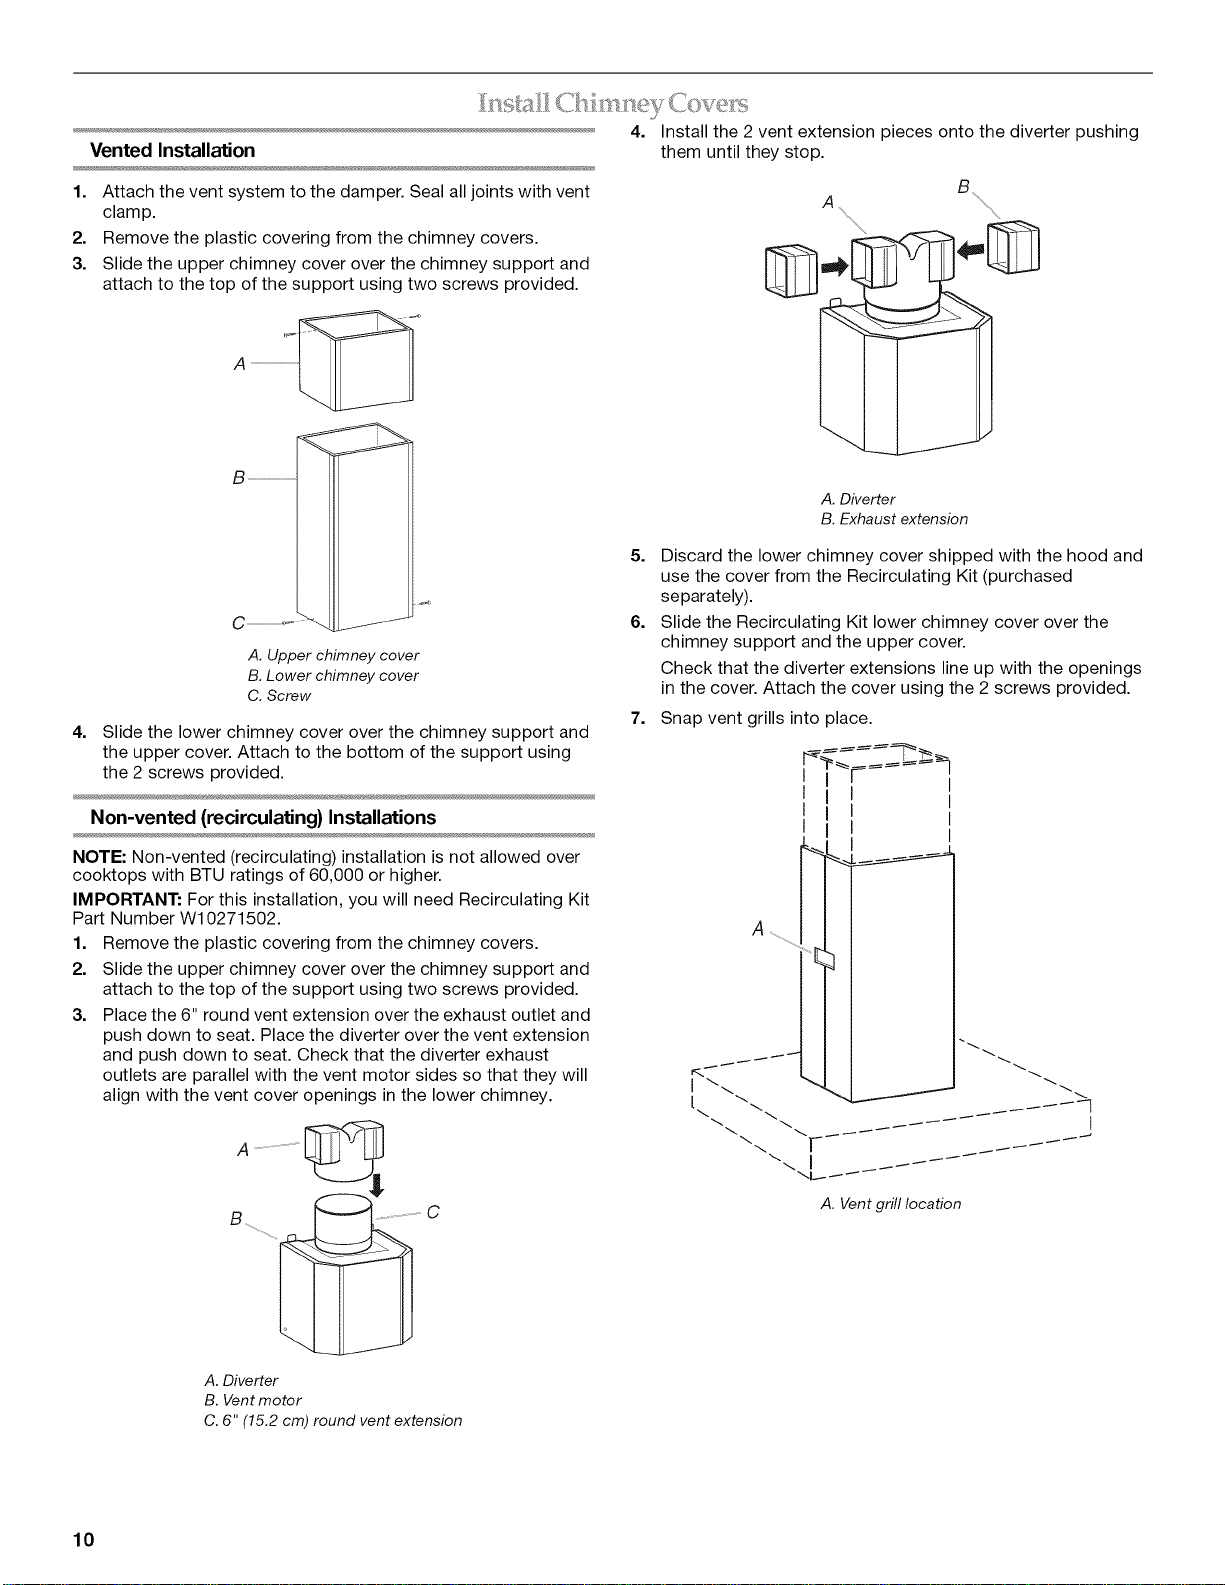
4. Install the 2 vent extension pieces onto the diverter pushing
Vented Installation them until they stop.
B
1. Attach the vent system to the damper. Seal all joints with vent
clamp. A ...............
2. Remove the plastic covering from the chimney covers. .......
3. Slide the upper chimney cover over the chimney support and
attach to the top of the support using two screws provided.
A. Upper chimney cover
B.Lower chimney cover
C. Screw
4. Slide the lower chimney cover over the chimney support and
the upper cover. Attach to the bottom of the support using
the 2 screws provided.
Non-vented (recirculating) Installations
NOTE: Non-vented (recirculating) installation is not allowed over
cooktops with BTU ratings of 60,000 or higher.
IMPORTANT: For this installation, you will need Recirculating Kit
Part Number W10271502.
1. Remove the plastic covering from the chimney covers.
2. Slide the upper chimney cover over the chimney support and
attach to the top of the support using two screws provided.
3. Place the 6" round vent extension over the exhaust outlet and
push down to seat. Place the diverter over the vent extension
and push down to seat. Check that the diverter exhaust
outlets are parallel with the vent motor sides so that they will
align with the vent cover openings in the lower chimney.
C
A. Diverter
B. Vent motor
C. 6" (15.2 cm) round vent extension
A. Diverter
B. Exhaust extension
5. Discard the lower chimney cover shipped with the hood and
use the cover from the Recirculating Kit (purchased
separately).
6. Slide the Recirculating Kit lower chimney cover over the
chimney support and the upper cover.
Check that the diverter extensions line up with the openings
in the cover. Attach the cover using the 2 screws provided.
7. Snap vent grills into place.
A
I
I
I
I
A. Vent grill location
10
Loading ...
Loading ...
Loading ...