840317201 09/19
w WARNING
Fire Hazard.
• If contents ignite, do not open oven door. Unplug oven and allow contents to stop burning and cool before opening
door.
• Do not operate unattended while in Broil mode.
• Do not use with oven cooking bags.
• Do not heat taco shells in countertop oven. Always use full-size conventional oven.
• Always allow at least one inch between food and heating element.
• Always unplug oven when not in use.
• Regular cleaning reduces risk of fire hazard.
IMPORTANT SAFEGUARDS
When using electrical appliances, basic safety precautions should always be followed to reduce the risk of fire,
electric shock, and/or injury to persons, including the following:
1. Read all instructions.
2. This appliance is not intended for use by
persons (including children) with reduced
physical, sensory, or mental capabilities, or lack
of experience and knowledge, unless they are
closely supervised and instructed concerning use
of the appliance by a person responsible for their
safety.
3. Close supervision is necessary when any
appliance is used by or near children. Children
should be supervised to ensure that they do not
play with the appliance.
4. Do not touch hot surfaces. Use handles or knobs.
5. To protect against electrical shock, do not
immerse cord, plug, or toaster oven in water or
other liquid.
6. Unplug from outlet when not in use and before
cleaning. Allow to cool before cleaning appliance
and putting on or taking off parts.
7. Do not operate any appliance with a damaged
supply cord or plug, or after the appliance
malfunctions or has been dropped or damaged
in any manner. Supply cord replacement and
repairs must be conducted by the manufacturer,
its service agent, or similarly qualified persons
in order to avoid a hazard. Call the provided
customer service number for information on
examination, repair, or adjustment.
8. The use of accessory attachments not
recommended by the appliance manufacturer
may cause injuries.
9. Do not use outdoors.
10. Do not let cord hang over edge of table or
counter or touch hot surfaces.
11. Do not place on or near a hot gas or electric
burner or in a heated oven.
12. Extreme caution must be used when moving an
appliance containing hot oil or other hot liquids.
13. To disconnect, turn off red power indicator light
by pressing START/STOP button; then remove
plug from wall outlet.
14. Use extreme caution when removing pan or
disposing of hot grease.
15. Do not clean with metal scouring pads. Pieces
can break off the pad and touch electrical parts,
creating a risk of electrical shock.
16. Oversize foods or metal utensils must not be
inserted in an oven as they may create a fire or
risk of electric shock.
17. The bread may burn. A fire may occur if toaster
is covered or touching flammable material,
including curtains, draperies, walls, overhead
cabinets, paper or plastic products, cloth towels,
and the like, when in operation.
18. Extreme caution should be exercised when using
containers constructed of materials other than
metal or glass.
19. Do not store any materials, other than
manufacturer- recommended accessories, in this
oven when not in use.
20. Do not place any of the following materials in the
oven: paper, cardboard, plastic, and the like.
21. Do not cover crumb tray or any part of the oven
with metal foil. This will cause overheating of the
oven.
22. To turn oven off, press START/STOP button until
red power indicator light is off. See “Parts and
Features” section.
23. Do not place eyes or face in close proximity with
tempered safety glass door, in the event that the
safety glass breaks.
24. Always use appliance with crumb tray securely
in place.
25. Do not use appliance for other than intended use.
26. Clean oven interior carefully. Do not scratch or
damage heating element tube.
27. Do not operate the appliance by means of
an external timer or separate remote-control
system.
28. CAUTION: HOT SURFACE. The temperature
of accessible surfaces may be high when the
appliance is operating.
SAVE THESE INSTRUCTIONS
Other Consumer Safety Information
This appliance is intended for household use only.
w WARNING
Electrical Shock Hazard: This
appliance is provided with a polarized plug (one wide
blade) to reduce the risk of electric shock. The plug
fits only one way into a polarized outlet. Do not defeat
the safety purpose of the plug by modifying the plug
in any way or by using an adapter. If the plug does
not fit fully into the outlet, reverse the plug. If it still
does not fit, have an electrician replace the outlet.
The length of the cord used on this appliance was
selected to reduce the hazards of becoming tangled
in or tripping over a longer cord. If a longer cord is
necessary, an approved extension cord may be used.
The electrical rating of the extension cord must be
equal to or greater than the rating of the appliance.
Care must be taken to arrange the extension cord so
that it will not drape over the countertop or tabletop
where it can be pulled on by children or accidentally
tripped over.
This appliance is equipped with a fully tempered
safety glass door. The tempered glass is four times
stronger than ordinary glass and more resistant to
breakage. Tempered glass can break; however, it
breaks into pieces with no sharp edges. Care must
be taken to avoid scratching door surface or nicking
edges. If the door has a scratch or nick, call our toll-
free customer service number.
Always unplug your oven from the outlet when not
in use.
Countertop Oven
Four de comptoir
Horno para mostrador
Read before use.
Lire avant utilisation.
Lea antes de usar.
For Questions: 1.800.851.8900
For recipes, tips, product
information and registration:
www.hamiltonbeach.com
Pour questions : 1.800.267.2826
Pour des recettes, des conseils, des
renseignements sur le produit et
l’enregistrement :
www.hamiltonbeach.ca
Por preguntas: 800 71 16 100
Para recetas, consejos, información
del producto y registro:
www.hamiltonbeach.com.mx
Le invitamos a leer cuidadosamente este instructivo antes de usar su aparato.
How to Use
Before first use: Most heating appliances produce an odor and/or smoke when used the first time. Plug into outlet. Turn
Function Dial to BAKE and set temperature to 450˚F (232ºC). Let the Oven preheat for approximately 5 minutes. The odor
should not be present after this initial preheating. Wash drip tray before using.
Place Oven Rack in desired position with Crumb Tray in place. Plug into outlet. If Display is blank, press any button to
illuminate display. Rack can be in middle or low position for Convection or Bake mode, depending on size of food.
Reheat Mode
Use to quickly warm cooked foods. Reheat food with Rack in middle or low position.
1. Turn Function Dial to REHEAT.
2. Temperature will default to 325°F (163°C).
3. Temperature can be set from 250°F (93°C) to 400°F
(204°C) and can be changed using the + or –
Temperature Buttons.
4. Time can be set from 1 minute to 2 hours and can be
changed at any time during cycle using + or – Time
Buttons to adjust.
Keep Warm Mode
Use to keep already cooked foods warm with Rack in middle or low position.
1. Turn Function Dial to KEEP WARM.
2. Temperature will default to 175°F (79°C) with 15 minutes
of cooking time.
3. Temperature can be set from 150°F (66°C) to 225°F
(107°C) and can be changed using the + or –
Temperature Buttons.
4. Time can be set from 1 minute to 2 hours and can be
changed at any time during cycle using + or – Time
Buttons to adjust.
Stay On Function
The Oven can be set to stay on by pressing the – Time Button until ON shows in Display. Stay On can be used in Reheat, Keep
Warm, Bake, Convection and Rotisserie modes..
Bake Mode
Use as a normal oven for foods such as roasts, potatoes or cakes.
1. Turn Function Dial to BAKE. Select temperature between
200ºF (93ºC) and 450ºF (232ºC) by pressing + or –
Temperature buttons to increase or decrease temperature.
2. Set time for up to 2 hours using + or – Time buttons to
adjust.
Broil Mode
Use to cook and brown foods such as beef, chicken, fish, pork and casseroles. Broil food on Oven Rack in Drip Tray in top or
middle rack position. Food must be a minimum of 1 inch (2.5 cm) from the heating elements.
1. Turn Function Dial to BROIL. “HI” will show in Display
and time default is 30 minutes. Oven broils on HIGH
temperature and may not be adjusted.
2. Adjust cooking time by pressing + or – Time Buttons
Broiling time can be set from 1 minute to 30 minutes.
3. Special feature allows door to hold open slightly during
broiling without shutting off.
Convection Mode
Circulates forced hot air to speed baking/roasting process for faster, more even cooking. When using convection baking, reduce
cooking time or reduce recipe temperature by 25°F.
1. Turn Function Dial to CONVECTION. Select temperature
between 200°F (93°C) and 450°F (232°C) by pressing
+ or – Temperature buttons to increase or decrease
temperature.
2. Set time for up to 2 hours by pressing + or – Time button
to adjust. Default temperature is 350°F (176ºC).
Rotisserie Mode
Use to roast whole chicken, or beef, pork or lamb roasts.
1. Turn Function Dial to ROTISSERIE. Select temperature between 200°F (93°C) and 450°F (232°C) by pressing + or –
Temperature Buttons to increase or decrease temperature. Default temperature is 350°F (176°C).
2. Set time for up to 2 hours by pressing + or – Time
Buttons to adjust. To prepare and truss a chicken
visit https://everydaygoodthinking.com/2013/09/17/
the-ultimate-guide-to-trussing-a-chicken-and-a-rotisserie-
chicken-recipe/. Insert Drip Tray in the lowest rack position
before using rotisserie.
Cleaning Your Oven
w WARNING
Electrical Shock Hazard. Do not clean with metal scouring pads. Pieces can break off pad and touch
electrical parts, causing a risk of electric shock.
1. Unplug Oven and let cool completely.
2. Wipe Display with a slightly damp sponge and dry.
Protect Display when cleaning any other surfaces.
3. Use a nonabrasive stainless steel cleaner to clean the
exterior stainless steel areas. Apply cleaner with a soft,
lint-free cloth. To bring out the natural luster, lightly
wipe surface with a water-dampened, lint-free cloth
followed by a dry polishing cloth. Always follow the
grain of stainless steel. Signature Polish can be ordered
via their website at
www.signaturepolishonline.com.
4. Wipe Oven walls and bottom of Oven with a damp,
soapy cloth. Repeat with a damp, clean cloth. For
stubborn stains, use a plastic scouring pad.
5. Clean Oven Racks with a mild abrasive cleaner and
rinse. Dry with clean cloth.
6. Slide out Crumb Tray. Hand-wash Crumb Tray and Drip
Tray in hot, soapy water. Rinse and dry.
7. Wipe Function Dial and Buttons with a damp, soapy
cloth. Repeat with a damp, clean cloth and dry.
8. When window is cool, use a razor blade to gently lift
baked-on foods. Spray glass cleaner on cloth to clean.
Wipe with a damp sponge to rinse. Dry thoroughly with
a clean cloth.
Troubleshooting
In case of power interruption.
• If power is out for less than 15 seconds, Oven will go
back to previous setting. If more than 15 seconds, Oven
switches to standby mode once power returns.
Oven will not heat.
• Check to make sure electrical outlet is working and the
Oven is plugged in. Set temperature to 350ºF (176ºC). Turn
Function Dial to BAKE; then set to stay on by pressing the
– Time Button.
An odor and smoke come from Oven.
• Smoke and odor are normal during first use of most
heating appliances. These will not be present after initial
heating period.
Drip Tray does not fit on Rack.
• The Drip Tray fits directly into slots. Use to catch drips
while baking or broiling. Do not broil directly on Drip Tray.
• Refer to “Parts and Features” section for details on rack
positions.
Limited Warranty
This warranty applies to products purchased and used in the U.S. and Canada. This is the only express warranty for
this product and is in lieu of any other warranty or condition.
This product is warranted to be free from defects in material and workmanship for a period of five (5) years from the
date of original purchase in Canada and one (1) year from the date of original purchase in the U.S. During this period,
your exclusive remedy is repair or replacement of this product or any component found to be defective, at our option;
however, you are responsible for all costs associated with returning the product to us and our returning a product or
component under this warranty to you. If the product or component is no longer available, we will replace with a similar
one of equal or greater value.
This warranty does not cover glass, filters, wear from normal use, use not in conformity with the printed directions,
or damage to the product resulting from accident, alteration, abuse, or misuse. This warranty extends only to the
original consumer purchaser or gift recipient. Keep the original sales receipt, as proof of purchase is required to make a
warranty claim. This warranty is void if the product is used for other than single-family household use or subjected to
any voltage and waveform other than as specified on the rating label (e.g., 120 V ~ 60 Hz).
We exclude all claims for special, incidental, and consequential damages caused by breach of express or implied
warranty. All liability is limited to the amount of the purchase price. Every implied warranty, including any statutory
warranty or condition of merchantability or fitness for a particular purpose, is disclaimed except to the extent
prohibited by law, in which case such warranty or condition is limited to the duration of this written warranty.
This warranty gives you specific legal rights. You may have other legal rights that vary depending on where you
live. Some states or provinces do not allow limitations on implied warranties or special, incidental, or consequential
damages, so the foregoing limitations may not apply to you.
To make a warranty claim, do not return this appliance to the store. Please call 1.800.851.8900 in the U.S. or
1.800.267.2826 in Canada or visit hamiltonbeach.com in the U.S. or hamiltonbeach.ca in Canada. For faster service,
locate the model, type, and series numbers on your appliance.
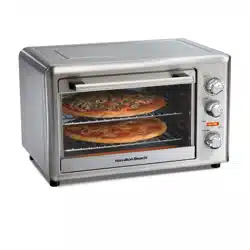
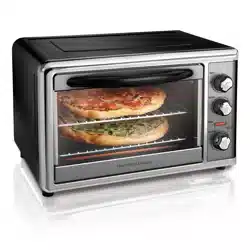
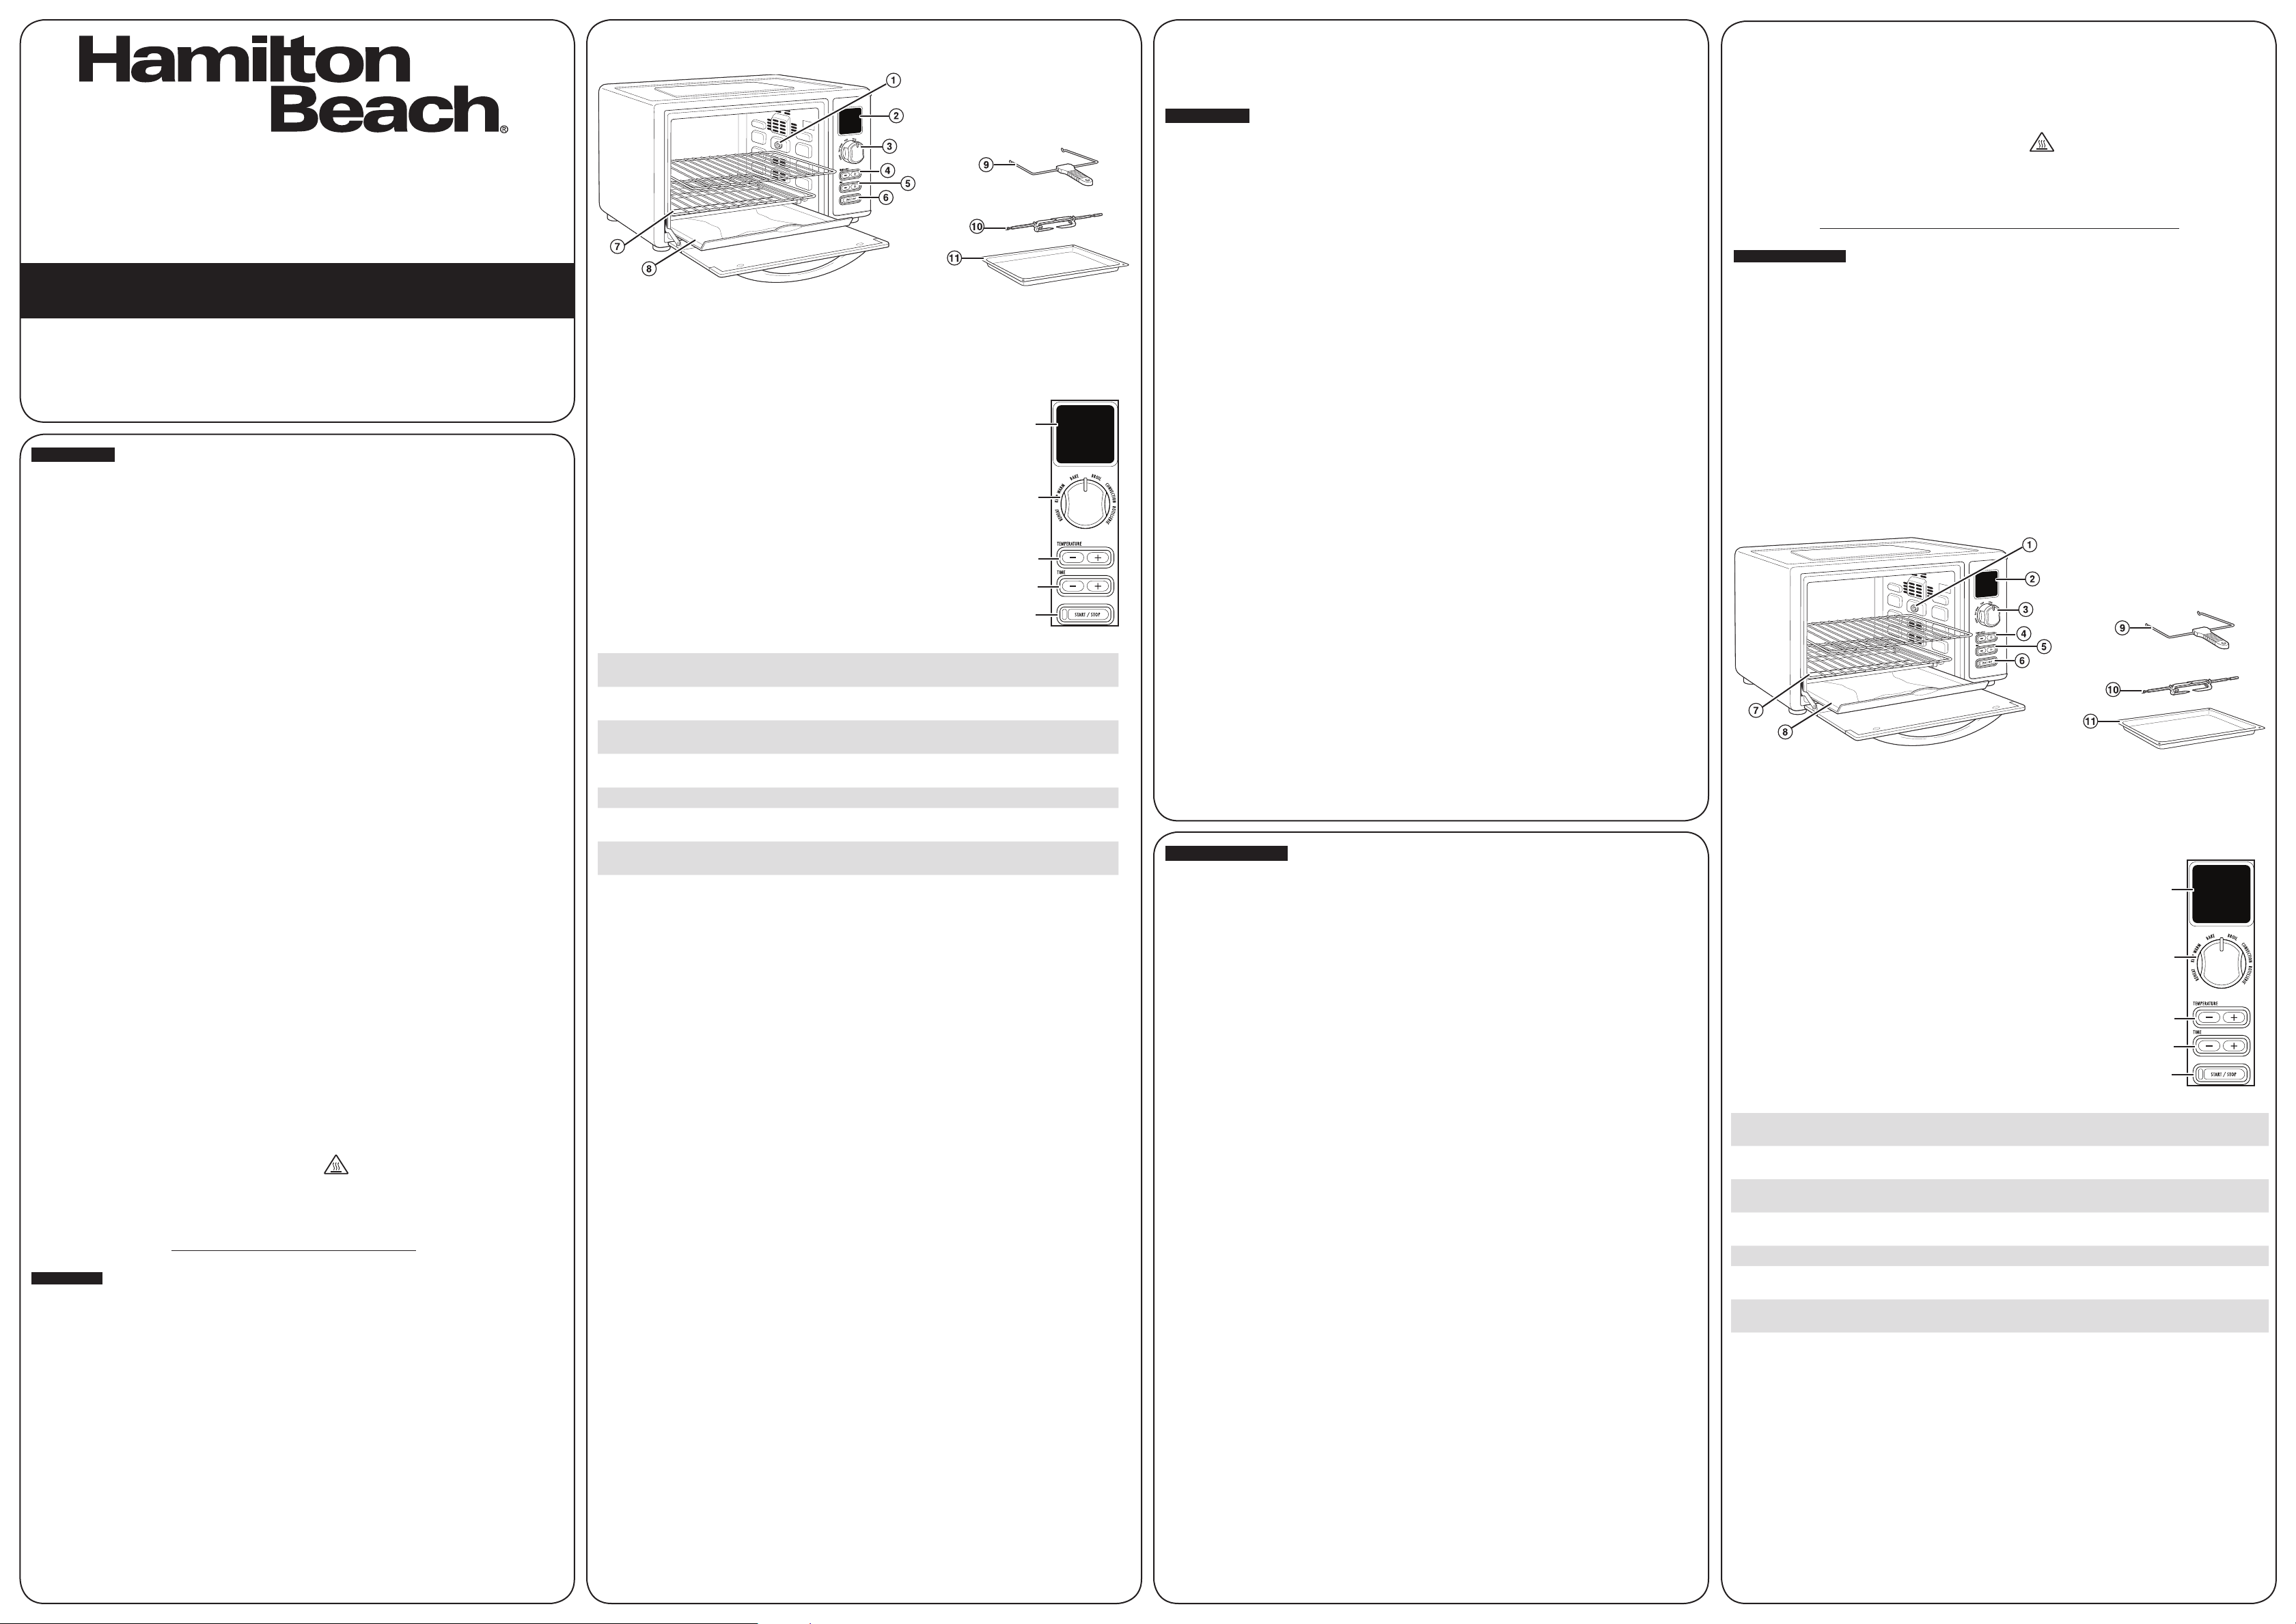
Parts and Features
To order parts:
US: 1.800.851.8900
www.hamiltonbeach.com
Canada: 1.800.267.2826
Mexico: 800 71 16 100
1. Rotisserie Insert (on select models)
2. LCD Display
3. Function Dial
4. TEMPERATURE Buttons
5. TIME Buttons
6. START/STOP Button
7. Oven Racks (2)
8. Slide-out Crumb Tray
9. Rotisserie Lift (on select models)
10. Rotisserie Forks on Rotisserie Rod (Rotisserie
Skewer) (on select models)
11. Drip Tray
a
b
c
d
e
a. LCD Display: The easy-to-read digital LCD Display illuminates after any control is
pressed. It will go into sleep mode after 30 seconds if START/STOP button is not
pressed. In Reheat, Keep Warm, Bake, and Convection modes, temperature and
cooking time are displayed. In Broil Mode, “HI” and time are displayed.
b. Function Dial: Use Dial to select cooking mode.
c. TEMPERATURE Buttons: Press +/– buttons to increase or decrease temperature.
Temperature display can be switched between Fahrenheit and Celsius by pressing and
holding – and + buttons for 5 seconds.
d. TIME Buttons: Press when adjusting cook time. Press +/– buttons to decrease or
increase setting.
e. START/STOP Button with Red Power Indicator Light: Press to illuminate Display
and to start or end cooking mode.
Getting to Know Your Display
Modes
Default
Temperature
Temperature
Range Time
Stay On
Option Oven Rack Position
Reheat* 325ºF (163ºC) 250ºF–400ºF
(121ºC–204ºC)
1 min – 2 hours
ü
Middle or Low
Keep
Warm*
175ºF (79ºC) 150ºF–225ºF
(66ºC–107ºC)
1 min – 2 hours
ü
Middle or Low
Bake* 350ºF (176ºC) 200ºF–450ºF
(93ºC–232ºC)
1 min – 2 hours
ü
Middle or Low
Broil HI N/A 1–30 minutes N/A High or Low
Convection* 350ºF (176ºC) 200ºF–450ºF
(93ºC–232ºC)
1 min – 2 hours
ü
Middle or Low
Rotisserie 350ºF (176ºC) 200ºF–450ºF
(93ºC–232ºC)
1 min – 2 hours
ü
Drip Tray in Low with no
oven racks
Cooking Guide
*Preheat 10 minutes before adding food to Countertop Oven.
w AVERTISSEMENT
Danger d’incendie.
• Si le contenu s’enflamme, ne pas ouvrir la porte. Débrancher le four et laisser le contenu s’éteindre et refroidir avant
d’ouvrir la porte.
• Ne pas faire fonctionner le four sans supervision.
• Ne pas utiliser de sac brunisseur dans le four.
• Ne pas faire chauffer les coquilles à taco dans le four de comptoir. Toujours faire réchauffer dans un four
conventionnel.
• Toujours garder au moins 1 po (2,5 cm) entre les aliments et l’élément chauffant.
• Toujours débrancher le four lorsqu’il n’est pas utilisé.
• Un nettoyage régulier réduit les risques d’incendie.
PRÉCAUTIONS IMPORTANTES
Pour utiliser un appareil électroménager, vous devez toujours prendre des mesures élémentaires de sécurité pour
réduire le risque d’incendie, d’électrocution et/ou de blessure corporelle, en particulier les mesures suivantes :
1. Lire toutes les instructions.
2. Cet appareil n’est pas destiné à être utilisé par
des personnes (y compris les enfants) dont les
capacités physiques, sensorielles ou mentales
sont réduites, ou manquant d’expérience et de
connaissance, sauf si elles sont étroitement
surveillées et instruites sur l’utilisation de
l’appareil par une personne responsable de leur
sécurité.
3. Une surveillance étroite est requise pour tout
appareil utilisé par ou près des enfants. Surveiller
que les enfants ne jouent pas avec l’appareil.
4. Ne pas toucher les surfaces chaudes. Utiliser les
poignées ou boutons.
5. Pour protéger contre le risque de choc électrique,
ne pas immerger le cordon, la fiche ou le four
grille-pain dans l’eau ou autre liquide.
6. Débrancher l’appareil de la prise de courant
électrique lorsqu’il n’est pas utilisé et avant un
nettoyage. Le laisser refroidir avant le nettoyage
et avant d’y placer ou d’y enlever des pièces.
7. Ne pas faire fonctionner un appareil
électroménager avec un cordon ou une fiche
endommagée, ou lorsque l’appareil ne fonctionne
pas bien ou a été échappé ou endommagé d’une
manière quelconque. Le remplacement et la
réparation du cordon d’alimentation doivent être
faits par le fabricant, son agent de service ou
toute personne qualifiée de façon à éviter tout
danger. Appeler le numéro de service à la clientèle
fourni pour des renseignements concernant
l’examen, la réparation ou l’ajustement.
8.
L’utilisation d’accessoires non recommandés par le
fabricant de l’appareil peut causer des blessures.
9. Ne pas utiliser à l’extérieur.
10. Ne pas laisser le cordon pendre du bord d’une
table ou d’un comptoir, ou toucher des surfaces
chaudes.
11. Ne pas placer l’appareil sur ou près d’un brûleur
chaud à gaz ou d’un élément électrique, ou dans
un four chauffé.
12. Une précaution extrême doit être employée lors
du déplacement d’un appareil électroménager
contenant de l’huile chaude ou autre liquide
chaud.
13. Pour débrancher, éteindre le témoin d’alimentation
rouge en appuyant sur le bouton START/STOP
(marche/arrêt). Retirer ensuite la fiche de la prise
murale.
14. Une prudence extrême s’impose lors de
l’enlèvement du plateau ou de la vidange de
graisse chaude.
15. Ne pas nettoyer avec des tampons à récurer en
métal. Des particules peuvent se détacher du
tampon et toucher les pièces électriques, créant
un risque de choc électrique.
16. Des aliments ou des ustensiles de métal de
grosseur excessive ne doivent pas être insérés
dans un four grille-pain, car ils peuvent créer un
incendie ou un risque de choc électrique.
17. Le pain peut brûler. Un incendie peut survenir si
le grille-pain est recouvert ou en contact avec
un matériau invlammable, y comprise rideaux,
tentures, murs, armoires en surplomb, produits
en papier our en plastique, serviettes en tissu et
autres articles semblables, lorsqu’il fonctionne.
18. Une grande précaution doit être prise lors de
l’utilisation de contenants construits en matériaux
autre que le métal ou le verre.
19. Ne pas remiser des matériaux autres que les
accessoires recommandés par le fabricant dans
cet appareil lorsqu’il n’est pas utilisé.
20. Ne pas placer l’un des matériaux suivants dans
le four : papier, carton, plastique et articles
semblables.
21. Ne pas couvrir le plateau à miettes ou toute pièce
du four avec du papier métallique. Ceci causera
un surchauffe du four.
22. Pour éteindre le four, appuyer sur le bouton
START/STOP (marche/arrêt) jusqu’à ce que le
témoin d’alimentation rouge s’éteigne. Vois la
section « Pièces et caractéristiques ».
23. Ne pas placer les yeux ou le visage près de la
porte en verre renforcé de sécurité, au cas où le
verre de sécurité se briserait.
24. Toujours utiliser cet appareil avec le plateau à
miettes bien en place.
25. Ne pas utiliser cet appareil pour tout autre usage
que celui recommandé.
26. Nettoyer l’intérieur du four avec précaution.
Ne pas égratigner ou endommager le tube de
l’élément chauffant.
27. Ne pas faire fonctionner cet appareil avec
une minuterie externe ou un système de
telecommande distinct
28. ATTENTION : SURFACE CHAUDE. La
température des surfaces extérieures sera plus
élevée pendant le fonctionnement de l’appareil.
CONSERVER CES INSTRUCTIONS
Autres consignes de sécurité pour le consommateur
Cet appareil est destiné à un usage domestique uniquement
w AVERTISSEMENT
Risque de choc électrique :
Cet appareil est fourni avec une fiche polarisée (une
broche large) pour réduire le risque d’électrocution.
Cette fiche n’entre que dans un seul sens dans
une prise polarisée. Ne contrecarrez pas l’objectif
sécuritaire de cette fiche en la modifiant de quelque
manière que ce soit ou en utilisant un adaptateur. Si
vous ne pouvez pas insérer complètement la fiche
dans la prise, inversez la fiche. Si elle refuse toujours
de s’insérer, faire remplacer la prise par un électricien.
La longueur du cordon installé sur cet appareil
a été sélectionnée afin de réduire les risques
d’enchevêtrement ou de faux pas causés par un fil trop
long. L’utilisation d’une rallonge approuvée est permise
si le cordon est trop court. Les caractéristiques
électriques de la rallonge doivent être équivalentes ou
supérieures aux caractéristiques de l’appareil. Prendre
toutes les précautions nécessaires pour installer la
rallonge de manière à ne pas la faire courir sur le
comptoir ou sur une table pour éviter qu’un enfant ne
tire sur le cordon ou trébuche accidentellement.
Cet appareil est doté d’une porte en verre renforcé
de sécurité. Le verre renforcé est quatre fois plus fort
que le verre ordinaire et plus résistant aux bris. Le
verre renforcé peut se briser, mais il se brise en pièces
sans bords coupants. Il faut prendre soin d’éviter
d’égratigner la surface de la porte ou d’endommager
le contour. Si la porte a une égratignure ou un bris,
composer notre numéro sans frais d’interurbain
d’assistance à la clientèle.
Toujours débrancher votre four de la prise de courant
lorsqu’il n’est pas utilisé.
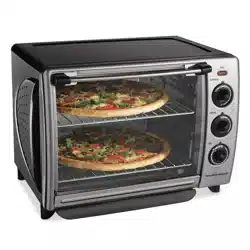
Pièces et caractéristiques
Pour commander des pièces :
www.hamiltonbeach.ca
Canada : 1.800.267.2826
1. Raccord de la rôtissoire (sur certains modèles)
2. Affichage ACL
3. Commande de fonction
4. Boutons de TEMPERATURE (température)
5. Boutons de TIME (durée)
6. Bouton START/STOP (marche/arrêt)
7. Grilles du four (2)
8. Plateau coulissant à miettes
9. Système de levage de la rôtisserie (sur certains modèles)
10. Broches à rôtir sur tournebroche (pincho de asador)
(sur certains modèles)
11. Ramasse-gouttes
a
b
c
d
e
a. Affichage ACL : L’écran numérique à cristaux liquides facile à lire s’illumine lorsqu’on
appuie sur un bouton de commande. Il se met en mode veille après 30 secondes
si on n’appuie pas sur le bouton START/STOP (marche/arrêt). En modes Reheat
(réchauffer), Keep Warm (garder au chaud), Bake (cuisson) et Convection (convection),
la température et la durée de cuisson sont affichées. En mode Broil (griller), l’écran
affiche « HI » et la durée.
b. Commande de fonction : Utiliser cette commande pour sélectionner le mode de cuisson.
c.
Boutons de TEMPERATURE (température) : Appuyer sur les boutons +/– pour augmenter
ou diminuer la température. L’affichage de la température peut être changé en Fahrenheit ou
en Celsius en appuyant et en maintenant les boutons – et + pendant 5 secondes.
d. Boutons de TIME (durée) : Appuyer pour ajuster la durée de cuisson. Appuyer sur les
boutons +/– pour augmenter ou diminuer le réglage
e. Bouton START/STOP (marche/arrêt) avec témoin d’alimentation rouge : Toucher pour
réveiller l’affichage, mettre en marche la cuisson et l’arrêter.
Découverte de l’affichage
Tableau de cuisson
*Préchauffer 10 minutes avant d’ajouter des aliments dans le four de comptoir.
Utilisation
Avant la première utilisation : a plupart des appareils chauffants produisent une odeur ou de la fumée (ou les deux) lors
de leur première utilisation. Brancher l’appareil dans une prise. Tourner la commande par cadran à BAKE (cuisson) et le
sélecteur de température à 450 °F (230 °C). Laisser le four se préchauffer pendant environ 5 minutes. L’odeur ne doit plus
être présente après ce préchauffage initial. Nettoyer le ramasse-gouttes avant l’utilisation.
Mettre la grille dans la position souhaitée avec le plateau coulissant à miettes. Brancher dans la prise. Si l’écran n’affiche
rien, appuyer sur n’importe quel bouton pour illuminer l’écran. La grille peut être placée à la position du milieu ou du bas
pour les modes convection et cuisson, selon la taille des aliments.
Mode REHEAT (réchauffer)
Utiliser pour réchauffer rapidement les aliments cuits. Réchauffer les aliments en plaçant la grille à la position du milieu
ou du bas.
1. Tourner le cadran de commandes à la position REHEAT
(réchauffer).
2. La température par défaut est de 163 °C (325 °F).
3. La température peut être réglée de 93 °C (250 °F) à
204 °C (400 °F) et peut être modifiée en utilisant les
boutons de températures + ou –. Temperature Buttons.
4. La durée peut être réglée de 1 minute à 2 heures et
peut être modifiée en tout temps au cours du cycle en
utilisant les boutons de durée + ou – pour ajuster.
Modes
Température
par défaut
Écart de
température Temps
Fonction
rester allumé
Position de la grille
du four
Réchauffer* 163 ºC (325 ºF) 121 ºC – 204 ºC
(250 ºF – 400 ºF)
1 min –
2 heures
ü
Milieu or Bas
Garder au
chaud*
79 ºC (175 ºF) 66 ºC – 107 ºC
(150 ºF – 225 ºF)
1 min –
2 heures
ü
Milieu or Bas
Cuisson* 176 ºC (350 ºF) 93 ºC – 232 ºC
(200 ºF – 450 ºF)
1 min –
2 heures
ü
Milieu or Bas
Griller HI N/A 1 – 30
minutes
N/A Haut or Bas
Convection* 176 ºC (350 ºF) 93 ºC – 232 ºC
(200 ºF – 450 ºF)
1 min –
2 heures
ü
Milieu or Bas
Rôtissoire 176 ºC (350 ºF) 93 ºC – 232 ºC
(200 ºF – 450 ºF)
1 min –
2 heures
ü
Plateau ramasse-gouttes à
la position du bas sans grille

840317201 09/19
Grupo HB PS, S.A. de C.V.
Monte Elbruz No. 124 - 401
Col. Polanco V Sección, Miguel Hidalgo
Ciudad de México, C.P. 11560
GARANTÍA PARA PRODUCTOS COMPRADOS EN MÉXICO
PRODUCTO: MARCA: MODELO:
Grupo HB PS, S.A. de C.V. cuenta con una Red de Centros de Servicio Autorizada, por favor consulte en la lista anexa el
nombre y dirección de los establecimientos en la República Mexicana en donde usted podrá hacer efectiva la garantía,
obtener partes, componentes, consumibles y accesorios; así como también obtener servicio para productos fuera de
garantía. Para mayor información llame al: Centro de Atención al Consumidor: 800 71 16 100
Grupo HB PS, S.A. de C.V. le otorga a partir de la fecha de compra:
GARANTÍA DE 1 AÑO.
COBERTURA
• Esta garantía ampara, todas las piezas y componentes del producto que resulten con defecto de fabricación incluyendo la
mano de obra.
• Grupo HB PS, S.A. de C.V. se obliga a reemplazar, reparar o reponer, cualquier pieza o componente defectuoso;
proporcionar la mano de obra necesaria para su diagnóstico y reparación, todo lo anterior sin costo adicional para el
consumidor.
• Esta garantía incluye los gastos de transportación del producto que deriven de su cumplimiento dentro de su red de
servicio.
LIMITACIONES
• Esta garantía no ampara el reemplazo de piezas deterioradas por uso o por desgaste normal, como son: cuchillas, vasos,
jarras, filtros, etc.
• Grupo HB PS, S.A. de C.V. no se hace responsable por los accidentes producidos a consecuencia de una instalación
eléctrica defectuosa, ausencia de toma de tierra, clavija o enchufe en mal estado, etc.
EXCEPCIONES
Esta garantía no será efectiva en los siguientes casos:
a) Cuando el producto se hubiese utlizado en condiciones distintas a las normales. (Uso industrial, semi-industrial o
comercial.)
b) Cuando el producto no hubiese sido operado de acuerdo con el instructivo de uso.
c) Cuando el producto hubiese sido alterado o reparado por personas no autorizadas por Grupo HB PS, S.A. de C.V. el
fabricante nacional, importador o comercializador responsable respectivo.
El consumidor puede solicitar que se haga efectiva la garantía ante la propia casa comercial donde adquirió su producto,
siempre y cuando Grupo HB PS, S.A. de C.V. no cuente con talleres de servicio.
PROCEDIMIENTO PARA HACER EFECTIVA LA GARANTÍA
• Para hacer efectiva la garantía, lleve su aparato al Centro de Servicio Autorizado más cercano a su domicilio (consulte la
lista anexa).
• Si no existe Centro de Servicio Autorizado en su localidad llame a nuestro Centro de Atención al Consumidor para recibir
instrucciones de como hacer efectiva su garantía.
FECHA DE
ENTREGA
SELLO DEL
VENDEDOR
QUEJAS Y SUGERENCIAS
DÍA___
MES___
AÑO___
Si desea hacer comentarios o sugerencias con respecto a nuestro servicio o tiene
alguna queja derivada de la atención recibida en alguno de nuestros Centros de
Servicio Autorizados, por favor dirigirse a:
GERENCIA INTERNACIONAL DE SERVICIO
800 71 16 100
Email: [email protected]
CENTROS DE SERVICIO AUTORIZADOS
Ciudad de México
ELECTRODOMÉSTICOS
Av. Plutarco Elias Cailes No. 1499
Zacahuitzco, Benito Juárez,
Ciudad de México, C.P. 09490
Tel: 55 5235 2323
CASA GARCÍA
Av. Patriotismo No. 875-B
Mixcoac, Benito Juárez,
Ciudad de México, C.P. 03910
Tel: 55 5563 8723
Nuevo León
FERNANDO SEPÚLVEDA REFACCIONES
Ruperto Martínez No. 238 Ote.
Col. Centro Monterrey, N.L., CP 6400
Tel: 81 8343 6700
Jalisco
SERVICIOS DE MANTENIMIENTO CASTILLO
Garibaldi No. 1450
Ladrón de Guevara, Guadalajara, Jalisco, C.P. 44660
Tel: 33 3825 3480
Modelo: Tipo
:
Características Eléctricas:
31154 O78 120 V ~ 60 Hz 1500 W
Los modelos incluídos en el instructivo de Uso y Cuidado pueden ir seguidos o no por un sufijo correspondiente a
una o varias letras del alfabeto y sus combinaciones, separadas o no por un espacio, coma, diagonal, o guión. Como
ejemplos los sufijos pueden ser: “Y” y/o “MX” y/o “MXY” y/o “Z”.
Mode KEEP WARM (garder au chaud)
Utiliser pour garder au chaud les aliments déjà cuits sur la grille placée au milieu ou au bas.
1. Tourner le cadran de commandes à la position KEEP
WARM (garder au chaud).
2. La température par défaut est de 79 °C (175 °F) avec
une durée de cuisson de 15 minutes.
3. La température peut être réglée de 66 °C (150 °F) à
107 °C (225 °F) et peut être modifiée en utilisant les
boutons de températures + ou –.
4. La durée peut être réglée de 1 minute à 2 heures et
peut être modifiée en tout temps au cours du cycle en
utilisant les boutons de durée + ou – pour ajuster.
Fonction Stay On (rester allumé)
Le four peut être réglé pour rester allumer en appuyant sur le bouton de durée – jusqu’à ce que « ON » apparaisse à
l’écran. Stay On peut être utilisé dans les modes de Reheat (réchauffage), de Keep Warm (maintien au chaud), de Bake
(cuisson), de Convection (convection) et de Rotisserie (rôtisserie).
Mode BAKE (cuisson)
Utilisez-le comme four normal pour des aliments tels que des rôtis, des pommes de terre ou des gâteaux.
1. Tourner le cadran de commandes à la position BAKE
(cuisson). Sélectionner une température entre 93 ºC
(200 ºF) et 232 ºC (450 ºF) en appuyant sur les boutons
de température + ou –
.
2. Régler la durée jusqu’à 2 heures en utilisant les
boutons de durée + ou – pour ajuster.
Mode BROIL (griller)
Utiliser pour cuire et griller les aliments comme le bœuf, le poulet, le poisson, le porc et les plats en cocotte. Griller les
aliments sur la grille du four placée dans le plateau ramasse-gouttes à la position du haut ou du milieu. Les aliments
doivent être placés à une distance minimum de 2,5 cm (1 pouce) des éléments chauffants.
1. Tourner le cadran de commandes à la position BROIL
(griller). L’écran affichera « HI » et la durée par défaut
est de 30 minutes. Le four grille à température ÉLEVÉE
et celle-ci ne peut pas être ajustée.
2. Ajuster la durée de cuisson en appuyant sur les
boutons de durée + ou –. La durée en mode BROIL
(griller) peut être réglée de 1 à 30 minutes.
3. Un dispositif spécial permet de garder la porte
légèrement ouverte durant le mode griller sans
s’éteindre.
Mode CONVECTION
Fait circuler de l’air chaud forcé pour accélérer le processus de cuisson/grillage et permettre une cuisson plus rapide
et uniforme. Lors de l’utilisation du mode de cuisson par convection, il faut réduire la durée de cuisson ou réduire la
température de cuisson de 25 °F.
1. Tourner le cadran de commandes à la position
CONVECTION. Sélectionner une température entre
93 °C (200 °F) et 232 °C (450 °F) en appuyant sur les
boutons de température + ou – pour augmenter ou
diminuer la température.
2. Régler la durée jusqu’à 2 heures en appuyant sur les
boutons de durée + ou – pour ajuster. La température
par défaut est de 176 ºC (350 °F).
Mode ROTISSERIE (rôtisserie)
Utiliser pour faire rôtir un poulet entier, ou préparer des rôtis de bœuf, de porc ou d’agneau.
1. Tourner le cadran de commandes à la position
ROTISSERIE (rôtisserie). Sélectionner une température
entre 93 °C (200 °F) et 232 °C (450 °F) en appuyant
sur les boutons de température + ou – pour
augmenter ou diminuer la température. La température
par défaut est de 176 °C (350 °F).
2. Régler la durée jusqu’à 2 heures en appuyant sur les
boutons de durée + ou – pour ajuster. Pour savoir
et préparar comment brider un poulet, consulter le
https://everydaygoodthinking.com/2013/09/17/the-
ultimate-guide-to-trussing-a-chicken-and-a-rotisserie-
chicken-recipe/. Insérer le plateau ramasse-gouttes
à la position la plus basse avant d’utiliser le mode
rôtisserie.
Nettoyage de votre four
w AVERTISSEMENT
Risque de choc électrique : Ne pas nettoyer à l’aide d’un tampon à récurer en acier. Des
morceaux du tampon pourraient se briser pendant le nettoyage de la plaque et toucher les parties électriques, causant
ainsi un risque de décharge électrique.
1. Débrancher. Laisser le four refroidir complètement.
2. Essuyer le panneau de commande à l’aide d’une
éponge légèrement humide, puis sécher. Protéger
l’affichage pendant le nettoyage des autres parties.
3. Utiliser un nettoyant non abrasif pour acier inoxydable
pour nettoyer les parties externes en acier inoxydable.
Appliquer le nettoyant à l’aide d’un chiffon non
pelucheux. Pour faire ressortir le lustre naturel, frotter
doucement la surface à l’aide d’un chiffon humide, d’un
chiffon non pelucheux, puis d’un chiffon à lustrer sec.
Toujours suivre le grain de l’acier inoxydable. Le produit
Signature Polish peut être commandé sur leur site Web
au www.signaturepolishonline.com.
4. Essuyer les parois intérieures et la base à l’aide d’un
chiffon humide et savonneux. Répéter à l’aide d’un
chiffon humide sans savon. Pour les taches rebelles,
utiliser un tampon à récurer en plastique.
5. Nettoyer les grilles du four à l’aide d’un nettoyant
légèrement abrasif, puis rincer. Sécher à l’aide d’un
chiffon propre.
6. Retirer le ramasse-miettes. Laver à la main le ramasse-
miettes, la plaque de cuisson et la grille lèchefrite dans
de l’eau chaude savonneuse. Rincer et sécher.
7. Essuyer le cadran de commandes et les boutons
à l’aide d’un chiffon humide et savonneux. Répéter
l’opération à l’aide d’un chiffon propre et humide et
sécher.
8. Lorsque la fenêtre est froide, utiliser une lame de rasoir
pour dégager doucement les aliments cuits. Vaporiser
un nettoyant pour vitres sur un chiffon pour nettoyer.
Essuyer à l’aide d’une éponge humide pour rincer. Bien
sécher à l’aide d’un chiffon propre.
Dépannage
En cas de panne de courant :
• Si la panne dure moins de 15 secondes, le four conserver
les réglages. Si la panne dure plus de 15 secondes, le four
passera en mode attente au retour de l’alimentation.
Le four ne chauffe pas.
• Assurez-vous que la prise électrique est fonctionnelle et
que le four est branché. Régler la température à 176 ºC
(350 ºF). Tourner le cadran de commandes à la position
BAKE (cuisson). Appuyer ensuite le bouton de durée –
pour activer la fonction rester allumer.
Odeur et fumée émanant du four.
• La fumée et l’odeur qui se dégage sont normales au
cours de la première utilisation de la plupart des appareils
chauffants. Ceci ne devrait pas se répéter au cours des
utilisations ultérieures.
Le ramasse-goutes ne peut se placer sur la grille.
• Le ramasse-gouttes se glisse directement dans les
fentes. Utiliser pour recueillir les débordements pendant
la cuisson ou le rôtissage. Ne pas faire griller les aliments
directement dans le plateau d’égouttage.
• Consulter le chapitre « Pièces et caractéristiques » pour
plus de détails au sujet des positions de grille.
Garantie limitée
Cette garantie s’applique aux produits achetés et utilisées aux É.-U. et au Canada. C’est la seule garantie expresse pour
ce produit et est en lieu et place de tout autre garantie ou condition.
Ce produit est garanti contre tout défaut de matériaux et de main-d’oeuvre pour une période des cinq (5) ans à
compter de la date d’achat d’origine au Canada et un (1) an à compter de la date d’achat d’origine aux É.-U. Au cours
de cette période, votre seul recours est la réparation ou le remplacement de ce produit ou tout composant s’avérant
défectueux, à notre gré, mais vous êtes responsable de tous les coûts liés à l’expédition du produit et le retour d’un
produit ou d’un composant dans le cadre de cette garantie. Si le produit ou un composant n’est plus offert, nous le
remplacerons par un produit similaire de valeur égale ou supérieure.
Cette garantie ne couvre pas le verre, les filtres, l’usure d’un usage normal, l’utilisation non conforme aux directives imprimées,
ou des dommages au produit résultant d’un accident, modification, utilisation abusive ou incorrecte. Cette garantie s’applique
seulement à l’acheteur original ou à la personne l’ayant reçu en cadeau. La présentation du reçu de vente d’origine comme
preuve d’achat est nécessaire pour faire une réclamation au titre de cette garantie. Cette garantie s’annule si le produit est
utilisé autrement que par une famille ou si l’appareil est soumis à toute tension ou forme d’onde différente des caractéristiques
nominales précisées sur l’étiquette (par ex. : 120 V ~ 60 Hz).
Nous excluons toutes les réclamations au titre de cette garantie pour les dommages spéciaux, consécutifs et indirects
causés par la violation de garantie expresse ou implicite. Toute responsabilité est limitée au prix d’achat. Chaque
garantie implicite, y compris toute garantie ou condition de qualité marchande ou d’adéquation à un usage
particulier, est exonérée, sauf dans la mesure interdite par la loi, auquel cas la garantie ou condition est limitée
à la durée de cette garantie écrite. Cette garantie vous donne des droits légaux précis. Vous pouvez avoir d’autres
droits qui varient selon l’endroit où vous habitez. Certaines provinces ne permettent pas les limitations sur les garanties
implicites ou les dommages spéciaux ou indirects de telle sorte que les limitations ci-dessus ne s’appliquent peut-être
pas à votre cas.
Ne pas retourner cet appareil au magasin lors d’une réclamation au titre de cette garantie. Téléphoner au
1.800.851.8900 aux É.-U. ou au 1.800.267.2826 au Canada ou visiter le site internet www.hamiltonbeach.com
aux É.-U. ou www.hamiltonbeach.ca au Canada. Pour un service plus rapide, trouvez le numéro de modèle, le type
d’appareil et les numéros de série sur votre appareil.
w ADVERTENCIA
Riesgo de incendio.
• Si el contenido se incendia, no abra la puerta del horno. Desenchufe el horno y espere hasta que el contenido deje
de quemarse y se enfríe antes de abrir la puerta.
• No haga funcionar sin atención mientras se encuentre en el modo Broil (asar).
• No utilice con bolsas de cocción para horno.
• No caliente tacos duros en el horno tostador. Siempre use el horno convencional.
• Siempre deje por lo menos una pulgada entre los alimentos y el elemento calentador.
• Siempre desenchufe el horno cuando no la esté en uso.
• Una limpieza regular reduce el riesgo de peligro de incendio.
SALVAGUARDIAS IMPORTANTES
Cuando utilice artefactos eléctricos, siempre deben seguirse precauciones de seguridad básicas a fin de reducir
el riesgo de incendio, descarga eléctrica, y/o lesiones a personas, incluyendo las siguientes:
1. Lea todas las instrucciones.
2. Este aparato no se destina para utilizarse por
personas (incluyendo niños) cuyas capacidades
físicas, sensoriales o mentales sean diferentes
o estén reducidas, o carezcan de experiencia
o conocimiento, a menos que dichas personas
reciban una supervisión o capacitación para el
funcionamiento del aparato por una persona
responsable de su seguridad.
3. Se requiere de una estrecha supervisión cuando
el aparato se use por o cerca de niños. Los niños
deben supervisarse para asegurar que ellos no
empleen los aparatos como juguete.
4. Verifique que el voltaje de su instalación
corresponda con el del producto.
5. No toque superficies calientes. Use manijas o
perillas.
6. Para protegerse contra el riesgo de choque
eléctrico, no sumerja el cable, el enchufe o el
horno eléctrico en agua ni en ningún otro líquido.
7. Desenchúfelo del tomacorriente cuando no lo esté
usando y antes de la limpieza. Deje que el aparato
se enfríe antes de limpiarlo o de colocar o sacar
alguna pieza.
8. No opere ningún aparato con cables o enchufe
dañados o después de que el aparato funcione
mal o se caiga o dañe de cualquier manera.
El reemplazo del cable de suministro y las
reparaciones deben ser efectuadas por el
fabricante, su agente de servicio, o personas
igualmente calificadas para poder evitar
un peligro. Llame al número de servicio al
cliente proporcionado para información sobre
examinación, reparación o ajuste.
9. El uso de accesorios no recomendados por
fabricante de electrodomésticos puede causar
lesiones.
10. No lo use al aire libre.
11. No deje que el cable cuelgue sobre el borde de
una mesa o de un mostrador, o que toque alguna
superficie caliente.
12. No coloque el aparato sobre o cerca de un
quemador a gas o eléctrico caliente, ni dentro de
un horno caliente.
13. Es importante tener extremo cuidado cuando se
mueva un aparato eléctrico que contenga aceite
caliente u otros líquidos calientes.
14. Para desconectar, apague la luz roja indicadora de
alimentación presionando el botón START/STOP
(encender/apagar); luego retire el enchufe del
tomacorriente de pared.
15. Tenga mucho cuidado cuando saque la charola o
elimine la grasa caliente.
16. No limpie con esponjillas metálicas. La esponjilla
se puede desintegrar y los trozos pueden tocar las
partes eléctricas, creando un riesgo de choque
eléctrico.
17. No introduzca alimentos de tamaño demasiado
grande ni utensilios metálicos en el horno
eléctrico ya que pueden crear un incendio o riesgo
de choque eléctrico.
18. El pan puede arder. Puede ocurrir un incendio si el
tostador está cubierto o en contacto con material
inflamable como cortinas, paredes, armarios por
encima, productos de papel o de plástico, toallas
de tela u objetos semejantes, cuando estáen
operación.
19. Se debe tener mucho cuidado cuando se usan
envases que no sean de metal o de vidrio.
20. No guarde ningún material adentro del horno
cuando no se use, exceptuando los accesorios
recomendados por el fabricante.
21. No coloque ninguno de los siguientes materiales
en el horno: papel, cartón, plástico y similares.
22. No cubra la charola para migajas ni ninguna otra
parte del horno con papel metálico. Eso hará que
el horno se recaliente.
23. Para apagar el horno, presione el botón START/
STOP (encender/apagar) hasta que la luz
indicadora de encendido se apague. Vea la
sección “Piezas y características”.
24. No ponga los ojos o la cara cerca de la puerta de
seguridad de vidrio templado, en caso de que el
vidrio de seguridad se rompa.
25. Siempre use el aparato con la charola para
migajas firmemente en su lugar.
26. No use el aparato eléctrico para ningún otro fin
que no sea el indicado.
27. Limpie con cuidado el interior del horno. No raye
ni dañe el tubo del elemento de calentamiento.
28. No haga funcionar el aparato mediante un
temporizador externo o un sistema de control
remoto separado.
29. PRECAUCIÓN: SUPERFICIE CALIENTE.
La temperatura de las superficies accessibles
puede ser alta cuando el artefacto se encuentra en
funcionamiento.
GUARDE ESTAS INSTRUCCIONES
Otra información para la seguridad del cliente
Este aparato ha sido diseñado solamente para uso doméstico.
w ADVERTENCIA
Riesgo de Descarga Eléctrica:
Este aparato es provisto con un enchufe polarizado
(una pata más ancha) para reducir el riesgo de una
descarga eléctrica. El enchufe embona únicamente en
una dirección dentro de un tomacorriente polarizado.
No trate de obviar el propósito de seguridad del
enchufe modificándolo de alguna manera o utilizando
un adaptador. Si el enchufe no entra completamente
en la toma, invierta el enchufe. Si aún no entra, haga
que un electricista reemplace la toma.
El largo del cable que se usa en este aparato fue
seleccionado para reducir el peligro de que alguien
se enganche o tropiece con un cable más largo. Si es
necesario usar un cable más largo, se podrá usar un cable
de extensión aprobado. La clasificación eléctrica nominal
del cable de extensión debe ser igual o mayor que la
clasificación nominal del aparato. Es importante tener
cuidado de colocar el cable de extensión para que no se
pliegue sobre el mostrador o la mesera en donde niños
puedan tirar del mismo o tropezarse accidentalmente.
Este aparato viene equipado con una puerta de
seguridad de vidrio totalmente templado. El vidrio
templado es cuatro veces más fuerte que el vidrio
común y más resistente a las roturas. El vidrio
templado se puede romper, sin embargo se rompe en
trozos sin bordes filosos. Es importante tener cuidado
para evitar rayar la superficie de la puerta o hacer
muescas en los bordes. Si la puerta está rayada o
tiene muescas, llame a nuestro número gratuito de
servicio al cliente.
Siempre desenchufe el horno eléctrico del
tomacorriente cuando no lo esté usando.
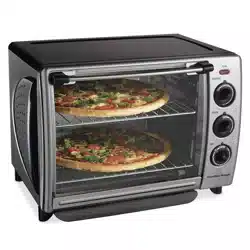
Piezas y características
a
b
c
d
e
a. Pantalla LCD: La pantalla LCD digital de fácil lectura se ilumina después de presionar
cualquier control. Ingresará al modo de reposo después de 30 segundos si no se
presiona el botón START/STOP (encender/apagar). En los modos Reheat (recalentar),
Keep Warm (mantener caliente), Bake (hornear) y Convection (convección), se
muestran la temperatura y el tiempo de cocción. En el modo Broil (asar al horno), se
muestran “HI” y el tiempo.
b. Cuadrante de funciones: Use el cuadrante para seleccionar el modo de cocción.
c. Botones de TEMPERATURE (temperatura): Presione los botones +/– para aumentar
o disminuir la temperatura. La visualización de la temperatura se puede cambiar entre
Fahrenheit y Celsius presionando y manteniendo presionados los botones – y +
durante 5 segundos.
d. Botones de TIME (tiempo): Presione cuando ajuste el tiempo de cocción. Presione
los botones +/– para aumentar o disminuir la configuración.
e. Botón START/STOP (encender/apagar) con luz roja indicadora de encendido:
Presione para iluminar la pantalla e iniciar o finalizar el modo de cocción.
Información sobre la pantalla
Tabla de cocción
*Precaliente 10 minutos antes de agregar alimentos al horno para mostrador.
Cómo usar
Antes del primer uso: La mayoría de los aparatos calentadores producen olor y/o humo cuando se utilizan por primera
vez. Enchufe en el tomacorriente. Gire la perilla de función a BAKE (hornear) y gire la perilla de temperatura a 450˚F
(230˚C). Deje que el horno se precaliente durante aproximadamente 5 minutos. El olor no debe estar presente después de
este precalentamiento inicial. Lave la charola de goteo antes de usarlos.
Coloque la rejilla del horno en la posición deseada con la bandeja para migajas en su lugar. Enchufe en un tomacorriente. Si
la pantalla está en blanco, presione cualquier botón para iluminar la pantalla. La rejilla puede estar en posición media o baja
para el modo de convección u horneado, según el tamaño de los alimentos.
Modo Reheat (recalentar)
Use para calentar rápidamente los alimentos cocinados. Recaliente los alimentos con la rejilla en posición media o baja.
1. Gire la perilla de función a REHEAT (recalentar).
2. La temperatura predeterminada será de 325°F (163°C).
3. La temperatura se puede ajustar desde 250°F (93°C)
hasta 400°F (204°C) y se puede cambiar utilizando los
botones de temperatura + o –.
4. El tiempo se puede configurar de 1 minuto a 2 horas
y se puede cambiar en cualquier momento durante
el ciclo utilizando los botones de tiempo + o – para
ajustar.
Modo Keep Warm (mantener caliente)
Úselo para mantener calientes los alimentos ya cocinados con la rejilla en posición media o baja.
1. Gire la perilla de función a KEEP WARM (mantener
caliente).
2. La temperatura predeterminada será de 175°F (79°C) con
15 minutos de tiempo de cocción.
3. La temperatura se puede ajustar desde 150°F (66°C)
hasta 225°F (107°C) y se puede cambiar utilizando los
botones de temperatura + o –.
4. El tiempo se puede configurar de 1 minuto a 2 horas y
se puede cambiar en cualquier momento durante el ciclo
utilizando los botones de tiempo + o – para ajustar.
Función Stay on (permanecer encendido)
El horno se puede configurar para que permanezca encendido presionando el botón Time – hasta que aparezca “ON” en la
pantalla. Stay On se puede usar en los modos Reheat (recalentar), Keep Warm (mantener caliente), Bake (hornear), Convection
(convección) y Rotisserie (rostizador).
Modo Bake (hornear)
Utilícelo como un horno normal para alimentos tales como asados, papas o pasteles.
1. Gire la perilla de función a BAKE (hornear). Seleccione
la temperatura entre 200ºF (93ºC) y 450ºF (232ºC)
presionando los botones de temperatura + o – para
aumentar o disminuir la temperatura.
2. Configure el tiempo hasta por 2 horas usando los botones
de tiempo + o – para ajustar.
Modo Broil (asar al horno)
Se usa para cocinar y dorar alimentos como carne de res, pollo, pescado, cerdo y guisos. Ase los alimentos sobre la rejilla del
horno en la bandeja de goteo en la posición superior o media de la rejilla. Los alimentos deben estar separados un mínimo de
2.5 cm (1 pulg.) de los elementos calefactores.
1. Gire la perilla de función a BROIL (asar al horno). Aparecerá
“HI” en la pantalla y el tiempo predeterminado es de 30
minutos. El horno asa a temperatura ALTA y no se puede
ajustar.
2. Ajuste el tiempo de cocción presionando los botones de
Tiempo + o – para ajustar. El tiempo de asar se puede
ajustar entre 1 y 30 minutos.
3. Una característica especial permite que la puerta se
mantenga ligeramente abierta al asar sin apagarse.
Modo Convection (convección)
Hace circular aire caliente forzado para acelerar el proceso de hornear/asar para una cocción más rápida y uniforme. Cuando
use el horneado por convección, reduzca el tiempo de cocción o reduzca la temperatura de la receta en 25°F.
1. Gire la perilla de función a CONVECTION (convección).
Seleccione la temperatura entre 200ºF (93ºC) y 450ºF
(232ºC) presionando los botones de temperatura + o –
para aumentar o disminuir la temperatura.
2. Configure el tiempo hasta por 2 horas presionando los
botones de tiempo + o – para ajustar. La temperatura
predeterminada es 350°F (176°C).
Modo Rotisserie (rostizador)
Se usa para asar pollo entero, o carne de res, cerdo o cordero.
1. Gire la perilla de función a ROTISSERIE (rostizador).
Seleccione la temperatura entre 200ºF (93ºC) y 450ºF
(232ºC) presionando los botones de temperatura + o –
para aumentar o disminuir la temperatura. La temperatura
predeterminada es 350°F (176°C).
2. Configure el tiempo hasta por 2 horas presionando los
botones de tiempo + o – para ajustar. Para preparar
y atar un pollo, visite https://everydaygoodthinking.
com/2013/09/17/the-ultimate-guide-to-trussing-a-chicken-
and-a-rotisserie-chicken-recipe/. Inserte la bandeja de
goteo en la posición más baja de la rejilla antes de usar el
rostizador.
Limpieza de su horno
w ADVERTENCIA
Riesgo de descarga eléctrica. No limpie con estropajos metálicos. Trozos de estropajo se
pueden desprender y tocar piezas eléctricas, lo cual genera el riesgo de una descarga eléctrica.
1. Desenchufe. Déjelo el horno enfriar por completo.
2. Repase la pantalla del panel de control con una
esponja ligeramente húmeda y seque. Proteja la
pantalla cuando limpie cualquier otra superficie.
3. Use un limpiador no abrasivo para acero inoxidable
para limpiar las zonas exteriores de acero inoxidable.
Aplique el limpiador con un paño suave sin pelusa.
Para recuperar el lustre natural, repase suavemente
la superficie con un paño sin pelusa humedecido con
agua y, después, con un paño de pulir seco. Siga
siempre la veta del acero inoxidable. Puede pedir
Signature Polish a través de su sitio web en
www.signaturepolishonline.com.
4. Repase las paredes y el piso del horno con un paño
enjabonado húmedo. Repita con un paño limpio
húmedo. Para las manchas rebeldes, use un estropajo
plástico.
5. Limpie las rejillas del horno con un limpiador abrasivo
suave y enjuague. Seque con un paño limpio.
6. Deslice y extraiga la bandeja para migas. Lave a
mano la bandeja para migas y la bandeja para hornear
con la parrilla para asar al horno en agua jabonosa
caliente. Enjuague y seque.
7. Limpie la perilla de función y los botones con un paño
húmedo y jabonoso. Repita con un paño húmedo y
seque.
8. Cuando la ventana esté fría, use una hoja de rasurar
para levantar con suavidad los alimentos endurecidos
por el horneado. Rocíe limpiavidrios en un paño
para limpiar. Repase con una esponja húmeda para
enjuagar. Seque meticulosamente con un paño limpio.
Resolviendo problemas
En caso de un corte de energía:
• Si la electricidad se corta durante menos de 15 segundos,
el horno volverá al ajuste anterior. Si el corte dura más
de 15 segundos, el horno cambiará al modo en espera
cuando la electricidad regrese.
El horno no calienta.
• Asegúrese de que el tomacorriente funcione y que
el horno esté enchufado. Ajuste la temperatura a
350ºF (176ºC). Gire la perilla de función a BAKE
(hornear); luego configure que permanezca encendido
presionando el botón Time –.
Sale un olor o humo del horno.
• El humo y olor es normal durante el primer uso de
la mayoría de los aparatos con calor. Esto no estará
presente después del periodo inicial de calentamiento.
La charola de goteo no entra en la parrilla.
• La charola de goteo entra directamente en las ranuras.
Utilícela para recoger salpicaduras mientras hornea o
asa. No ase directamente en la charola de goteo.
• Consulte la sección ”Piezas y características” para
más detalles sobre las posiciones de las parrillas.
Para ordenar partes:
EE. UU.: 1.800.851.8900
www.hamiltonbeach.com
México: 800 71 16 100
1. Accesorio de rostizador (en modelos selectos)
2. Pantala LCD
3. Perilla de función
4. Botones de TEMPERATURE (temperatura)
5. Botones de TIME (tiempo)
6. Botón START/STOP (encender/apagar)
7. Parrilla del horno (2)
8. Charola para migajas deslizable
9. Elevador de roticería (en modelos selectos)
10. Tenedores de rosticería en varilla de rosticería
(pincho de asador) (en modelos selectos)
11. Charola de goteo
Modos
Temperatura
por defecto
Rango de
temperatura Tiempo
Función permanecer
encendido
Posición de la rejilla en
el horno
Recalentar*
325ºF (163ºC)
250ºF–400ºF
(121ºC–204ºC)
1 min –
2 horas
ü
Medio or bajo
Mantener
caliente*
175ºF (79ºC)
150ºF–225ºF
(66ºC–107ºC)
1 min –
2 horas
ü
Medio or bajo
Hornear* 350ºF (176ºC)
200ºF–450ºF
(93ºC–232ºC)
1 min –
2 horas
ü
Medio or bajo
Asar al
horno
HI N/A 1–
30
minutos
N/A Alto or bajo
Convección*
350ºF (176ºC)
200ºF–450ºF
(93ºC–232ºC)
1 min –
2 horas
ü
Medio or bajo
Rostizador 350ºF (176ºC)
200ºF–450ºF
(93ºC–232ºC)
1 min –
2 horas
ü
Charola de goteo en posición
baja sin rejillas de horno