Loading ...
Loading ...
Loading ...
Depending on the width of your door opening, it may be 3.
necessary to remove the drawer fronts to move the refrigerator
into your home.
IMPORTANT:
If the refrigerator was previously installed and you are
moving it out of the home, before you begin, turn the
refrigerator control OFF, and unplug the refrigerator or
disconnect power. Remove food from the drawers.
• Two people may be required to remove and replace the
drawer fronts.
Tools Needed: 1¼,, Hex head nut driver, Flat-blade screwdriver
Refrigerated Drawer
Disconnect Wiring
NOTES:
On one side of the wiring connector, insert the screwdriver
blade between the connector tab and the connector to
release. Repeat for the opposite side. Pull the wiring
connector apart.
.
2.
The exterior refrigerator drawer front is connected to the
temperature control. Before removing the drawer front, the
wires must be disconnected from the temperature control.
The gray cable visible behind and under the pantry drawer
at the right side contains wiring for the pantry control and
moves with the drawer as it is pulled out. There is no need to
disconnect this cable.
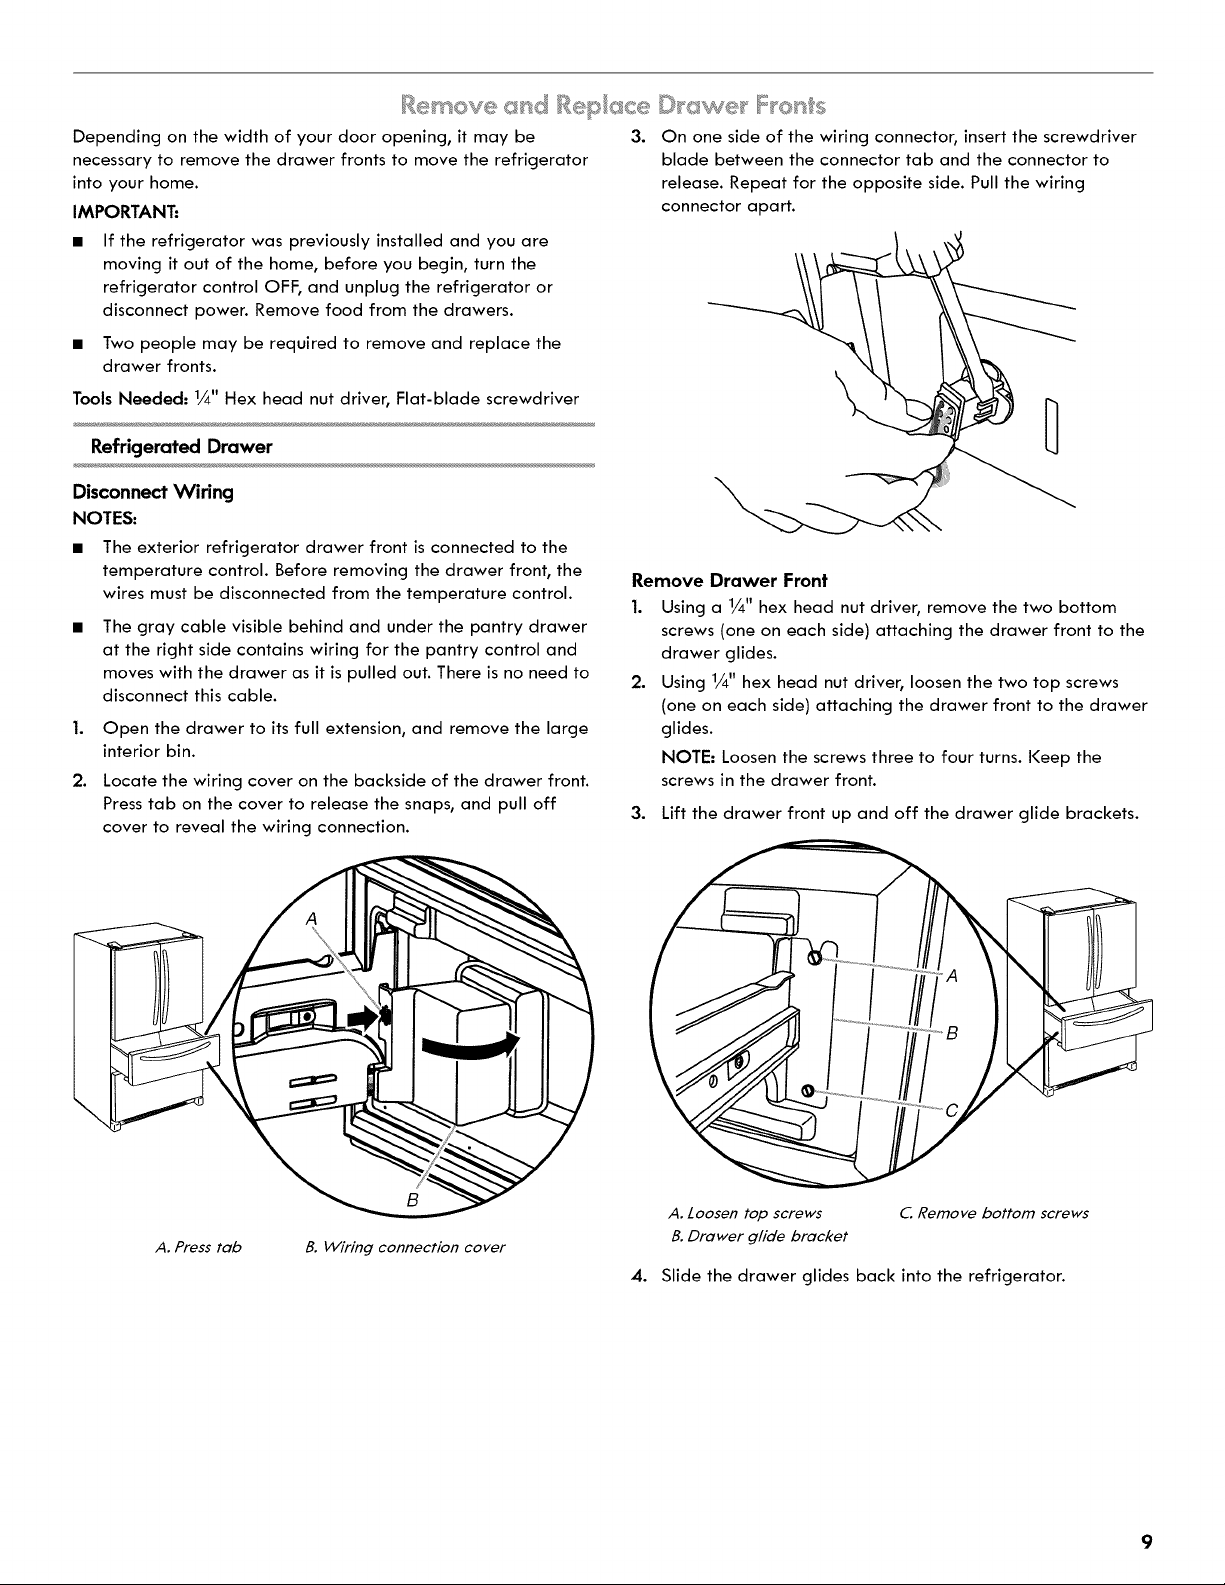
Open the drawer to its full extension, and remove the large
interior bin.
Locate the wiring cover on the backside of the drawer front.
Press tab on the cover to release the snaps, and pull off
cover to reveal the wiring connection.
Remove Drawer Front
1. Using a 1/4"hex head nut driver, remove the two bottom
screws (one on each side) attaching the drawer front to the
drawer glides.
2. Using 1/4" hex head nut driver, loosen the two top screws
(one on each side) attaching the drawer front to the drawer
glides.
NOTE: Loosen the screws three to four turns. Keep the
screws in the drawer front.
3. Lift the drawer front up and off the drawer glide brackets.
A. Press tab
B. _Viring connection cover
A. Loosen top screws
B. Drawer glide bracket
C. Remove bottom screws
4. Slide the drawer glides back into the refrigerator.
Loading ...
Loading ...
Loading ...