Loading ...
A
C
3.54i
nch/
9
c
m
C
B
B
C
B
A
5.
78 in
/
14.
7
c
m
INSTALLATION AND OPERATION INSTRUCTIONS
INSTALLATION
• Gently remove all parts from the package and lay them out on a smooth surface.
IMPORTANT: Ensure your solar panel is placed where it is exposed to optimized sunlight. Be aware of objects such as trees or property overhangs
that may impede the panel’s ability to generate a charge.
If install more than 1 light and you would like to have linkable function, you must link your lights first before installation begins.
You may link up to 20 lights. After the lights are linked you may begin the installation process.
LINKABLE SET-UP INSTRUCTION (THIS FUNCTION WORKS WITH MORE THAN 2 LIGHTS)
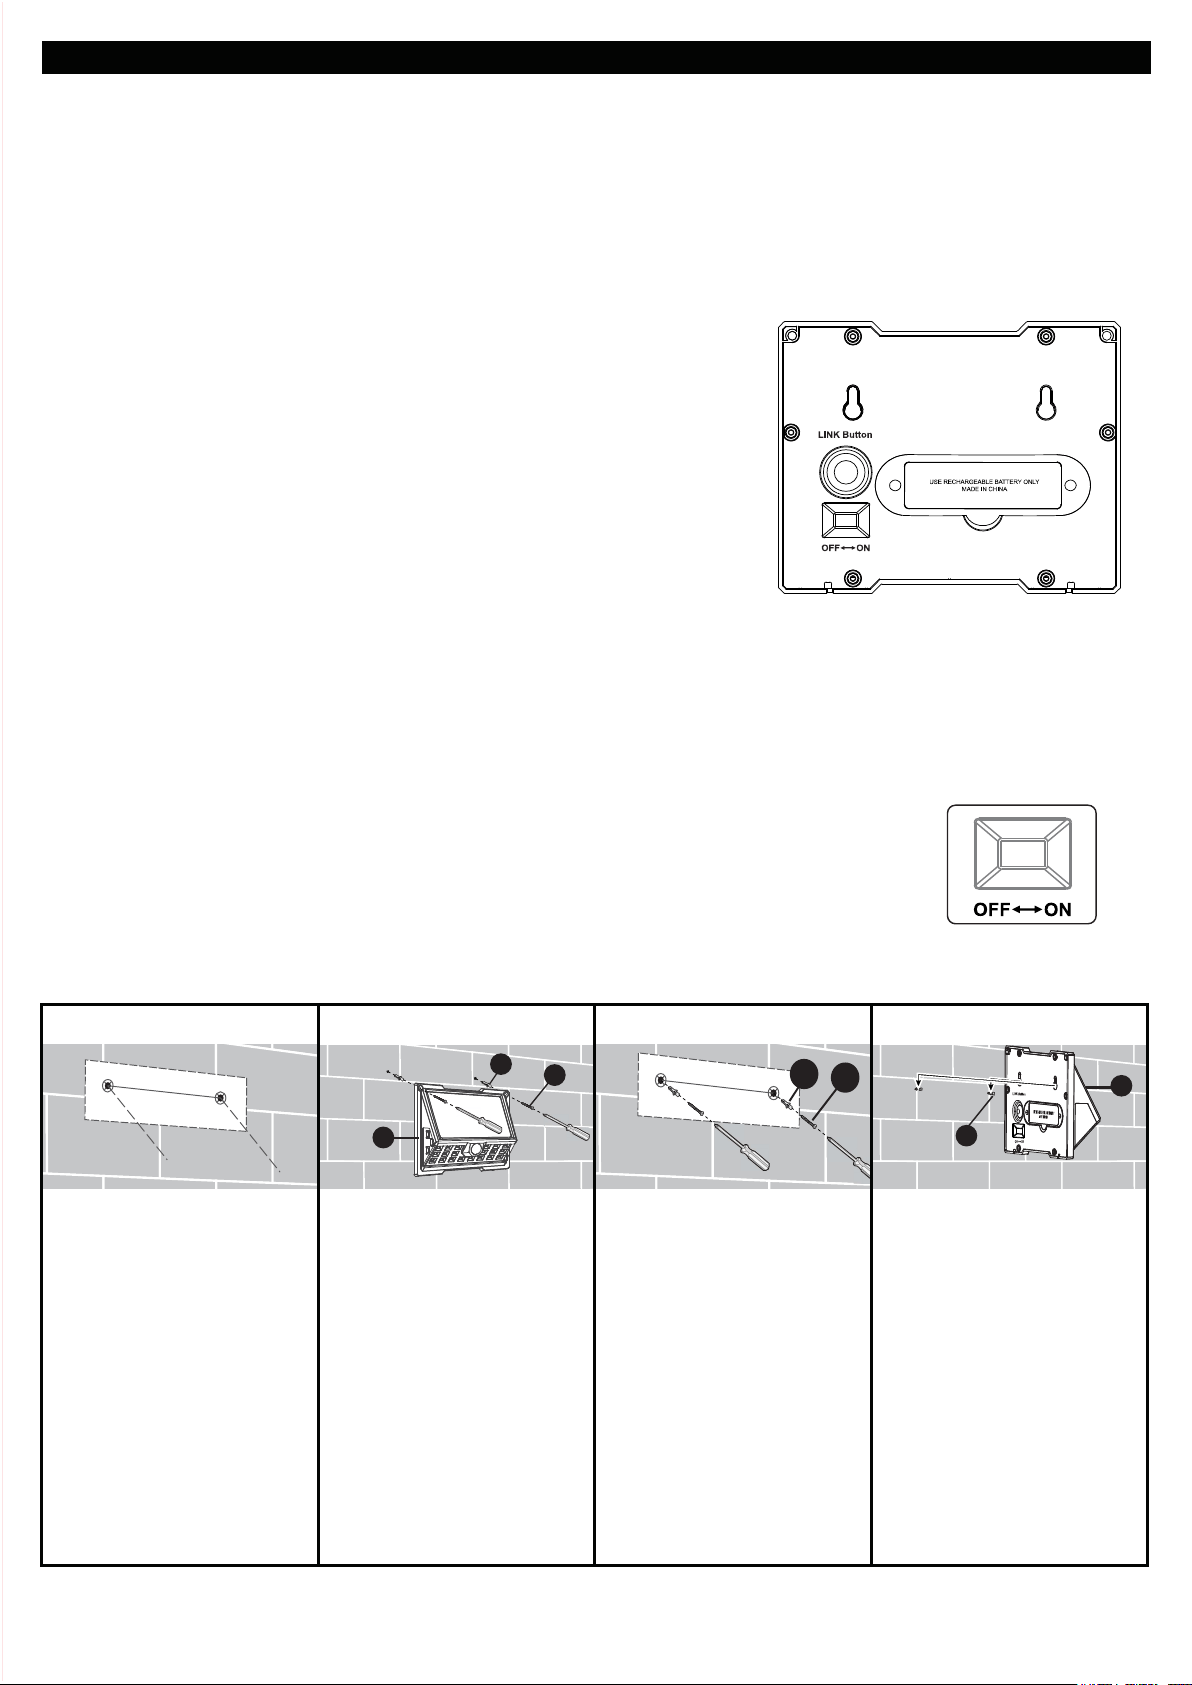
1. The "OFF-ON" switch and the “LINK Button" switch are all located on the back of the light.
Make sure every single light is switched to the "ON" position. Warm up time is approx. 15 seconds.
2. Select one light as the primary light, while the other light(or lights) will be the secondary light.
3. Signal Matching.
A - After 15 seconds "warm-up" period, press and hold the “LINK Button” switch on the
primary light for 3 - 5 seconds. The light will then flash slowly (1 time per second).
B - Press the “LINK Button” switch once on the secondary light.
When the secondary light flashes quickly (2 times per second) then turns off,
it means they are linked together successfully.
C - Repeat step B until all secondary lights are linked. When all lights are successfully
connected, press the primary light’s “LINK Button” switch once to cease linking.
D - When linked, all lights will illuminate to full brightness when any single one of them
detects motion. After 20 seconds of no motion detection, the lights will return back
to the low-level dusk-to-dawn brightness.
E - To remove the linkable function, press the “LINK Button” switch twice on each light
you choose to disconnect. The light will illuminate for 2 seconds and then turn off.
TROUBLE SHOOTING ON FAIL LINKABLE CONNECTING
1. Please check all lights and make sure every light is switched to the “ON” position.
2. Check that the primary light is flashing slowly. If not, press the “Link Button” switch 3-5 seconds to make sure the light flashes slowly.
3. Check that the secondary light flashes quickly. If not, please power off then back on, and press the "Link Button" switch once again.
4. Check that the distance between the primary light & the secondary light is no more than 50-ft apart, and that there are no obstacles in
between.Connectivity can be up to 50-ft between each light.
Prior to using your solar wall light, initial charge is needed and it should be done in the OFF position for at least three sunny days. After the third
day, your included battery will be enough power for operation of solar wall light.
1. Place the first mounting
bracket template (refer to the
template shown on the last
page of this instruction) over
the desired mounting
surface.
Mark the screw hole
locations indicated by the X
symbol for the
solar wall light.
2. Use a power drill (not
included) to drill two 13/64
inch holes into the mounting
surface. Insert the plastic
archors (B) in the holes and
fasten the solar wall light (A)
onto the wall with attached
mounting screws(C).
3. Another install type:
Place the second mounting
bracket template (refer to the
template shown on the last
page of this instruction) over
the desired mounting
surface. Mark the screw hole
locations indicated by the X
symbol for the solar wall
light.
4. Drill two 13/64 inch holes
into the mounting surface.
Insert the plastic anchors (B)
into the holes. Screw the
mounting screws (C) into the
anchors (B), leaving about
1/4 inch of the screws (C)
sticking out of the mounting
surface. Align and place the
two mounting holes on the
back of the solar wall light (A)
over the mounting screws
(C).
2
INSTALL THE LIGHT ON THE WALL
Loading ...
Loading ...